2 Sisters 2 Cities

Image Map
  • About 2 Sisters 2 Cities
  • Recipe Index
  • Project Index
  • Contact Us
  • Like us on Facebook
  • Follow m on twitter
  • Follow k on twitter
  • Follow 2S2C on Pinterest
  • Follow 2S2C on G+
  • rss
  • e-mail 2S2C

Archives for April 2012

Quick French Bread

Posted by 2 Sisters 2 Cities on April 14, 2012

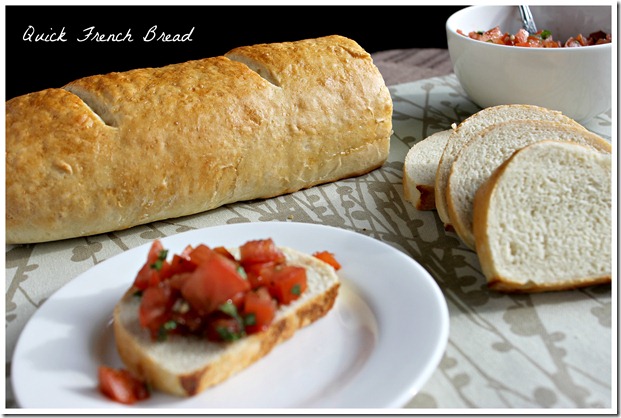
I wanted to learn how to make French bread the other day so that I could serve it with dinner that night.   Come to find out, most authentic French breads take a long time to make, sometimes even having to sit overnight.   I then realized I should have thought of this the night before so I could have started it by now.   Not accepting defeat,  I looked further into making French bread and found a few relatively quick “French” breads to make.  Now, I wouldn’t go serving this French bread to a French citizen proclaiming that you have made their native bread.  Since the bread only takes a little over two hours to make,  it might not be what I consider authentic “French” bread.  But, it is totally okay with me because it was still delicious fresh bread that I could make and serve within a day!

As soon as it came out of the oven, my boyfriend and I devoured a good part of the bread.  I whipped up some fresh tomato bruschetta (which I will give you my recipe for tomorrow) and we ate it with the warm French bread. I have made this bread a couple of more times,  each time being even better than the last.  I swear one day I will make the 24 hour versions of French bread, but for now in my busy life I am loving the quick one!

quick french bread

Print
Quick French Bread
Author: K
Recipe type: Bread
Prep time:  1 hour 40 mins
Cook time:  20 mins
Total time:  2 hours
Serves: 12
 
A quicker version of making French Bread
Ingredients
  • 1 package of dry yeast (2¼ tsp.)
  • 1 cup warm water (100-110 degrees)
  • 3 cups of bread flour (or about 12.75 oz.)
  • 1 tsp. salt
  • Cooking spray
  • 1 tbsp. water
  • 1 large egg white, lightly beaten
Instructions
  1. Place warm water into a small bowl and sprinkle the yeast on top. Let yeast dissolve for 5 minutes.
  2. Measure out the bread flour by weighing with a scale or spooning into a measurement cup and scraping the top off with a knife. Put flour and salt into a food processor with a dough attachment and pulse 2-3 times until combined (I also tried using a stand mixer to make this recipe and it worked out fine).
  3. With food processor or mixer on, slowly add the yeast into the flour mixture. Mix until dough forms a ball. Continue to mix for 1 more minute. Take dough out of food processor/mixer and place on a lightly floured surface. Lightly knead 4-5 times.
  4. Coat a large bowl with cooking spray and place ball of dough in bowl, turning to coat with cooking spray. Cover dough and let rise for 45 minutes or until doubled in size. Placing dough in a warm draft free place is key. *To test if bread is finished rising, push dough in the center with fingers, if the indentation stays the dough is done rising.
  5. Take dough out of bowl and punch dough down and shape into a 12x8 inch rectangle. Working with the 12 inch side, roll the dough up pressing firmly to prevent air pockets. Pinch the dough to seal the seams of the dough. Roll the dough slightly to lengthen the shape and place seam down on a baking sheet.
  6. Cover the dough and let rest for 30 minutes or until double in size.
  7. Preheat the oven to 450 degrees.
  8. Uncover the dough and with a sharp knife make three 3 inch slashes on top of the bread, equal distances apart. Combine the tablespoon of water and egg white. Brush the mixture on the bread with a pastry brush, making sure the exposed dough gets brushed with the egg white mixture.
  9. Place the bread on a baking sheet in the oven and bake for 20 minutes. The loaf should sound hollow when tapped. Best eaten within the first few days
Notes
Source- Adapted from Cooking Light’s Cooking Light Complete Cookbook
Nutrition Information
Calories: 127 Fat: 0.7 Carbohydrates: 25.1 Fiber: .2 Protein: 4.6 Cholesterol: 0
2.2.6


Filed Under: K's Recipes Tagged With: Bread recipe, french bread recipe, quick french bread, quick french bread recipe

Fresh Produce Tuesday- Week #3: Spring Onions

Posted by 2 Sisters 2 Cities on April 10, 2012

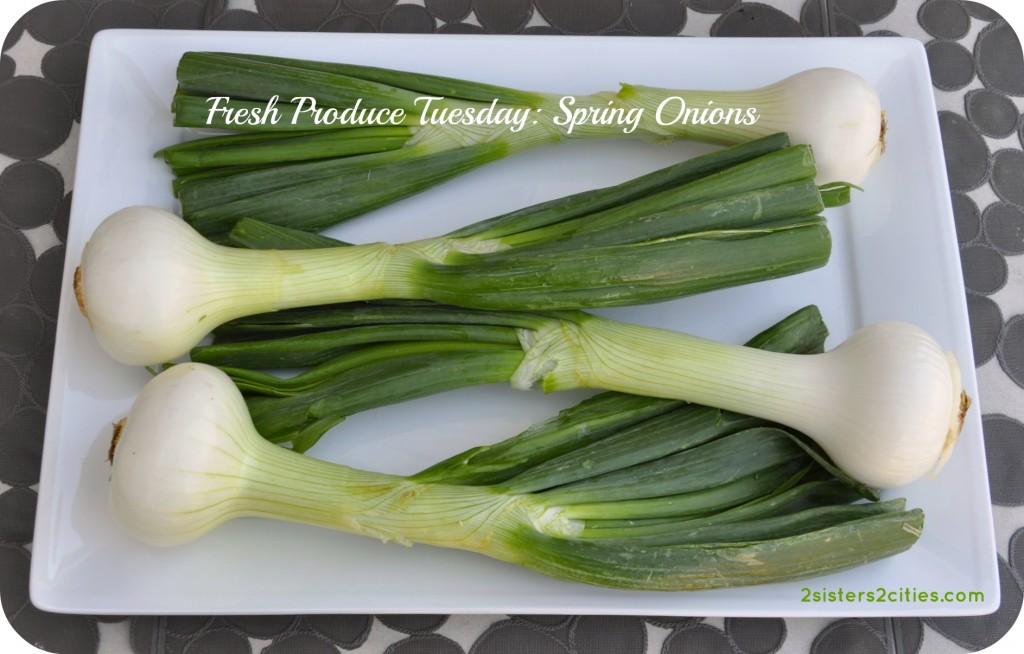
For the third week of the Fresh Produce Tuesday series, we are showcasing spring onions.  We’ve received so many great recipe ideas for asparagus and artichokes in the past couple of weeks (the linky parties for both are still open if you would like to submit a recipe!)  Also, here is the current schedule for the Fresh Produce Tuesday series by week:

Week #1- March 27th: Asparagus
Week #2- April 3rd: Artichokes
Week #3- April 10th: Spring Onions
Week #4- April 17th: Peas
Week #5- April 24th: Garlic Scapes
Week #6- May 1st: Rhubarb
Week #7- May 8th: Fava Beans

Spring onions are onions that are picked before they grow into conventional onions.  They have a milder flavor than regular onions.  Elizabeth Schnieder, author of Vegetables from Amaranth to Zuchini describes spring onions in the following manner:

What we call spring onions are usually young onions, more mature than a straight green onion or scallion, less mature than the bigger round things we call onions.

I made some spring onions as a side for dinner a few weeks ago.  I brushed them with olive oil, sprinkled on some salt and pepper, and just threw them on the grill for a few minutes.  Very easy and very tasty!  Here are some other recipe ideas that include spring onions:

  • Asparagus + Spring Onion Risotto from The Year in Food
  • Braised Spring Onions, Fennel, and Swiss Chard from Anne Burrell
  • Grilled Spring Onions from Serious Eats
  • Pasta Alla Carbonara with Spring Onions and Lemon from Rachel Ray
  • Potato and Spring Onion Soup from Saveur
  • Roast Leg of Lamb with Spring Onions and Mint from Whole Foods
  • Roasted Spring Onions from the quinces and the pea
  • Spring Onion and Pea Soup with Ramp Crostini from Martha Stewart
  • Spring Vegetable Soup from Pink Parsley
  • Zucchini Ribbons with Caramelized Spring Onions from O, The Oprah Magazine, June 2006
Do you have a recipe that includes spring onions?  If so, please link up your recipe below!  (It would be great if you could provide a link back to 2 Sisters 2 Cities or add our button to your spring onions post, but it is not required.)


Filed Under: M's recipes Tagged With: 10 recipe ideas for spring onions, csa recipes, Farmers Market, farmers market cooking, farmers market recipes, fresh produce tuesday, how to cook spring onions, spring onion, spring onion recipe ideas, spring onion recipes

10 Recipe Ideas for Leftover Easter Eggs

Posted by 2 Sisters 2 Cities on April 8, 2012

Happy Easter!  I hope you have a wonderful holiday and that you got a chance to decorate lots of Easter eggs!  With all these extra eggs, I decided to pull together a list of 10 recipe ideas for all those leftover Easter eggs.  I made about two dozen eggs yesterday and dyed them with the standard Paas egg dye kits.  I did see a lot of blog posts this year showing how to use beets, cabbage, blueberries, and turmeric to dye eggs naturally, but I decided to go the traditional all-American route this year with the dye tablets and vinegar.

My husband likes to eat hard-boiled eggs just plain, but we still had a lot of eggs to go through (it’s recommended that you eat hard-boiled eggs within five days of making them.)  Here are 10 recipes I found that use hard-boiled Easter eggs, or just regular hard-boiled eggs :)

  • Asparagus with Dijon Mustard Sauce and Chopped Hard-Boiled Egg from Serious Eats
  • Caesar Salad Deviled Eggs from smitten kitchen
  • Curry Egg Salad Sandwich from The Cozy Kitchen
  • Cobb Salad with Garlic Vinaigrette from Real Simple
  • Deviled Eggs from Simply Recipes
  • Ed’s Mother’s Meatloaf from Nigella Lawson
  • Egg Salad Sandwich from Kitchen Daily
  • Hard-Boiled Eggs Florentine from Gourmet January 2005
  • Nicoise Salad from foodieinberlin’s blog
  • Spinach Salad with Warm Bacon Dressing from The Pioneer Woman

What do you plan on making with those leftover Easter eggs?


Filed Under: M's recipes Tagged With: Easter egg recipes, Easter eggs, hard-boiled egg recipes, leftover Easter eggs, recipe ideas for leftover Easter eggs

Chicken Spinach Artichoke Pizza

Posted by 2 Sisters 2 Cities on April 6, 2012

I was inspired to make this pizza after having the Chicken Artichoke Flatbread Pizza at Outback Steak House. Spinach artichoke dip is always one of my favorite appetizers to order at restaurants, so after trying the flat bread pizza I knew I would need to create my own pizza. I have made Spinach Artichoke Dip a few times for parties and have always been pretty satisfied with the results. I decided to create this pizza to be able to post it to M’s Produce Tuesday for artichokes (I used canned artichoke hearts, but you certainly could use fresh ones as well- here is a tutorial on how to trim and clean an artichoke heart).

Everything was going perfectly with the creation of this pizza until I went to remove the pizza from the oven. The pizza slipped off the pizza peel and landed topping down into the crack of the oven and the oven door.  What a mess!  I was so upset after I dropped it my boyfriend had to clean it up and try to save as much as he could of it. We still ate what he was able to save and it was still delicious, just not really pretty to photograph and show you guys. I was so proud of what the results were going to be so it broke my heart when I dropped it. Just goes to show you that kitchen accidents happen to everyone!  I will definitely be trying this pizza again.

Print
Chicken Spinach Artichoke Pizza
Recipe type: Entree
Prep time:  15 mins
Cook time:  10 mins
Total time:  25 mins
Serves: 4
 
Ingredients
  • 4 oz. light cream cheese
  • 3 tbsp. light mayonnaise
  • 3 tbsp. light sour cream
  • 3 tbsp. grated parmesan
  • 5oz. frozen chopped spinach, thawed, drained and moisture squeezed out
  • 5-6 canned artichokes hearts, quartered
  • 2 cloves of garlic, minces
  • salt
  • pepper
  • 3 oz grilled chicken breast cut into small pieces
  • ¼ cup shredded parmesan
  • ¾ cup mozzarella
  • Pizza dough- I use the recipe from Annie’s Eats
Instructions
  1. Preheat the oven to 500 degree with pizza stone in oven. Assemble the artichoke dip in a medium bowl mixing together the cream cheese, mayo, sour cream, 3 tbsp. parmesan, spinach, artichokes, garlic, and salt and pepper to taste. With a sheet of parchment paper cut to fit your pizza stone, sprinkle corn meal down on parchment paper and spread out pizza dough. Once the dough is spread out to the size you want, spread artichoke dip onto pizza leaving the edges open for crust. Place cut chicken slices on top of artichoke dip . Then, sprinkle parmesan and mozzarella cheese on top. Place pizza on preheated pizza stone in the oven and bake for 10 minutes. Carefully take out of the oven and by all means do not drop the pizza!!
2.2.6


Filed Under: K's Entrees, K's Recipes Tagged With: artichokes, chicken spinach artichoke pizza, outback steakhouse chicken artichoke flatbread pizza, pizza recipe, spinach artichoke dip pizza

Caramel Corn

Posted by 2 Sisters 2 Cities on April 4, 2012

I can’t believe Easter weekend is in a few days.   My boyfriend and I learned this year how obsessed we are with Easter Candy.  We have been eating it for treats all month.  Some of my favorites are the Reese’s Peanut Butter Eggs,  Russell Stover Marshmallow Eggs,  Starburst Jelly Beans,  Sour Patch Kid Jelly beans, and Cadbury Mini Eggs.   I have noticed that stores have run low on Easter candy this year.  So if you are not finding the candy that you want to put in your children’s Easter Basket this year,  I have just the idea for you.   Who doesn’t love caramel corn?   This caramel corn recipe is really easy to make and it’s delicious!  After five days, the caramel corn is still really crisp and just as tasty as the first day I made it (I kept it stored in a plastic container.)

Maybe putting this caramel corn in plastic eggs is a little extreme, but it could easily be put into a treat bag with a ribbon to put in an Easter basket.   Nothing goes better with a chocolate bunny than caramel corn!!

caramel popcorn

Print
Caramel Corn
Author: K
Prep time:  25 mins
Cook time:  20 mins
Total time:  45 mins
Serves: 6
 
Ingredients
  • ½ cup of unsalted butter (1 stick)
  • 1 cup of light brown sugar
  • ¼ cup light corn syrup
  • 2 tsp. kosher salt
  • ¼ tsp. baking soda
  • ½ tsp. vanilla extract
  • 12 cups of popped popcorn (I tried to use a minimal amounts of oil to keep the popcorn fresher longer)
Instructions
  1. Preheat oven to 300 degrees. Line a baking sheet with aluminum foil and then spray with cooking spray.
  2. Place butter in medium pot over medium heat to melt. Add in brown sugar and corn syrup and stir until sugar dissolves.
  3. Bring to a boil, then turn heat down to low and allow sugar syrup to simmer for 4-5 minutes without stirring.
  4. After, stir the mixture and continue to simmer for 5-6 minutes, stirring every 30 seconds. The caramel mixture will start to become a deep golden color.
  5. At this point turn off heat and stir in salt, baking soda and vanilla extract.
  6. Once the caramel is all mixed together, pour over large bowl of popcorn. Stir the caramel into the popcorn, trying to get all the popcorn mixed in. You will need to work quickly because caramel with start to dry. (Also note that as you bake it you will be able to spread the caramel out more.)
  7. Spread the popcorn out on the lined baking sheet and place in the oven.
  8. Bake for 15-20 minutes, stirring every five minutes. The finished popcorn will have a deep amber color and the caramel will looks a bit like sugar crystals. I usually go the entire 20 minutes because every five minutes I use a rubber spatula to break up and stir the caramel so each piece of popcorn has a little caramel on it.
  9. Let the caramel corn cool and store in an airtight container.
3.2.1652

Source- adapted from Recipe Girl

What is your favorite type of Easter candy?


Filed Under: K's Recipes Tagged With: caramel corn, caramel corn recipe, caramel popcorn, easter basket, easter basket ideas, Easter candy, popcorn, popcorn recipe

Fresh Produce Tuesday- Week #2: Artichokes

Posted by 2 Sisters 2 Cities on April 3, 2012

For our second week of the Fresh Produce Tuesday series, we are featuring another great spring vegetable- artichokes.  Thank you to all of you who submitted your asparagus recipes last week!  If you missed it or have another asparagus-related post you would like to submit, the linky party is still open on the Asparagus link below.  Also, here is the current schedule for the Fresh Produce Tuesday series by week:

Week #1- March 27th: Asparagus
Week #2- April 3rd: Artichokes
Week #3- April 10th: Spring Onions
Week #4- April 17th: Peas
Week #5- April 24th: Garlic Scapes
Week #6- May 1st: Rhubarb

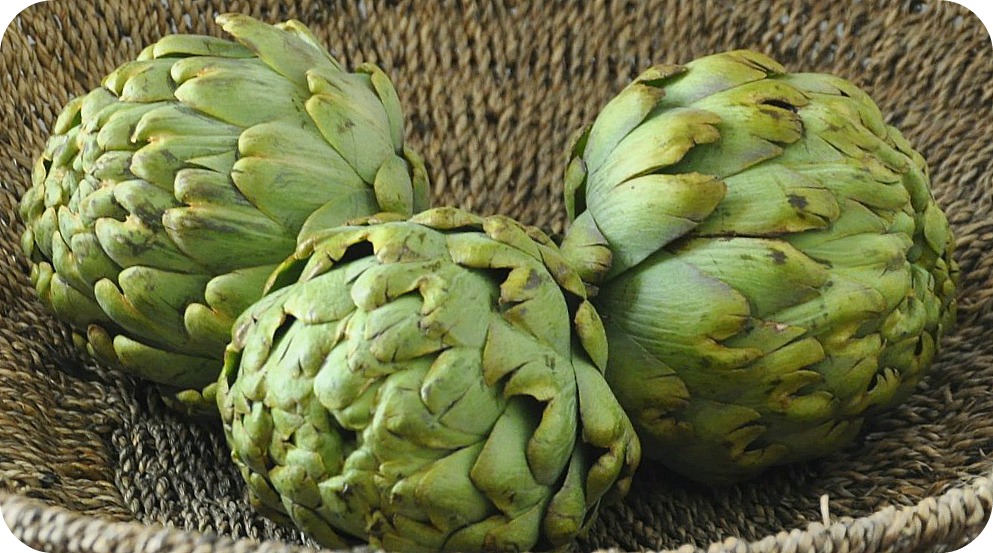
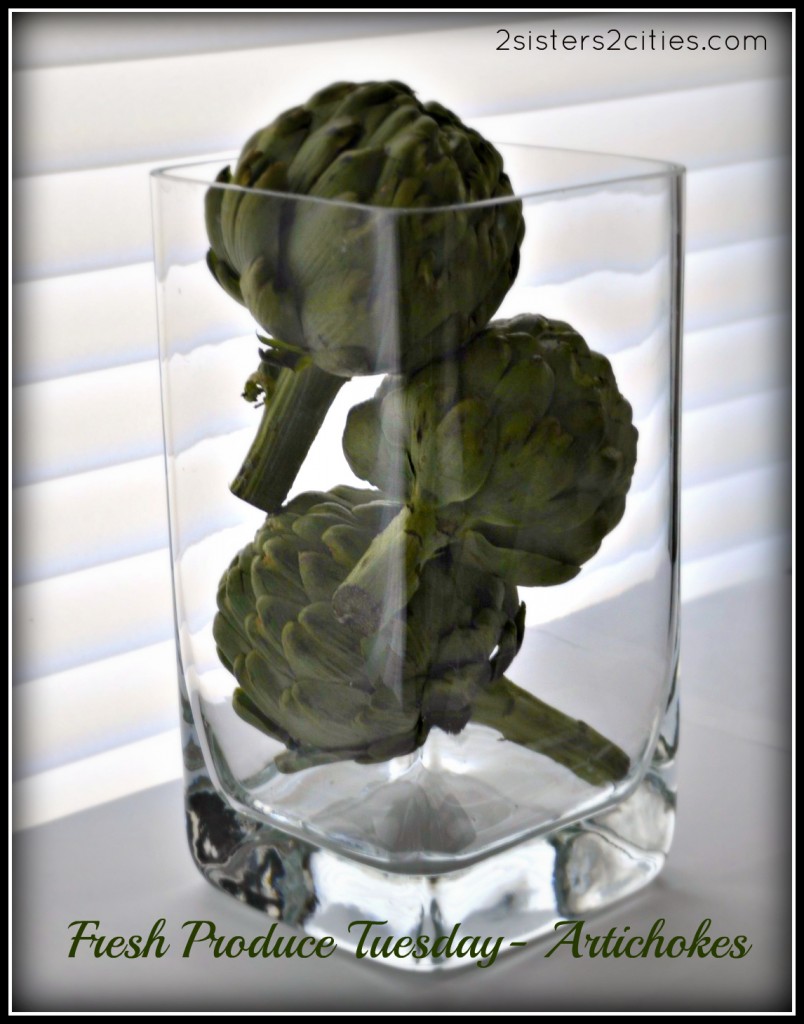
I’ve actually only made fresh artichokes once before, and that was just a couple weeks ago.  I used Julia Child’s Mastering the Art of French Cooking to learn how to prepare them, how long to boil them and what to serve them with.  The stem needs to be snapped off and the ends of the leaves need to be trimmed with scissors.  The artichokes then need to be boiled uncovered for 35-45 minutes.  I served them warm with her simple red wine vinegar and olive oil vinaigrette poured over them.  Here is how Julia describes what to look for when picking artichokes:

A fresh, desirable artichoke is heavy and compact, with fleshy, closely clinging leaves of a good, green color all the way to the tips.  The stem is also fresh and green.

Even after reading an entire section of Julia’s cookbook, I still think artichokes can be a little intimidating to prepare and to figure out how to eat them.  Here is a helpful article (with pictures) to show you how to cook and eat an artichoke.

For our second Fresh Produce Tuesday, here are some great sounding recipes featuring artichokes:

  • Artichoke Dipping Sauce from Average Betty
  • Boiled Artichokes with Dijon-Worcestershire Dipping Sauce from cookthink
  • Braised Greek Artichoke Bottoms with Lemon and Olive Oil from The New York Times
  • Fried Baby Artichokes from Steamy Kitchen
  • Grilled Artichokes with Remoulade Sauce from Waltzing in the Kitchen
  • Herb Gorgonzola Crusted Artichokes with Parmesan Hollandaise from how sweet it is
  • How to Cook Artichokes in the Slow Cooker from the kitchn
  • Roasted Baby Artichokes from spoon fork bacon
  • Steamed Artichokes with Lemon Butter Sauce from Whole Foods
  • Stuffed Artichokes from Allrecipes

Now it’s your turn to share a recipe that you have made which includes artichokes!  Please link up below- the post can be new or old.  Since there are so many great sauces (hollandaise, a homemade mayonnaise, etc) that could be served with artichokes, we would love to see some of those recipes as well even if the post isn’t specifically about artichokes.  It would be great if you could link back to 2 Sisters 2 Cities or add our button to your artichokes post (our button can be found in the right-hand column), but it is not required.  Please link up even if your recipe is similar to one of the recipes posted above- it’s always great to see various pictures of a dish.  If you don’t have a blog, feel free to try out any of these recipes and/or click the “like” link on any that sounds particularly appetizing to you!


Filed Under: M's recipes Tagged With: artichoke recipe, artichokes, fresh produce tuesday, how to cook artichokes, how to prepare artichokes, spring recipes

Menu Plan Monday: Once a Month Mom Meal Plan

Posted by 2 Sisters 2 Cities on April 2, 2012

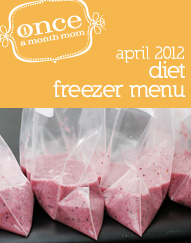
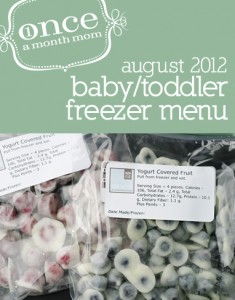
As I was scrolling through Pinterest yesterday, I came across a few pins for meal plan menus from once a month mom.  They are a series of menu plans that allow you to cook a whole month of meals in one day to store in your freezer.  I once went to a “meal assembly” franchise like  Dream Dinners, My Girlfriend’s Kitchen, and Let’s Dish, but I don’t really need or want to pay the mark-up to have someone else prep all the ingredients for me.  There are six different menus available each month- traditional, whole foods, diet, vegetarian, gluten/dairy-free, and baby food.  I am going to attempt to make the diet freezer menu this week as we are back in diet-mode in our house and it looks pretty delicious!

I am heading to the grocery store this afternoon to stock up on ingredients with the pre-made grocery list for the meal plan.  I love how everything is linked up in Excel…so fun to see Excel being put to good use outside of financial spreadsheets.  Along with the printable grocery list, there are  recipe cards for each meal, instructions with detailed steps on how to cook all the meals in one day, and my favorite item- printable labels for freezer bags with heating instructions and nutritional information.

After I’m done cooking, I should have 6-10 breakfasts, 8 lunches, and 16 dinner for two people.  While this is not enough for an entire month of meals, the plan takes into account that you will periodically be getting take-out, eating out, or preparing a meal fresh that night.  You can however make enough for the full month if you double the recipes accordingly.

I am hoping to get the prep work done tonight (it’s recommended that you do the chopping and a small amount of prep work the night before.)   I’m not sure I will be able to do the full day of cooking in one day as Baby T requires a lot of attention and would be jumping off my kitchen table if I left him unchecked all day.  I’m also slightly concerned about the amount of freezer space I have, but I think I can make a lot more room with some organization and removing the ice gel packs that are taking up about a quarter of the space.  I am hoping this will make evenings less of scramble to get baby fed and dinner on the table.

I am hoping to make the baby/toddler menu once we use up our current stockpile of baby meals in the freezer.

Have you ever made a huge amount of meals in one day?  What was your strategy in planning all the meals?


This post is linked at:


Filed Under: M's Entrees, M's recipes Tagged With: diet, easy to prepare meals, freezer meals, meal plan monday, once a month mom

Soft Sugar Cookies with Buttercream Frosting

Posted by 2 Sisters 2 Cities on April 1, 2012

So, I have seen these soft sugar cookies on just about every blog I read.  I have been trying to ignore their existence because I knew they would be too good and I would eat them all.  Well, I finally caved in and made them for a bake sale that was going on at my work to support local food banks.  I was right… these cookies are too good!  They need to be erased from my mind like on Men in Black or maybe a vampire can compel me to not remember these cookies.  I am afraid these things can’t happen and I will have to suffer on the elliptical at the gym everyday knowing that these cookies exist.

Okay, I am being a little over-dramatic.  I just think these cookies are really great.  They are a really yummy soft sugar cookie with butter-cream frosting.  My boyfriend called them cupcake cookies because they sort of look like the top of a cupcake.  They were very successful in the bake sale, although they were selling them for a dollar! These cookies are totally worth two dollars.

These soft sugar cookies can be festive for whatever holiday that you want them to be with a little food coloring and sprinkles.  I made mine Easter/ Spring color with light yellow frosting and pink sprinkles.  You could make them for any holidays like Easter,  Memorial Day, Fourth of July, Halloween, St. Patrick’s Day, Christmas, my birthday, and even just a Tuesday.  I am sure I can think of more reasons to make these cookies!

Soft Sugar Cookies with Buttercream Frosting

Print
Soft Sugar Cookies with Buttercream Frosting
Author: 2 Sisters 2 Cities
 
Ingredients
  • Cookies:
  • 4½ cups AP flour
  • 4½ tsp. baking powder
  • ¾ tsp. salt
  • 3 sticks unsalted butter, at room temperature (1½ cup)
  • 1½ cups sugar
  • 3 large eggs
  • 5 tsp. vanilla extract
  • Frosting:
  • 5 cups confectioners’ sugar
  • ⅓ cup (5⅓ tbsp.) unsalted butter, melted
  • 1 tbsp. vanilla extract
  • 7-8 tbsp. milk (plus more, as needed)
  • Food coloring
  • Sprinkles
Instructions
  1. Line baking sheets with silicone non-stick mats or parchment paper. In a medium sized bowl, mix together flour, baking powder and salt. Next in a large bowl or the bowl of your electric mixer combine butter and sugar, Mix on medium–high until light and fluffy. Beat in eggs one at a time until combined. Next mix in vanilla extract being sure to scrape down the sides to combine everything. Gradually add in dry ingredients on low speed until combined, then cover and refrigerate for 1 hour.
  2. Preheat oven to 350 degrees. Using the large cupcake scoop or a ¼ measuring cup scoop out portions of dough and roll into balls. Flatten each dough ball with hand and place cookies 2-3 inches apart from one another on baking sheet. Bake for 10-12 minutes until set. Let cool on baking sheet for 2-3 minutes then move over to a cooling rack.
  3. In the bowl of the mixer with a whisk attachment add in 5 cups of confectioners’ sugar. Add in melted butter, vanilla and milk and whisk at low speed until smooth. Continue to whisk for 1 minute. Add in food coloring at this time and mix to combine. When cookies are completely cool, frost and top with sprinkles. Leave cookies out at room temperature until the frosting hardens on top. Place the cookies in an airtight container and place wax paper between the layers. Serve with a big glass of milk and charge at least 2 dollars for them at a bake sale!
3.2.2199

Source- adapted from Annie’s Eats, originally from Hostess with the Mostess


Filed Under: K's Desserts, K's Recipes Tagged With: bake sale idea, buttercream, cookies, Easter cookies, holiday cookies, soft sugar cookies, spring cookies

Happy April!

Posted by 2 Sisters 2 Cities on April 1, 2012

Hope you had a great April Fool’s Day!  Did you pull off any good pranks?  I got my husband by telling him there were 50 turkeys in our front yard, which is actually pretty believable given our track record with turkeys.  We had a fun, outdoorsy Sunday- we did a 10K walk in the morning and lots of yard work in the afternoon.

Just wanted to share with you an adorable desktop wallpaper for April from Kelly Ashworth Design.  Check out her site to download this wallpaper for your iPhone, iPad, or computer!

Here’s hoping that April showers will bring May flowers!

Related Posts Plugin for WordPress, Blogger...


Filed Under: M's post

  • « Previous Page
  • 1
  • 2

Recent Posts

  • Easy Holiday Office Party Tips
  • 5 Steps to an Easy Football Party
  • Gingerbread Biscotti
  • Holiday Coffee Bar and Thanksgiving Recipes
  • Soft Sugar Pumpkin Cookies
  • Cinnamon Sugar Apple Cake
  • Hello Pumpkin Season!
  • Make Your Own Milkshake Party!
  • Mama’s Pickles
  • S’more Cookies

Categories

  • About 2 Sisters 2 Cities (7)
  • Books (8)
  • Crafting & DIY (22)
  • Design & Decorating (15)
  • Gardening (5)
  • Giveaway (14)
  • Guest Bloggers (8)
  • K's post (46)
  • K's Recipes (191)
    • K's Desserts (75)
    • K's Entrees (23)
    • K's Sides (24)
  • M's post (72)
  • M's recipes (167)
    • M's Entrees (21)
    • M's Sides (14)
    • M's Desserts (30)
  • Organizing (7)
  • Party Ideas (49)
  • Uncategorized (1)
  • Vacation (12)
Stitch Fix

Archives

Blogroll

  • Annie's Eats
  • Bake at 350
  • Baked Bree
  • Boston Harbor Beacon
  • Confections of a Foodie Bride
  • Cook Like a Champion
  • Erin’s Food Files
  • Forever and a Recipe
  • Framed Cooks
  • Oh Happy Day
  • On Common Ground
  • Pennies on a Platter
  • Pink Parsley
  • Recipe Girl
  • Sally's Baking Addiction
  • Simply Scratch
  • The Curvy Carrot
  • The Pioneer Woman
  • Tidy Mom
  • Two Peas & Their Pod
  • What’s Gaby Cooking
  • Young House Love
Increase your website traffic with Attracta.com

grab a 2 sisters button!


Copyright © 2014 ~ 2 Sisters 2 Cities | Blog Design by Minx Design