2 Sisters 2 Cities

Image Map
  • About 2 Sisters 2 Cities
  • Recipe Index
  • Project Index
  • Contact Us
  • Like us on Facebook
  • Follow m on twitter
  • Follow k on twitter
  • Follow 2S2C on Pinterest
  • Follow 2S2C on G+
  • rss
  • e-mail 2S2C

Archives for October 2012

Happy Halloween & Mickey Mouse Costume Reveal

Posted by 2 Sisters 2 Cities on October 31, 2012

pumpkin patch

Happy Halloween everyone!  Is anyone else in shock that it is the last day of October?  We ended up pretty much unscathed from Hurricane Sandy.  One of our Japanese maples was uprooted and we lost power for a couple of hours, but pretty minor stuff compared to how others on the East Coast fared.  I hope everyone else out there that was affected by the storm is doing ok!

Since it’s now officially Halloween, I wanted to reveal baby T’s Mickey Mouse costume.  First, here’s a quick round-up of a few Halloween posts that we have done in the past.

Halloween round-up:

  • Scary Black Cat Cookies
  • Eery Half Moon Cookies
  • Boo-tiful Mini Pumpkin Muffins with Cream Cheese Frosting
  • Witch’s Cauldron Crockpot Cider with Mulling Spices
  • Spooky DIY Halloween Pennant Banner

Mickey Mouse Costume:

My son (who turns 2 in a couple of weeks) is pretty much obsessed with the tv show Mickey Mouse Clubhouse.  I decided a couple months ago to dress him up as Mickey Mouse for Halloween.  When I started looking for costumes on-line, I was unimpressed with the results so I decided to make the costume myself.  It was actually very simple to make and ended up costing less than $25.

DIY Mickey Mouse Costume

Materials Needed:

  • black Pants– $5.00
  • long-sleeved black t-shirt– $4.00
  • red shorts– $4.25
  • 2 large white  buttons- less than $2.00 at Michael’s
  • headband- 99 cents  in clearance box at Target
  • thick black pipe cleaner (also called chenille stem)- $2.99 at Michael’s
  • black and yellow felt- 29 cents a piece at Michael’s
  • needle and thread- already had
  • scissor- already had
  • glue gun- already had
  • safety pin- already had
  • black face paint- $4.99 at Michael’s (I know I could have gotten this cheaper somewhere else, but I was running short on time and picked up a set here)
Directions:
Use needle and thread to attach 2 large white buttons to the front of the red shorts.  Cut the chenille stem in half and attach one half to the red shorts with a safety pin.  Use the other half of the chenille stem and cut two small pieces out of (long enough to shape two circle ears out of).  Twist both pieces into circles and attach to headband.  Cut out 4 black circles from the felt and use the glue gun to attach to the circular chenille stems on the headband.  Next, cut a two half-circles and 2 small rectangles from the yellow felt.  Put one half-circle on top of a sneaker and wrap the rectangle piece around the bottom of the sneaker.  Use a glue fun to attach the two pieces so it is a snug fit to the shoe (be careful not to glue the felt directly to the shoe however.)  Repeat for the other shoe.
When it’s costume time, put on black pants and black long-sleeved t-shirt.  Put red shorts on over the pants.  Put on “yellow” shoes and Mickey Mouse ears.  Dab a bit of black face paint on nose and start doing the Hot Dog dance!

Here’s T getting ready to go trick-or-treating!

mickey mouse costume

Hope you have a great Halloween!
sister m signature


Filed Under: Crafting & DIY, Party Ideas Tagged With: diy costume, halloween, halloween diy projects, halloween recipes, mickey mouse clubhouse, mickey mouse costume

DIY Halloween Pennant Banner

Posted by 2 Sisters 2 Cities on October 26, 2012

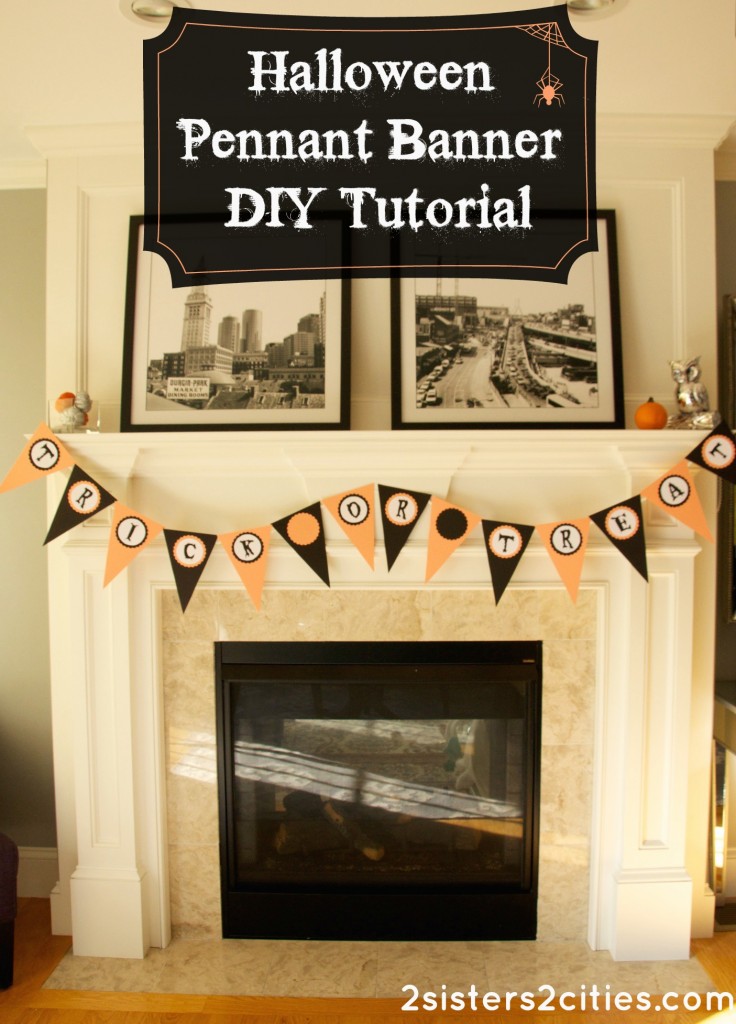
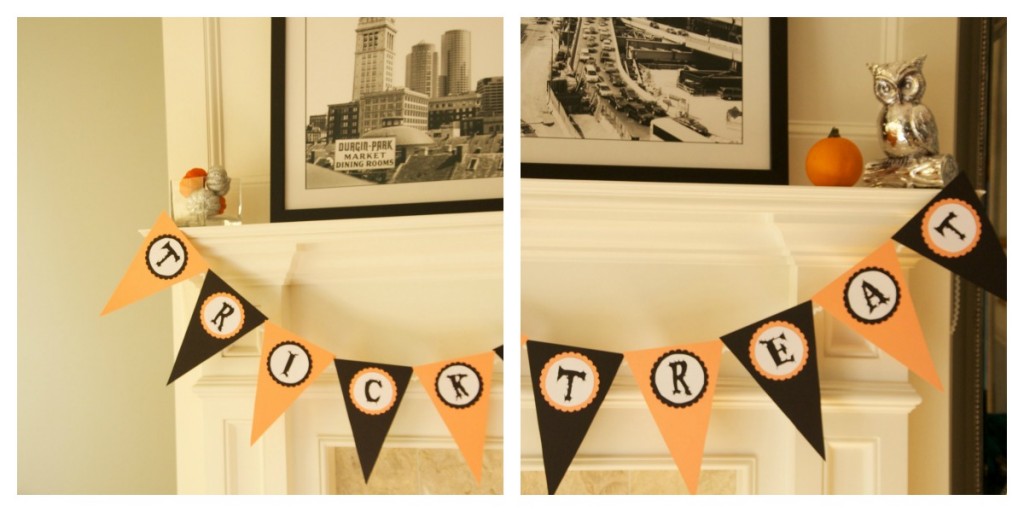
Halloween Pennant Banner DIY Tutorial

I realized the other day that we have hardly any Halloween decorations in our house besides our cheapo plastic pumpkin that holds candy.  I didn’t want to spend too much money considering Halloween is only five days away so I decided to just focus on sprucing up our fireplace mantle.  The Halloween pennant banner is really easy to make and I’ve got a free printable below so you can use the same spooky letters if you want.

Halloween decorations

I picked up a few other decorations for the mantel earlier today.  The glittery pumpkins were 50 cents a piece at Michael’s.  I found the owl at Marshall’s for less than $10.  My husband and baby T and always complaining that an owl outside keeps them up at night so I thought he would fit in perfectly to our Halloween display.  I bought the baby pumpkin a few weeks ago. All the other pumpkins I bought  at the time have since rotted so we need to pick up a few more this weekend for carving.

Halloween Pennant Banner Tutorial

Materials Needed:

  • Orange, black, and white cardstock
  • A few yards of rickrack or another type of string/ribbon
  • Double-sided tape
  • Masking Tape
  • Large scallop punch (this step is optional if you don’t have one)
  • Ruler
  • Scissors
  • Pencil
  • Halloween candy to munch on

Directions:

Use a ruler to make a template for the pennant flags.  Mine measured out 6 inches on the short side and 9.5 inches on the two long sides.  Sketch out the measurements with a pencil and use scissors to cut out the flag.  Use this flag to trace 13 additional flags alternating the paper color if desired.  Cut out the rest of the flags.

Use a scallop punch to make 14 scalloped circles (Alternative idea: if you don’t have a scallop punch, you could use a can to trace a large circle.)  Print out the font templates below if you want to use the same message and font on my banner.  (For Macs: Save the two jpeg files and open it in Preview to print.)  If you want to create your own message or use a different type of font, I highly recommend checking out picmonkey.com.  They have a lot of different Halloween fonts right now as well.  Trace a small circle (I used a small can) over each letter and cut out the 12 letters.

templates for the letters T-R-I-C-K-O Template for the letters T-R-E-A-T-R

Use double-sided tape to attach the scalloped circle and font circle onto the pennant flag.  Lay out the rickrack and tape the flags to the rickrack using masking tape.  Hang the Halloween pennant banner on your mantel, step back, and admire!

sister m signature


Filed Under: Crafting & DIY, Design & Decorating Tagged With: DIY, diy project, diy tutorial, halloween, halloween pennant, mantel, mantel decorations, pennant, pennant banner

Swag Bag Giveaway

Posted by 2 Sisters 2 Cities on October 24, 2012

Swag Bag Giveaway

As I mentioned in my last post, I am doing a giveaway of some of the contents in my swag bag that I got at the Blog Better Boston Food Summit.  I felt guilty keeping it all to myself so I wanted to share the love with our 2S2C readers!  This swag bag giveaway includes the following items:

  • Chef’n Veggichop hand-powered vegetable chopper
  • Collection of 6 Mara-Mi Oscar Wilde Bottle tags
  • 4oz. jar of Stonewall Kitchen Holiday Jam
  • 4oz. jar of Stonewall Kitchen Maine Maple Champagne Mustard (this item was not actually part of the swag bag, but I purchased it at the Stonewall Kitchen store…I love to use it in recipes as an alternative to dijon mustard.)
  • 8oz. bottle Wyman’s Wild Blueberry 100% Juice, complete with laminated recipe card with recipes for 14 blueberry drinks (laminated card not shown in above picture)

These items have a combined retail value of approximately $50.  Good luck!

a Rafflecopter giveaway

The Rules: U.S. residents only.  No entries will be accepted after October 31, 2012.  Entries that do not follow the entry requirements will not be considered.  One winner will be chosen at random and announced on November 1, 2012.  The chosen winners will then have 30 days to respond by e-mail to claim their prize.  While these products were given to 2sisters2cities.com for free, this giveaway is not associated with Chef’n, Mara-Mi, Stonewall Kitchen, or Wyman’s. Void where prohibited.  See additional rules and terms in the Rafflecopter widget.

sister m signature


Filed Under: Giveaway Tagged With: 2 Sisters 2 Cities giveaway, blog better boston, blogging conference, chef'n, giveaway, mara-mi, stonewall kitchen, swag bag, wyman's

Blog Better Boston Food Summit at Stonewall Kitchen

Posted by 2 Sisters 2 Cities on October 22, 2012

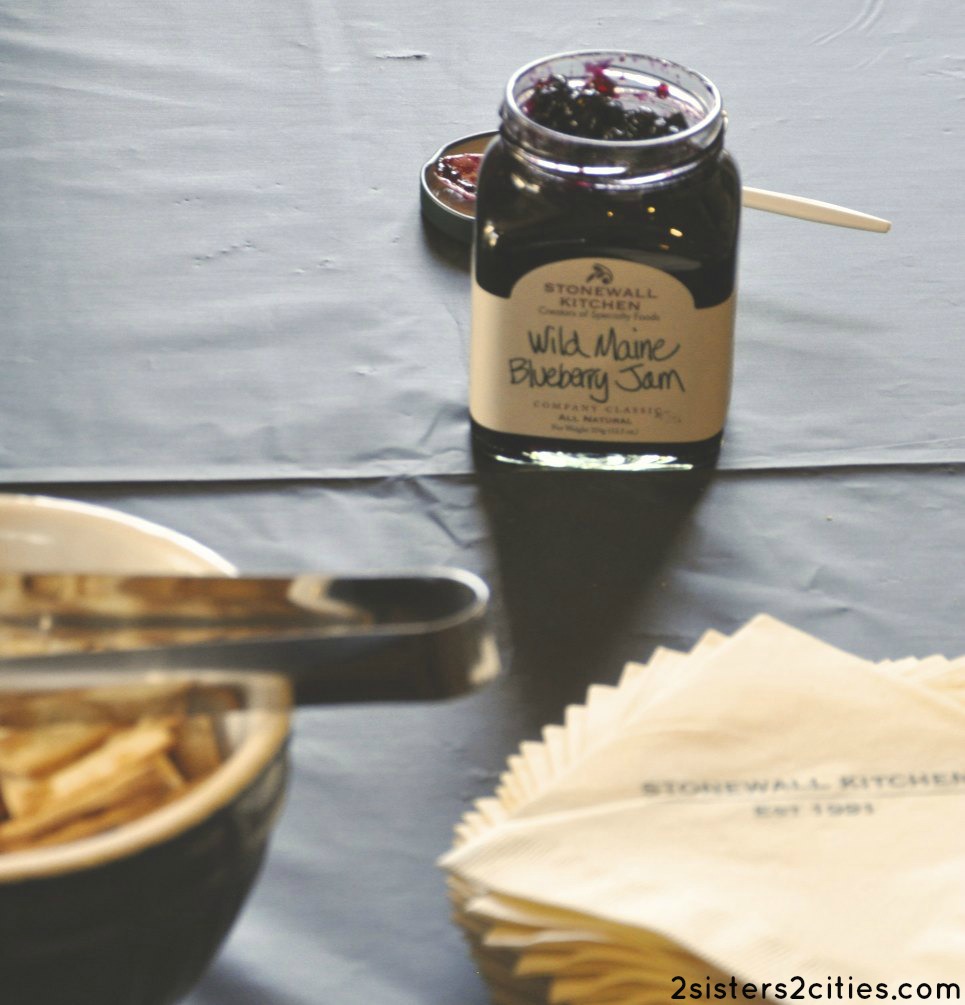
Stonewall Kitchen Wild Maine Blueberry Jam

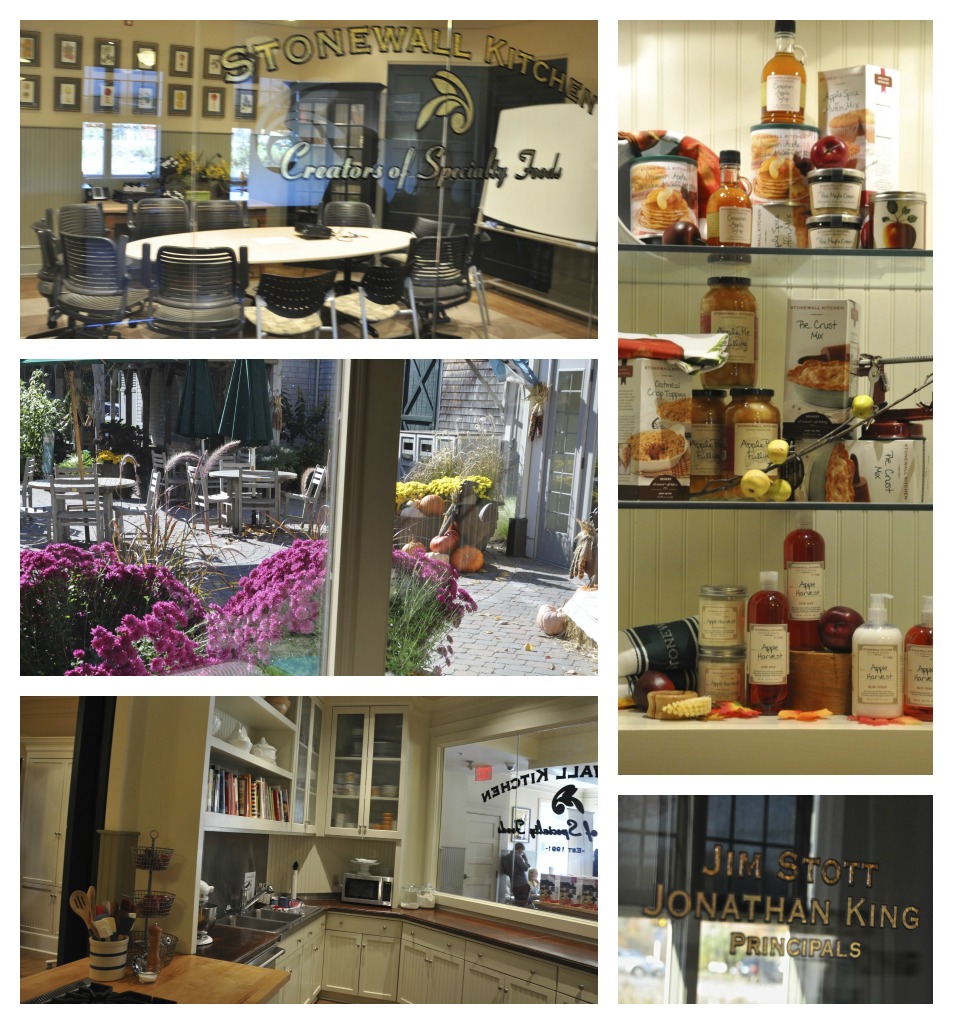
My husband, baby T, and I traveled up to Maine this weekend to visit some family and friends and so that I could attend the Blog Better Boston Food Summit at Stonewall Kitchen.  Stonewall Kitchen’s headquarters in York, ME include a food production plant, their corporate offices, a cooking school, and a huge store with SK products.  I’ve always driven by their headquarters on many other trips to Maine and have always wanted to check it out.  When I found out that the lovely ladies behind Blog Better Boston were organizing a food summit at Stonewall Kitchen, I knew I had to attend!

We started off with a delicious breakfast provided by Au Bon Pain.  Next, we toured the Stonewall Kitchen facilities.  It was very cool to check out the production line.

Stonewall Kitchen Production Facility

I also loved the office spaces and conference  rooms-  what a beautiful space to work in!

Stonewall Kitchen Offices

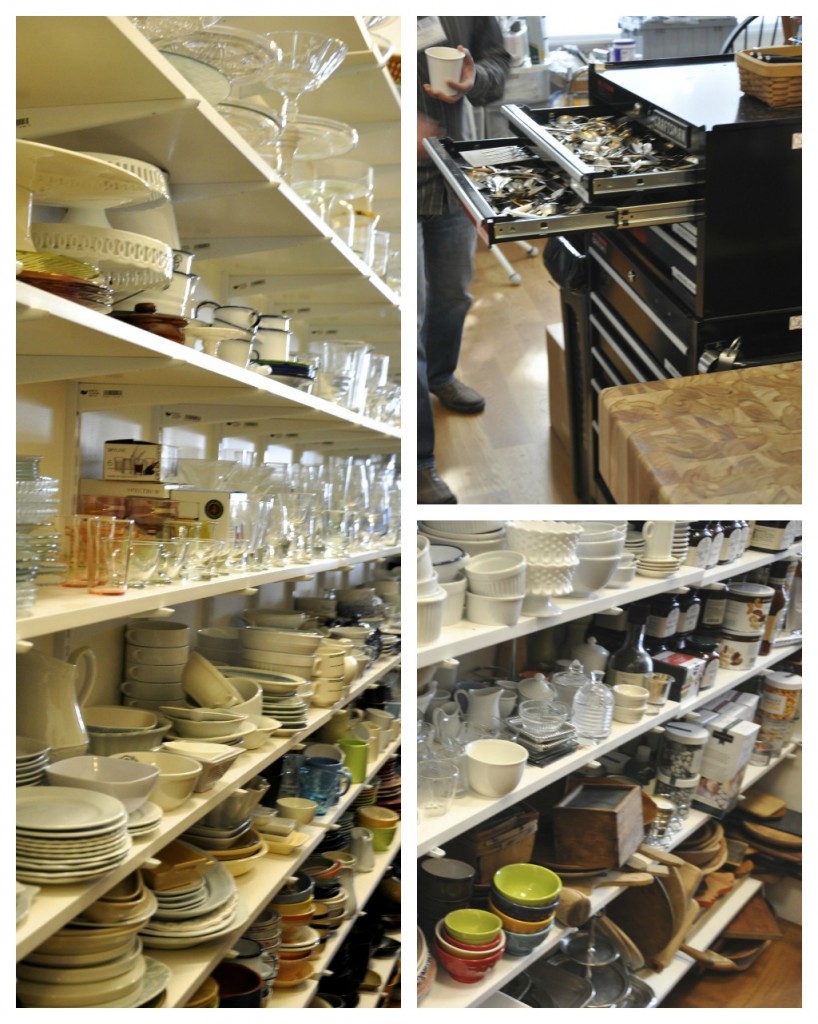
We had four sessions throughout the day: Restaurant Reviews, Food Photography, Recipe Development, and Photo Editing.  They were all great sessions and I learned so much information.  I was really inspired by the Food Photography session hosted by Stonewall Kitchen’s product photographer, Michael Cabelin.  He provided so many great photography tips that I am hoping to implement soon!  I was blown away by their props collection- check out all the plates and bowls!  They also had an entire tool cabinet of different size spoons and forks.  How funny would it be if I took out all my husband’s tools out of his tool chest and put in blogging props instead?

Stonewall Kitchen Props

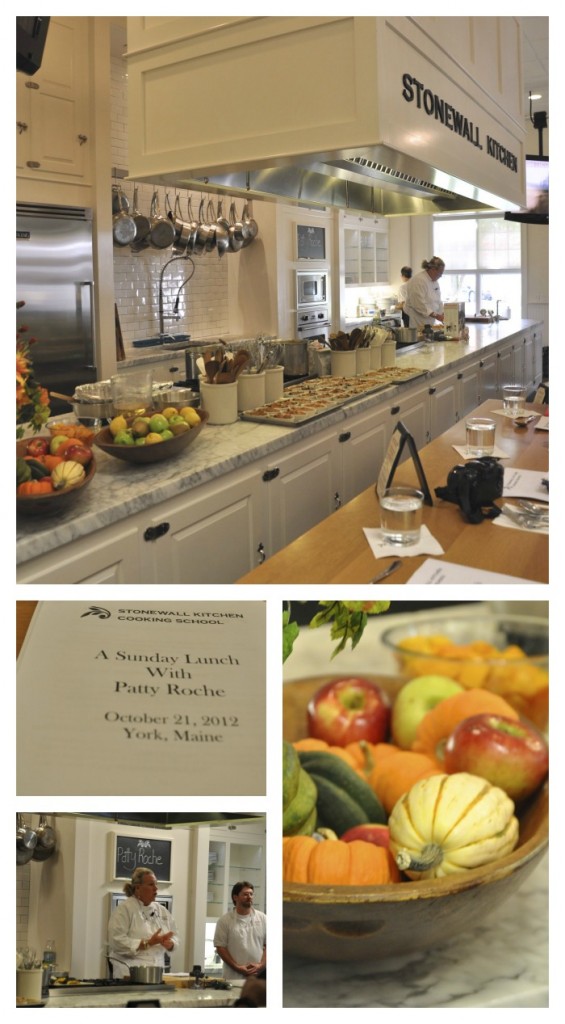
For our lunch break, we got to attend Stonewall Kitchen’s Cooking School.  Culinary instructor Patty Roche walked us through the delicious lunch menu.  We started off with a butternut squash soup with ginger.  The entrée consisted of prosciutto-wrapped chicken with ricotta and sage topped with a lemon roasted garlic beurre blanc and side of roasted pumpkin & vegetable medley with creamy polenta.  We topped off the meal with a pear and fig cobbler dessert.  (Check out the 2S2C facebook page for photos of all 3 dishes!)  It was a wonderful fall meal and the class itself was very entertaining.  It was like being on the set of a cooking show!  Patty also shared many great cooking tips throughout the class.

Stonewall Kitchen Cooking School

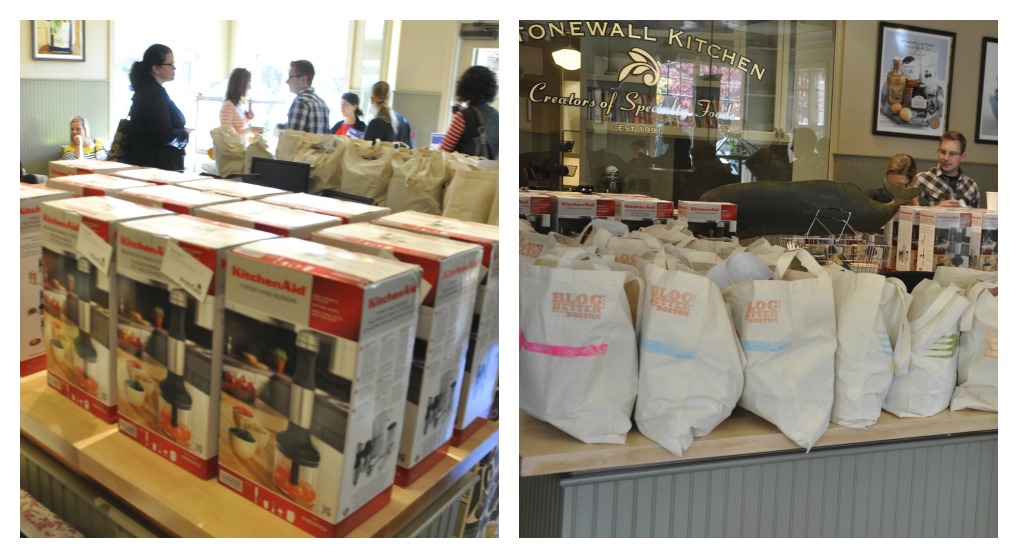
Before we left, we were treated with a pretty awesome swag bag.  Some of my favorite items included the Stonewall Kitchen Holiday Jam, coasters from Chilewich, and the Lake Champlain organic cherry peruvian dark chocolate bar. My favorite item overall has to be the Kitchen Aid 3-Speed Immersion Blender from Wayfair…I can’t wait to try it out on some recipes later this week.  Be sure to check in to 2S2C later this week- I am planning a giveaway with some of the swag I received! (And speaking of giveaways, have you entered our Kitchen Aid Mixer Giveaway yet?!?)

blog better boston food summit swag

This was actually the third conference of the year that I have attended (see here and here for recaps from the first two.)  I really enjoyed this conference since it solely focused on food blogging.  I definitely hope to attend more food blogging conferences in the future!

So tell me, do you have a particular favorite Stonewall Kitchen product?  Share in the comments…

sister m signature


Filed Under: M's post Tagged With: blog better boston, blog conference, blogging, blogging conferences, cooking class, food photography, maine, stonewall kitchen

Menu Plan Monday- Week of October 29th

Posted by 2 Sisters 2 Cities on October 22, 2012

orange and yellow leaves on a tree in fall

It’s a Monday and I am working on my menu for the week so I thought I would do a quick Menu Plan Monday post!  I have been letting my cooking magazines pile up so I vowed to finally go through them today and pull out some recipe ideas for the week.  Have you seen this November’s issue of Cooking Light– it’s huge!  I’m looking forward to sitting down and reading it in its entirety, but for now I just flipped through.  They list the top 25 best Cooking Light recipes ever from 1987 through 2011.  I’m thinking about making all 25 dishes and doing a post about each one- might be a fun challenge and a sure fire way to try some great recipes!

Anyway, here’s my menu plan for the week.  I’m taking a few nights off here and there from cooking.  My husband has requested low-carb meals, which is always a challenge because I enjoy making carb-y dishes.

Monday: going out to eat
Tuesday: Walnut and Rosemary Oven-Fried Chicken and a side salad from Cooking Light, November 2012
Wednesday: Poblano-Turkey Sausage Chili from Cooking Light, October 2012
Thursday: Lemony Chicken Saltimbocca with steamed haricots verts from Cooking Light, November 2012
Friday: Beef and Broccoli Bowl from Cooking Light, October 2012
Saturday: night off from cooking
Sunday: Soy-Ginger Pork Chop with Stir-Fried Bok Choy from Martha Stewart Everyday Food, November 2012 – recipe not available on-line, but here is a similar recipe

What is on your menu for the week?

sister m signature


This post is linked up at:
Organizing Junkie


Filed Under: M's recipes Tagged With: fall recipes, menu for the week, menu plan monday, october, october recipes, recipes

Half Moon Cookies – Our Family Recipe

Posted by 2 Sisters 2 Cities on October 19, 2012

half moon cookies

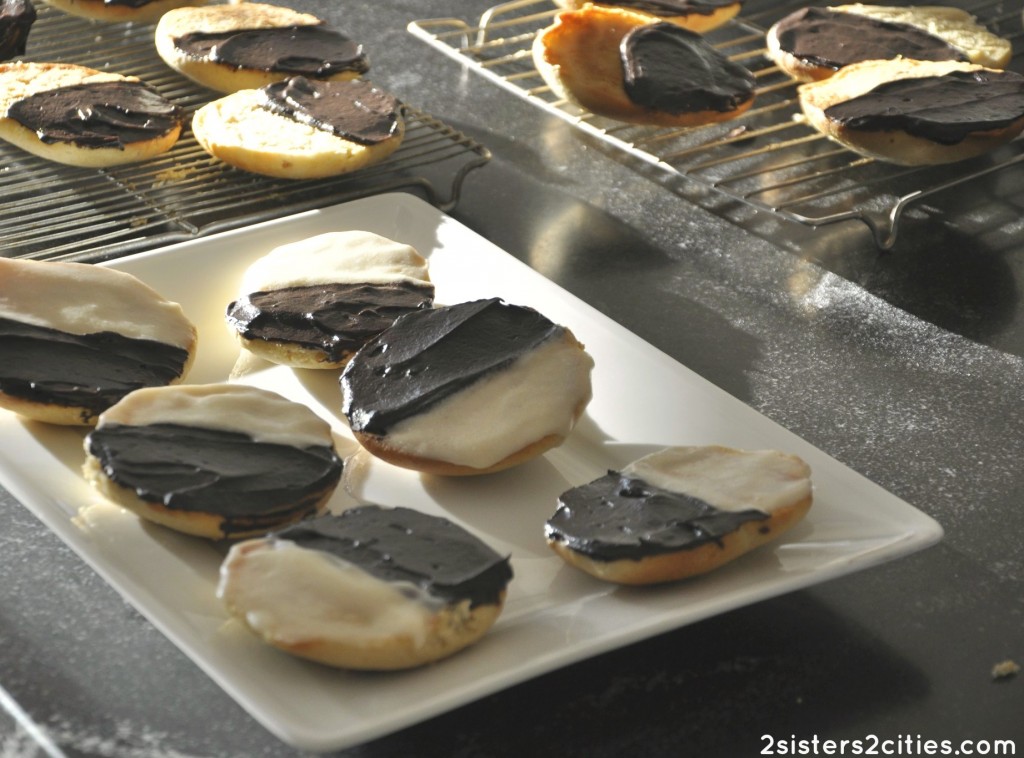
I have been wanting to post the recipe for my grandma’s half moon cookies for a long time and I finally got a chance to make them yesterday.  I thought the timing was also appropriate because they make great cookies for Halloween as well!  I loved having these cookies growing up- we called them half moon cookies.  When I moved to Boston, I realized most people around here call them black and white cookies (Wikipedia claims otherwise, but I have yet to meet a non-upstate NYer that calls them half moon cookies.)

half moon cookies on a cooling rack and plate

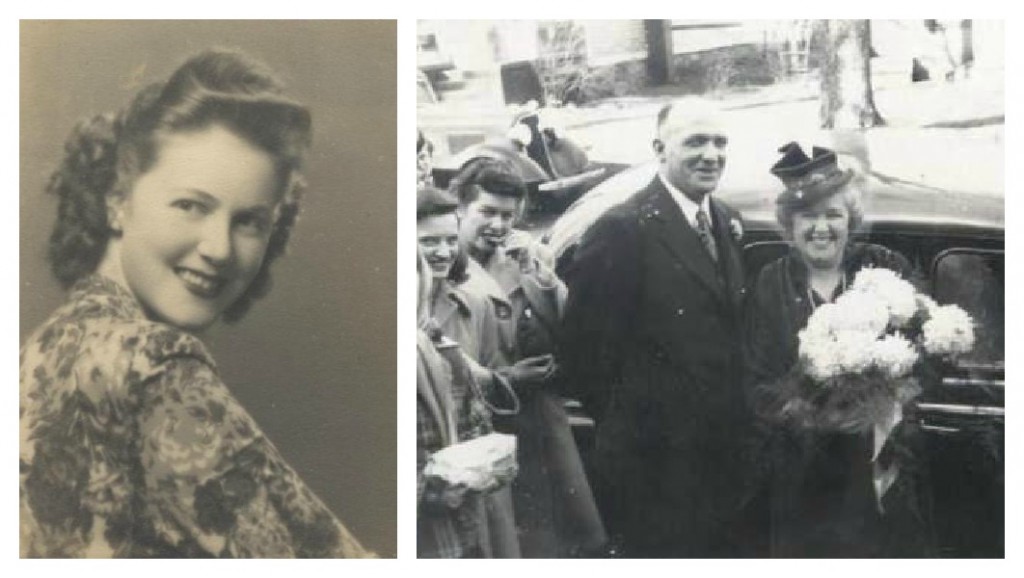
The half moon cookie originated in Utica, NY, but this recipe is from the now-defunct Mattot Bakery in Oswego, NY.  My step-great-grandmother got the half moon cookie recipe before the bakery closed and passed it along to my grandmother.  My grandma then passed along the recipe to us- it’s now published in our family cookbook.  Here are a couple of historical family photos.  The first is of my grandmother.  The second photo is my great-grandfather’s and my step-great-grandmother’s wedding in 1946:

historical family photos

Here is the recipe for the half moon cookies.  I updated two of the ingredients in the cookie recipe based on more contemporary ingredients, but I include the original ingredients in parentheses if you are interested.  I also created my own frosting recipe based on a few that I found.

Print
Half Moon Cookies
Author: 2 Sisters 2 Cities
Recipe type: cookie
Prep time:  35 mins
Cook time:  10 mins
Total time:  45 mins
Serves: 20
 
The original half moon cookie recipe from Mattot Bakery in Oswego, NY.
Ingredients
  • Cookie Ingredients:
  • 1 cup sugar
  • ½ cup butter (original recipe: margarine)
  • 2 eggs
  • ½ cup buttermilk (original recipe: sour milk or a vinegar milk combination)
  • 2 and ¼ cups flour
  • 1 tsp baking soda
  • 1 tsp baking powder
  • ½ tsp salt
  • 1 tsp vanilla
  • ⅛ tsp nutmeg
  • Frosting Ingredients:
  • 6 tablespoons butter, softened
  • 2 and ½ cups confectioner's sugar
  • ⅓ cup milk
  • 1 teaspoon vanilla
  • ¼ cup cup cocoa powder
Instructions
  1. Mix sugar, butter, eggs, and vanilla in a medium bowl. Combine flour, baking soda, baking powder, salt, and nutmeg in a separate bowl. Add dry ingredients to butter mixture and mix together. Chill for at least 30 minutes, up to 24 hours.
  2. Preheat oven to 350 degrees F. Drop cookie batter from tablespoon onto ungreased cookie sheet. Bake for 12 minutes.
  3. Meanwhile, make the frosting. Cream the butter in a small bowl. Mix in the confectioner's sugar, vanilla, and milk alternatively. Beat until the frosting consistency is smooth (no lumps.) Remove half the frosting into a separate bowl (this will be the vanilla frosting.) Mix in the cocoa powder with the remaining frosting to make the chocolate frosting.
  4. Once the cookies are cool, frost the flat bottoms with vanilla frosting on one half and chocolate frosting on the other half.
3.1.09

Do you have any family recipes that have been passed down that you still like to make?

sister m signature


Filed Under: M's Desserts, M's recipes Tagged With: black and white cookies, cookie recipe, cookies, family history, family recipe, half moon cookies, halloween, heirloom recipes, mattot bakery, upstate NY

Chewy Chocolate Cookies with Fleur de Sel

Posted by 2 Sisters 2 Cities on October 18, 2012

Today we have a guest post from someone near and dear to our heart- our mom!  K and I owe our love of cooking to her.  She is always sharing the latest recipes she has found on various food blogs.  Today she shares with us a cookie recipe she recently made: chewy chocolate cookies with fleur de sel.  If you can’t find fleur de sel at your local store, it can be found in the 2S2C Amazon store or at O&CO.

Chewy Chocolate Cookies with Fleur de Sel

One of my fun memories as a newlywed in the 1970s was searching for and trying five new recipes a week.  At that time, my search was limited to magazines and my collections of cookbooks, which grew not surprisingly large with time.  Trends over the years certainly have changed.  I remember the very first Asian stir-fry beef recipe that I cooked- it used 3/4 cup of oil .  A contemporary version would have a tablespoon or less!

The quest for new recipes continues 38 years later, but today there are so many new options for finding them, including food channels and of course , blogs, that m. introduced me to a few years ago. She may have created a monster.  I follow so many blogs that it often takes a full afternoon to read through my blog list, but I am partial to 2 Sisters 2 Cities!!

While my 4 children were growing up, we baked  and cooked and ate together! Although, some of their memories are fading and only k. can remember great details about every recipe that I cooked!  Now,my 4 daughters are all grown adults , but I still like to bake for my husband and myself. The evening is not complete without a “treat” with our tea. Here is a recent cookie recipe that I tried.  I just enjoyed one with a glass of milk this afternoon- so good!

Print
Chewy Chocolate Cookies with Fleur de Sel
Author: Mom
Recipe type: cookie
Prep time:  10 mins
Cook time:  10 mins
Total time:  20 mins
Serves: 12
 
Ingredients
  • ½ cup unsalted butter, at room temperature
  • 1½ cups sugar
  • 2 large eggs ( I try to bring to room temp, it makes the mixture cream together easier)
  • 1 tsp. vanilla extract
  • 2 cups all-purpose flour
  • ⅔ cup cocoa powder ( I used "Special Dark" but regular would work)
  • 1 tsp baking soda
  • ½ tsp salt
  • Fleur de Sel for sprinkling (or coarse sea salt)
Instructions
  1. Preheat oven to 350 degrees F. Line baking sheets with parchment or silpats, if you are lucky enough to own them.
  2. In a medium size bowl, whisk or sift (if yours is lumpy) together flour, cocoa powder, baking soda and salt. Set aside.
  3. In mixing bowl, beat the butter and sugar until creamy and light, about 3-4 minutes with mixer on medium high. Add each egg, 1 at a time, mixing briefly after each and then add the vanilla extract.
  4. Now, add the dry mixture to this and gently combine until mixed. Using a medium cookie scoop ( or 1 rounded tablespoon), drop onto prepared cookie sheets. Flatten slightly with your hand and sprinkle the tops with the fleur de sel.
  5. Bake about 9-10 minutes until the edges are crisp. Cool slightly on pan and then transfer to wire rack to cool completely. Store in an airtight container at room temperature. They keep well for several days if you can keep them that long. Makes 2 dozen cookies.
3.1.09

 Source: Adapted from Erin’s Food Files

-Mom


Filed Under: Guest Bloggers Tagged With: chewy chocolate cookies, chocolate, chocolate recipe, cookie recipe, cookies, fleur de sel, guest blogger, guest post, mom, recipes from mom

Crockpot Cider with Mulling Spices

Posted by 2 Sisters 2 Cities on October 17, 2012

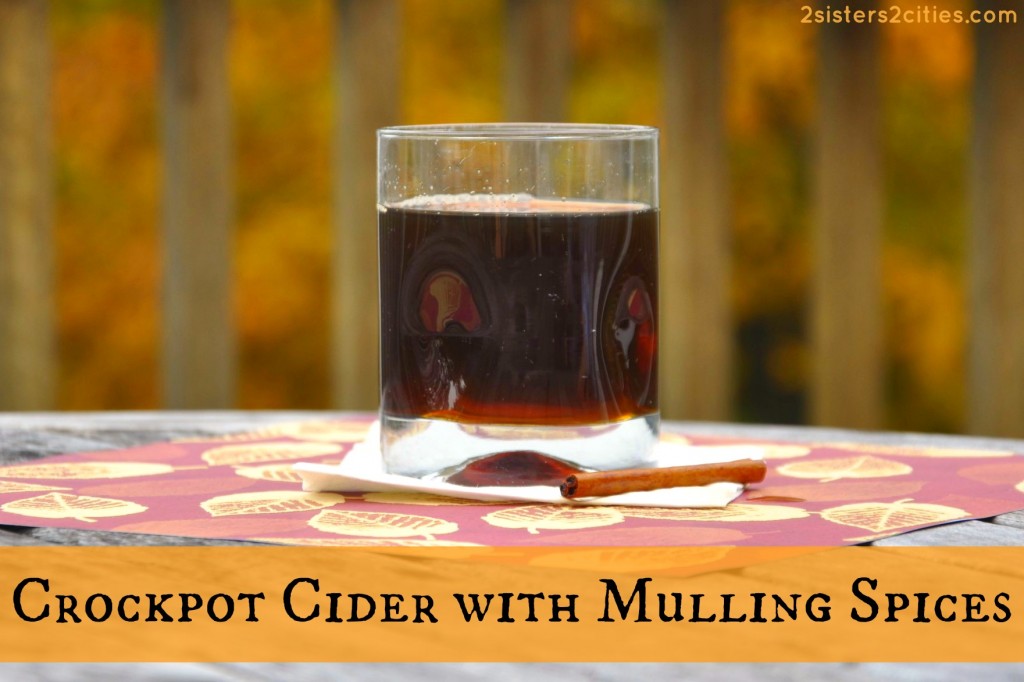
Crockpot Cider with Mulling Spices

There is nothing better in the world on a fall day than apple cider, except that is warm, mulled cider.  One of my favorite ways to make mulled cider is with my crockpot.  This crockpot cider can cook anywhere from two to eight hours and it will make your house smell heavenly.  If you don’t own a crockpot, this recipe can also be made just as easily simmering on low on your stovetop.

This crockpot cider is perfect for any fall party, whether it be a birthday party to a football game watch.  Set aside a small ladle with some mugs and allow your guests to help themselves to the cider.  Just be sure to reset your slow cooker to warm (from low) about 3o minutes before your guests arrive.  I find that the low setting is a bit too warm and might burn your tongue if you take a sip too quickly.

Print
Crockpot Cider with Mulling Spices
Author: 2 Sisters 2 Cities
Recipe type: Drinks
Serves: 8
 
Ingredients
  • 2 quarts cider
  • ¼ cup brown sugar
  • 2 cinnamon sticks
  • 1 and ½ tsp whole cloves
  • 1 orange, cut into slices (optional)
  • cheesecloth
Instructions
  1. Pour the cider into a slow cooker. Add brown sugar and orange slices. Cut a 7"x7" square of cheesecloth and put the cinnamon sticks and cloves in the cloth. Tie into a pouch and add the spice pouch to the crockpot. Cook on low for 2-8 hours. Before serving, remove orange slices and spice pot. Serve with cinnamon sticks if desired.
#version#

Sister M signature


Filed Under: M's recipes Tagged With: apple cider, apple recipes, apples, autumn recipes, crockpot cider, crockpot mulled cider, crockpot recipes, fall recipe, mulled cider, party recipe

Rolling Storage Crate DIY Tutorial

Posted by 2 Sisters 2 Cities on October 16, 2012

rolling storage cart do-it-yourself tutorial

One of my favorite retailers, Serena & Lily, is selling these adorable vintage-looking rolling storage crates in their baby section.  I fell in love with the little carts.  I realized I already had unfinished crates very similar to the ones featured in the S&L catalog, as well as some ball bearing casters leftover from a previous project.  I decided to turn this into a little DIY project and made one for less than $15 since I had some of the materials on hand.  If you have none of the materials, it will cost you about $30 to make a rolling storage crate.

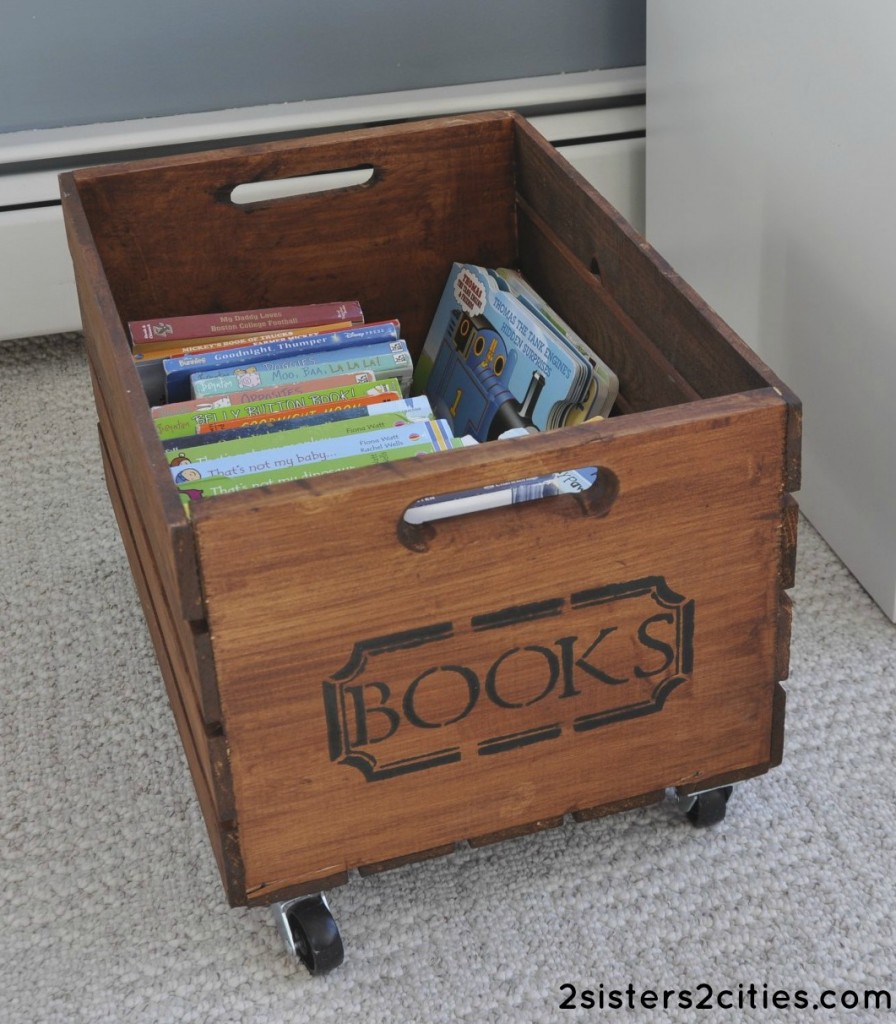
rolling storage crate

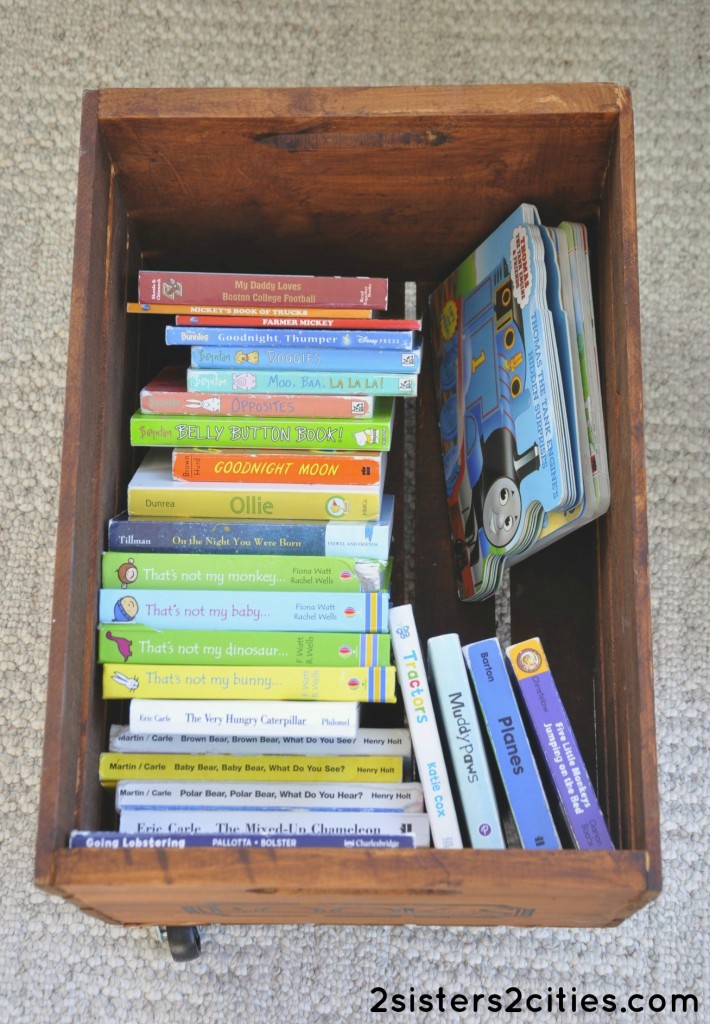
The rolling storage crate is perfect for storing the many books we have in our household.  My son loves pushing it from room to room.

rolling storage cart books

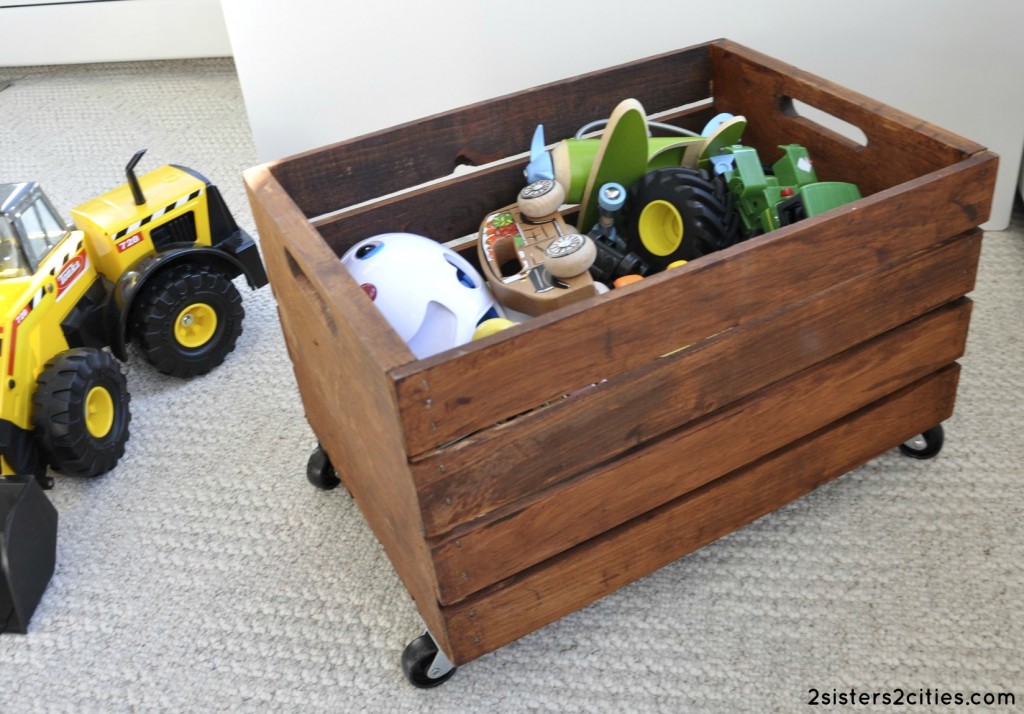
Alternatively, it also makes great toy storage bin as well.  Here is the cart filled with trucks, cars, trains, and plains:

rolling storage cart toys

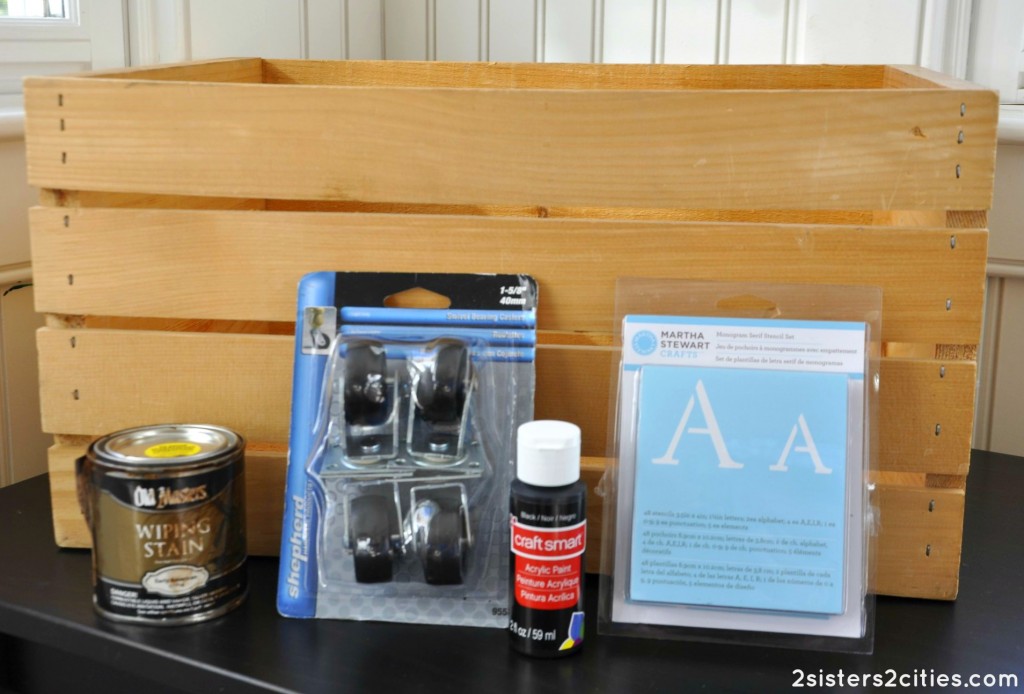
Here are the materials I used on this project:

rolling storage crates materials

  • Unfinished wooden crate– approximately $9.99 (be sure to use a coupon if you buy it at Michaels)
  • 1/2 pint Old Masters Wiping stain (I used Early American 11716)
  • Four 1″ ball-bearing swivel casters
  • Letter stencils
  • Stencil paint
  • Stencil brush
  • Cloth or rag to apply wood stain
  • 8 small screws
  • Drill
  • Screwdriver

I started off by applying the stencil to the crate.  I chose to write “Books,” but you can be more creative with your wording if you like (the Serena & Lily crates say Soft Drinks, Lemonade, Super Seven or White Star.)  I was going for a retro font from the Mad Men era, but I think the font ended up feeling a bit more old west saloon.  I still like how it turned out, but it wasn’t what I originally had in mind.

Once the stencil was dried, I applied a wood stain.  I used a cloth to apply it.  Since I wanted the rolling storage crate to have a distressed feel to it, I pretty much slapped the stain on and didn’t worry about making the coverage exactly even.

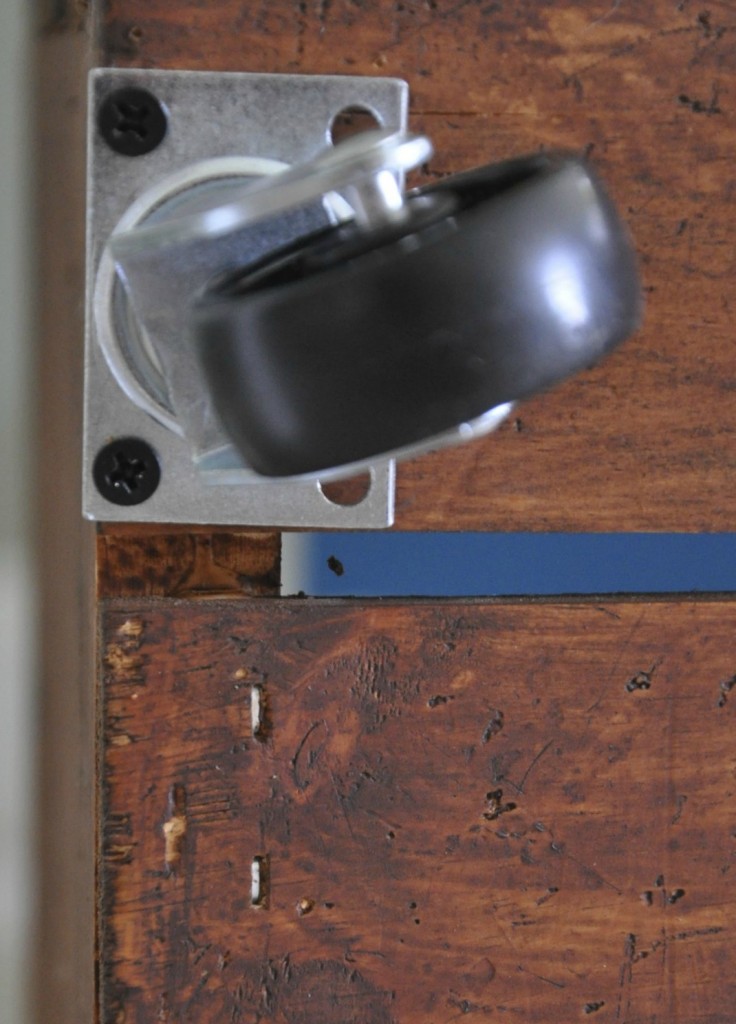
The wood stain took about 24 hours to dry.  I recommend putting it outside if it’s nice out or in a room you are not using- the fumes were a bit strong while it dried.  Once dry, I used a screwdriver to screw the ball-bearing swivel casters on.  Each caster had room for 4 screws, but I only used the two outer wholes (photo below.) If I used all four screws on each caster, the screws on the inside of the crate would poke through the bottom of the crate.  Since the casters are not being used to support a person’s body weight, I think two screws on each caster would be sufficient.  You could use a drill to put eight starter holes (two per each caster) in the crate, but I ended up putting the screws in with just a screwdriver.

wheel

I love how this DIY project turned out!  Have you ever been inspired by something you saw in a catalog and decided to make it yourself?


This post was shared at:

Today's Creative Blog


Filed Under: Crafting & DIY Tagged With: baby storage, book storage, DIY, diy project, diy tutorial, nursery storage, rolling storage crate, serena & lily, storage crate, toy storage, vintage

Kitchen Aid Mixer Giveaway

Posted by 2 Sisters 2 Cities on October 15, 2012

With the holidays approaching, I know my Kitchen Aid Mixer is about to get a huge workout.  K and I wanted to show how much we appreciate all our readers so we have decided to participate in the Ultimate Kitchen Aid Mixer Giveaway!  What color will you pick?  The empire red seen in the photo below?  Silver metallic (my personal favorite)?  Or perhaps a throwback shade like pistachio?  Whatever color you decide on, the Kitchen Aid Mixer would be all yours right before Thanksgiving!  There is a chance to enter daily between now and November 14th.

Welcome to the Ultimate Kitchen Aid Mixer giveaway event! Why ultimate? Keep reading!

I have teamed up with Musings From a Stay At Home Mom, Fabulous Finds by Tiffany, Only A Breath, Worthy of the Prize, The Mama Report, and Triple Braided along with more fabulous bloggers to sponsor this great prize!

The Prize:
One lucky winner will receive their choice of color/style Kitchen Aid Artisan 5 Quart Stand Mixer with a value of up to $350 from Amazon!

Entry:
Enter below with the Rafflecopter form. You can come back everyday for the daily tweet option – that gives you a lot of extra entries!

Rules:
This giveaway ends on November 14, 2012 at 11:59 EST
The winner will be picked randomly and will have 48 hours to respond by email before the prize is forfeited and a new winner is chosen.
Open to the US and Canada*
*If the winner is Canadian, they will be given a $350 Amazon.ca gift card to be used toward the purchase of the mixer.

Good luck!

a Rafflecopter giveaway

Disclaimer: This giveaway is in no way associated with Amazon or KitchenAid.


and

Related Posts Plugin for WordPress, Blogger...


Filed Under: Giveaway Tagged With: 2 Sisters 2 Cities giveaway, christmas baking, giveaway, holiday baking, holidays, Kitchen Aid mixer, mixer, Thanksgiving

  • 1
  • 2
  • Next Page »

Recent Posts

  • Easy Holiday Office Party Tips
  • 5 Steps to an Easy Football Party
  • Gingerbread Biscotti
  • Holiday Coffee Bar and Thanksgiving Recipes
  • Soft Sugar Pumpkin Cookies
  • Cinnamon Sugar Apple Cake
  • Hello Pumpkin Season!
  • Make Your Own Milkshake Party!
  • Mama’s Pickles
  • S’more Cookies

Categories

  • About 2 Sisters 2 Cities (7)
  • Books (8)
  • Crafting & DIY (22)
  • Design & Decorating (15)
  • Gardening (5)
  • Giveaway (14)
  • Guest Bloggers (8)
  • K's post (46)
  • K's Recipes (191)
    • K's Desserts (75)
    • K's Entrees (23)
    • K's Sides (24)
  • M's post (72)
  • M's recipes (167)
    • M's Entrees (21)
    • M's Sides (14)
    • M's Desserts (30)
  • Organizing (7)
  • Party Ideas (49)
  • Uncategorized (1)
  • Vacation (12)
Stitch Fix

Archives

Blogroll

  • Annie's Eats
  • Bake at 350
  • Baked Bree
  • Boston Harbor Beacon
  • Confections of a Foodie Bride
  • Cook Like a Champion
  • Erin’s Food Files
  • Forever and a Recipe
  • Framed Cooks
  • Oh Happy Day
  • On Common Ground
  • Pennies on a Platter
  • Pink Parsley
  • Recipe Girl
  • Sally's Baking Addiction
  • Simply Scratch
  • The Curvy Carrot
  • The Pioneer Woman
  • Tidy Mom
  • Two Peas & Their Pod
  • What’s Gaby Cooking
  • Young House Love
Increase your website traffic with Attracta.com

grab a 2 sisters button!


Copyright © 2014 ~ 2 Sisters 2 Cities | Blog Design by Minx Design