2 Sisters 2 Cities

Image Map
  • About 2 Sisters 2 Cities
  • Recipe Index
  • Project Index
  • Contact Us
  • Like us on Facebook
  • Follow m on twitter
  • Follow k on twitter
  • Follow 2S2C on Pinterest
  • Follow 2S2C on G+
  • rss
  • e-mail 2S2C

Make-Ahead Turkey Gravy

Posted by 2 Sisters 2 Cities on November 24, 2013

K and I are both cooking up a storm in our kitchens this weekend so we asked our mom to do a guest post on her traditional make-ahead turkey gravy recipe.  By completing this step ahead of time, it cuts down on a lot of the cooking time (and stress!) on Thanksgiving day.  Take it away mom!
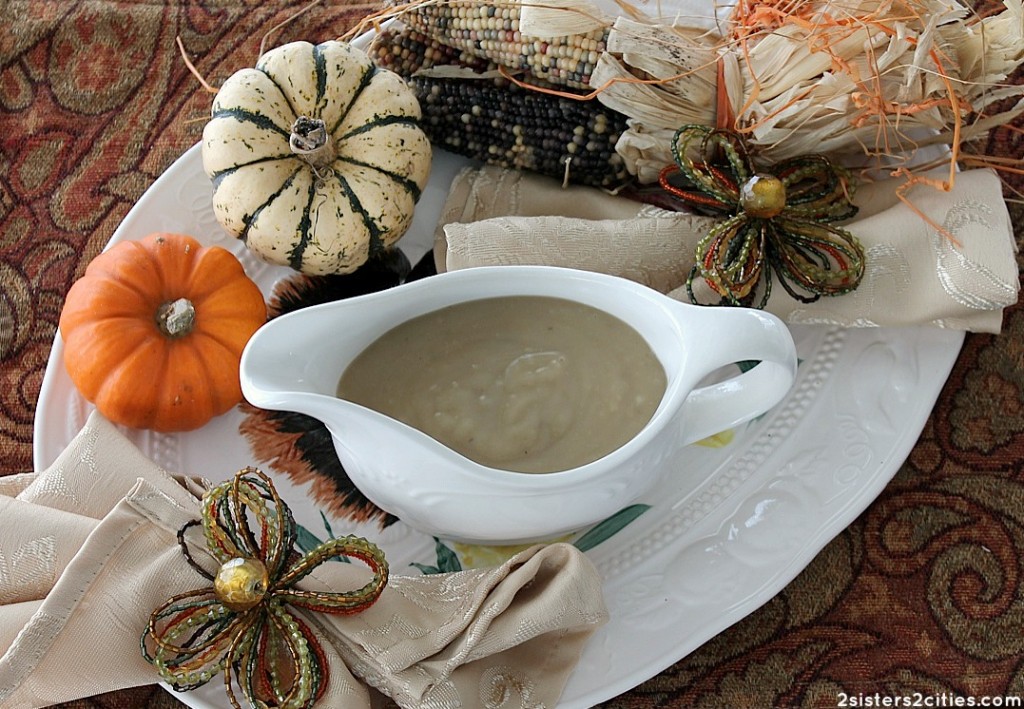
Make-Ahead Turkey Gravy {from 2 Sisters 2 Cities}

I love to get many of the sides for Thanksgiving dinner done ahead of time. There are so many tasks to complete towards the end  of the cooking session that this recipe is a great time saver and delicious, too!  Before I  found this recipe, roasting a turkey dinner and then making gravy was a dreaded event. After nearly four decades of cooking for my husband and family, I have resolved that part of my holiday stress.

On a calm day in early November, this  recipe comes together easily – don’t let all the steps scare you. Most of the time is spent smelling the awesome vegetable -turkey broth simmering on the stove.  Easy enough to place in a couple quart mason jars, and freeze up to 1 month. Then, take out two days before Thanksgiving, put in refrigerator to thaw. The final steps of reheating can easily be delegated to a willing guest or one of my four daughters in my case!

Print
Make-Ahead Turkey Gravy
Author: 2 Sisters 2 Cities
Recipe type: Sauce
Cuisine: American
Prep time:  30 mins
Cook time:  3 hours
Total time:  3 hours 30 mins
Serves: 10
 
Makes 6-7 cups Planning tip: Freeze up to 1 month then refrigerate 2 days to thaw. Reheat in saucepan, whisking to combine.Turkey drippings from roast pan can be added at that time.
Ingredients
  • 4 turkey wings ( 3-4 lbs)
  • 2 medium onions, peeled and quartered
  • 8 cups chicken broth ( RESERVE 2 CUPS)
  • 1 cup dry white wine or water
  • 1 cup sliced carrots
  • 3 peeled garlic cloves
  • ½ tsp. dried thyme
  • ¾ cup flour
  • 2 Tbsp butter
  • salt and pepper to taste
Instructions
  1. Heat oven to 400 degrees. Put wings in a single layer in a roasting pan. Scatter the onions on top. Roast 1 and ¼ hours or until wings are nicely browned.
  2. Put roasted wings and onions in a 5- to 6-qt. pot. Add 1 cup of the broth to the roasting pan and scrape any of the brown bits from the bottom. Add this back to pot with 5 more cups chicken broth,( Keep the remaining 2 cups broth in the frig until later), carrots, garlic and thyme. Bring to a boil, reduce heat and simmer gently, uncovered 1 and ¼ hours.
  3. Remove wings from broth. Optional: When cool, pull off skin and can save meat for another use. Otherwise discard.
  4. Strain broth through fine mesh strainer, pressing vegetables to extract as much broth as possible. Discard vegetables. Skim fat off broth ( easy way to do this if time permits, refrigerate overnight and remove any solidified fat.)
  5. Whisk the flour into the reserved chicken broth until well blended and smooth.
  6. Bring strained broth to a gentle boil. Whisk in flour mixture. Whisk until thickened and boiling. Boil 3-4 minutes to cook out any flour taste. Stir in butter , season to taste.
  7. On Thanksgiving, after the turkey is removed from the roasting pan, you can spoon the fat off the drippings and add 1-2 cups of the drippings to the gravy as it is being reheated.
3.2.2124

Have a wonderful Thanksgiving!!

-2S2C Mom


Filed Under: Guest Bloggers Tagged With: gravy, guest post, holiday planning, make-ahead, mom, Thanksgiving, thanksgiving menu, thanksgiving recipe, turkey

Christmas Mantel Guest Post at My Way Home

Posted by 2 Sisters 2 Cities on December 7, 2012

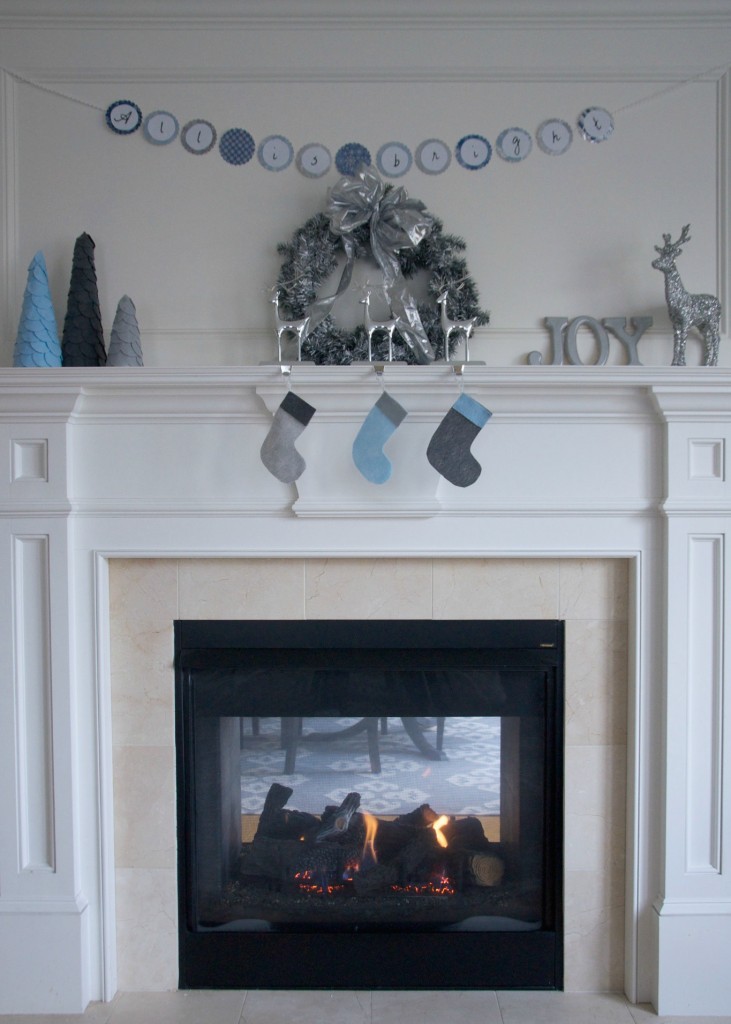
DIY Christmas mantel

In addition to my blue and silver holiday wreath that I posted about yesterday, I also decided to incorporate this color palette to decorate my mantel for Christmas.  I have a few DIY projects that I made for the mantel being featured today on Wayfair’s blog, My Way Home.

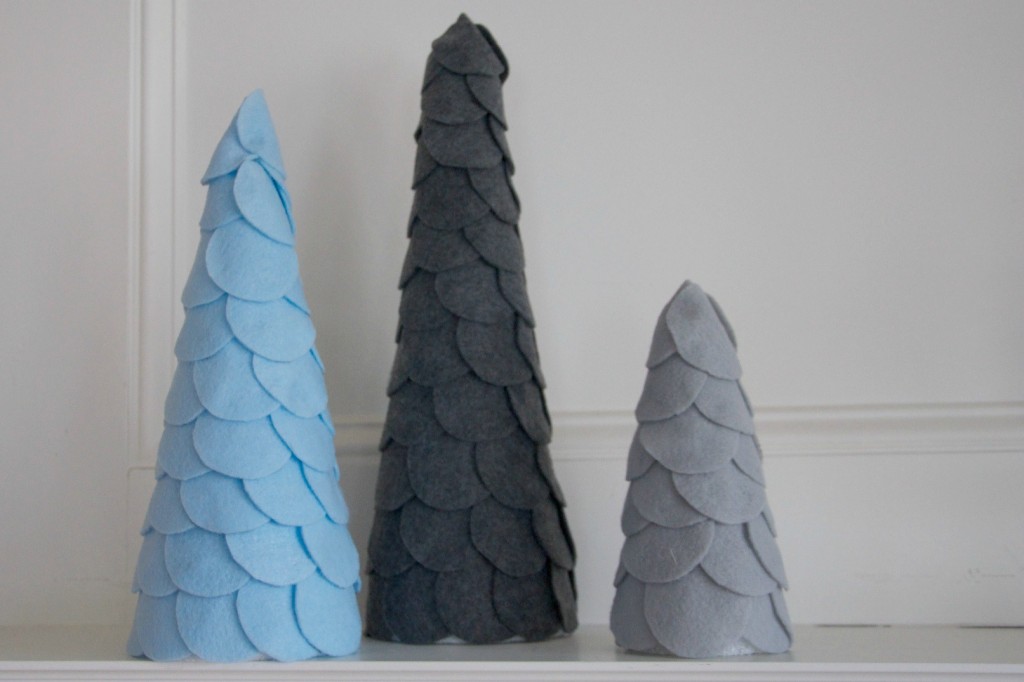
DIY scalloped felt trees

The first thing I made for my Christmas mantel were these felt scalloped trees inspired by ones I saw in the Land of Nod catalog.  They were really fun to make and are easily customizable with any color scheme you want to do with your holiday decor.  This could also be a great project to make with kids!

Banner reads All is Bright

The second project was the holiday banner mantel that read “All is Bright.”  I wanted to use a message that would remind myself to enjoy all the special moments of the holiday season.

I also made the wooden letters that spelled J-O-Y, the wreath, and the felt stockings.  The letters and the wreath all got hit with a couple applications of silver spray-paint.  I used the leftover felt from the scalloped trees to just cut out mini stockings to match the rest of the Christmas mantel.

To access my tutorials and more details on all these projects, check out my guest post at My Way Home.  I also got to pick five items from the Wayfair website to complement my post- I had so much fun picking them out.  I would love it if you could stop by and leave a comment with your thoughts on my post at My Way Home!

K and I will be back very shortly with our nice remaining Christmas cookies for our 12 days of Christmas Cookies series.  We have been busy baking away!  For our first three cookie recipes, see the links below:

Day 12: Twelve Oreo Truffles
Day 11: Eleven Mini Pecan Pie Bites
Day 10: Ten Crisp Toffee Chocolate Bars

sister m signature


Filed Under: Crafting & DIY, Design & Decorating, Guest Bloggers Tagged With: all is bright, blue, christmas, Christmas DIY, Christmas mantel, DIY, diy project, felt scalloped trees, gray, guest post, holiday banner, holiday banner mantel, holiday mantel, Land of Nod, My Way Home, silver, silver wreath, wayfair

DIY Holiday Wreath Guest Post

Posted by 2 Sisters 2 Cities on December 6, 2012

DIY Holiday Wreath

Today I’m guest blogging over at Juggling Act Mama about my DIY Holiday Wreath that cost less than $20 to make!  I really wanted to incorporate more blue and silver into my holiday decorating scheme.  Since I had so much fun making this hydrangea wreath in the spring, I decided to make my own holiday wreath.  All the supplies to make this wreath can be found at a craft store, such as Michael’s or A.C. Moore.

DIY holiday wreath

What do you think of the results?  I’m really pleased with how cute it turned out!  For the full tutorial, head over to to Juggling Act Mama!

sister m signature


Filed Under: Guest Bloggers, M's post Tagged With: christmas, christmas wreath, DIY, diy christmas project, diy holiday wreath, DIY wreath, guest post, juggling act mama, wreath

How to Deep Fry a Turkey

Posted by 2 Sisters 2 Cities on November 18, 2012

how to deep fry a turkey

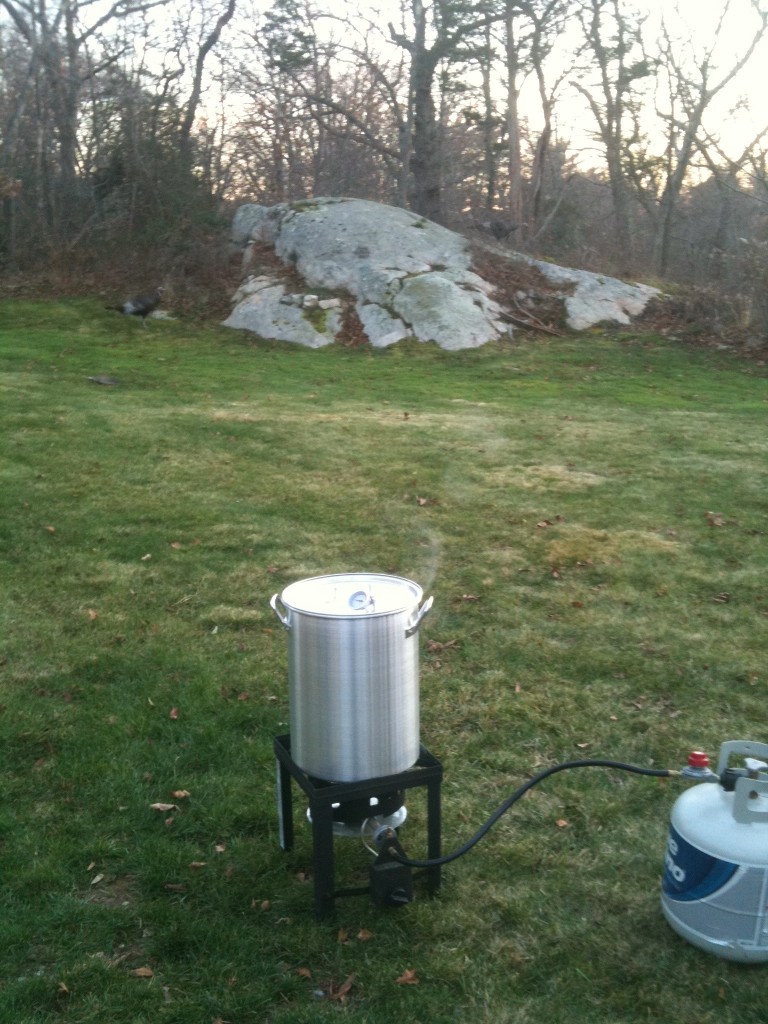
Like last Thanksgiving, we are planning on deep-frying a turkey for our Thanksgiving dinner on Thursday.  While I prepare the appetizers, sides, and dessert, I let me husband handle the bird logistics.  I asked my husband to write up a quick tutorial on how to deep fry a turkey:

Frying a turkey is fun experience that produces an excellent product if done correctly. If done incorrectly, it can be extremely dangerous, so if you decide to fry a turkey, there is a great need to pay very close attention to instructions (not to mention staying sober).

There are multiple warnings on the internet, like this one, but this type of caution is warranted. There are several steps in the process that if done incorrectly can cause a fire or explosion. Remember, you are dealing with oil here, which can be more than 3.0X the temperature of boiling water.

The disaster scenario is that when the turkey is placed in the pot the oil overflows onto the open flames and causes a huge fire, thereby burning you and igniting your house. This is what we want to avoid. So here is how to avoid it.

  • When you set up the frying apparatus, do it FAR from any structure. This means outside, not nearby a roof, and not close to anything flammable.
  • Make sure the turkey is dry and COMPLETELY defrosted. If it is still even slightly frozen the water will react with the boiling water to explode.
  • Don’t fully fill the pot. Remember that the turkey will displace the pot and raise the oil level. You only want to turkey to be covered when it is in- you don’t want an overflow.
  • After the oil is preheated, turn the flames OFF! This way, if the oil does overflow, it won’t fall onto the open flames and create an explosion. Once the turkey is safely in the hot oil, then you can re-ignite the flames. While cooking, don’t allow the temperature to get over 350 degrees Fahrenheit.
  • Wearing safety googles and being sober while you do this are prerequisites.

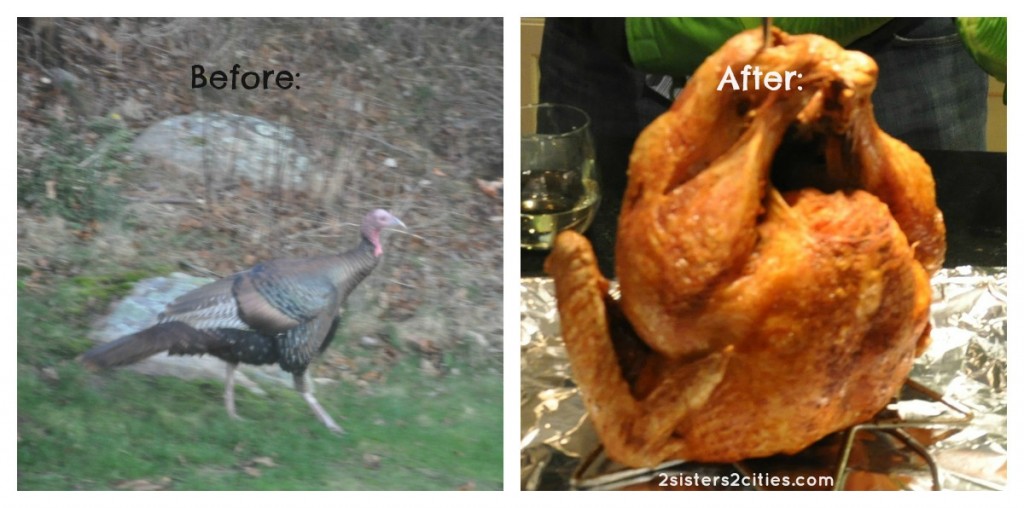
Before we started cooking the turkey, we rubbed it with a dry rub mix.  We used a mix of Paula Deen’s spice rub and some Dinosaur BBQ Cajun Spice Rub that we had on hand.

how to deep fry a turkey before and after

Have you ever deep fried a turkey before?  Share your favorite turkey cooking tips in the comments!

sister m signature


Filed Under: Guest Bloggers, M's recipes Tagged With: fried turkey, guest post, how to deep fry a turkey, husband m, safety tips, Thanksgiving, thanksgiving recipe, turkey, turkey recipe

Chewy Chocolate Cookies with Fleur de Sel

Posted by 2 Sisters 2 Cities on October 18, 2012

Today we have a guest post from someone near and dear to our heart- our mom!  K and I owe our love of cooking to her.  She is always sharing the latest recipes she has found on various food blogs.  Today she shares with us a cookie recipe she recently made: chewy chocolate cookies with fleur de sel.  If you can’t find fleur de sel at your local store, it can be found in the 2S2C Amazon store or at O&CO.

Chewy Chocolate Cookies with Fleur de Sel

One of my fun memories as a newlywed in the 1970s was searching for and trying five new recipes a week.  At that time, my search was limited to magazines and my collections of cookbooks, which grew not surprisingly large with time.  Trends over the years certainly have changed.  I remember the very first Asian stir-fry beef recipe that I cooked- it used 3/4 cup of oil .  A contemporary version would have a tablespoon or less!

The quest for new recipes continues 38 years later, but today there are so many new options for finding them, including food channels and of course , blogs, that m. introduced me to a few years ago. She may have created a monster.  I follow so many blogs that it often takes a full afternoon to read through my blog list, but I am partial to 2 Sisters 2 Cities!!

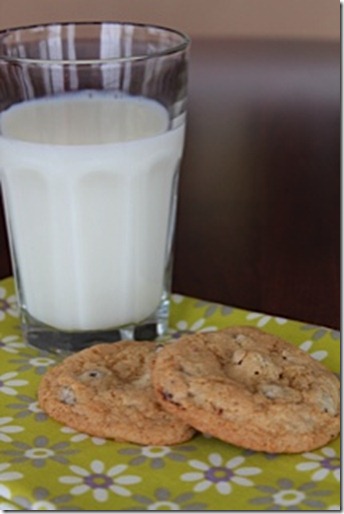
While my 4 children were growing up, we baked  and cooked and ate together! Although, some of their memories are fading and only k. can remember great details about every recipe that I cooked!  Now,my 4 daughters are all grown adults , but I still like to bake for my husband and myself. The evening is not complete without a “treat” with our tea. Here is a recent cookie recipe that I tried.  I just enjoyed one with a glass of milk this afternoon- so good!

Print
Chewy Chocolate Cookies with Fleur de Sel
Author: Mom
Recipe type: cookie
Prep time:  10 mins
Cook time:  10 mins
Total time:  20 mins
Serves: 12
 
Ingredients
  • ½ cup unsalted butter, at room temperature
  • 1½ cups sugar
  • 2 large eggs ( I try to bring to room temp, it makes the mixture cream together easier)
  • 1 tsp. vanilla extract
  • 2 cups all-purpose flour
  • ⅔ cup cocoa powder ( I used "Special Dark" but regular would work)
  • 1 tsp baking soda
  • ½ tsp salt
  • Fleur de Sel for sprinkling (or coarse sea salt)
Instructions
  1. Preheat oven to 350 degrees F. Line baking sheets with parchment or silpats, if you are lucky enough to own them.
  2. In a medium size bowl, whisk or sift (if yours is lumpy) together flour, cocoa powder, baking soda and salt. Set aside.
  3. In mixing bowl, beat the butter and sugar until creamy and light, about 3-4 minutes with mixer on medium high. Add each egg, 1 at a time, mixing briefly after each and then add the vanilla extract.
  4. Now, add the dry mixture to this and gently combine until mixed. Using a medium cookie scoop ( or 1 rounded tablespoon), drop onto prepared cookie sheets. Flatten slightly with your hand and sprinkle the tops with the fleur de sel.
  5. Bake about 9-10 minutes until the edges are crisp. Cool slightly on pan and then transfer to wire rack to cool completely. Store in an airtight container at room temperature. They keep well for several days if you can keep them that long. Makes 2 dozen cookies.
3.1.09

 Source: Adapted from Erin’s Food Files

-Mom


Filed Under: Guest Bloggers Tagged With: chewy chocolate cookies, chocolate, chocolate recipe, cookie recipe, cookies, fleur de sel, guest blogger, guest post, mom, recipes from mom

Scribble Shop Guest Post

Posted by 2 Sisters 2 Cities on September 27, 2012

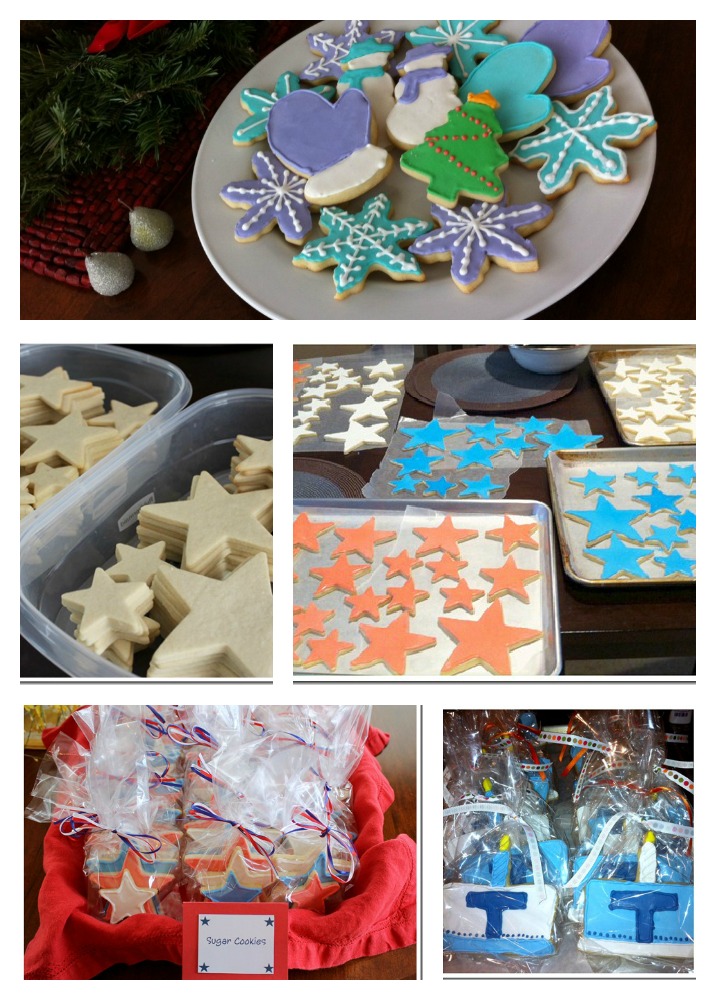
I’ve been a busy guest-blogger this week- today I’m guest-posting at the Scribble Shop blog.  I shared a number of K’s amazing (looking and tasting) cut-out sugar cookies that she has made to celebrate special occasions.  The post also has K’s favorite cut-out cookie recipe.  My Scribble Shop guest post can be found here.

Scribbleshop.com has tons of arts & crafts supplies, as well as an extensive amount of cookie and cake decorating supplies.  They have set up a special coupon code just for 2 Sisters 2 Cities’ readers to receive 15% off your order.  Just enter promotion code: 2CITIES2 to receive the 15% discount.  This promotion code is valid until November 1st!  It’s the perfect time to start stocking up for the holiday trifecta coming up.

Do you enjoy making cut-out cookies?  What’s your favorite cookie cutter that you own?  My personal favorites are some of the Christmas cookie cutters that my Grandma used to bake cookies with.


Filed Under: Guest Bloggers, M's recipes, Party Ideas Tagged With: 4th of july, baby's first birthday, christmas, cookie cutters, cut-out cookies, fourth of july, halloween, holidays, party favors, sugar cookies

Pumpkin Spice Iced Coffee

Posted by 2 Sisters 2 Cities on September 26, 2012

Still want iced coffee, but ready to transition over to fall?  I’m a huge fan of pumpkin spiced lattes, as well as iced coffee.  Are you too?  If so, try my recipe for pumpkin spice iced coffee!  I’m guest-blogging over at Musings from a Stay at Home Mom today and share the full recipe in my post.

What’s your favorite way to prepare coffee?


Filed Under: Guest Bloggers, M's recipes

The Best (Gluten-Free) Chocolate Chip Cookies

Posted by 2 Sisters 2 Cities on January 14, 2012

I am not sure if we have told you this before, but Sister M and I are not each others only siblings.  We actually have 2 other sisters,  sister C and another sister M.  M and M are the youngest and oldest of the sisters while C and I fall in the middle.  I am number three,   although you all know I am number one Smile.   As we have told you in our intro, we grew up with our mom always cooking our dinners,  baking new things,  sewing the occasional outfit for us,  quilting, and scrapbooking.   She definitely is the reason behind all of our creative energy, and we all do have a lot of it.  Today I would like to introduce you to our other sister M, our little sister M!  People always ask me how old she is when I call her my little sister.  Okay she is actually in college so she not that little, but to us she will always our little sister.   Little sister M will occasionally be a guest blogger for us,  when she can take the time away from her busy school schedule.   Also little sister M will be our gluten free contributor, since she was diagnosed with a gluten intolerance last summer.  Take it away little M.

The Best (Gluten-Free) Chocolate Chip Cookies

Whether you have Celiac Disease or just gluten sensitivity, adapting to a gluten-free diet can be pretty difficult. When my doctor recommended I try going gluten-free last summer, I was pretty overwhelmed at first. As a college student, I can’t really afford to buy my bread and flour from the organic section of the store all the time. As I learned more about the diet, I learned to adjust and find inexpensive substitutes to the sources of gluten I had taken for granted in my diet before I went gluten-free. However, every once in a while it’s fun to try out a new gluten-free recipe such as this one.

If you have ever tried baking gluten-free before, you know that it is no easy task. Because the several types of GF flours don’t have the same binding quality as wheat flour, you also need to include a binding agent such as Xanthan Gum or Guar Gum in baking to make up for the lack of gluten. These can be found in the gluten-free section near the gluten-free flours.

cookies

Printer-Friendly Recipe

Ingredients:

½ cup plus 2 tablespoons brown rice flour
½ cup plus 2 tablespoons white rice flour
½ cup tapioca flour
½ cup sweet rice flour
1 teaspoon xanthan gum (a little under)
1 teaspoon baking soda
1 ½ teaspoon baking powder
1 teaspoon salt
2 large eggs
1 tablespoon milk
¾ cup unsalted butter
1 ¼ cups light brown sugar
¼ cup granulated sugar
1 teaspoon vanilla
12-ounce bag of semisweet chocolate chips (2 cups)

Directions:

Preheat the oven to 375 degrees. Combine the dry ingredients (flours, xanthan gum, baking soda, baking powder, and salt). In a separate bowl, mix together eggs, milk, butter, sugars, and vanilla on medium speed for about three minutes until well blended. Gradually add the dry ingredients and mix until just combined. Stir in the chocolate chips.

Line the baking sheets with parchment paper or a nonstick spray. Place rounded, overflowing tablespoons of dough about two inches apart on the sheet. Bake for 9-10 minutes or until just browned. Let cool and enjoy!

Source: Adapted from RecipeGirl.com
Pin It

Related Posts Plugin for WordPress, Blogger...


Filed Under: Guest Bloggers Tagged With: chocolate chip cookies, gluten-free, gluten-free cookies

Recent Posts

  • Easy Holiday Office Party Tips
  • 5 Steps to an Easy Football Party
  • Gingerbread Biscotti
  • Holiday Coffee Bar and Thanksgiving Recipes
  • Soft Sugar Pumpkin Cookies
  • Cinnamon Sugar Apple Cake
  • Hello Pumpkin Season!
  • Make Your Own Milkshake Party!
  • Mama’s Pickles
  • S’more Cookies

Categories

  • About 2 Sisters 2 Cities (7)
  • Books (8)
  • Crafting & DIY (22)
  • Design & Decorating (15)
  • Gardening (5)
  • Giveaway (14)
  • Guest Bloggers (8)
  • K's post (46)
  • K's Recipes (191)
    • K's Desserts (75)
    • K's Entrees (23)
    • K's Sides (24)
  • M's post (72)
  • M's recipes (167)
    • M's Entrees (21)
    • M's Sides (14)
    • M's Desserts (30)
  • Organizing (7)
  • Party Ideas (49)
  • Uncategorized (1)
  • Vacation (12)
Stitch Fix

Archives

Blogroll

  • Annie's Eats
  • Bake at 350
  • Baked Bree
  • Boston Harbor Beacon
  • Confections of a Foodie Bride
  • Cook Like a Champion
  • Erin’s Food Files
  • Forever and a Recipe
  • Framed Cooks
  • Oh Happy Day
  • On Common Ground
  • Pennies on a Platter
  • Pink Parsley
  • Recipe Girl
  • Sally's Baking Addiction
  • Simply Scratch
  • The Curvy Carrot
  • The Pioneer Woman
  • Tidy Mom
  • Two Peas & Their Pod
  • What’s Gaby Cooking
  • Young House Love
Increase your website traffic with Attracta.com

grab a 2 sisters button!


Copyright © 2014 ~ 2 Sisters 2 Cities | Blog Design by Minx Design