2 Sisters 2 Cities

Image Map
  • About 2 Sisters 2 Cities
  • Recipe Index
  • Project Index
  • Contact Us
  • Like us on Facebook
  • Follow m on twitter
  • Follow k on twitter
  • Follow 2S2C on Pinterest
  • Follow 2S2C on G+
  • rss
  • e-mail 2S2C

Throwing a 60th Birthday Party

Posted by 2 Sisters 2 Cities on March 11, 2012

Well hello everyone, long time no see.  I am sorry it has been so long since I have posted, but I have been very busy with traveling to Las Vegas for a trade show for work.   I got back early in the morning on Thursday and then went to work for the full day.  It’s funny how such a short trip like that can affect your energy levels.  I finally recovered after sleeping in late on Saturday morning.

Before leaving for Vegas on Monday, I did however throw a 60th birthday party for my boyfriend’s mom.  She always goes out of her way to make holidays special for us so I wanted to do something really special for her to celebrate such a monumental year.   During the week before, I planned for the party and made a list of all the things I wanted to do.  My boyfriend had to bring me back to reality at some points with my ideas.   What?? I really wanted a limo!!
IMG_0874

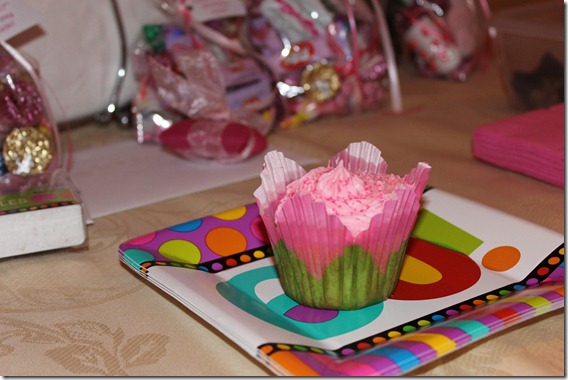
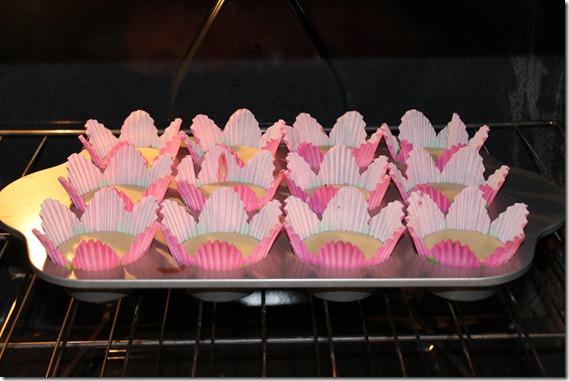
On Thursday night I had a little energy after dinner, so I went ahead and made a half of a batch of cupcakes.   I used the Magnolia cupcake recipe I use all the time.  My boyfriends mom loves these cupcakes so I didn’t want to change it up too much.  I had flower petal cupcake papers from Wilton’s which I got from my mom for Christmas.   This was really where I came up with my theme for the party- since the wrappers were pink flowers, I wanted everything to be pink.  My boyfriend’s Mom (lets just call her R) has lived the majority of her life with men, my boyfriend and his father/her husband.  I thought a perfect way to ring in a 60th birthday would be a pink party since it is so feminine and pretty.
IMG_0900

At Party City I bought:
–Pink Fluffy Pom Poms–  I have seen these in Martha Stewarts Magazines and in her showrooms in NY
-Two tones of Pink streamers
-3 tones of pink balloons
– Pink napkins
–60th Birthday Plates– they had pink in them so I allowed them
– Pink birthday Tiara
–Pink Boa–  this was just something I thought would be fun addition-  nothing makes you feel like a princess or queen like a feather boa and tiara!
–Pink 60th Birthday Button–  This button can be customized by age- I personalized it with a big pink 60!
– Wilton’s Clear Treat Bags
– Assortment of Pink Candy*
–60th Birthday Candles

At A.C. Moore I bought:
– An assortment of pink ribbons- in different shades and sizes.   I found them all in the clearance bins for a dollar and the thinner ones were only 50 cents.

At the grocery store the day of the party, I bought:
-Assortment of Pink Candy*
– Assortment of 60 Pink Roses  (I got about 30 regular roses and 20 small spray roses)

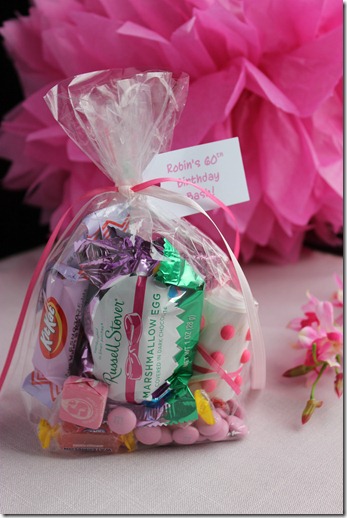
*Pink candy included-  Pink Kit Kats (it’s Easter time so I was able to find these), Pink Reeses Peanut Butter Cup, Smarties,  Pink Lollipops, Pink Starburst,  Pink M&Ms,  Pink Cotton Candy, Pink button candies, and Russell Stover Chocolate Marshmallow Eggs in a pink wrapper.

I placed all the candy into the candy bags and tied them with pink ribbons and created a tag with a personalized party message.   I used a tag paper punch to cut these tags out and punched the hole with a heart shape paper punch.
IMG_0908

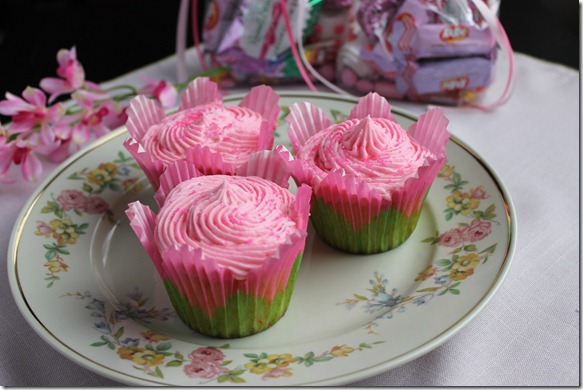
I then made R her favorite dessert-  Extreme 3-Layer Brownies and then frosted the Magnolia Cupcakes I had made on Thursday Night with a pink butter-cream frosting and pink sanding sugar.

Next I filled 2 vases filled with the assorted pink roses and tied thick pink ribbons around the neck of the vases.

IMG_0883

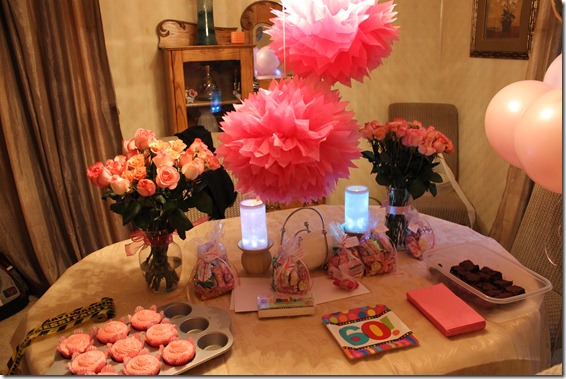
Once I got to R’s house, I had her distracted in another room while my boyfriend and I decorated the dining room with the streamers,  balloons, pink puffs, vases of roses, candy bags, and the plates of brownies and cupcakes.   When she came into the room, we greeted her with the boa and tiara!  She was so shocked and so happy about all the decorations.  My gift I gave her even fit into the theme-  a pink Swarovski crystal bead for her charm bracelet so she can remember her 60th Birthday Party!
IMG_0886

Throwing parties can be easily put together with a theme and good planning.  No matter the size of the party, people will notice all the details you put into everything.   I love, love, love planning parties! :)


This post was linked at:

Somewhat Simple


Filed Under: K's post, Party Ideas Tagged With: 60th Birthday Party, birthday party, cupcakes, party favors, pink party, pink-themed party

French Onion Soup

Posted by 2 Sisters 2 Cities on February 29, 2012

It’s a SoupaPalooza at TidyMom and Dine and Dish sponsored by KitchenAid, Red Star Yeast and Le Creuset!  Come join the fun by linking up and adding a soup recipe.   Go to either of TidyMom or Dine and Dish site to read the rules.

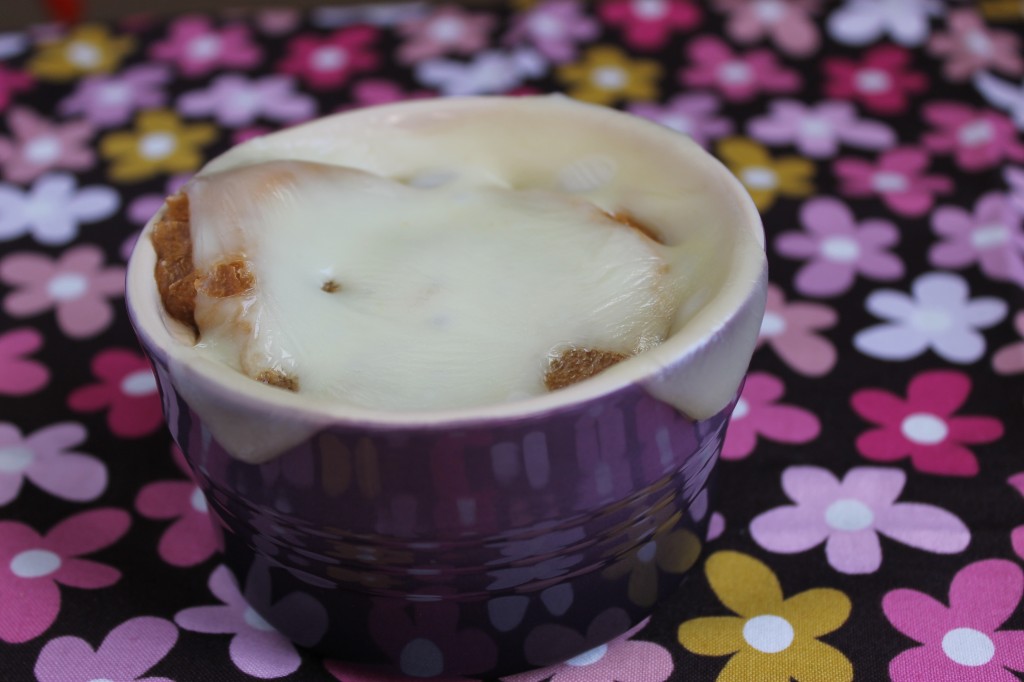
My boyfriend and I love French Onion Soup.  We order it when we are out at restaurants all the time so we have experienced an array of flavors and different ways of having it served to us.   I have developed my recipe over time from a mixture of recipes to get what we consider the best French onion soup.   It’s so easy to make, I often whip it up at least once every two weeks for lunch on the weekend.  Also with the addition of reduced fat Swiss, we can make this recipe a little bit more healthy.

French Onion Soup
Ingredients
4-5 cups of halved then sliced onions
1 tablespoon butter
4 cups beef broth
1 tablespoon of sherry
1 tablespoon of worchestire sauce
4 slices of stale or toasted crusty bread ( French or Italian)
4 slices of Swiss cheese

Directions:
In a Dutch oven or large pot, melt butter over medium heat.  Add onions and stir to coat with butter.  Place cover on pot and allow onions to caramelize, stirring occasionally.  This process will take about 15-20 minutes.  Once the onions are caramelized and golden brown add in broth, sherry and worchestire sauce. Bring to a simmer and keep it there for about ten minutes.  While the soup simmers, take out 4 oven proof bowls and prepare bread and cheese.  Place bowls on a baking sheet and turn on your broiler on the oven.  Ladle soup into 4 bowls evenly.  Top each with a crusty piece of bread and a piece of Swiss.  Place baking sheet with bowls of soup into the oven and allow the cheese to melt and the bread to toast up.  Keep an eye on them because they melt/toast quickly.  When ready, serve ( with oven mitts and warn who you are serving it to that the bowls are hot!) Enjoy!

Weight Watchers PointsPlus- about 5 depending on the size of your bread and cheese

*K’s tip*-  I keep a loaf of sliced Italian bread in my freezer to serve a quick piece of garlic bread with pasta or to top my French onion soup.  This stops us from over-eating the bread and it last us a few months.  Wrap bread in plastic wrap and place in a freezer bag.  I take out the bread before I start cooking and it is thawed by the time I need it.

Come join SoupaPalooza at TidyMom and Dine and Dish sponsored by KitchenAid, Red Star Yeast and Le Creuset


Filed Under: K's Entrees, K's post Tagged With: french onion soup, soup, soupapalooza

Sister K’s Weekly Menu

Posted by 2 Sisters 2 Cities on February 27, 2012

Yesterday, I was sitting down to write a post about my weekly menu and the process I go through every week.  I looked at 2 Sisters 2 Cities and noticed M had the same exact post!  Wow, are we sisters or what!

My weeks tend to be really busy with work, my commute, and going to the gym.  I am also quite the stickler of getting 7-8 hours of sleep a night, meaning I have even less time to make dinner, clean up and relax before I need to hit the sack and start again the next day.   Since the beginning of this year I have been trying to cook healthier and more often.  To be able to do this I need to plan ahead.

All week I keep track of recipes I think I would like to make for the following week and keep them in a note on my iPhone. On Saturday morning I plan out the menu for the whole week and make my grocery list.  I use Ziplist to make my list and am able to pull it up on my phone while I am at the grocery store.   I am in love with this app and website because it makes grocery shopping so much easier and I hardly ever forget an item.   The website can also pull a list of ingredients from a recipe online and add them to your list.   image

Here is an example of how Ziplist pulls the ingredients from a recipe.  I used a recipe for Salted Caramel Chocolate Cupcakes from Annie’s Eats, as an example of how Ziplist works.   This isn’t necessarily something I make for dinner, but I had this recipe up on my browser and they look soooo good.   I am totally making these for my birthday… in July.  After clicking on my Ziplist Recipe Clipper button of my favorite bar, the website pulls up this dialog box and you can then add them to you shopping list.  Ziplist gives you specific directions on how to add the Recipe Clipper to your favorites bar.

image

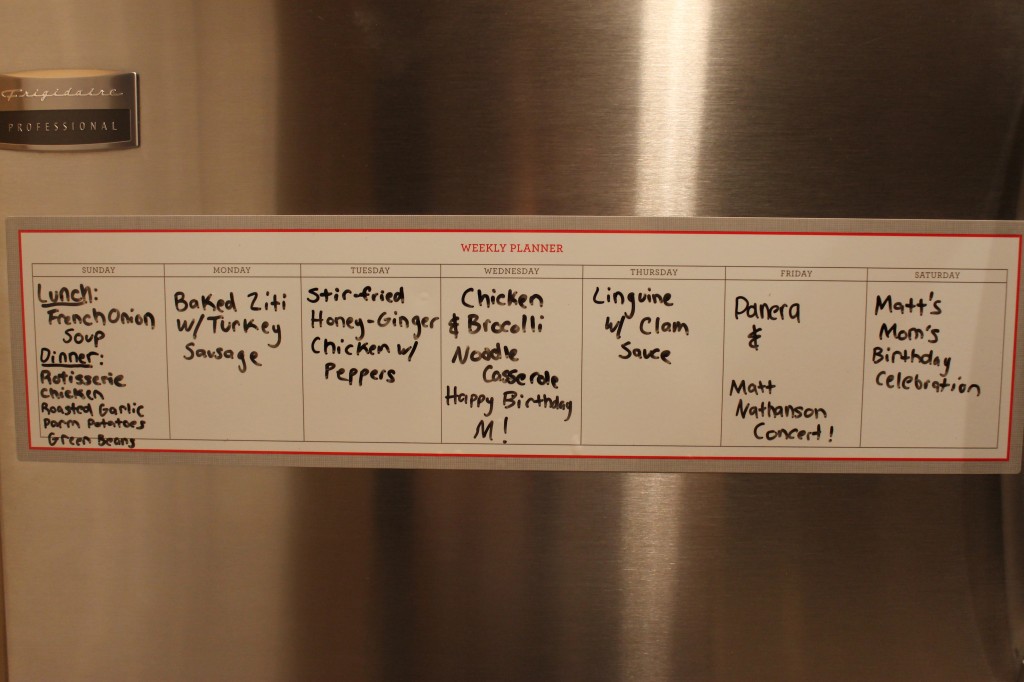
As I had told you before, for Valentine’s Day this year, the boyfriend got me a bunch of items from Martha Stewart’s office line at Staples that I wanted.  One of the items that I picked out was a weekly calendar dry erase board that clings onto the refrigerator for menu planning.  I have been using this since to write out the menu for the week.  It is a helpful reminder for both of us to see what dinner is going to be that night and gives us something to look forward to.   Sometime I even send out an e-mail reminder of the weekly meals to his work email. May sound silly but who got flowers today for no particular reason??  Oh yeah… ME!

My menu for the week:
Sunday
LUNCH- French Onion Soup (I will post this later this week)
DINNER-Rotisserie Chicken, Steamed Green Beans, and Roasted Potatoes
Monday
DINNER- Ziti with Turkey Sausage (Posting this later this week)
Tuesday
DINNER- Stir-Fried Honey-Ginger Chicken with Peppers
Wednesday
DINNER- Chicken and Broccoli Noodle Casserole
Thursday
DINNER- Linguine with Clam Sauce
Friday
DINNER- Panera Bread (this is our Friday Tradition after the gym- I get the Pick 2 Greek Salad and Broccoli Cheddar Soup which is 10 PointsPlus Weight watchers Points)


Filed Under: K's post, K's Recipes, Organizing Tagged With: Martha Stewart office line, menu for the week, weeknight dinner, winter dinner, ziplist

How to Make Team Spirit Appetizer Picks/Cupcake Decoration

Posted by 2 Sisters 2 Cities on February 5, 2012

As you might have seen in my part of the Super Bowl Appetizer Contest, I had NY Giants appetizer picks in my Buffalo Chicken Bites.    I thought I would share with you how I made these.  They are really easy to make and are cheaper then going to a party supply stores for team decorations.

Here is what you need:

– A computer with internet connection
– White Card Stock Paper
– Colored Printer
– Scissors
– 1 1/2 inch circle paper punch/or stencil
– Double Sided Tape
– Flat Toothpicks
IMG_0718

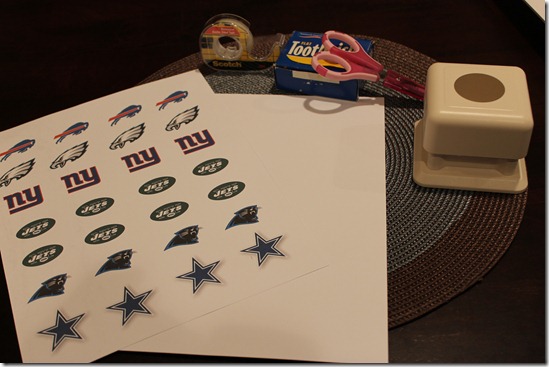
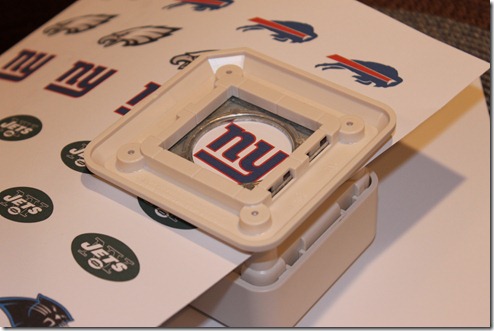
On a word processor, paste your teams logos  (you can get them off the internet on Google Image by searching for your team.)  Size them so they will fit in a 1 1/2 inch circle (I did this on MS Word.)

image

Print out on stock paper and punch or cut out into 1 1/2 inch circles. (if you don’t have a circle punch, you can trace a circle around the images with pencil and then cut them out)
IMG_0721
Cut as many circles out as you need toothpicks for,  then make as many blank circles as you made logo ones.
IMG_0722
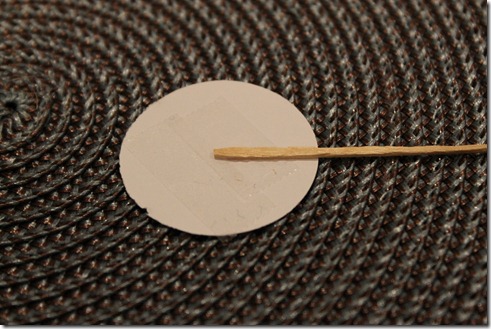
Take the blank circle and place two pieces of double-sided tape on the circle. Place toothpick on the tape.
IMG_0727
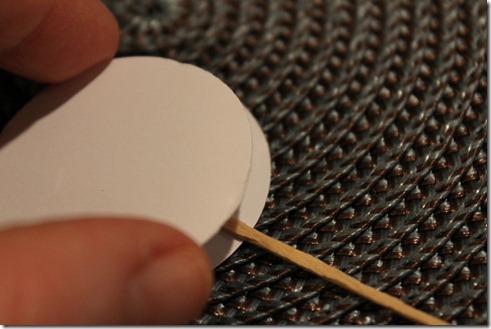
Take logo circle, logo-side up and line it up with the tape-side up circle with toothpick in place ( making sure to line the logo up with the toothpick so that the logo will be straight)and press together.  Press hard until everything looks stuck together.
IMG_0728
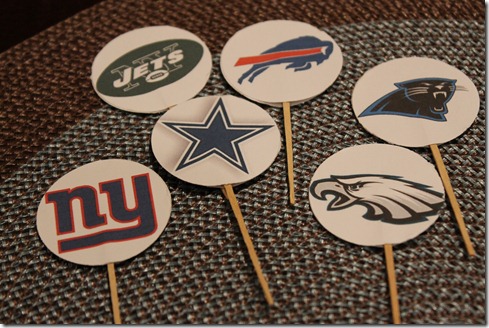
You can make these for different teams or actually anything!  I made the following for my friends who are fans of these teams:

IMG_0729
And put them in cupcakes with green frosting and homemade chocolate footballs.
New York Teams!
IMG_0741
Group Picture! GO Jets, Bills, Giants, Panthers, Eagles, and Cowboys!  Note there are no Patriot cupcakes.
IMG_0751
I made my favorite cupcake recipe, which I have already posted about 2 years ago.  In the post, I referenced a guy I was dating.  Well that “guy” I was dating is now my boyfriend and we have been together for 2 years as of yesterday!

-k


Filed Under: Crafting & DIY, K's post, K's Recipes, Party Ideas Tagged With: appetizers, baseball, basketball, DIY, football, hockey, picks, Super Bowl, team spirit

Herb-Rubbed Chicken with Creamy Orzo

Posted by 2 Sisters 2 Cities on January 22, 2012

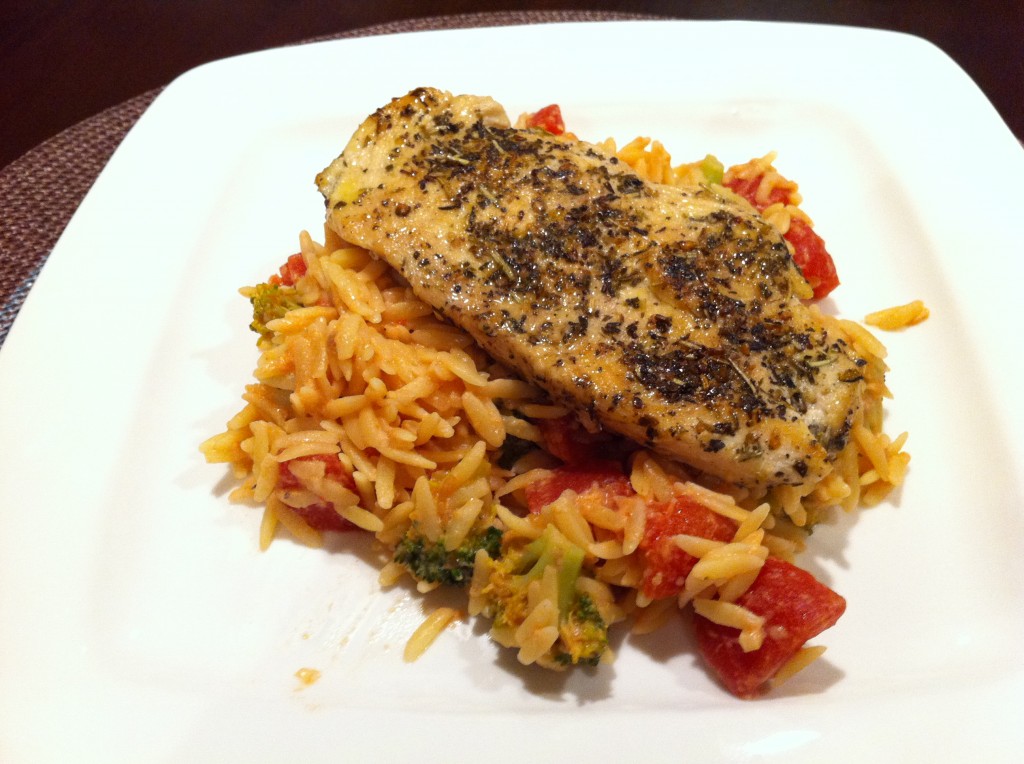
The other night after work I made this recipe. The original recipe that I found was twice as large and had cream in it.  To make this recipe healthier I used half and half instead of cream, cut back on the olive oil, and halved the recipe (since there is only two of us.) It took about 30 minutes to put together and was really delicious.  The servings were pretty big and my boyfriend and I were so stuffed afterwards.  If you think 12 PointsPlus is too many to to have for dinner, you can add more broccoli to this recipe and divide the recipe into fourths for 6 PointsPlus a serving.

Herb-Rubbed Chicken with Creamy Orzo

Ingredients:
4 oz. orzo pasta, uncooked
2 – 3 oz. pieces of chicken
1/4 teaspoon dried basil
1/4 teaspoon dried oregano
1/4 teaspoon dried rosemary
1/4 teaspoon dried thyme
2 tsp. olive oil
1 small shallot, chopped
1 clove of garlic
1/2 of a 14.5 oz. can of diced tomatoes with juices
1 cup of broccoli florets
1/4 cup of half and half
3 tablespoons of grated Parmesan cheese

Directions:
Cook orzo according to the package directions.  Reserve 1/4 cup of pasta water and then drain orzo.

In a small bowl combine basil, oregano, rosemary, and thyme.   Take the two pieces of chicken and season both sides with salt and pepper.  Take the combined dried herbs and sprinkle on both sides of chicken evenly.  Heat olive oil in a 12-14 inch skillet over medium-high heat.   Place chicken in skillet and cook on both sides for about 3-4 minutes each until golden brown.   Once the chicken is cooked,  place on a plate and cover with aluminum foil.  Reduce the heat in the skillet to medium,  add the shallot to the pan and sauté 2-3 minutes.  Add garlic and stir until fragrant, about 1 minute.   Add diced tomatoes with juices and broccoli florets to the skillet.  Scrape the bottom of the pan to remove any of the brown bits.  Bring to a boil, then reduce heat to a simmer.  Cover the skillet and cook until for about 10 minutes, until broccoli is tender.   Next stir in parmesan cheese, half and half and cooked orzo.  Stir until combined, adding pasta water if sauce needs smoothing out.  Season with salt and pepper and divide evenly onto two plates.   Place each piece of cooked chicken on top of the beds or orzo.  Serve right away.  (Weight Watchers PointsPlus- 12 points)
Pin It

Source– Adapted from Annie’s Eats

Enjoy!

-K


Filed Under: K's Entrees, K's post, K's Recipes

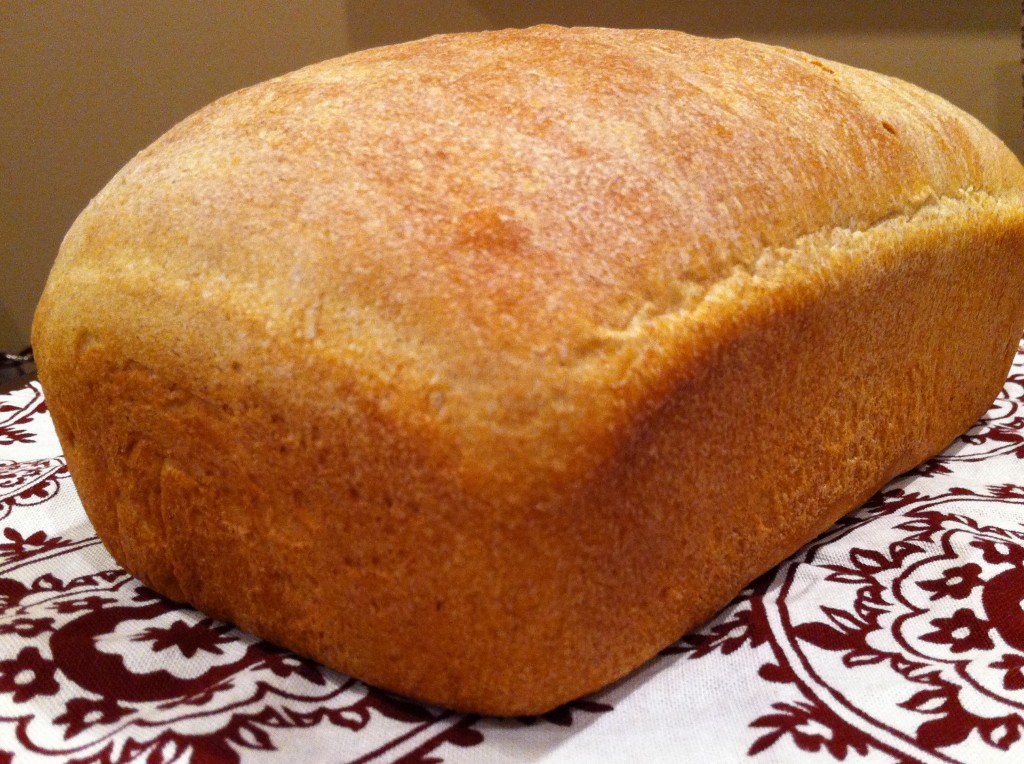
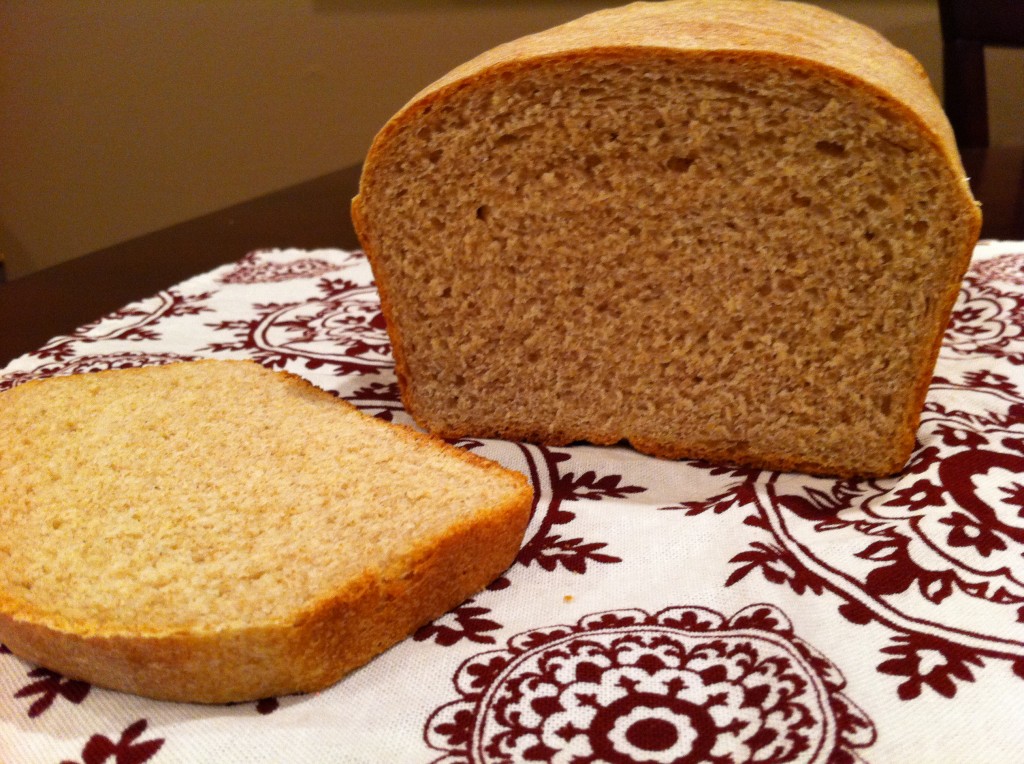
Light Honey Wheat Bread

Posted by 2 Sisters 2 Cities on January 17, 2012

I read this on a couple of blogs a few months back and I have been wanting to make this bread since.  After forgetting to get a loaf of bread at the grocery store this weekend, I decided that this would be the perfect opportunity to try out some homemade wheat bread.   It was really easy to put together even though I did have to knead the dough by hand for part of the time.  My mixer had an accident a few weeks ago and by accident I mean it tried to leap off my counter to it’s death.  You ask, how does a Kitchenaid mixer jump off a counter?  Well, this is a very good question.  While making pizza dough, I walked away from my mixer and because the dough was unbalanced it caused the mixer to rock itself off the counter.  It made a really loud noise causing my boyfriend to run into the room to see what happened to me.  Since this sad, sad moment,  my mixer has been a little out of sorts.  Tip to everyone: push your mixer far back on the counter and if you are kneading dough, don’t walk away from your mixer!

Back on topic, you should really try making this bread (it is possible without a stand mixer!)  I have been enjoying it all week for breakfast, and put the other half in the freezer.

Pin It
Light Honey Wheat Bread

Ingredients:
2 1/2 cups (11.25 oz.) bread flour
1 1/2 cups (6.75 oz.) whole-wheat flour
1 1/2 tablespoons  honey
1 1/2 teaspoons salt
3 tablespoons powdered milk
1 1/2 teaspoons instant yeast
2 tablespoons unsalted butter or shortening, at room temperature
1 1/4 cups water, at room temperature

Directions:
In the bowl of mixer combine both flours,  salt, powdered milk and yeast with paddle attachment.  Add in the butter, honey, and water.  Mix on low until combined, add it small amount of water if flour is still sitting on the bottom of the bowl. Change mixer to dough hook and mix on medium speed for about 6 minutes (or knead on a floured surface for 10 minutes). The dough should registers between 77-81 degrees, and not feel sticky (it should feel slightly tacky.)

Take a large bowl and lightly oil.   Place the dough ball in the bowl and cover with plastic wrap.  Let the dough rise for 1 1/2 to 2 hours, it should rise to twice it’s size. Once the dough is ready, place on a lightly floured surface.  Work into a 9×5 inch rectangular.  Start to roll the dough length wise, pinching the crease each turn to keep it together.  After the dough is completely rolled up,  roll back and fourth to smooth out crease, the dough should be about 9 inches in length.  Place the rolled dough in a 9×5 inch lightly oiled bread pan.  Mist dough with cooking spray and loosely cover with plastic wrap.  Leave in bread pan and allow to rise for 90 minutes.  Preheat oven to 350 when there is ten minutes left of the bread rising.  Make sure oven rack is in the center of the oven.   Once the dough has risen above the top of the pan.  Place bread pan on a baking sheet and place in the oven for 25 minutes.  Turn pan around 180 degrees and continue to bake for  15-30 minutes.  When the bread is done the center should register 190 degrees with a meat thermometer and make a hollow noise when knocked on.  Take bread out of pan and place on cooling rack.  After 1-2 hours, cut bread into half inch slices.  Should make around 16 slices. Each piece is 3 Pointsplus.

Source- adapted from Cook Like a Champion Pin It
Enjoy!

-K


Filed Under: K's post, K's Recipes Tagged With: Bread, Bread recipe, honey wheat bread

Cranberry, Banana and Walnut Muffins

Posted by 2 Sisters 2 Cities on January 10, 2012

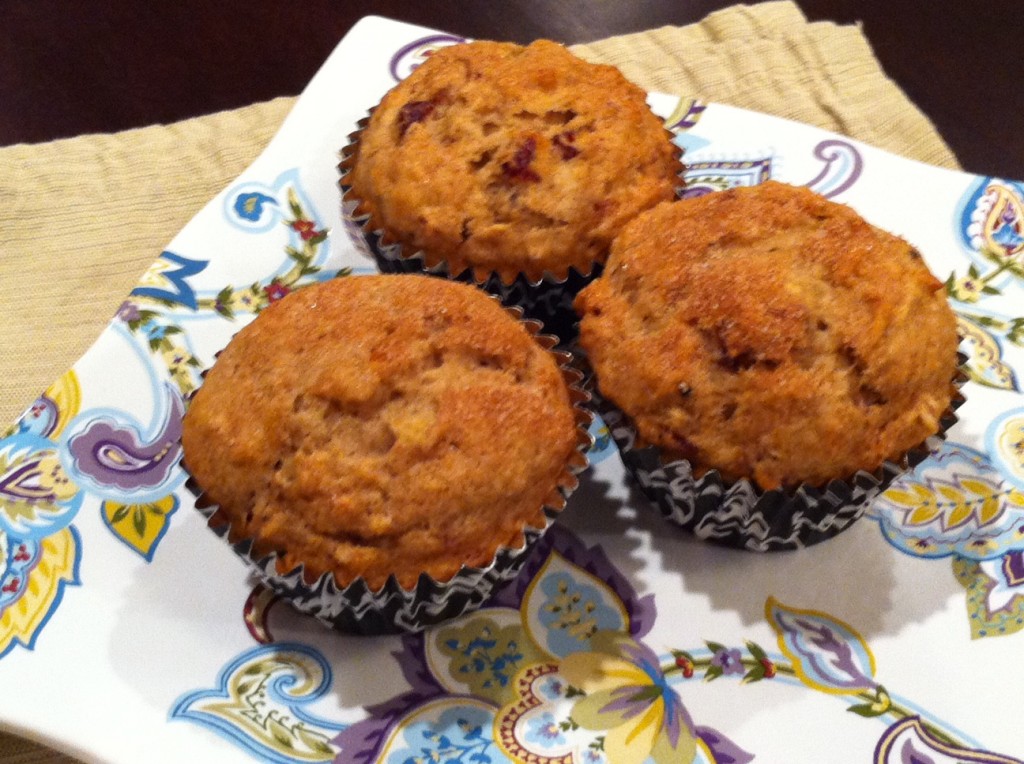
When searching for recipes the other day to plan out what I was going to go make this week I ran into a recipe for cranberry walnut muffins.  I was looking for something to bake a friend at work, whose birthday is this week.   I wanted a healthy recipe because everyone at work is watching their weight in the new year.  I also had overly ripe bananas that I hate to throw away.   I decided to create my own recipe with the addition of bananas.   They smelled so good when they were cooking,  I had to have one as soon as they came out of the oven.  Let me just tell you they were delicious… I ate two…but I counted them don’t worry.   They ended up being 4.5 PointsPlus on Weight Watchers, so I had to eat 2 to make it an even 9 points!

Cranberry, Banana and Walnut Muffins

Ingredients:
1 cup all-purpose flour
1/2 cup whole wheat flour
1/4 cup quick-cooking rolled oats
2 teaspoons baking powder
1/2 teaspoon ground cinnamon
1/4 teaspoon salt
1 egg, beaten
1/2 cup fat-free milk
1/2 cup sugar
3 tbsp. of canola oil
1 1/2 ripe bananas, mashed
1/3 dried cranberries, coarsely chopped
1/4 cup toasted walnuts, chopped
Cinnamon Sugar for sprinkling

Directions:

Preheat the oven to 375 degrees.  Prepare a muffin tin with nonstick spray or paper baking cups.  In a large bowl combine both flours, oats, baking powder, cinnamon, and salt.  In a smaller bowl combine egg, milk, sugar, and oil.  Add in mashed bananas to wet mixture.  Next add wet mixture to dry mixture,  stirring until just combined (don’t over mix!) Gently fold in cranberries and walnuts.  Scoop about 1/4 cup into the 12 muffin cups until mixture is divided evenly between the cups.  Sprinkle tops with cinnamon sugar.  Bake for 15-18 minutes until lightly browned.  Let cool.  Eat plain or spread a little light butter on them.

Enjoy!

-K
Pin It


Filed Under: K's post, K's Recipes Tagged With: muffins

Happy New Years From Sister K

Posted by 2 Sisters 2 Cities on January 1, 2012


Filed Under: K's post Tagged With: christmas, holidays

One Cut-out Sugar Cookies

Posted by 2 Sisters 2 Cities on December 24, 2011

Merry Christmas Eve!   I hope everyone made it to their Christmas destinations safely.   I am so excited for Christmas and can’t wait to spend some quality time with my family.   Living away from home sometimes has it’s downside, so I love when I can get together with my family.

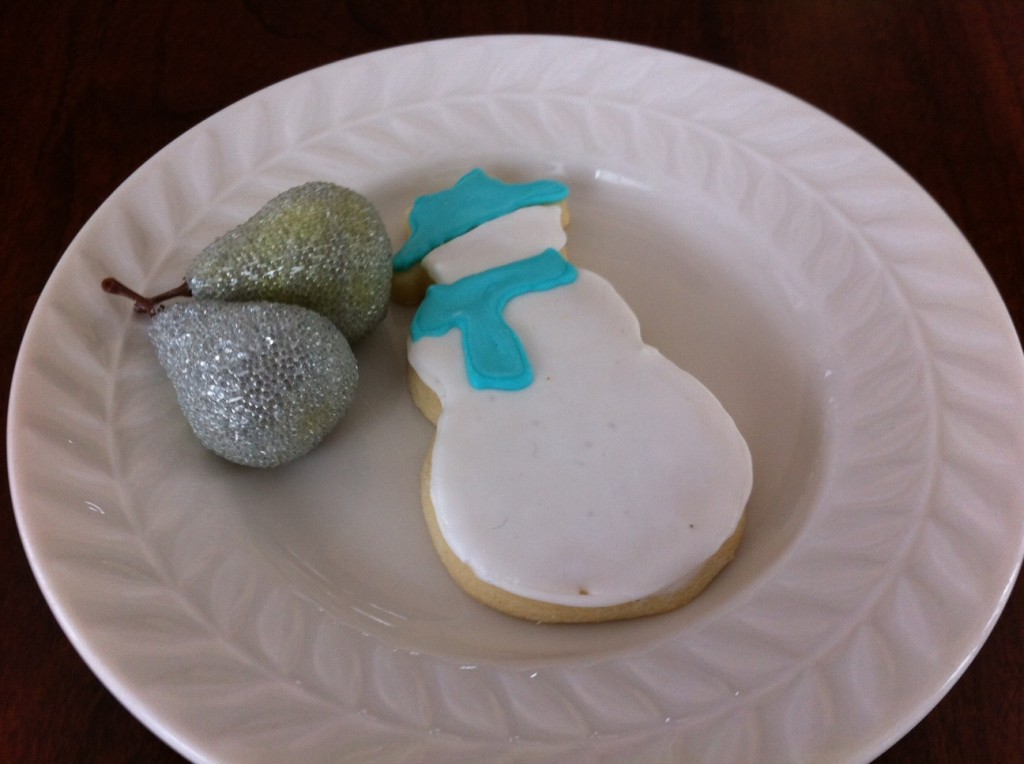
We are one day away from Christmas and you know what that means…(besides one partridge in a pear tree)- One type of cookie left to reveal!  Today’s cookie is the Christmas classic, the cut-out sugar cookie!  Growing up, one of our family tradition was decorating cut-outs on Christmas Eve.  They weren’t as technical as the royal icing cookies I made this year, but we always had a good time decorating.  Remember when I had that surviving the flood party and made the umbrellas  and boat sugar cookies?  Well, I have practiced several times since and I have gotten a lot better.

Print
Cut-out Sugar Cookies
 
Ingredients
  • 2 stick of unsalted butter
  • 1 cup confectioner's sugar
  • 1 egg
  • 1½ tsp almond extract
  • 1 tsp vanilla extract
  • 1 tsp of salt
  • 2½ cup of flour
Instructions
  1. In a mixer bowl, beat the butter until smooth.
  2. Add powder sugar and continue to mix. In a separate small bowl, beat egg.
  3. Mix in beaten egg, both extracts, salt, and flour until combined.
  4. Make dough into a ball and wrap in plastic wrap, and then flatten dough to a disc (this will help it to chill faster in the fridge.) Place dough in the fridge until hard.
  5. Preheat the 375 degrees.
  6. Once the dough is ready, place on a well floured surface and roll out to ¼ inch thickness.
  7. With cookie cutter, cut into shapes and place them on a greased sheet. Bake for 8-10 minutes until set, do not allow to brown.
  8. Place cookies on wire rack to cool.
  9. This makes around 20-24 cookies.
2.2.8

Source- Adapted from Annie’s Eats

K’s tip- To make multiple batches,  I just repeat the instruction for the dough and make right after the first (This way it doesn’t mess with the recipe by doubling it and you don’t have to dirty more dishes.

For Royal Frosting-  follow this recipe and tutorial on how to use royal icing from Annie’s Eats (aka my favorite blog-  I have got sister M hooked on Annie’s blog too.)  The tutorial  is actually how I learned how to decorate a cookie correctly with royal icing.  It does take a while and you will have to practice.  The results will make you proud though!

I couldn’t just show you just one cookie after all my hard work…

Merry Christmas Everyone!

-K


Filed Under: K's Desserts, K's post, K's Recipes Tagged With: 12 cookies of Christmas, Christmas cookie recipes, Christmas Cookies, sugar cookies

Eight White Chocolate Ginger Drops

Posted by 2 Sisters 2 Cities on December 16, 2011

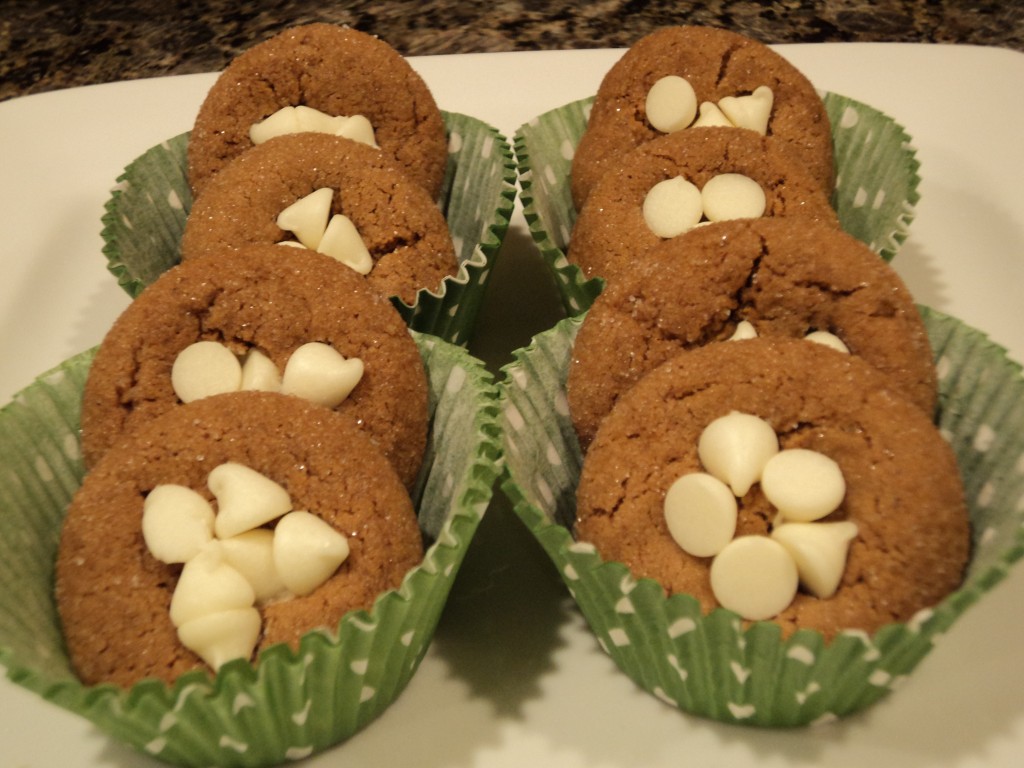
On the eighth day of Christmas, my true love gave to me… Eight White Chocolate Ginger Drops.  (I hope you sang that in the right tune.)  I think the song version of the Twelve Days of Christmas has eight maids of milking today, which is extremely convenient because these cookies are fabulous with a glass of milk.  I know this because I have had a few each night with a glass of milk…mmmmm.  I love this recipe because I don’t have to pipe the gingerbread cookies.   I plan on decorating sugar cookies this weekend, so the thought of having to pipe gingerbread men was exhausting (yes, piping gingerbread would have been my breaking point after making 12 types of cookies.)  So the reason why I love this recipe is because it gives you the same gingerbread cookie, but it is topped with white chocolate instead of royal icing. Which in this case makes them even more amazing. Don’t believe me?  Well, make them and try to prove me differently.

White Chocolate Ginger Drops

Ingredients
3 cups flour
1 tsp baking soda
1/4 tsp salt
2 tsp ground ginger
1 tsp cinnamon
1/4 tsp nutmeg
3/4 cup of unsalted butter (1 1/2 sticks) at room temperature
3/4 cup brown sugar
1/2 cup molasses
1 egg
1 tsp vanilla extract
½ cup of white sugar for dipping cookies in before cooking
1 cup of white chocolate chips

Directions
In a separate bowl whisk together the first 6 ingredients listed, up until the nutmeg. Next in bowl of an electric mixer, cream together butter and brown sugar until light and fluffy about 5 minutes.  Add in molasses, egg, and vanilla until all ingredients are combined.  Wrap dough in plastic wrap and chill for four hours of more.   When dough is ready take out of fridge and preheat the oven to 350 degrees.  Scoop cookies into one inch balls,  roll in sugar and place 2 inches apart from one another on a parchment paper lined baking sheet.  Bake for 8 -10 minutes.  When the cookies come out of the open place 4-5 white chocolate chips in the center.    Move cookies to wire cooling racks.

Enjoy!

-K


Related Posts Plugin for WordPress, Blogger...


Filed Under: K's Desserts, K's post, K's Recipes Tagged With: Christmas cookie recipes, Christmas Cookies, ginger, gingerbread cookies

  • « Previous Page
  • 1
  • 2
  • 3
  • 4
  • 5
  • Next Page »

Recent Posts

  • Easy Holiday Office Party Tips
  • 5 Steps to an Easy Football Party
  • Gingerbread Biscotti
  • Holiday Coffee Bar and Thanksgiving Recipes
  • Soft Sugar Pumpkin Cookies
  • Cinnamon Sugar Apple Cake
  • Hello Pumpkin Season!
  • Make Your Own Milkshake Party!
  • Mama’s Pickles
  • S’more Cookies

Categories

  • About 2 Sisters 2 Cities (7)
  • Books (8)
  • Crafting & DIY (22)
  • Design & Decorating (15)
  • Gardening (5)
  • Giveaway (14)
  • Guest Bloggers (8)
  • K's post (46)
  • K's Recipes (191)
    • K's Desserts (75)
    • K's Entrees (23)
    • K's Sides (24)
  • M's post (72)
  • M's recipes (167)
    • M's Entrees (21)
    • M's Sides (14)
    • M's Desserts (30)
  • Organizing (7)
  • Party Ideas (49)
  • Uncategorized (1)
  • Vacation (12)
Stitch Fix

Archives

Blogroll

  • Annie's Eats
  • Bake at 350
  • Baked Bree
  • Boston Harbor Beacon
  • Confections of a Foodie Bride
  • Cook Like a Champion
  • Erin’s Food Files
  • Forever and a Recipe
  • Framed Cooks
  • Oh Happy Day
  • On Common Ground
  • Pennies on a Platter
  • Pink Parsley
  • Recipe Girl
  • Sally's Baking Addiction
  • Simply Scratch
  • The Curvy Carrot
  • The Pioneer Woman
  • Tidy Mom
  • Two Peas & Their Pod
  • What’s Gaby Cooking
  • Young House Love
Increase your website traffic with Attracta.com

grab a 2 sisters button!


Copyright © 2014 ~ 2 Sisters 2 Cities | Blog Design by Minx Design