2 Sisters 2 Cities

Image Map
  • About 2 Sisters 2 Cities
  • Recipe Index
  • Project Index
  • Contact Us
  • Like us on Facebook
  • Follow m on twitter
  • Follow k on twitter
  • Follow 2S2C on Pinterest
  • Follow 2S2C on G+
  • rss
  • e-mail 2S2C

Grandma’s Sweet Refrigerator Rolls

Posted by Keelin Hollenbeck on November 25, 2013

Sweet Refrigerator Rolls

What is Thanksgiving without homemade rolls?  This recipe is from our family cookbook that my aunt put together for everyone many, many years ago.  We are actually on our second edition and I use both cookbooks in my kitchen all of the time.  It’s great to have all my favorite family recipes in one place.  This recipe for sweet rolls is really special to me and M, it is our Grandma’s recipe for rolls that she made for Thanksgiving each year. We lost our grandma a few years ago, but we still have her recipes and family tradition that lives on.

These rolls not only have a place in our heart, but they are really tasty!  Their sweet taste goes perfectly with a small amount of butter and of course a thanksgiving dinner.   Make these rolls for your holiday meal this year!

These rolls can be frozen or the dough can be made the day before and then rolled and baked an hour before dinner (if you have extra oven space.)  I made these rolls over the weekend and froze them for my work Thanksgiving lunch Friday.  We are all about making things ahead here around here!  In the past when I was only cooking for four people, I cut the recipe in half and it turned out great.
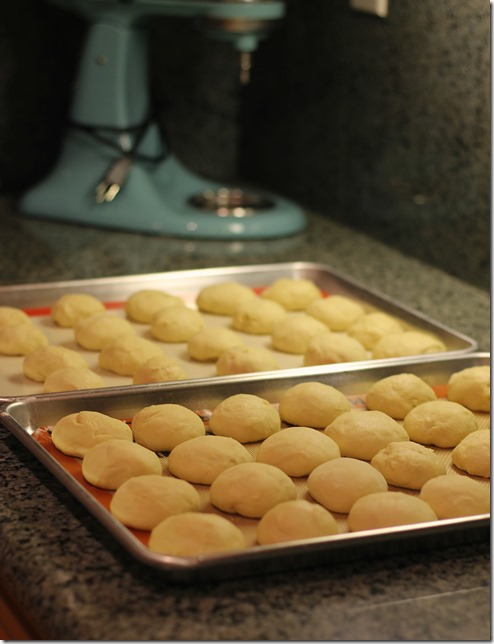
Homemade Rolls Rising

The rolls rising for 30 minutes before baking (plus my mixer in the background, isn’t she so pretty?)
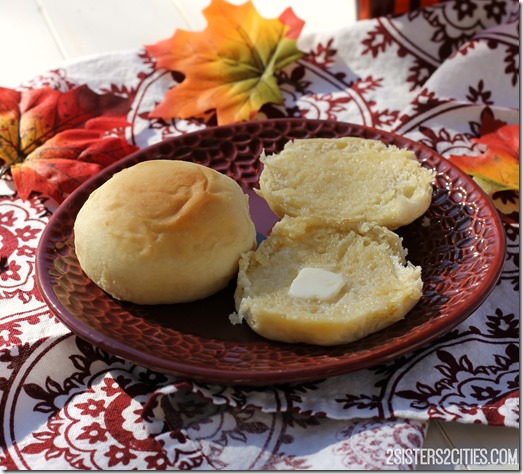
Sweet Rolls

Mmmm rolls…..

Print
Grandma's Sweet Refrigerator Rolls
Author: 2 Sisters 2 Cities
Serves: 30-36 rolls
 
Ingredients
  • ¾ cup butter
  • 1 cup boiling water
  • ⅓ cup sugar
  • 4½ tsp. active dry yeast
  • 1 cup luke warm water
  • 2 eggs
  • ⅓ cup sugar
  • 6 cups flour
  • 2 tsp. salt
Instructions
  1. Combine butter and 1 cup of boiling water. Stir until butter is melted.
  2. In the bowl of your mixer with paddle attachment add ⅓ cup of sugar, yeast, and 1 cup luke warm water. Combine on low.
  3. Once the butter reaches room temperature, add into yeast mixture and mix until combined.
  4. Add in eggs and another ⅓ cup of sugar, mix well.
  5. Next add in flour and salt. Combine completely.
  6. Cover bowl with plastic wrap and place in the refrigerator for at least 4 hours or overnight. If leaving overnight, punch the dough down before you go to bed so it doesn’t overflow in your fridge.
  7. One hour before dinner, turn dough out on a floured surface. The dough will be sticky so make sure your hands and surface are well floured.
  8. Preheat the oven to 400 degrees F. Form dough 30-36 rolls evenly sized. Place rolls 1-inch apart on a silicone mat lined baking sheet, you may need 2 baking sheets.
  9. Allow to rise for 30 minutes, then bake for 10-12 minutes. For best results cook each baking sheets one at a time.
  10. Serve immediately or store in an airtight container once cooled. Rolls can be frozen for up to 2 months.
3.2.2124

Source-  Adapted from Grandma H’s original recipe
sisterk (2)


Filed Under: K's Sides, K's post Tagged With: Bread, family recipe, grandma's sweet rolls, rolls, Sweet Refrigerator rolls, Sweet rolls, Thanksgiving, thanksgiving sides

Light Honey Wheat Bread

Posted by 2 Sisters 2 Cities on January 17, 2012

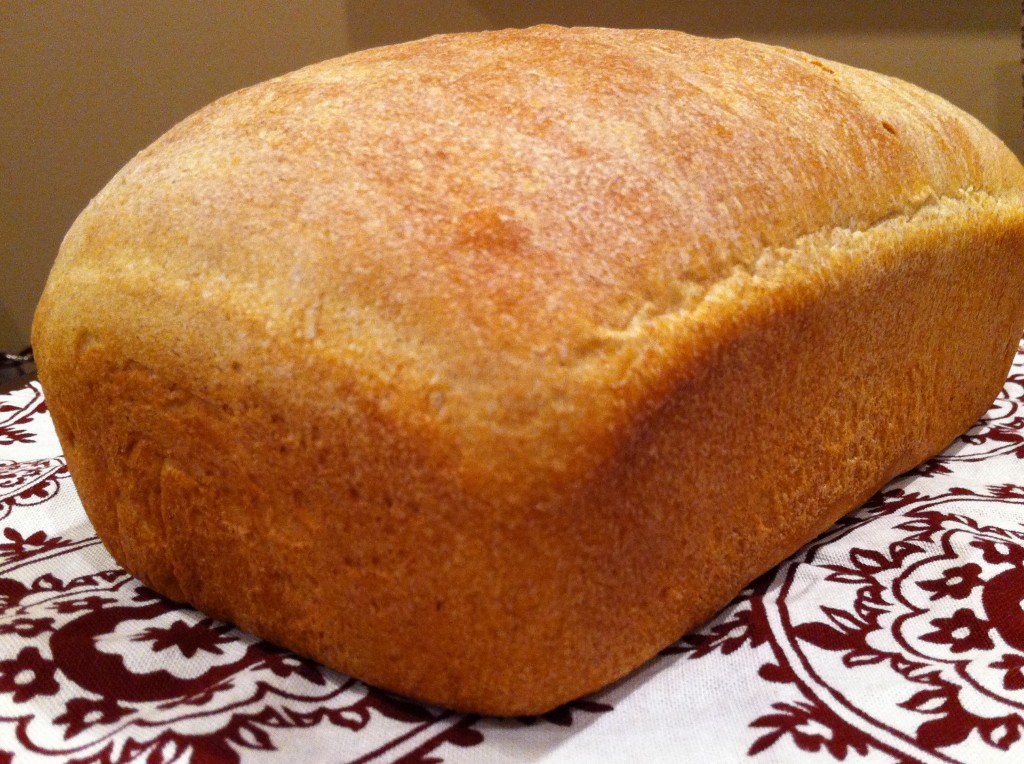
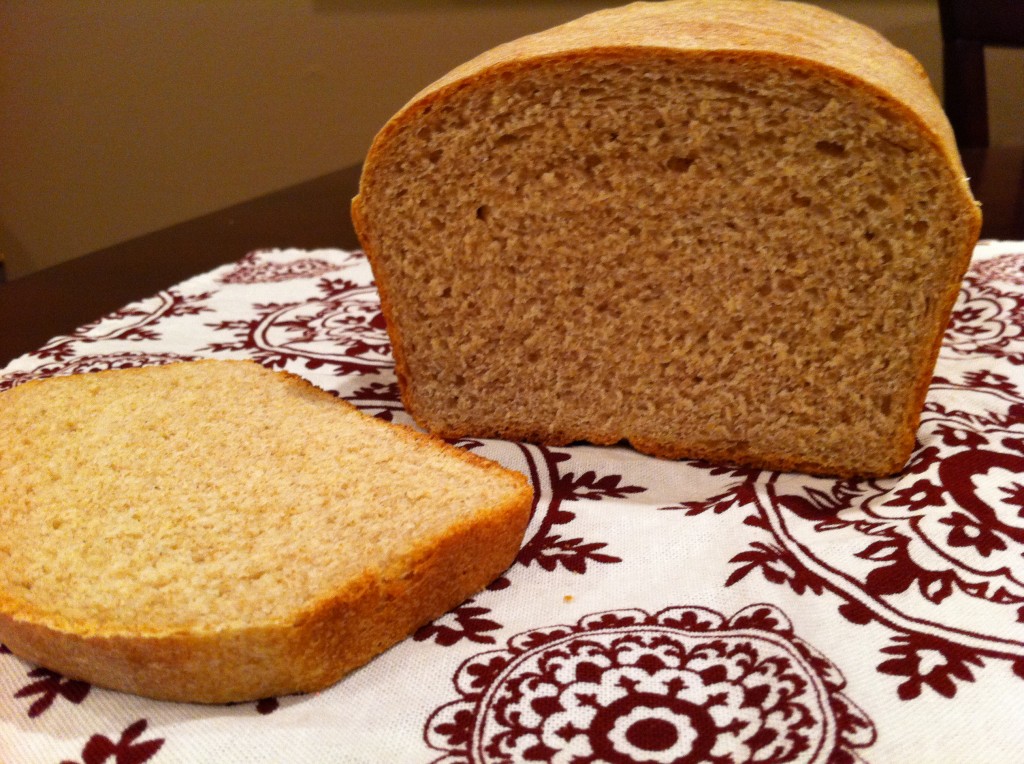
I read this on a couple of blogs a few months back and I have been wanting to make this bread since.  After forgetting to get a loaf of bread at the grocery store this weekend, I decided that this would be the perfect opportunity to try out some homemade wheat bread.   It was really easy to put together even though I did have to knead the dough by hand for part of the time.  My mixer had an accident a few weeks ago and by accident I mean it tried to leap off my counter to it’s death.  You ask, how does a Kitchenaid mixer jump off a counter?  Well, this is a very good question.  While making pizza dough, I walked away from my mixer and because the dough was unbalanced it caused the mixer to rock itself off the counter.  It made a really loud noise causing my boyfriend to run into the room to see what happened to me.  Since this sad, sad moment,  my mixer has been a little out of sorts.  Tip to everyone: push your mixer far back on the counter and if you are kneading dough, don’t walk away from your mixer!

Back on topic, you should really try making this bread (it is possible without a stand mixer!)  I have been enjoying it all week for breakfast, and put the other half in the freezer.

Pin It
Light Honey Wheat Bread

Ingredients:
2 1/2 cups (11.25 oz.) bread flour
1 1/2 cups (6.75 oz.) whole-wheat flour
1 1/2 tablespoons  honey
1 1/2 teaspoons salt
3 tablespoons powdered milk
1 1/2 teaspoons instant yeast
2 tablespoons unsalted butter or shortening, at room temperature
1 1/4 cups water, at room temperature

Directions:
In the bowl of mixer combine both flours,  salt, powdered milk and yeast with paddle attachment.  Add in the butter, honey, and water.  Mix on low until combined, add it small amount of water if flour is still sitting on the bottom of the bowl. Change mixer to dough hook and mix on medium speed for about 6 minutes (or knead on a floured surface for 10 minutes). The dough should registers between 77-81 degrees, and not feel sticky (it should feel slightly tacky.)

Take a large bowl and lightly oil.   Place the dough ball in the bowl and cover with plastic wrap.  Let the dough rise for 1 1/2 to 2 hours, it should rise to twice it’s size. Once the dough is ready, place on a lightly floured surface.  Work into a 9×5 inch rectangular.  Start to roll the dough length wise, pinching the crease each turn to keep it together.  After the dough is completely rolled up,  roll back and fourth to smooth out crease, the dough should be about 9 inches in length.  Place the rolled dough in a 9×5 inch lightly oiled bread pan.  Mist dough with cooking spray and loosely cover with plastic wrap.  Leave in bread pan and allow to rise for 90 minutes.  Preheat oven to 350 when there is ten minutes left of the bread rising.  Make sure oven rack is in the center of the oven.   Once the dough has risen above the top of the pan.  Place bread pan on a baking sheet and place in the oven for 25 minutes.  Turn pan around 180 degrees and continue to bake for  15-30 minutes.  When the bread is done the center should register 190 degrees with a meat thermometer and make a hollow noise when knocked on.  Take bread out of pan and place on cooling rack.  After 1-2 hours, cut bread into half inch slices.  Should make around 16 slices. Each piece is 3 Pointsplus.

Source- adapted from Cook Like a Champion Pin It
Enjoy!

-K


Filed Under: K's post, K's Recipes Tagged With: Bread, Bread recipe, honey wheat bread

5 Minute Artisan Bread

Posted by 2 Sisters 2 Cities on January 10, 2012

On Sunday, we took a stroll through our new town to check out some of the little shops, restaurants, and bakeries.  Most of them were unfortunately closed since it was late Sunday afternoon, but I’m looking forward to visiting them during business hours.  Peeking in the bakery windows, I suddenly became overcome with the need to make bread!  I am not a huge baker (as seen in the 12 Cookies of Christmas posts, sister K is way more into baking than I am.)  I did a quick google search on my phone and found this popular recipe called 5 Minute Artisan Bread Recipe.  I decided to give it a try that night.

On Sunday, I made the actual dough and let it rise for a few hours.  I kept it in a large plastic storage container in the fridge overnight.  I cut off a grapefruit-sized portion on Monday evening, let it rise for about 40 minutes and then baked it for 30 minutes.  (The “5 minute” part of this recipe’s title needs a huge asterisk next to it as it may only be about 5 minutes prep time, but the actual time is much, much longer!)

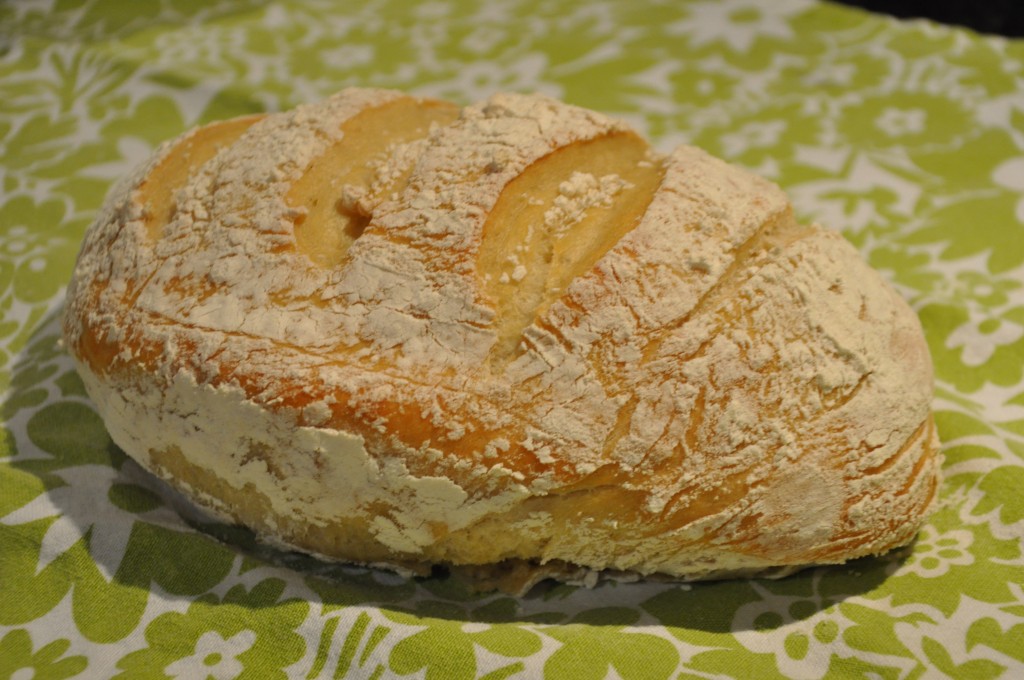
Check how it turned out- I’m an actual baker who can bake bread!

It was really good bread as well- very crusty on the outside, but chewy on the inside.  In fact, I had it with a salad for dinner last night and toast for breakfast this morning!

The thing I really like about this recipe is that I still have enough to make 3 more loaves in my fridge and it keeps up to 14 days.  The recipe says the flavor and texture even improves over time.  I hope to keep making this bread as it certainly can save money over time.  I don’t know the exact cost of 6 and 1/2 cups of flour and two yeast packets, but it is certainly cheaper than four $5 loaves of bread.  I’m also looking forward to trying out some different variations of this bread with some mix-ins (rosemary & garlic, whole-wheat, sea-salt crust…)

-m
Pin It


Filed Under: M's recipes Tagged With: 5 minute artisan bread, Artisan bread, baking, Bread

No-Knead Artisan Bread

Posted by Meaghan Barry on January 5, 2011

Edited from earlier post- sorry for any confusion!

Baby T and I have headed to my parents’ house early for the Christmas holiday so his nanna and grandpa could spend some quality time with him. Husband M will be joining us later this week- presumably well rested after a few baby-free night! Last night, my mom, sister M, and I enjoyed a ladies night in meal- soup, salad, and delicious artisan bread! The bread was so crusty and tasty- I loved it.

My mom’s decorator had shared this no-knead artisan bread with her and had told her how easy it was to make. After a little more research and experimenting, my mom has come up with the following recipe:

No-Knead Artisan Bread:

Ingredients:
-1/4 tsp yeast
-1 and a 1/2 cup warm water
-3 cups flour
-1 and 1/2 tsp salt

Combine the yeast and warm water. In a separate bowl, mix the flour and salt together. Add the yeast and water mixture to the flour mixture and combine. Cover with a dish towel and leave in bowl. Place the bowl in the oven (not on) or a warm place for 6-12 hours.

Take bowl out and preheat oven to 425 degrees,  as well as an enamel cast iron steel pan (such as Le Creuset). Once hot, toss in a small amount of flour to coat the pan then quickly throw in the dough.  Toss a little extra flour on top of the dough.

Re-cover dough immediately with the pot cover and put in oven. Leave cover on for 30-40 minutes depending on how crispy you would like the bread (the less you keep the cover on, the more crispy it will be. Bake for a total of 45 minutes. Remove the pan from oven, take bread out of pan, and put bread on cooling rack. Wait 30 minutes before slicing. Delicious served with olive oil!

I will definitely be trying this out at my house soon. This is one of those recipes that could easily be made on a work day as well if you did the first few steps in the morning and allowed the bread to rise while you were at work. I am looking forward to a week of delicious meals and hope to share some additional recipes soon!

-m

Related Posts Plugin for WordPress, Blogger...


Filed Under: M's recipes Tagged With: Artisan bread, Bread, Bread recipe, Mom's recipe, No Knead Artisan Bread

Recent Posts

  • Easy Holiday Office Party Tips
  • 5 Steps to an Easy Football Party
  • Gingerbread Biscotti
  • Holiday Coffee Bar and Thanksgiving Recipes
  • Soft Sugar Pumpkin Cookies
  • Cinnamon Sugar Apple Cake
  • Hello Pumpkin Season!
  • Make Your Own Milkshake Party!
  • Mama’s Pickles
  • S’more Cookies

Categories

  • About 2 Sisters 2 Cities (7)
  • Books (8)
  • Crafting & DIY (22)
  • Design & Decorating (15)
  • Gardening (5)
  • Giveaway (14)
  • Guest Bloggers (8)
  • K's post (46)
  • K's Recipes (191)
    • K's Desserts (75)
    • K's Entrees (23)
    • K's Sides (24)
  • M's post (72)
  • M's recipes (167)
    • M's Entrees (21)
    • M's Sides (14)
    • M's Desserts (30)
  • Organizing (7)
  • Party Ideas (49)
  • Uncategorized (1)
  • Vacation (12)
Stitch Fix

Archives

Blogroll

  • Annie's Eats
  • Bake at 350
  • Baked Bree
  • Boston Harbor Beacon
  • Confections of a Foodie Bride
  • Cook Like a Champion
  • Erin’s Food Files
  • Forever and a Recipe
  • Framed Cooks
  • Oh Happy Day
  • On Common Ground
  • Pennies on a Platter
  • Pink Parsley
  • Recipe Girl
  • Sally's Baking Addiction
  • Simply Scratch
  • The Curvy Carrot
  • The Pioneer Woman
  • Tidy Mom
  • Two Peas & Their Pod
  • What’s Gaby Cooking
  • Young House Love
Increase your website traffic with Attracta.com

grab a 2 sisters button!


Copyright © 2014 ~ 2 Sisters 2 Cities | Blog Design by Minx Design