2 Sisters 2 Cities

Image Map
  • About 2 Sisters 2 Cities
  • Recipe Index
  • Project Index
  • Contact Us
  • Like us on Facebook
  • Follow m on twitter
  • Follow k on twitter
  • Follow 2S2C on Pinterest
  • Follow 2S2C on G+
  • rss
  • e-mail 2S2C

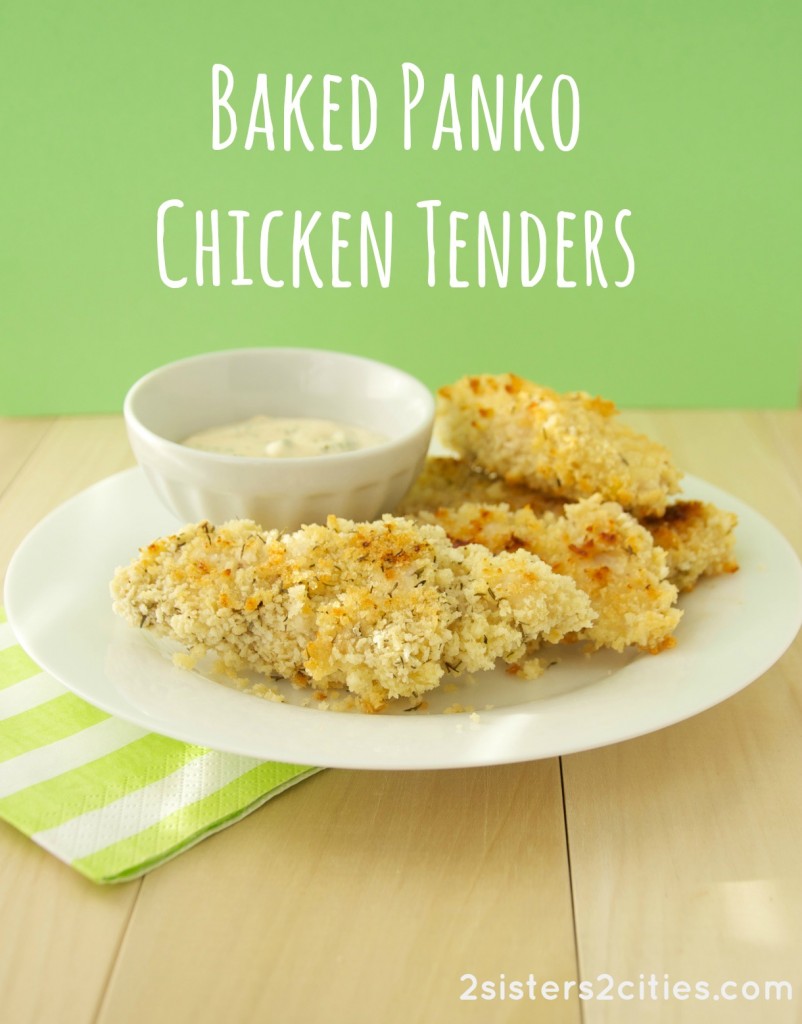
Baked Panko Chicken Tenders

Posted by Meaghan Barry on April 29, 2013

Baked Panko Chicken Tenders {from 2 Sisters 2 Cities}

As promised, here is a post with another toddler-friendly recipe!  Every couple of months I try to make a huge batch of chicken tenders and freeze them.  I can then just pull out a couple and reheat them for a quick lunch or dinner for T.  I usually serve them with a small bowl of homemade ranch dressing or ketchup and a side of steam veggies.  I’ve tried a lot of various recipes for chicken tenders, but this one for Baked Panko Chicken Tenders seems to be the biggest hit with him.  I prefer baking versus pan-frying them since it’s usually easier to cook and clean up a large batch of baked chicken tenders.

While I’ve categorized this recipe for baked panko chicken tenders as a toddler and kid-friendly recipe, I will admit my husband and I both heavily “sample” the tenders as soon as I pull them out of the oven.  These chicken tenders could easily be converted to an “adult meal” by serving them on top of a mixed greens salad dressed with the aforementioned ranch dressing.

If you’ve ever made any kind of chicken or fish that is dunked in buttermilk or an egg wash, then flour, then the liquid, and then another layer of breadcrumbs, you may have encountered what I like to call “monster hands.”  All four layers stick to your fingers and after repeating this process for a few times, your fingers look like they have contracted elephantiasis.  To avoid this, I recommend dunking your fingers (or tongs) in a bowl of warm water each time to rinse off all the layers.  This will help keep each individual bowl somewhat clean as well and prevent huge clumps of ingredients falling off your fingers and  into each bowl.
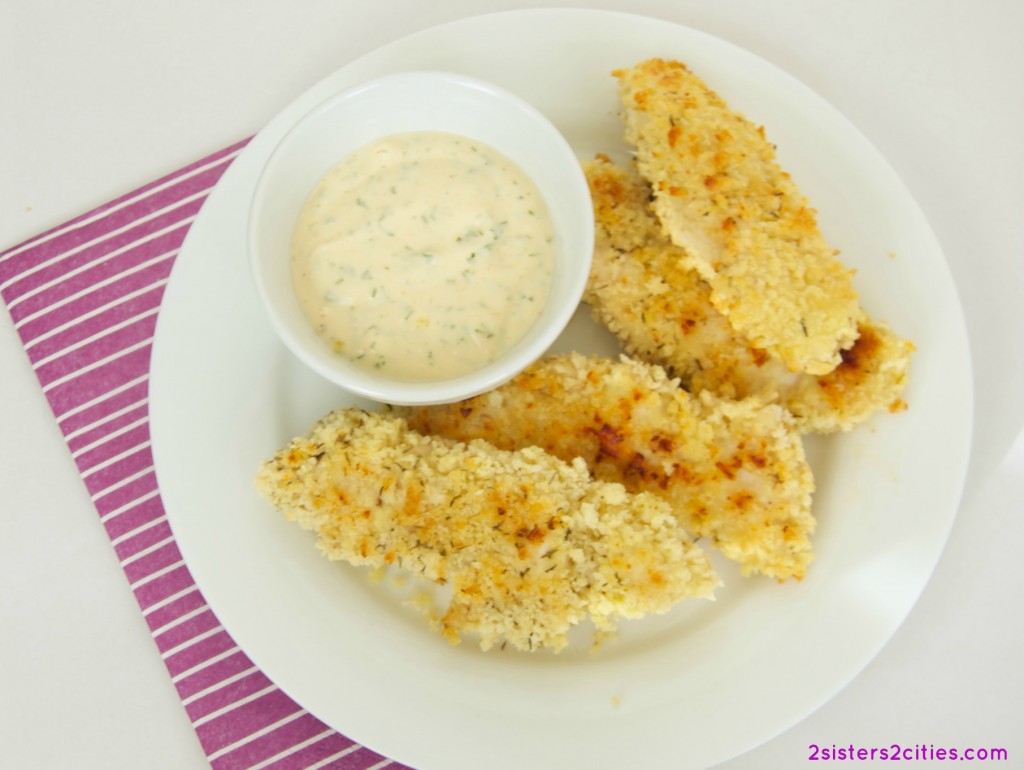
Baked Panko Chicken Tenders {from 2 Sisters 2 Cities}

Print
Baked Panko Chicken Tenders
Prep time:  20 mins
Cook time:  20 mins
Total time:  40 mins
 
Ingredients
  • -2-3 pounds chicken tenders (or chicken breasts cut into tender-sized strips)
  • -1 and ½ teaspoons kosher salt, divided
  • -1 and ¼ teaspoons ground black pepper, divided
  • -2 cups buttermilk
  • -2 cups eggs
  • -1 cup all-purpose flour
  • -4 cups panko (Japanese style breadcrumbs)
  • -1 teaspoon thyme
  • -cooking spray
  • -bowl of warm water
Instructions
  1. Preheat oven to 400 degrees F. Prepare two or three baking sheets with foil sprayed with cooking spray.
  2. Lay out chicken on a large platter or cutting board. Season both sides of chicken with ¾ teaspoon salt and ½ teaspoon ground black pepper. Prepare three bowls for chicken to be dipped into and add the following ingredients:
  3. ) buttermilk and egg, whisked together
  4. ) flour, ¾ teaspoon salt, and ¾ teaspoon ground black pepper, mixed together
  5. ) panko and thyme, mixed together
  6. Dip each individual chicken tender into the buttermilk mixture (1), the flour mixture (2), once again into the buttermilk mixture (1), and finally into the panko mixture (3.) Lay the covered chicken tender onto the prepared baking sheet. Once you fill up a tray of chicken tenders, spray the top of the chicken tenders with a light layer of cooking spray.
  7. Cook for 15-20 minutes until chicken tenders start to turn golden and the internal temperature of each piece of chicken reaches at least 160 degrees F. Continue to prepare and cook the remaining chicken tenders.
  8. Serve chicken tenders warm with ranch dressing or ketchup. Alternatively, allow baked panko chicken tenders to cool and place them in gallon-sized freezer bags. To serve, take out the desired amount of chicken tenders and reheat in the oven or microwave until warm.
3.2.1753

 Source: Adapted from The Picky Palate Cookbook and Recipes for Baby and Toddler: 365 Quick & Healthy Dishes

sister m signature


Filed Under: M's Entrees, M's recipes Tagged With: chicken, chicken nuggets, chicken recipe, chicken tenders, ketchup, kid-friendly recipes, panko, ranch dressing, toddler-friendly recipes

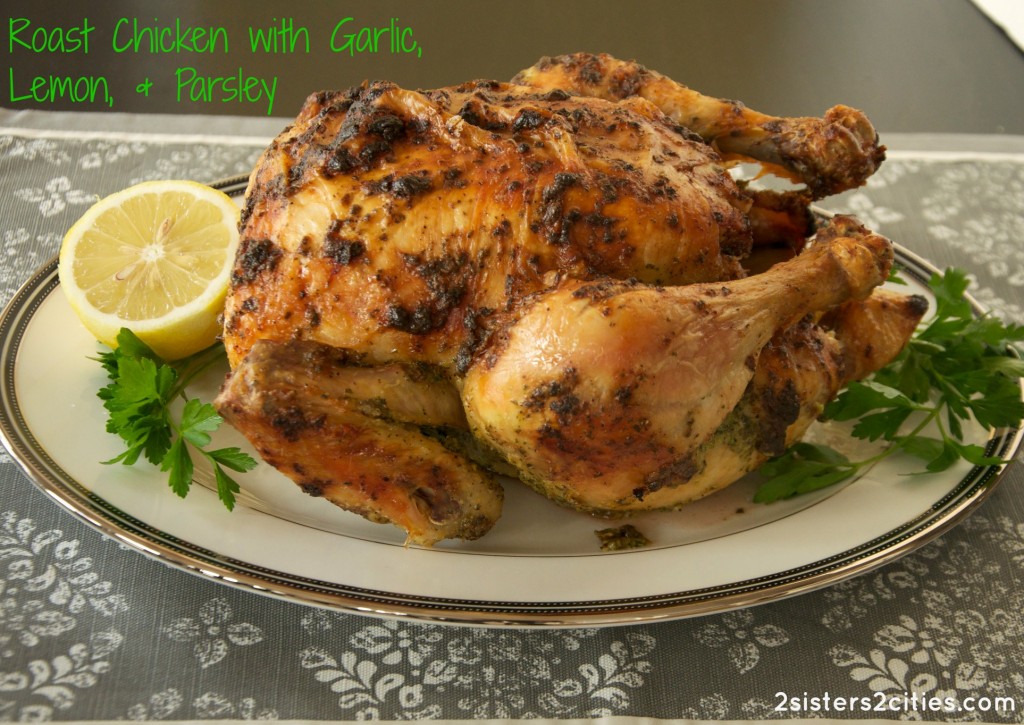
Roast Chicken with Garlic, Lemon, and Parsley

Posted by 2 Sisters 2 Cities on January 14, 2013

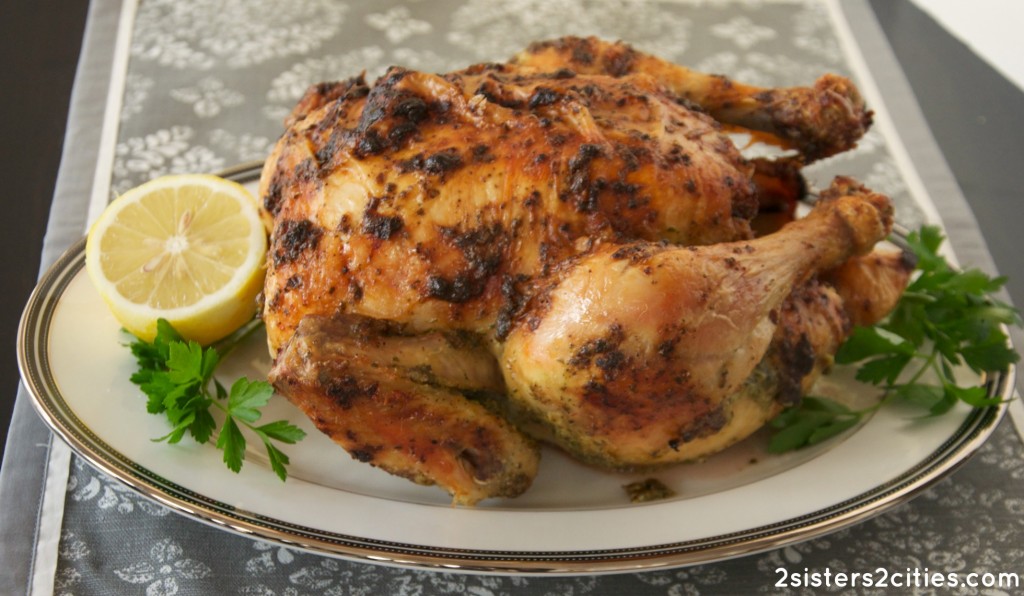
Roast Chicken with Garlic, Lemon, and Parsley

I recently tried this recipe for roast chicken with garlic, lemon, and parsley and I just had to share it on 2S2C.  My husband’s Aunt N gave me this recipe a few years ago and I had filed it in the chicken section of my recipe binder.  Last week, I was looking to make a dinner recipe for someone who recently had a baby and I wanted to be able to serve our family the same dinner that evening.  This roast chicken recipe actually calls for two whole chickens so I figured it would work out well.

The chicken turned out really delicious.  I highly recommend starting off with a higher-quality whole chicken, such as Bell & Evans.  While they are definitely a bit more pricey than standard grocery store whole chickens, we could really taste the difference in the quality of the meat.  The garlic, lemon, and parsley marinade also added the perfect punch of flavor as well.

The original recipe for this chicken is from the Hamersley’s Bistro in Boston’s South End.  I read a story that they have been serving this chicken on the menu for over twenty years and no matter what placement it gets on the menu, it sells out almost every night.  When we lived in the city, we always walked by this restaurant and I have no idea why we never went.  Now I am definitely intrigued and I want to pay it a visit (although now I can always make this chicken at home!)

I ended up serving this with garlic rice pilaf and a mixed green salad with walnuts, crumbled goat cheese, and dried cherries (which is just a different variation of toppings used in the apple, walnut, and blue cheese salad.)  Both of these recipes are quite easily doubled if you are looking to make a full dinner for your family and share with another.

roast chicken

Print
Roast Chicken with Garlic, Lemon, and Parsley
Author: 2 Sisters 2 Cities
Prep time:  2 hours 5 mins
Cook time:  2 hours
Total time:  4 hours 5 mins
Serves: 8
 
Ingredients
  • 1 bunch fresh Italian parsley, leaves picked off and stems discarded
  • 3 garlic cloves
  • 3 shallots
  • 3 tablespoons Dijon mustard
  • 2 teaspoons kosher salt
  • 2 teaspoons ground black pepper
  • 6 tablespoons extra virgin olive oil
  • Grated zest of 1 lemon
  • 2 whole chickens (I prefer Bell & Evans brand), 4 pounds each
Instructions
  1. To prepare the marinade, place parsley, garlic, shallots, mustard, salt, pepper, olive oil, and lemon in food processor and process until smooth. Meanwhile, remove chicken from packaging, remove giblets, and blot dry with paper towels. Place chickens side by side on a rack within a roasting pan. (Make sure your roasting pan is large enough for there to be some space between the two chickens so air can circulate. Otherwise, you may need to use two pans.) Rub the marinade all over the chickens and cover the chickens with a layer of plastic wrap. Allow to marinade 2-24 hours.
  2. Once chicken is done marinating, preheat oven to 350 degrees. Cook chickens for approximately 1 hour and 30 minutes to 2 hours. Remove chicken from oven and allow to cool once it reaches 165 degrees F in the thickest part of the thigh. Cooking time can vary greatly from oven to oven- I highly recommend investing in a good-quality thermometer to ensure that the chicken reaches the proper temperature. Allow chicken to cool for approximately 20 minutes before carving.
3.2.1336

Source: Adapted from Bistro Cooking at Home by Gordon Hamersley

sister m signature


Filed Under: M's Entrees, M's recipes Tagged With: chicken, chicken recipe, dinner recipe, garlic, lemon, parsley, roast chicken, roasted chicken, south end

Chicken Chili with Corn Muffin Croutons

Posted by 2 Sisters 2 Cities on January 9, 2013

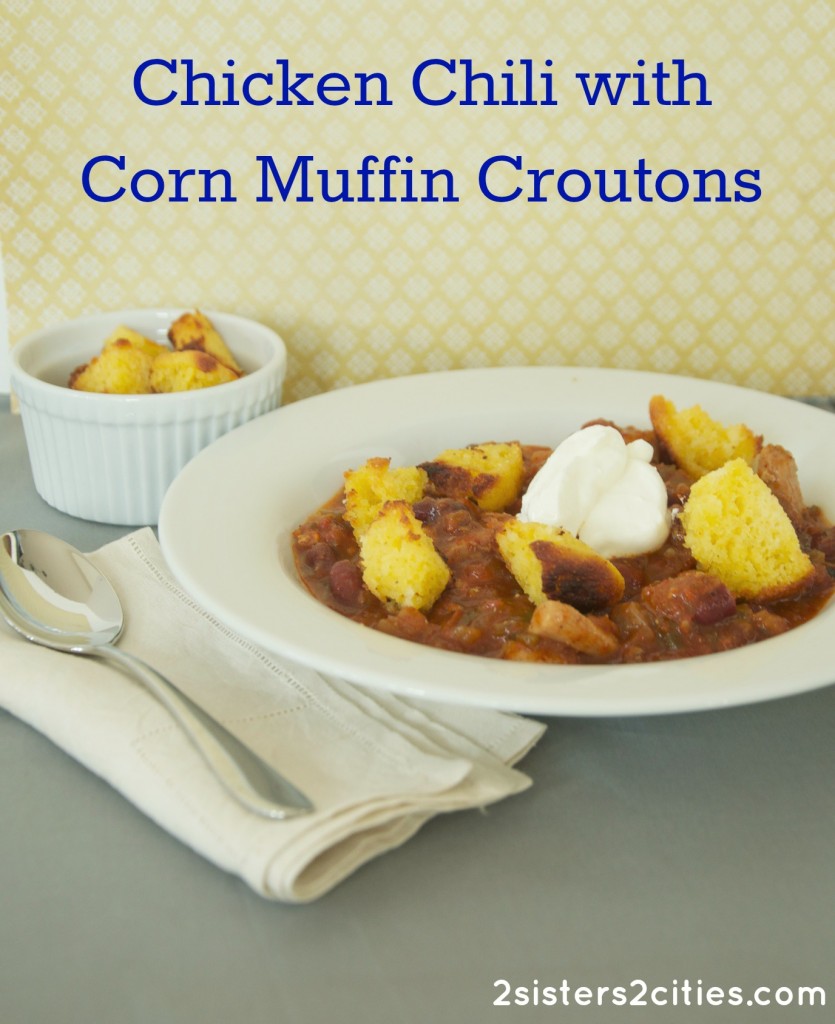
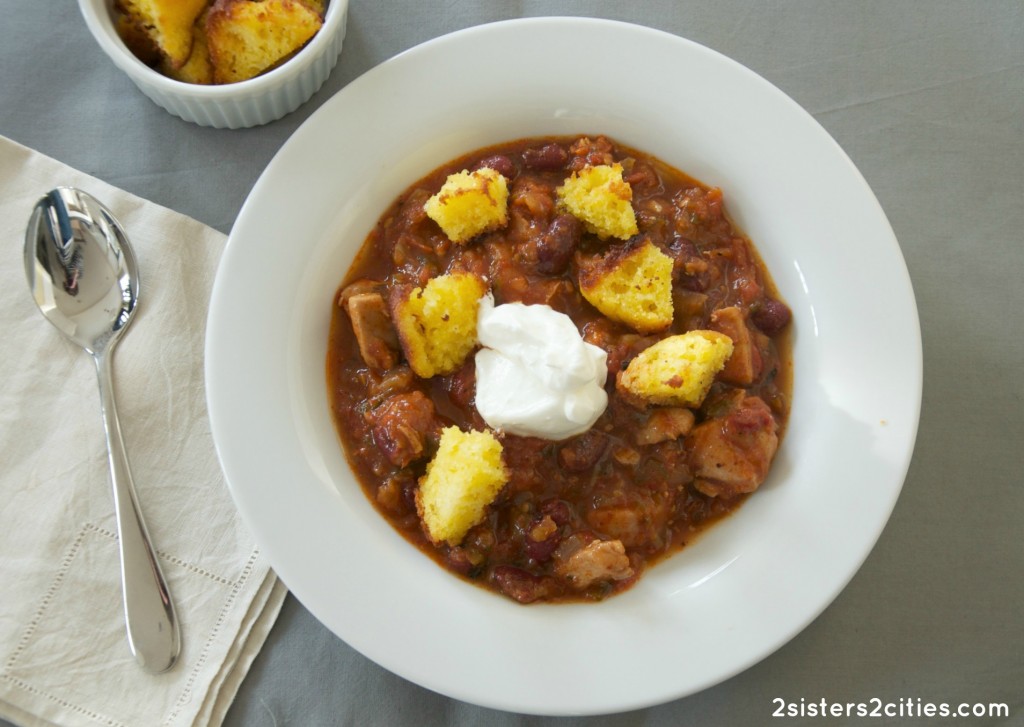
Chicken Chili with Corn Muffin Croutons from 2 Sisters 2 Cities

I would love to post about cookies for another month straight, but we are trying to move our focus to some easy and delicious dinner options.  As promised yesterday, here is one of my favorite recipes for chili!  This chicken chili with corn muffin croutons is so tasty and I’ve been making it every winter since it was first printed in Martha Stewart Living in September 2010.  I’ve made some adjustments to the original recipe which I found a tad too spicy (and I like spicy!)  I cut up the fresh corn muffins I made, tossed them with a little extra virgin olive oil, salt, and pepper, and baked them for 10-15 minutes at 350 degrees Fahrenheit.  Topped with the corn muffin croutons and sour cream, this chili makes the perfect weeknight winter meal.

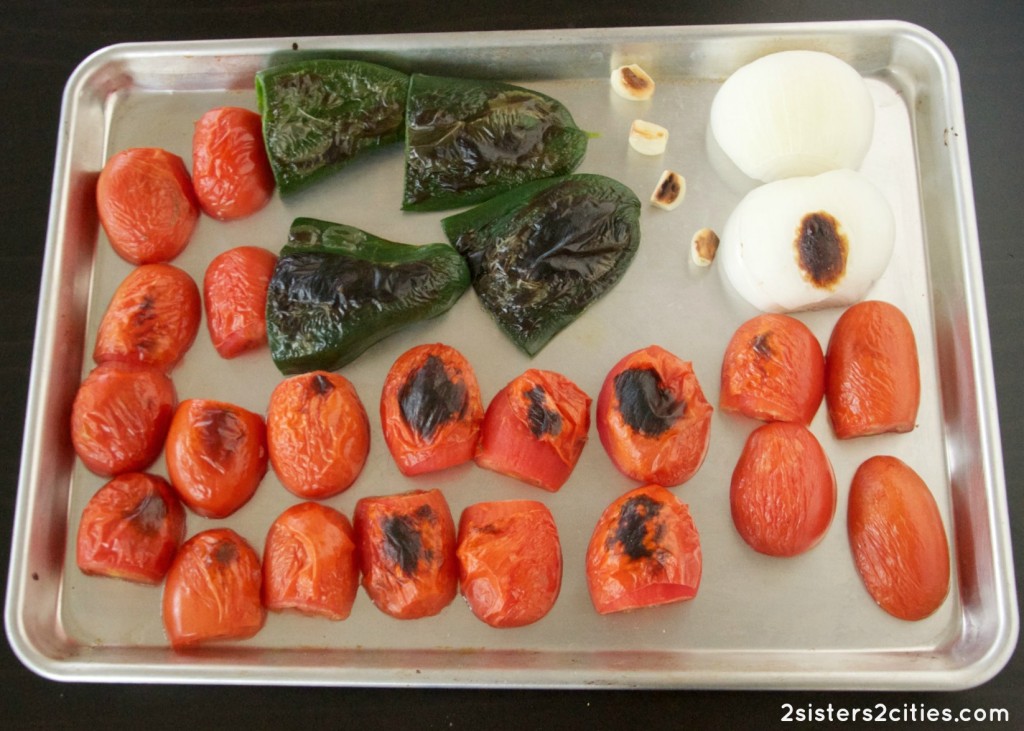
Chicken Chili prep

I love how this recipe starts off with fresh tomatoes, peppers, onions, and garlic.  Broiling them for a few minutes give them a nice char which really amps up the smoky flavor of the chili.  I also think this recipe calls for just the right amount of beans- I dislike it when chili has so many beans that you are full after two bites!  In case you do have any leftovers, I highly recommend serving this up for lunch the next day in the form of nachos (as recommended in the original article.)  Top some tortilla chips with the chicken chili, pickled jalapeños, and grated cheddar cheese and heat up.  Add some more sour cream and salsa to finish off your nachos.

Chicken Chili with Corn Muffin Croutons

Print
Chicken Chili with Corn Muffin Croutons
Author: 2 Sisters 2 Cities
Prep time:  15 mins
Cook time:  45 mins
Total time:  1 hour
 
Ingredients
  • 10 plum tomatoes, tops cut off halved lengthwise
  • 2 poblano peppers, halved and seed
  • 1 white onion, peeled and halved
  • 4 garlic cloves, peeled
  • 2 tablespoons extra-virgin olive oil
  • 2 pounds boneless, skinless chicken thighs, cut into ½-inch pieces
  • 3 tablespoons chili powder (use less if you prefer less spicy)
  • 1 tsp kosher salt
  • 2 canned chipotle chiles in adobo sauce, finely chopped
  • 1¾ cups low-sodium chicken stock
  • 1 can (15 ounces) kidney beans, drained
Instructions
  1. Preheat broiler. Arrange tomatoes, jalapeno, onion, and garlic, cut side down, on a baking sheet. Broil until they start to char (about 5 minutes.)
  2. Allow to cool slightly and pulse tomatoes and jalapeno in food processor until chunky. Chop onion and mince garlic.
  3. Heat a large heavy skillet over medium-high heat. Add oil. Add chicken and cook until no longer pink. Reduce heat to medium and add onion and garlic to skillet. Cook until onions and garlic are soft and golden (about 5-9 minutes.) Add chili powder and salt. Continue to cook for another minute. Stir in chipotles, and raise heat to high. Add tomato-jalapeno mixture. Scrape up any brown bits from the bottom of the pan and cook until mixed. Add chicken stock and allow chili simmer for 20 minutes.
  4. Add beans; simmer for at least another 10 minutes. Serve with corn muffin croutons and sour cream.
3.2.1311

Source: Adapted from Martha Stewart Living, September 2010

What ingredients are in your favorite chili recipe?

sister m signature


Filed Under: M's Entrees, M's recipes Tagged With: chicken chili, chicken recipe, chili recipe, corn muffins, mad hungry, martha stewart living, weeknight dinner, winter dinner, winter recipes

Jalapeño Popper Stuffed Chicken

Posted by 2 Sisters 2 Cities on September 8, 2012

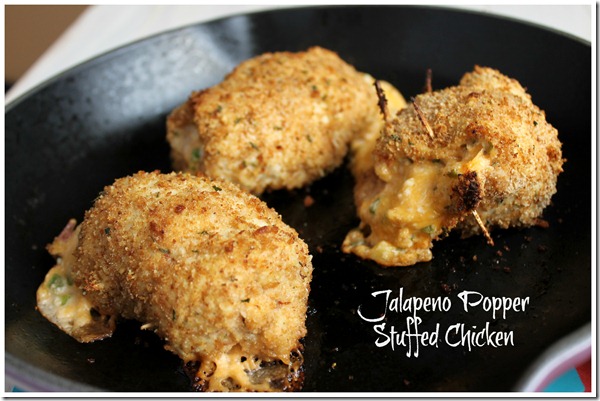
Jalapeno Popper Stuffed Chicken
Jalapeño poppers weren’t something I always desired.   I had thought they would be too spicy for me until a friend made me try hers in college.   After that, it was love at first bite and I couldn’t get enough.  I love jalapeño poppers so much I once telepathically communicated with my mom to tell her to make them for me.  Okay, okay, maybe it wasn’t exactly telepathic, but I did tell my little sister that I thought it would be amazing  to have jalapeño poppers when we got home.   Which we didn’t discuss again until we got home and my mom had made homemade jalapeño poppers.  She never had made them for us before either, so see, totally telepathic!   I have tried a few homemade jalapeño popper recipes on my own like the one here.  So when I found the recipe for jalapeño stuffed chicken I knew it would be a winner in my book.

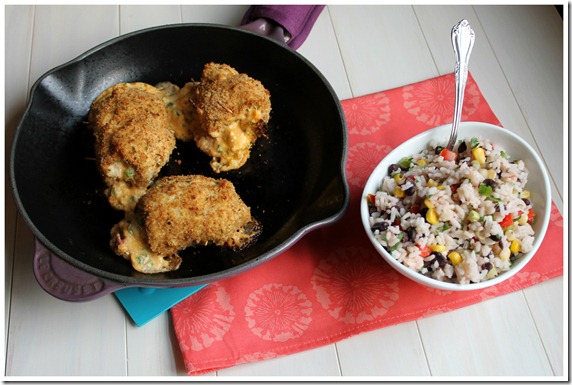
I have been making this recipe a lot lately since my boyfriend basically asks for it every week.   This was my first stuffed chicken recipe I have made because I always assumed they were too much work or too fatty, but this recipe was easy to put together and actually somewhat low-fat.   To stuff the chicken I used all reduced-fat ingredients like reduced-fat cream cheese, reduced-fat shredded cheddar, and turkey bacon.   I then serve the chicken with a fiesta rice which I will give you the recipe for later this week.  So stay tuned for more yumminess Smile.

Jalapeno Popper Stuffed Chicken with Fiesta Rice

Print
Jalapeno Popper Stuffed Chicken
Author: 2 Sisters 2 Cities
Serves: 4
 
Ingredients
  • 2 slices of cooked turkey bacon, crumbled
  • 3 jalapeño, chopped with seeds and ribs removed*
  • 4 oz. reduced fat cream cheese, softened
  • 4 oz. reduced fat shredded cheddar cheese
  • 2 tbsp. chopped scallions
  • 4 3oz. chicken breast, rinsed, dried and pounded thin
  • ⅓ cup whole wheat Italian bread crumbs
  • 1½ limes, juiced
  • 1 tbsp. olive oil
  • salt and fresh pepper
  • olive oil non-stick spray
Instructions
  1. Preheat the oven to 450 degrees F.
  2. In a medium sized bowl mix together cream cheese, shredded cheese, scallions, chopped jalapeño, and crumbled turkey bacon.
  3. In a small bowl whisk together lime juice, olive oil, salt, and pepper then place bread crumbs on a large plate.
  4. Lay pounded out chicken onto a cutting board or working surface. Place 2-3 tbsp. of cream cheese mixture in the middle and then tightly roll chicken around the filling. Close the edges of the chicken with toothpicks so the filling doesn’t leak out (There will still be some small filling that leak out.)
  5. Take rolled chicken and dip in lime/oil mixture and roll around. Take chicken out roll in bread crumbs. Place seam side down in the baking dish. Repeat for the rest of the chicken. Once all chicken is stuffed and breaded spray with non-stick spray.
  6. Bake for 22-25 minutes, and serve.
3.1.09

*Please note-  Jalapeño’s seeds and ribs are extremely hot and can burn the skin so please wear gloves or plastic bags on hands when handling and wash knife an cutting board with hot soap water after.   If you do get a jalapeño burn, soak your burn in milk of magnesia, brand name Maalox (it worked for me!)

Recipe Source– Adapted from Skinnytaste


Filed Under: K's Entrees, K's Recipes Tagged With: chicken recipe, dinner recipe, jalapeno poppers

Chicken Piccata

Posted by 2 Sisters 2 Cities on April 26, 2012

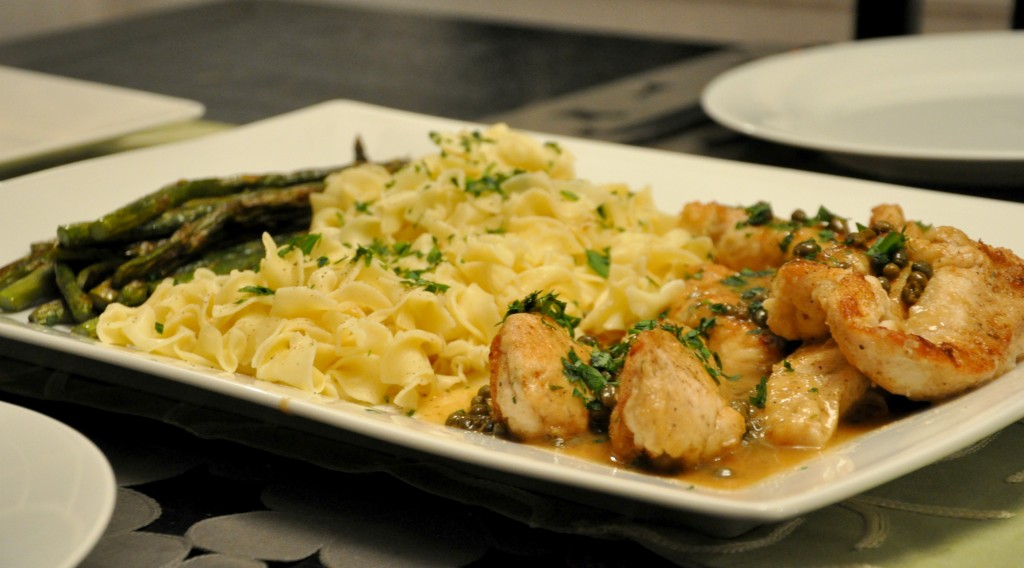
I made chicken piccata for dinner last night and I remembered why it is one of my favorite dinners to make. It’s fairly easy to have all the ingredients prepped and ready to go, and then make it in 10-15 minutes once it’s dinner time. The flavor in the sauce is incredible!  I like to serve it with egg noodles and roasted asparagus on one large platter.  We could have eaten it all last night, but I saved some leftovers for my lunch today.

Print
Chicken Piccata
Recipe type: Entree
Prep time:  10 mins
Cook time:  15 mins
Total time:  25 mins
Serves: 3
 
Ingredients
  • 1 lb chicken tenderloins (or slice up a large chicken breast into thick strips)
  • Kosher salt and freshly ground black pepper
  • ½ cup all-purpose flour
  • 4 tablespoons unsalted butter
  • 1 tablespoon extra-virgin olive oil
  • ⅓ cup fresh lemon juice
  • ½ cup chicken stock
  • ¼ cup brined capers, drained
  • ¼ cup dry white wine (may be omitted)
  • 2-3 tablespoons fresh parsley, chopped
Instructions
  1. Season chicken with salt and pepper. Dredge chicken in flour and shake off excess.
  2. In a large skillet over medium high heat, melt 2 tablespoons of butter with 1 tablespoons olive oil. When butter and oil start to sizzle, add the chicken and cook for 3 minutes. When chicken is browned, flip and cook other side for 3 minutes. Remove and transfer to plate.
  3. Add the lemon juice, stock, capers, and white wine to the pain. Return to stove and bring to boil, scraping up brown bits from the pan. Return all the chicken to the pan and simmer for 5 minutes. Remove chicken to platter. Add remaining 2 tablespoons butter to sauce and whisk until melted and incorporated. Pour sauce over chicken and garnish with parsley. Serve with egg noodles on the same platter to soak up some of the excess sauce.
2.2.6

Source: Adapted from Giada De Laurentiis

Related Posts Plugin for WordPress, Blogger...


Filed Under: M's Entrees, M's recipes Tagged With: chicken piccata, chicken piccata recipe, chicken recipe, easy weeknight dinner

Recent Posts

  • Easy Holiday Office Party Tips
  • 5 Steps to an Easy Football Party
  • Gingerbread Biscotti
  • Holiday Coffee Bar and Thanksgiving Recipes
  • Soft Sugar Pumpkin Cookies
  • Cinnamon Sugar Apple Cake
  • Hello Pumpkin Season!
  • Make Your Own Milkshake Party!
  • Mama’s Pickles
  • S’more Cookies

Categories

  • About 2 Sisters 2 Cities (7)
  • Books (8)
  • Crafting & DIY (22)
  • Design & Decorating (15)
  • Gardening (5)
  • Giveaway (14)
  • Guest Bloggers (8)
  • K's post (46)
  • K's Recipes (191)
    • K's Desserts (75)
    • K's Entrees (23)
    • K's Sides (24)
  • M's post (72)
  • M's recipes (167)
    • M's Entrees (21)
    • M's Sides (14)
    • M's Desserts (30)
  • Organizing (7)
  • Party Ideas (49)
  • Uncategorized (1)
  • Vacation (12)
Stitch Fix

Archives

Blogroll

  • Annie's Eats
  • Bake at 350
  • Baked Bree
  • Boston Harbor Beacon
  • Confections of a Foodie Bride
  • Cook Like a Champion
  • Erin’s Food Files
  • Forever and a Recipe
  • Framed Cooks
  • Oh Happy Day
  • On Common Ground
  • Pennies on a Platter
  • Pink Parsley
  • Recipe Girl
  • Sally's Baking Addiction
  • Simply Scratch
  • The Curvy Carrot
  • The Pioneer Woman
  • Tidy Mom
  • Two Peas & Their Pod
  • What’s Gaby Cooking
  • Young House Love
Increase your website traffic with Attracta.com

grab a 2 sisters button!


Copyright © 2014 ~ 2 Sisters 2 Cities | Blog Design by Minx Design