2 Sisters 2 Cities

Image Map
  • About 2 Sisters 2 Cities
  • Recipe Index
  • Project Index
  • Contact Us
  • Like us on Facebook
  • Follow m on twitter
  • Follow k on twitter
  • Follow 2S2C on Pinterest
  • Follow 2S2C on G+
  • rss
  • e-mail 2S2C

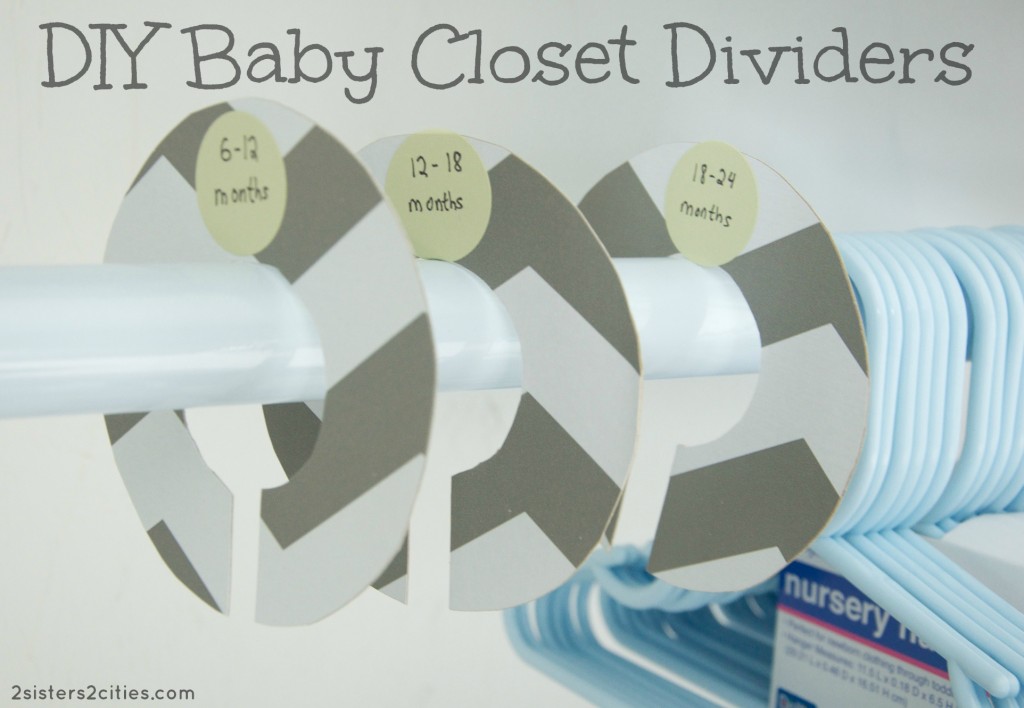
DIY Baby Closet Dividers

Posted by Keelin Hollenbeck on May 20, 2013

DIY Baby Closet Dividers {from 2 Sisters 2 Cities}

I’ve mentioned in a lot of my last posts that I have been busy nesting and getting ready for baby #2’s arrival.  This time around, I realize that the nursery does not need to be finished by the time the baby comes since he will be in a bassinet next to our bed most nights, but time will likely be a rare commodity with two little munchkins.  I’m trying to get as many things done ahead of time with just T around.

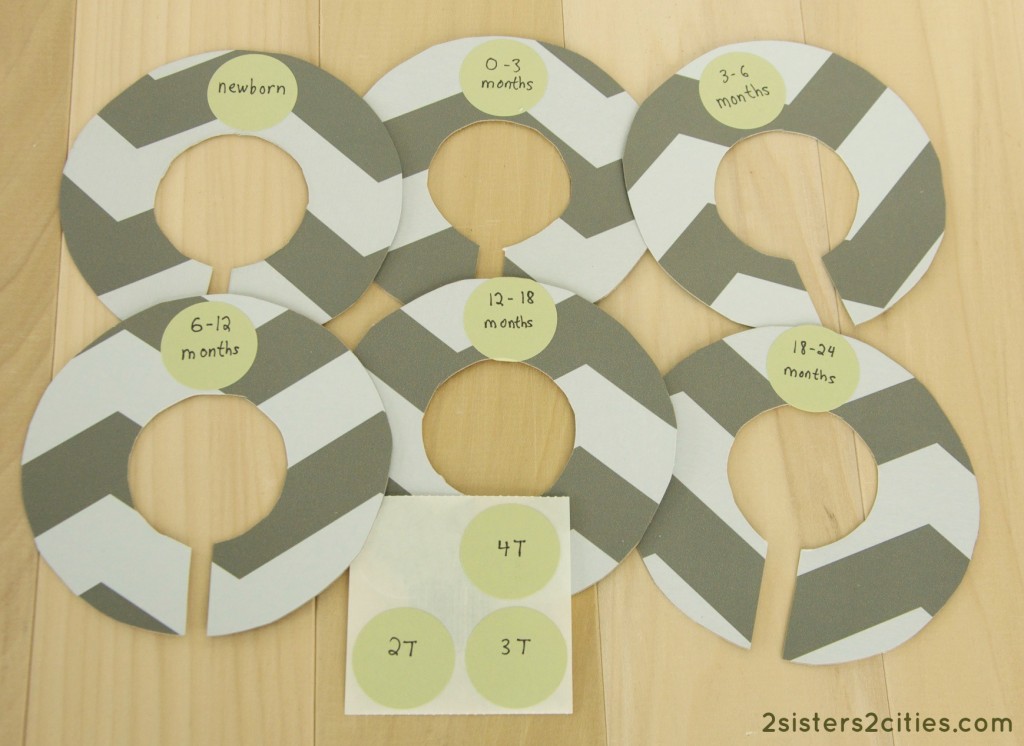
I wanted to share one of the latest baby projects that I just finished- DIY baby closet dividers.  These baby closet dividers are all the rage on etsy and I was originally going to just buy some.  I realized they would be fairly easy to make myself however so I decided to give it a try.  I had a few rolls of gray chevron contact paper that I picked up at Marshall’s a few months ago and I had put them aside for any projects that might come up.  I decided this paper would be perfect for making my own baby closet dividers.  {Side note: I’m not sure I’ve mentioned this in a past post, I decided to decorate this baby’s nursery in dark gray, bright green, and white.  Check out this post for a peek at baby T’s airplane-themed nursery that I did a few years ago.}

DIY Baby Closet Dividers

Materials
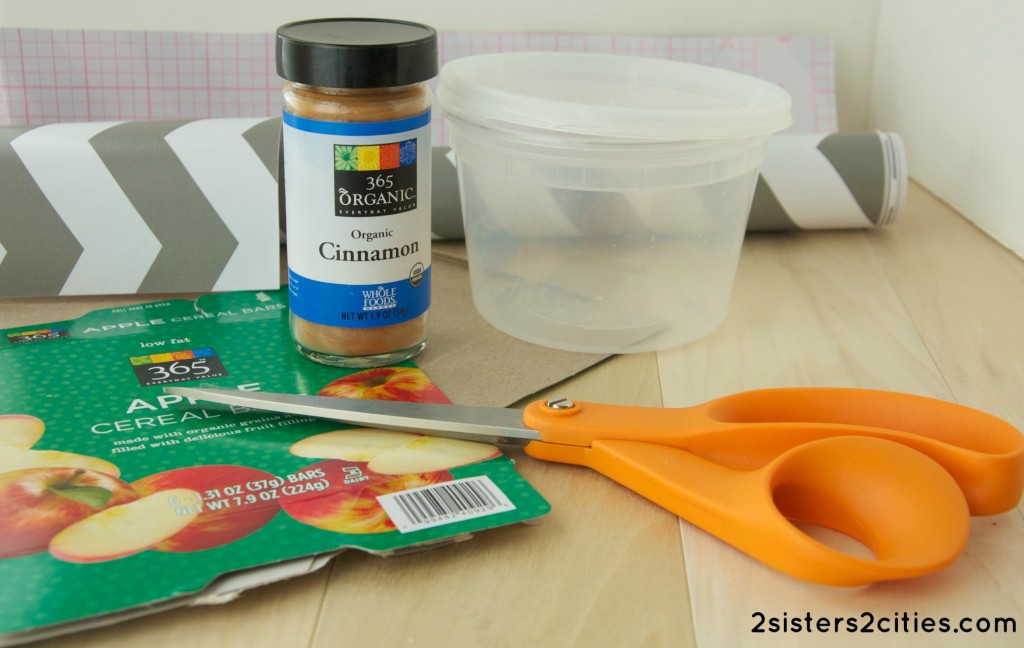
Materials for DIY Baby Closet Dividers

  • empty cereal, cracker, or snack cardboard boxes
  • large circle trace (I used a plastic take-out container)
  • small circle trace (I used a spice jar)
  • pencil
  • scissors
  • decorative contact paper
  • stickers or labels

Instructions

DIY Baby Closet Dividers {from 2 Sisters 2 Cities}

  1. Use the scissors to cut two large squares out of the decorative contact paper (make sure the squares are larger than the large circle trace you plan on using.)
  2. Remove the backing from the contact paper and place on both sides of a flat piece of cardboard.  The squares should match up so that when you cut a circle out of the cardboard, the contact paper will fully cover the circle on both sides.
  3. Using a pencil and large circle trace, trace a circle on one side of the square contact paper.  Then, using the small circle trace, trace a small circle in the middle of the large circle that you just traced.
  4. With your scissors, follow the large circle trace and cut the large circle from the piece of cardboard.  Then, cut two small even slits to cut out the small circle trace from the center.  Neaten any edges so that both circles appear even and smooth.
  5. Repeat this process 5-8 times depending on how many baby closet dividers you want to make.  (I made six of them since I will likely be storing away the baby clothes once the baby grows out of them.  I will then change the sticker out on the divider for a larger clothes size.)
  6. Label 6-9 stickers with common baby clothes sizes: newborn, 0-3 months, 3-6 months, 6-12 months, 12-18 months, 18-24 months, 2T, 3T, and 4T.  Apply sticker or label to top of clothes dividers.
  7. Hang in closet and organize baby’s clothes by size!
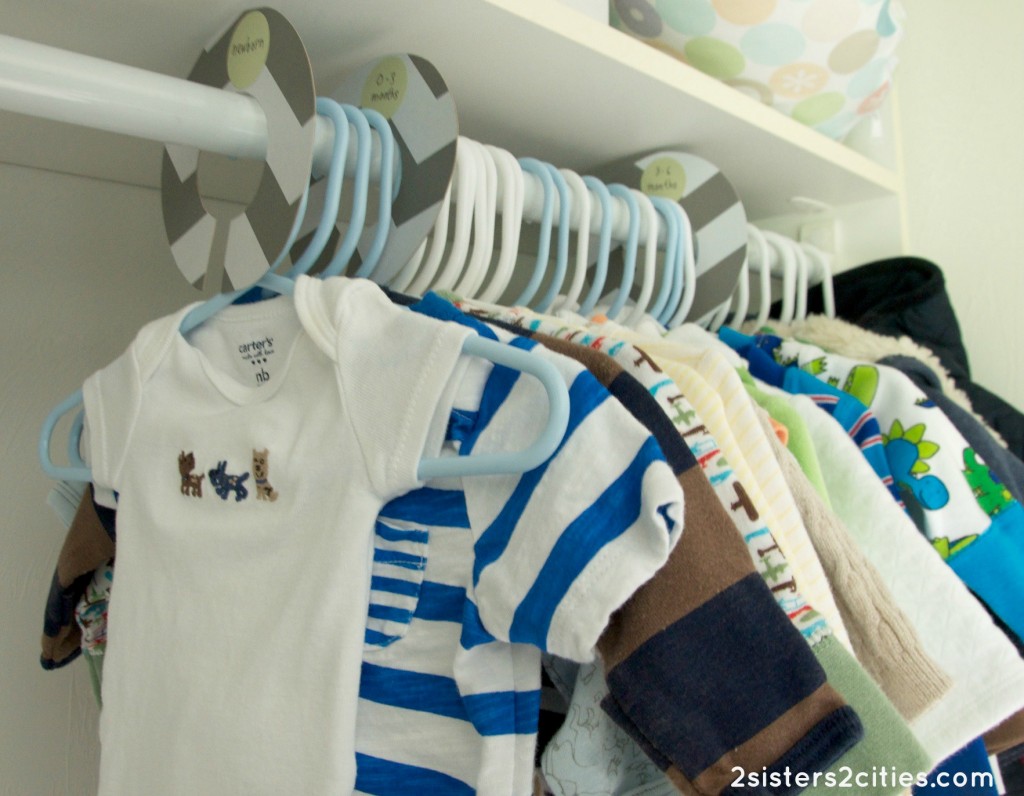
Baby Closet Dividers {from 2 Sisters 2 Cities}

I love how this project turned out!  Plus, I love being able to look at that first newborn onesie every time I open the closet door- I can never get over how little and cute newborn clothes are.  It barely even fits on the mini hanger!

T never had a closet in our city condo since the closet in his nursery served as my husband’s main closet.  I used a lot of baskets to divide his clothes by size and type and stored them on a bookshelf.  While that system worked well, I really like having everything organized and hanging in a closet this time around.  It’s much easier to visualize what I have by size with everything in sight.  I still need to do a little more organizing once I move the dresser and changing table into this room, but it’s come a long way from the catch-all closet it used to be.
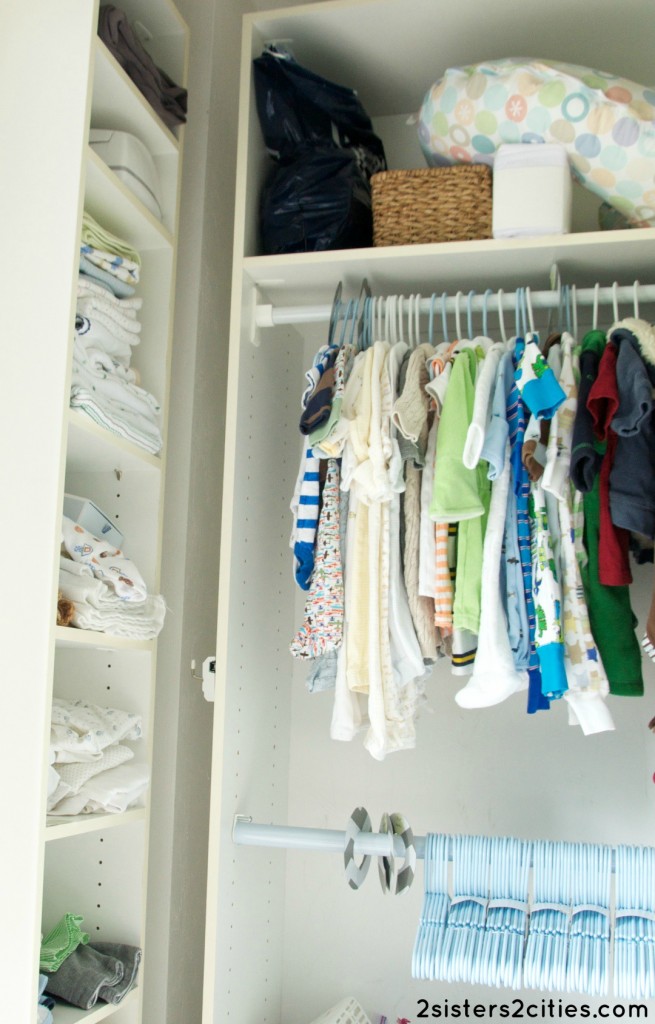
Baby Nursery Closet

Have you ever seen an idea on Etsy or a retail store that you decided to make yourself?

sister m signature


Filed Under: Crafting & DIY, M's post Tagged With: baby, baby #2, baby closet dividers, baby clothes, baby's nursery, closet organization, DIY projects, etsy, getting organized, getting ready for baby, nesting, nursery, nursery storage, preparing for baby

Gender Reveal Cupcakes

Posted by 2 Sisters 2 Cities on January 24, 2013

The big day has arrived and we finally found out what the gender of baby #2 was this morning!  Thank you so much to everyone who entered our  Oh Baby $25 Amazon Gift Card Giveaway and left their prediction.  I loved reading everyone’s comments and guesses as to whether the baby was going to be a boy or a girl.  Congrats to the winner of the gift card, Krystal M.!

I wanted to announce the baby’s gender in a special way- through a cupcake recipe!  I have seen so many cute ideas for gender reveals and wanted to fill a cupcake with either pink or blue frosting so you discover the baby’s gender with your first sweet bite of cupcake.  I think most people have the ultrasound technician write down the gender and put it in a sealed envelope, which then goes to the baker to make the appropriately-filled cupcakes.  I, however, needed to know the gender the very second it was possible for me to know.  I thought it would be really fun to try making these cupcakes myself and share the recipe/tutorial on 2S2C!

Before I share the final gender reveal, I did a little number crunching from the gender prediction comments in the giveaway.  51.4% of you predicted a girl, while 49.6% predicted a boy.

OK, who’s ready for the big reveal?  Is baby #2 going to be a boy or girl?  Team pink or team blue?

Are you sure you are ready?

Would you like to make one final guess?

3, 2, 1…

.

.

.

.

gender reveal cupcakes

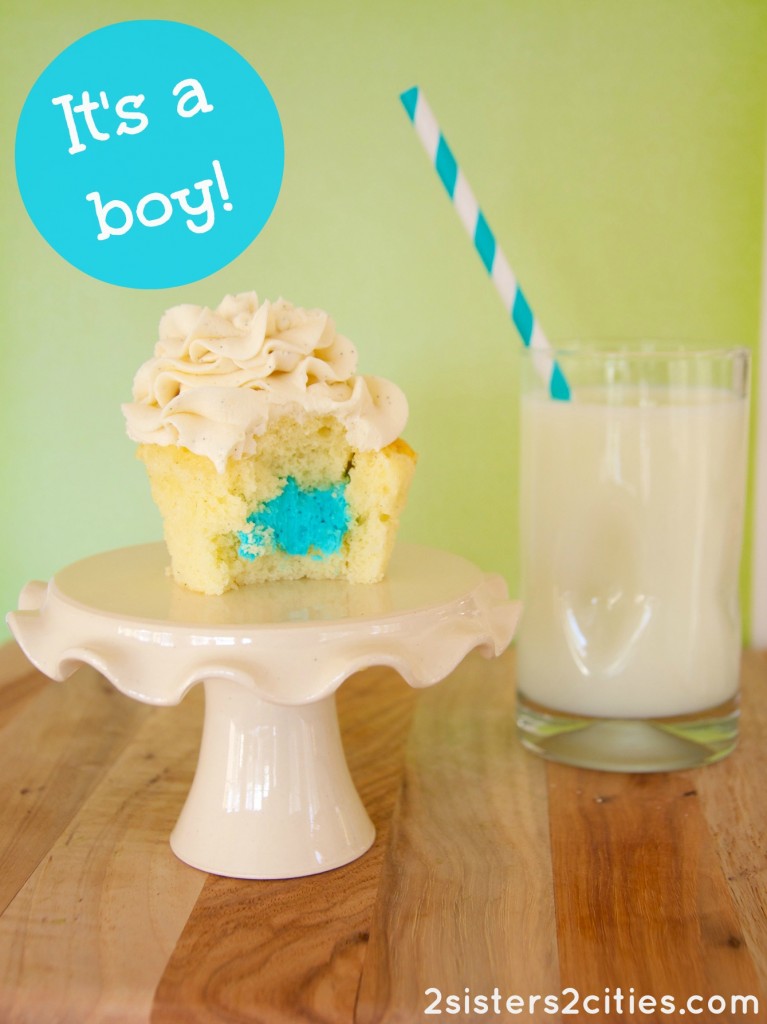
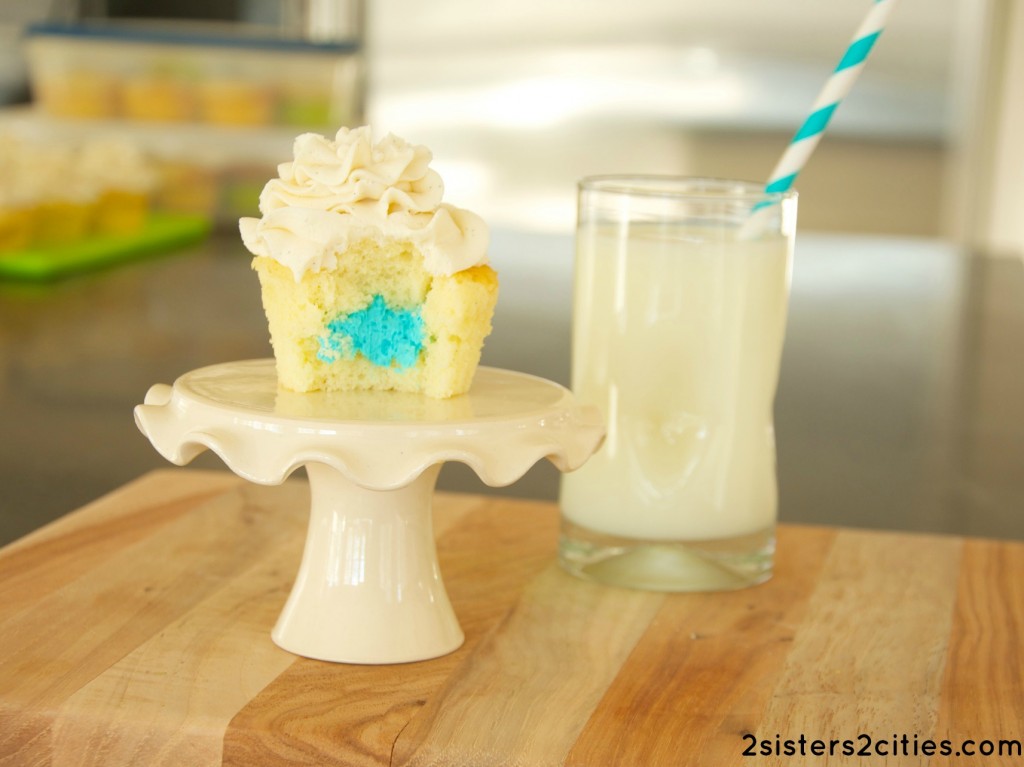
 Yes, it’s going to be another crazy little boy in our household!  Baby T is going to love having a little brother (I hope!)  While part of me hoped the baby was going to be a girl, I pretty much knew it was going to another bouncing baby boy.  Many of you mentioned with your prediction that you have to give a lot of credit to mother’s intuition and I definitely have thought that this pregnancy feels very similar to the last.  With two boys, I have a feeling the next few years (or 18) will be very active ones- please feel free to send any unused Starbucks cards my way!  Hopefully the two of them will be best of friends.

I put together a picture tutorial of how I made these cupcakes.  I just happened to find a little tool that made a hole in the cupcakes when I was in Marshall’s the other day.  It was only $2 so I picked it up, but you certainly would be able to do the same thing with a small paring knife.  Here are the six steps you need to take to enjoy your gender reveal cupcakes:

Gender Reveal Cupcakes Tutorial {from 2 Sisters 2 Cities}

I opted for a vanilla bean cupcake and vanilla bean buttercream frosting so the blue would really shine through.  I also just bought a huge bag of vanilla beans on-line for ice cream making and I wanted to try it with baking.

gender reveal cupcakes

Print
Prep time:  1 hour
Cook time:  25 mins
Total time:  1 hour 25 mins
 
Ingredients
Vanilla Bean Cupcakes
  • 3 cups cake flour
  • 1 tablespoon baking powder
  • ½ teaspoon salt
  • 1 vanilla bean, split lengthwise and seeds scraped out
  • ½ cup of unsalted butter (2 sticks), at room temperature
  • 2 cups sugar
  • 5 eggs, at room temperature
  • 1 and ¼ cups buttermilk (I did not have buttermilk so I used mixed up a powder buttermilk with water)
  • 1 tablespoon vanilla extract
Whipped Vanilla Buttercream
  • 1 and ½ cups butter, plus 2 tablespoons (3 sticks, plus 3 tbsp.), at room temperature
  • 3 cups confectioners' sugar, sifted
  • pinch of salt
  • 1 vanilla bean, split lengthwise and seeds scraped out
  • 2 tablespoons heavy cream
  • 1 tablespoon vanilla extract
Instructions
Vanilla Bean Cupcakes
  1. Preheat the oven to 350 degrees Fahrenheit. Prepare two cupcakes pans by lining them with (gender neutral!) paper liners.
  2. In a medium-sized bowl, whisk together the flour, baking powder, and salt. Set flour mixture aside. Meanwhile, add the butter to the bowl of an electric mixer and scrape the vanilla bean seeds into the bow. Using the paddle attachment, beat the butter and vanilla mixture for 3 minutes on medium-high speed. Periodically scrape down the bowl.
  3. Add the sugar to the butter mixture, one cup at a time. Beat for 1 minute after each cup. Add the eggs and continue to mix one at a time. In a liquid measuring cup, combine the buttermilk and vanilla extract. Add a bit of liquid mixture and flour mixture to the butter mixture and allow to incorporate after each addition. Continue to add the liquid and flour mixture until it all has been added to the cupcake batter.
  4. Pour the batter into the prepared baking cup liners about ⅔rd of the way through (you may end up with extra batter.) Bake for about 20 minutes, or until a toothpick entered in the center of each cupcake comes out clean. Allow to cool in the pan for a few minutes and then transfer to a cooling rack. Let cupcakes cook completely before frosting.
Whipped Vanilla Buttercream
  1. Place the butter in the bowl of an electric mixer. With the whisk attachment, blend the butter on medium-high speed for about a minute. Add the scraped out vanilla bean seeds and salt to the butter mixture and continue to whisk for another minute. Add the heavy cream and vanilla, scrape down the sides of the bowl, and continue to whip the frosting for another 4 minutes on high speed.
  2. To make gender reveal cupcakes, remove about ¾ of the vanilla bean frosting and add it to an icing bag. With the remaining ¼ of the frosting, add either blue or pink food coloring for the cupcakes' inner filling. Once completely blended, add blue/pink frosting to a second icing bag.
  3. Using a cupcake corer tool or a small paring knife, cut a hole on the top center of each cupcake. Carefully remove cupcake core and fill with blue or pink frosting. Add cupcake core back to the top of the cupcake and pat it down. Frost the top of the cupcake with the white vanilla bean icing.
3.2.1337

Source: Vanilla Bean Cupcake and Whipped Vanilla Buttercream slightly adapted from Annie’s Eats

Was your prediction correct?!?

sister m signature


Filed Under: M's Desserts, M's recipes Tagged With: baby #2, baby announcement, baby shower, boy, gender reveal, gender reveal cupcake tutorial, gender reveal cupcakes, getting ready for baby, girl, having a baby, how to make gender reveal cupcakes, it's a boy!, it's a girl!, team blue, team pink, vanilla bean cupcakes, whipped vanilla buttercream

Oh baby…

Posted by 2 Sisters 2 Cities on January 17, 2013

oh baby giveaway

So, I have a little announcement to make on 2 Sisters 2 Cities today…I’m having another baby!  And to celebrate, we are hosting a $25 Amazon Gift Card giveaway over the course of the next week!  Just enter through the Wafflecopter widget below and leave a comment with your guess as to whether I’m having a boy or girl.  There is also a chance to earn bonus entries by following 2S2C on Facebook, Twitter, Pinterest, Google+, RSS, and/or e-mail.  A winner will be picked at random so you don’t have to guess correctly, but it will be fun to see which way the votes sway!  We’ll be finding out the baby’s gender next Thursday and I’ll  be doing a special baking-related gender reveal at that point.

Some data points to assist with your baby gender guess:

  • My two-year old son, Baby T, is a boy.
  • I’m one of four girls.  My husband is an only child.
  • The Chinese gender calendar predicts girl.
  • My main pregnancy craving has been ice cream (thank goodness for the new ice cream maker K got my for Christmas!)  My last pregnancy, I craved salty snacks.
  • My intuition says it’s going to be a boy.

My due date is in late June which puts me in pretty much the same pregnancy timeline as Kate Middleton, Jessica Simpson, and now Kim Kardashian.  I think it would be really fun for my baby to share the same birthdate as the royal baby (and not so much with the latter two!)

I can’t wait to see what everyone guesses!

a Rafflecopter giveaway

The Rules:   No entries will be accepted after January 24th, 2013 at 12:00 am, EST.  Entries that do not follow the entry requirements will not be considered.  One winner will be chosen at random and will be announced on January 24th, 2013.  (The winner does not have to guess the gender correctly to win.)  The chosen winner will then have 30 days to respond by e-mail to claim their prize.  Please note that this giveaway is fully sponsored by 2 Sisters 2 Cites.  Void where prohibited.

sister m signature


Filed Under: About 2 Sisters 2 Cities, M's post Tagged With: 2 Sisters 2 Cities giveaway, amazon, amazon gift card, announcement, baby, baby announcement, gender guess, gender reveal, getting ready for baby, giveaway, having a baby, team blue, team pink

Our New (Mini) Kitchen Table

Posted by 2 Sisters 2 Cities on February 18, 2012

Yesterday I took my very first trip to Ikea.  I had a lot of fun checking it out, but it was definitely overwhelming.  I had scoped out their website beforehand and had pretty much decided what I wanted already, but I wanted to see it in person first to make sure the quality was acceptable.  The main purpose of the trip was to pick up a few things for Baby T, but I’m already planning a return trip back to pick up some more things for the house.

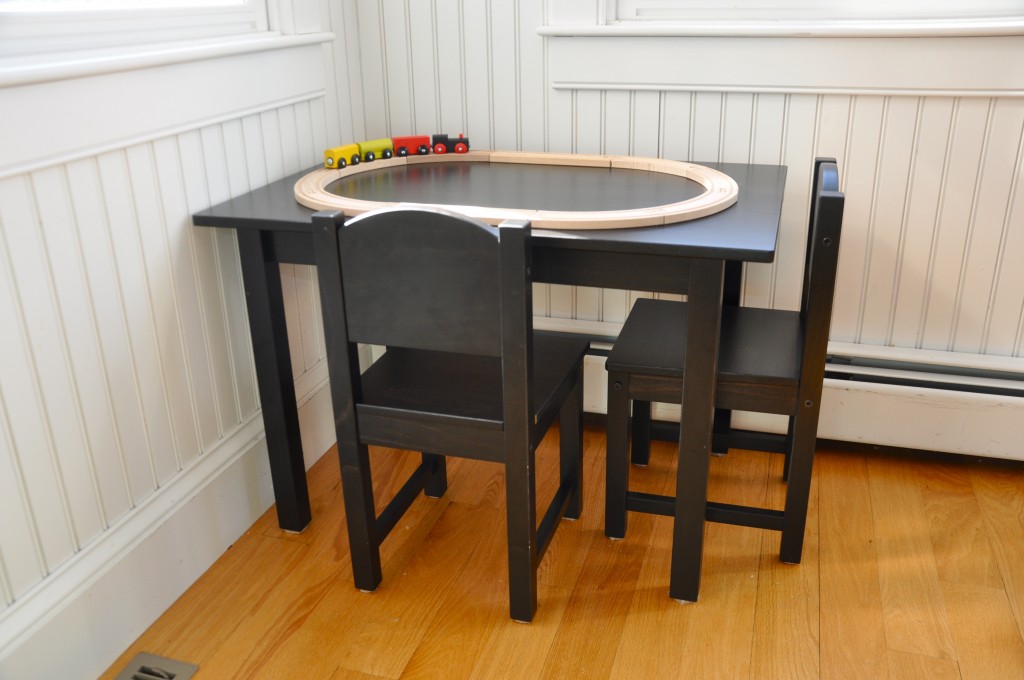
Baby T has a new found love of climbing.  His favorite thing to climb however is our kitchen table.  He pulls himself onto a chair and then the table (and he can do this very quickly.)  I decided to get him a children’s size table where he could eats snacks and play with toys.  I didn’t want to spend too much on the table since he’ll outgrow it pretty quickly and Ikea had just the thing…the Sundvik table and matching chairs:

How cute is that little train set as well?  I was really impressed with the quality and price of their toys!  The Lillabo train set was only $9.99 and has 20 pieces (the picture does not include the bridge and 4 additional curvy pieces.)  I also got him some of the Duktig kitchen accessories to go with his play kitchen he got for Christmas.  In addition, I also picked up a few small wooden toys, the drawing paper roll, and the Busa play tunnel.  I probably went a bit overboard, but I could not get over the prices!

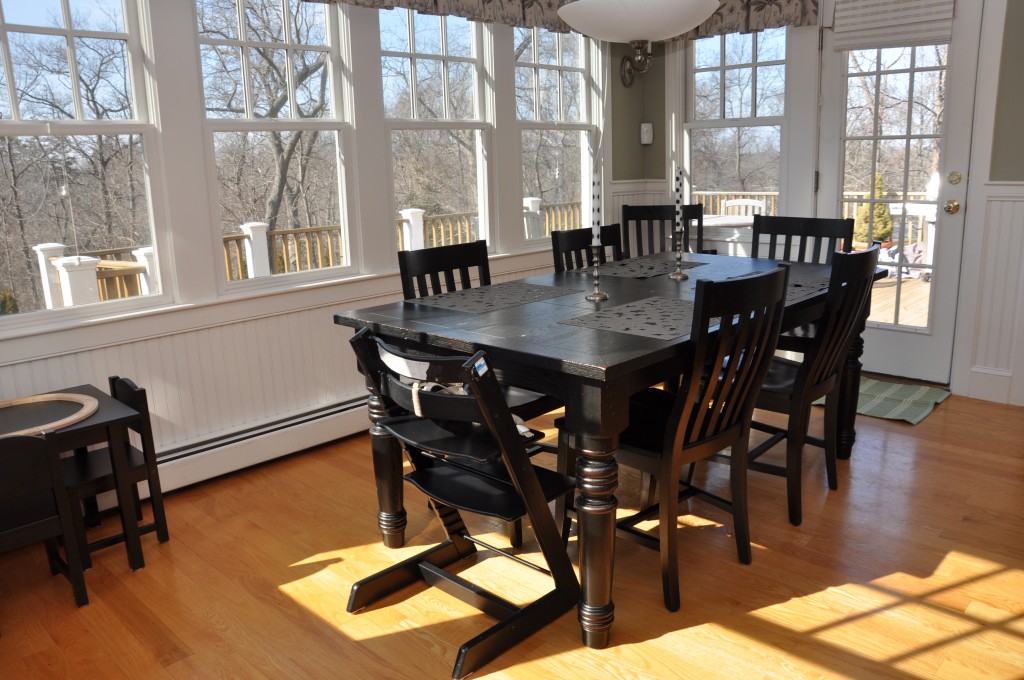
Here’s what the children’s table looks like next to our full-sized black kitchen table:

Hopefully the mini table is the antidote we need to solve our kitchen table climbing problem!
-m


Filed Under: Design & Decorating, M's post Tagged With: baby, baby t, baby's nursery, children's table, getting ready for baby, Ikea, kitchen, Sundvik children's table

Ready for Arrival: Airplane-Themed Nursery

Posted by Meaghan Barry on November 2, 2010

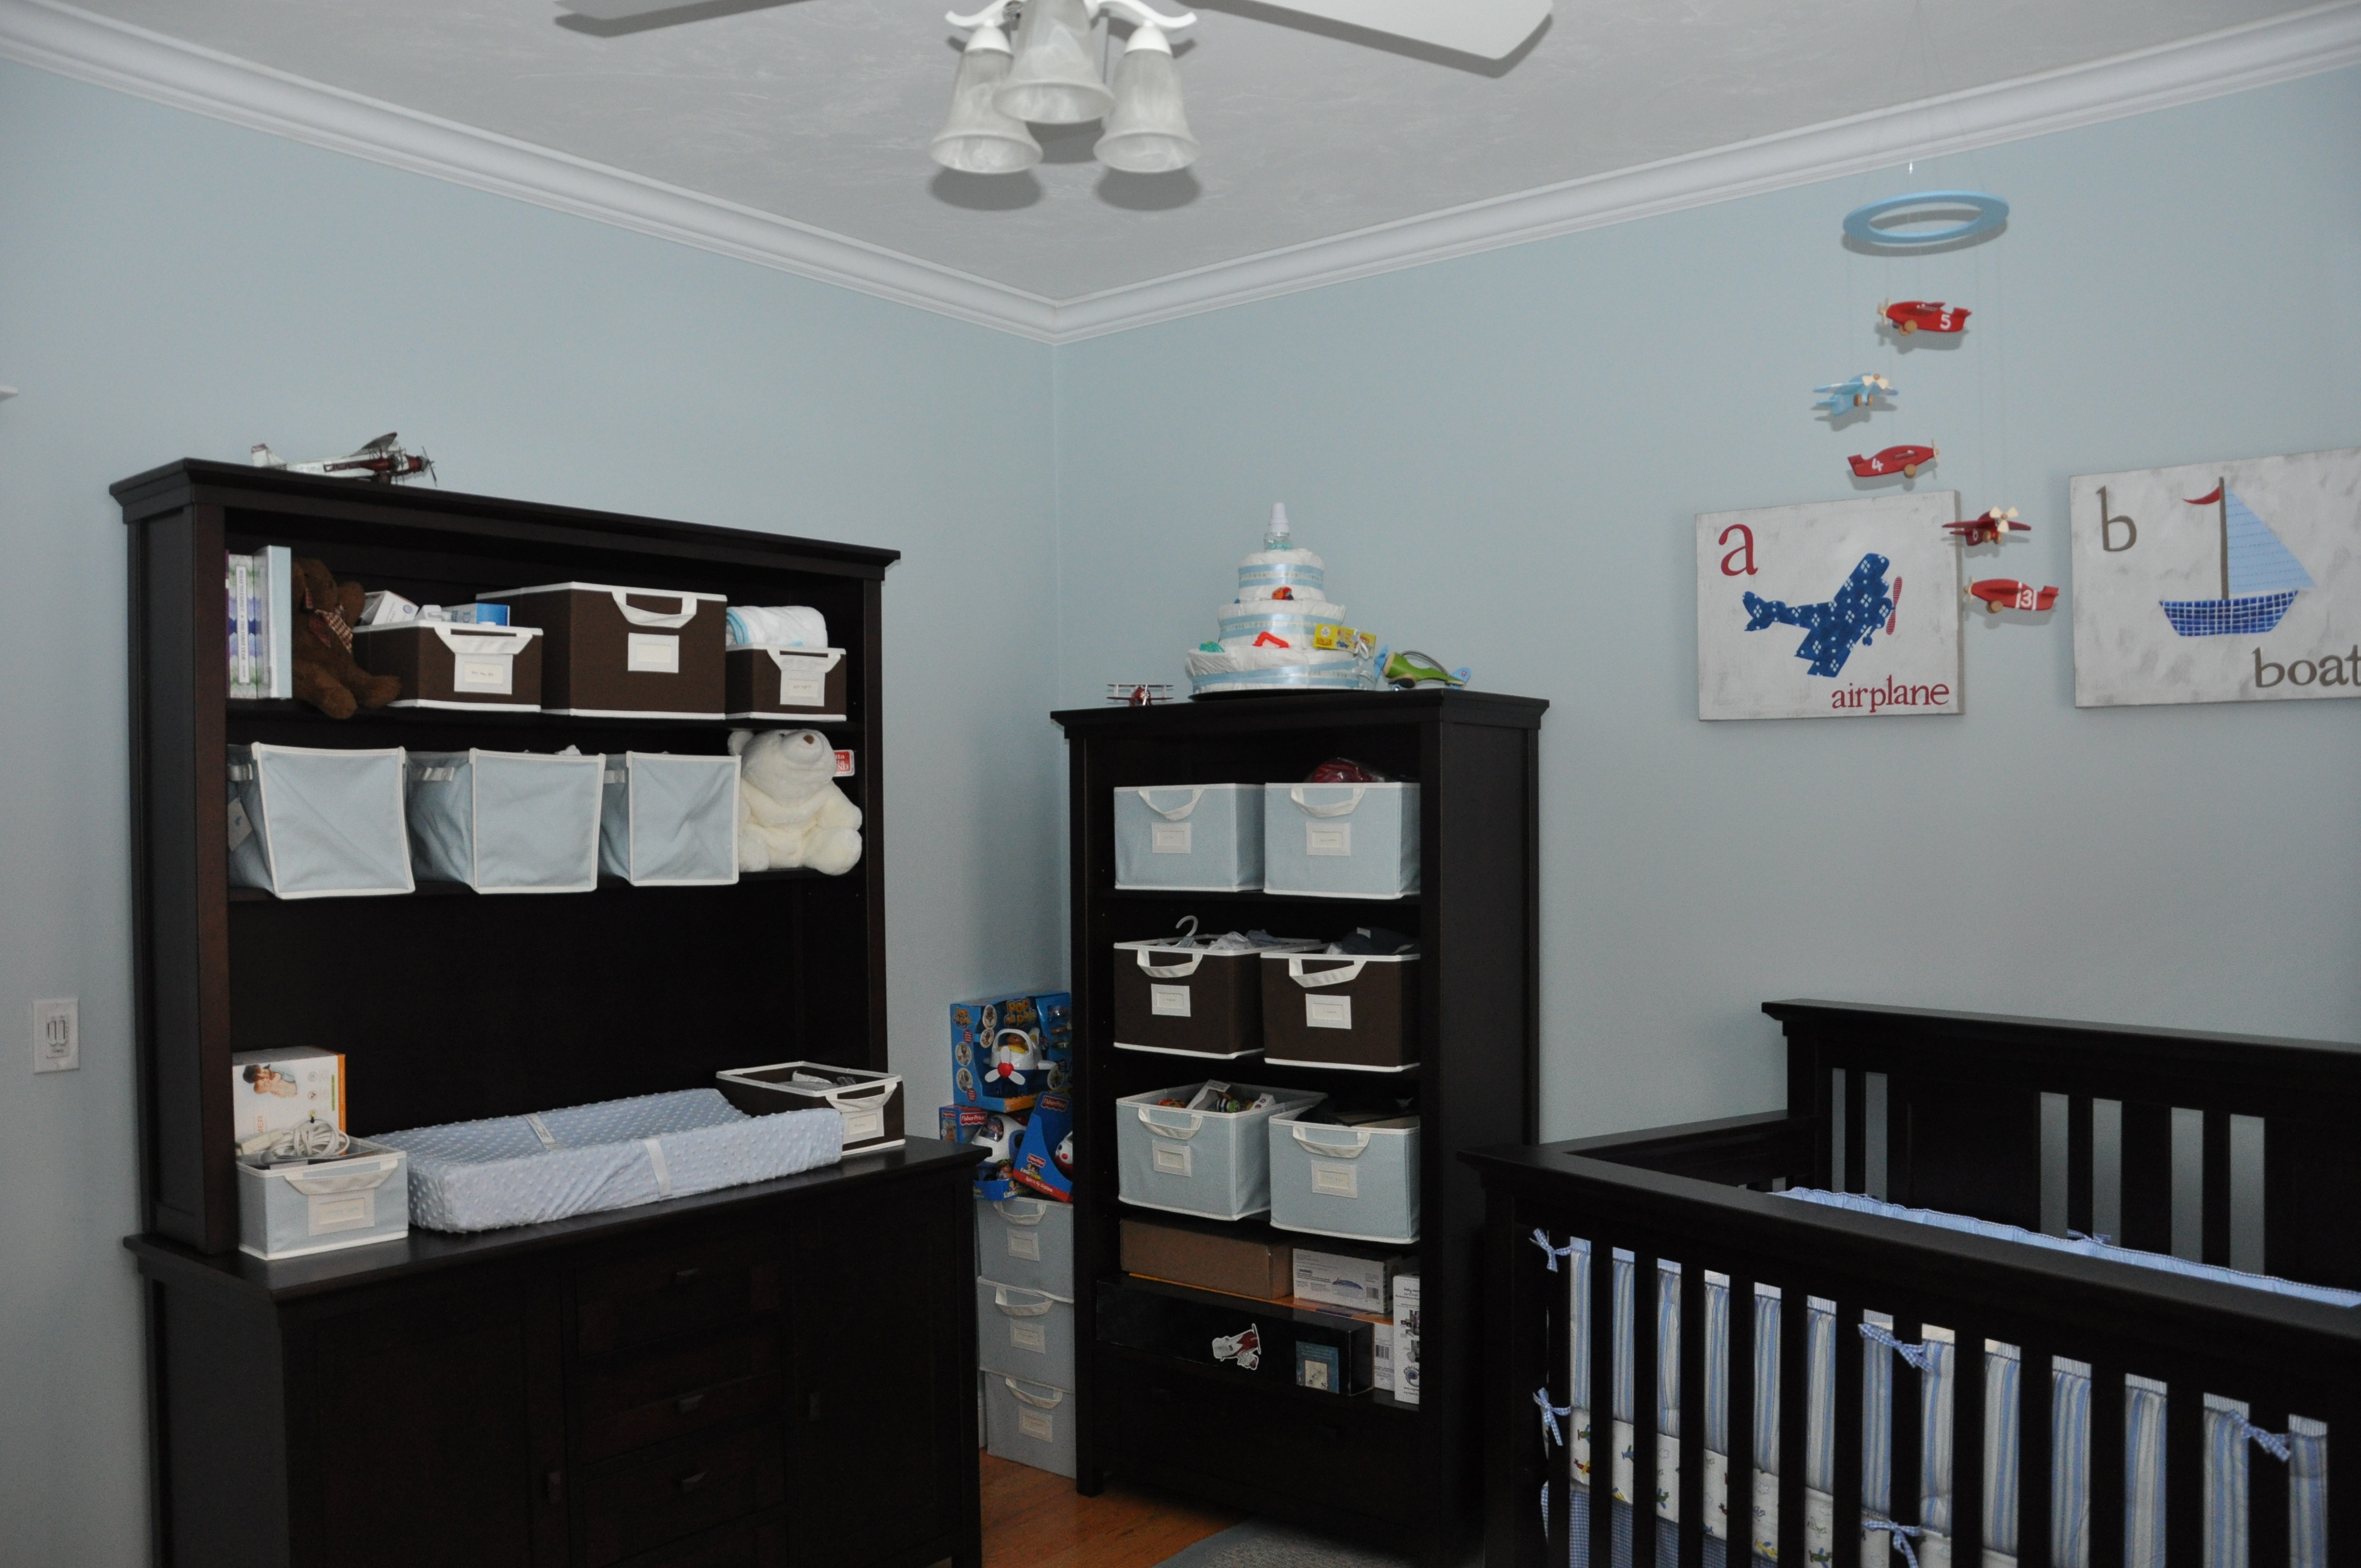
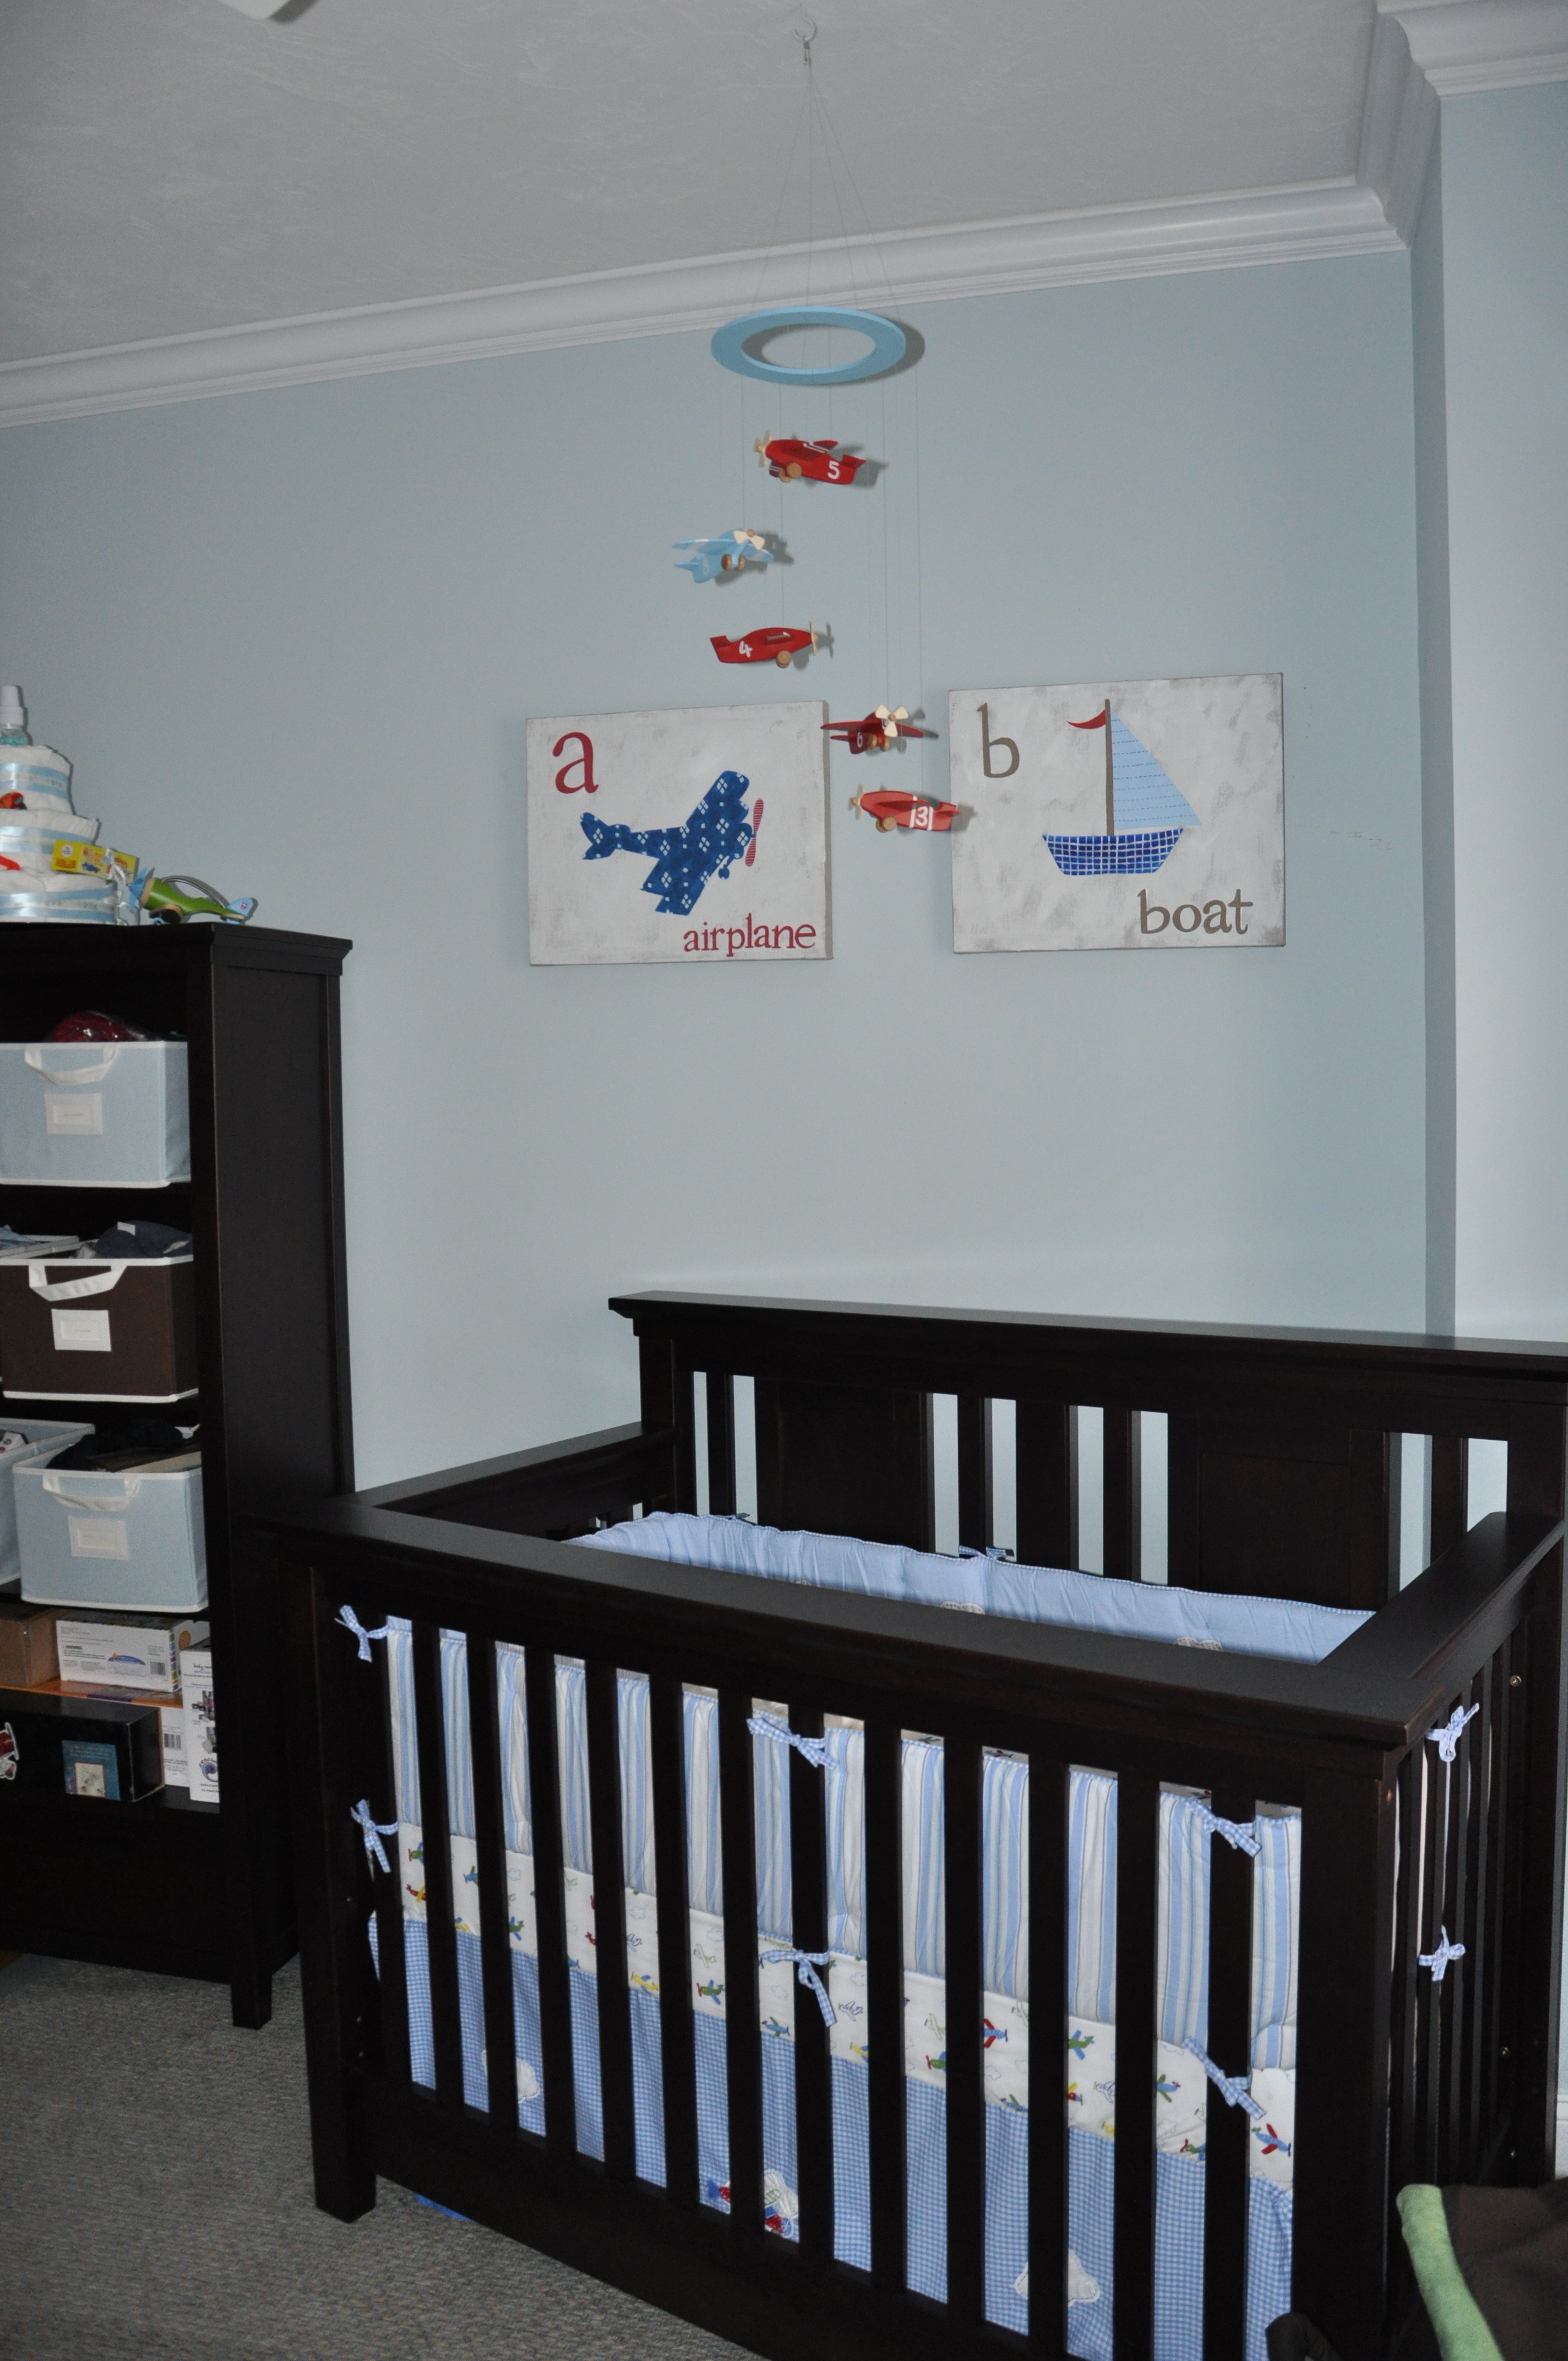
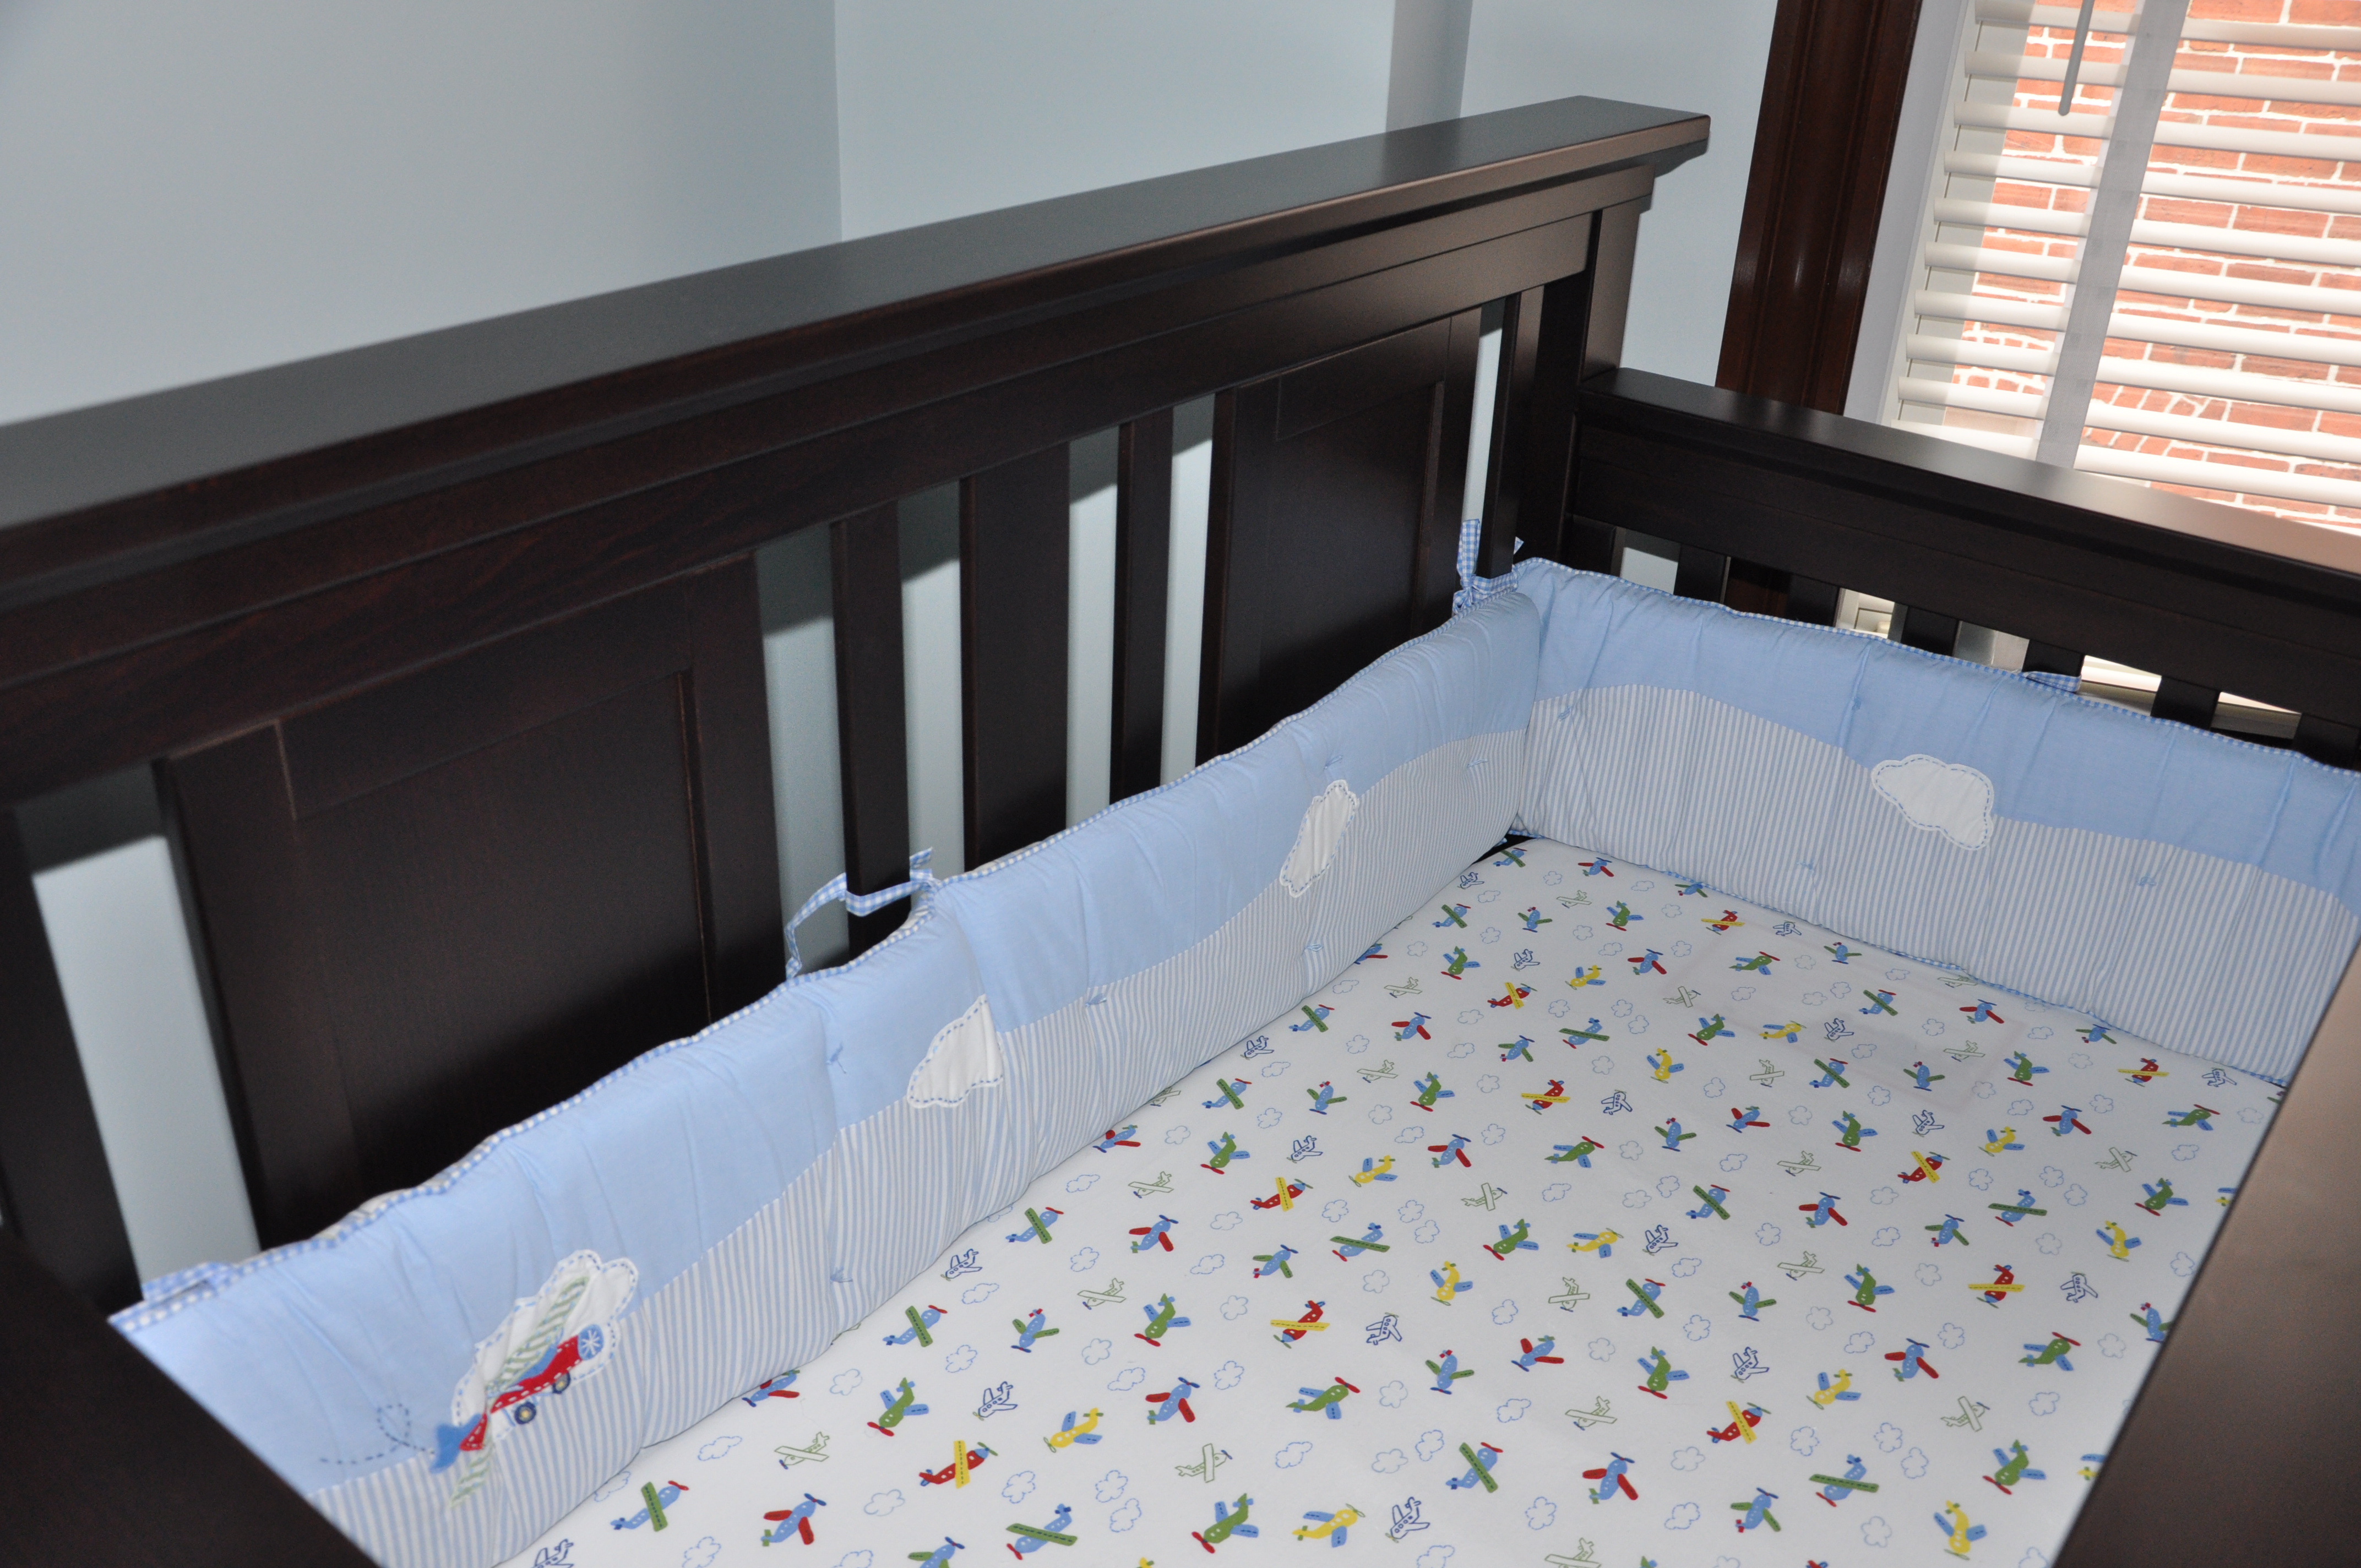
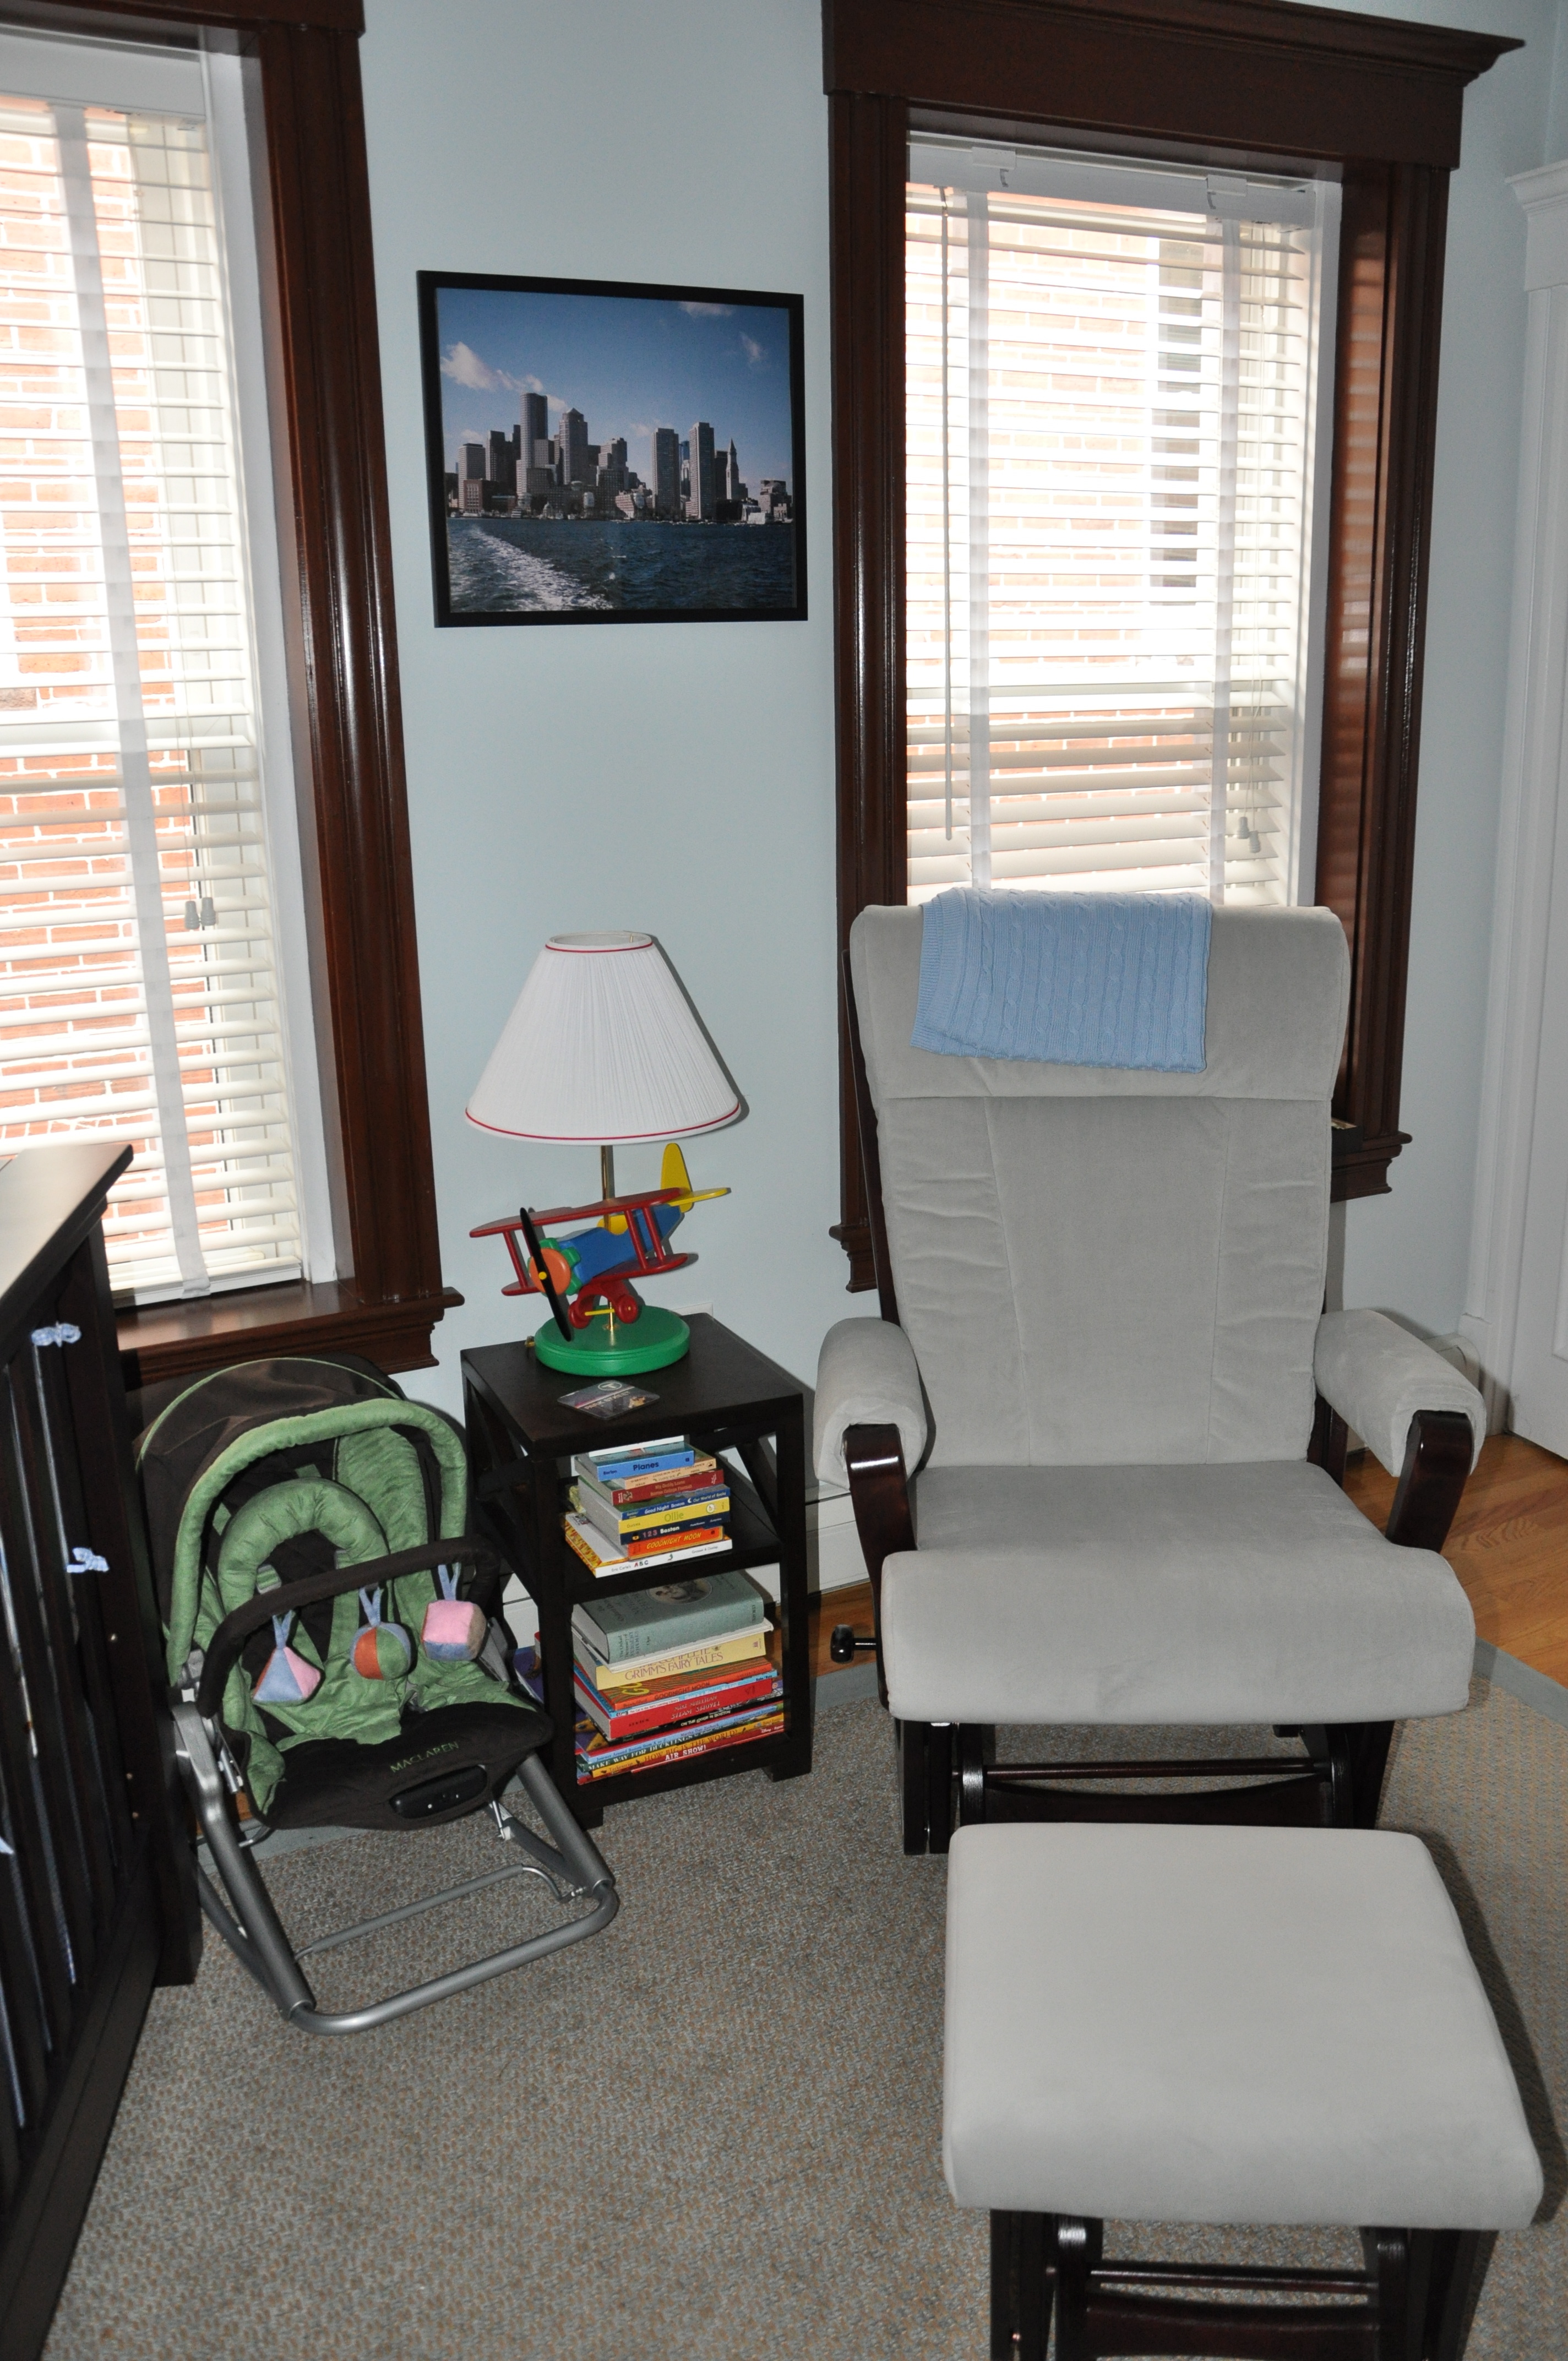
I’ve been on maternity leave for a little over a week now and I finally finished a few last minute touches to the baby’s nursery this morning.  I wanted to share some photos of the airplane-themed nursery that we put together.  Husband M and I decided (well, perhaps I decided) to go with an airplane theme as Husband M has loved planes since he was a little kid.  Growing up in London, his dad would take him to Heathrow every weekend to watch the planes take off.  When we were initially deciding on buying a place, I think one of the main selling points for South Boston  was its view of the runway approach to Logan Airport.  He spends half his summer up on the roof deck watching planes take off and land.  Hopefully our baby shares the same love of planes!

The final reveal:

airplane themed nursery

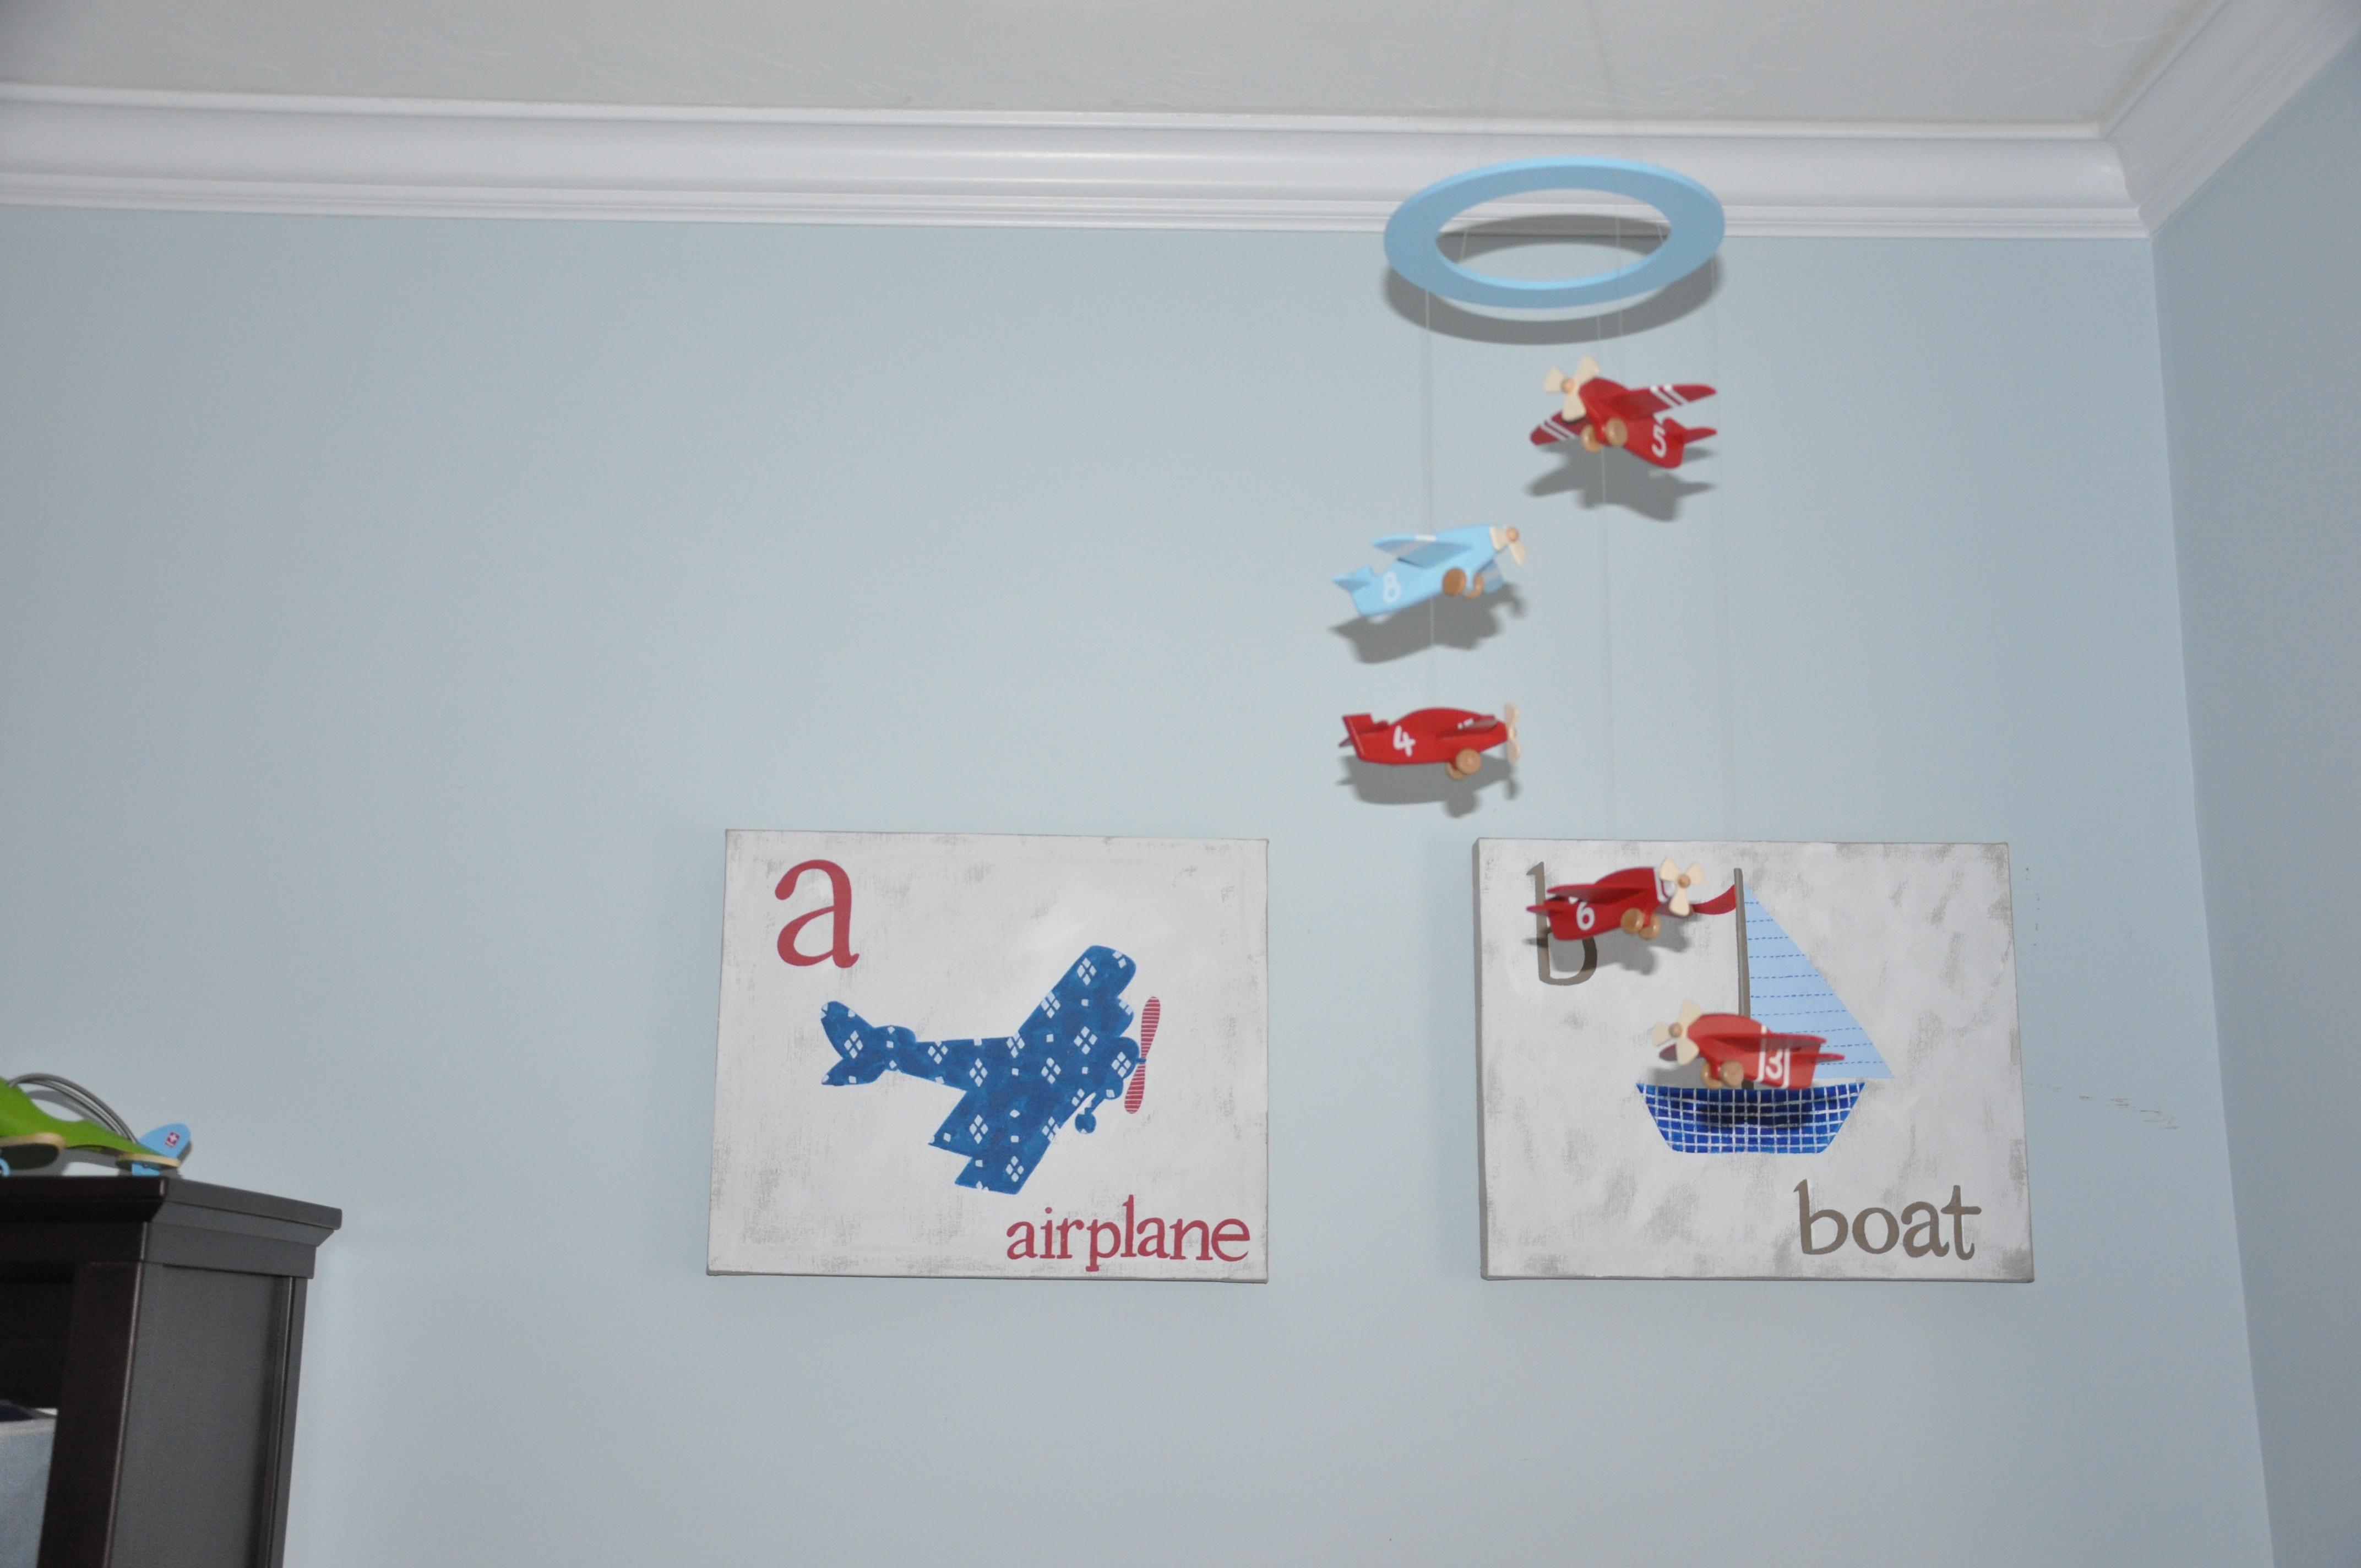
airplane mobile

airplane crib

We purchased all the furniture from Baby Furniture Warehouse in Braintree.  The crib, bookshelf, and baby station are from the Romina Karisma collection and the glider is from Dutalier.  The bedding, mobile, airplane & boat pictures, and storage containers are all from Pottery Barn Kids.  The airplane lamp was a gift from our good friends at Crescent Harbor Lighting.

As I reach the end of my to do list, all that is left is to wait for baby’s arrival.  Hopefully he is not following the trend of the airline industry and decides to come right on time!

-m


Filed Under: Design & Decorating, M's post Tagged With: airplane nursery, airplane-themed nursery, baby, baby's nursery, getting ready for baby, nursery, nursery design idea, plane nursery, preparing for baby

How to Make a Diaper Cake for a Baby Shower

Posted by Keelin Hollenbeck on October 20, 2010

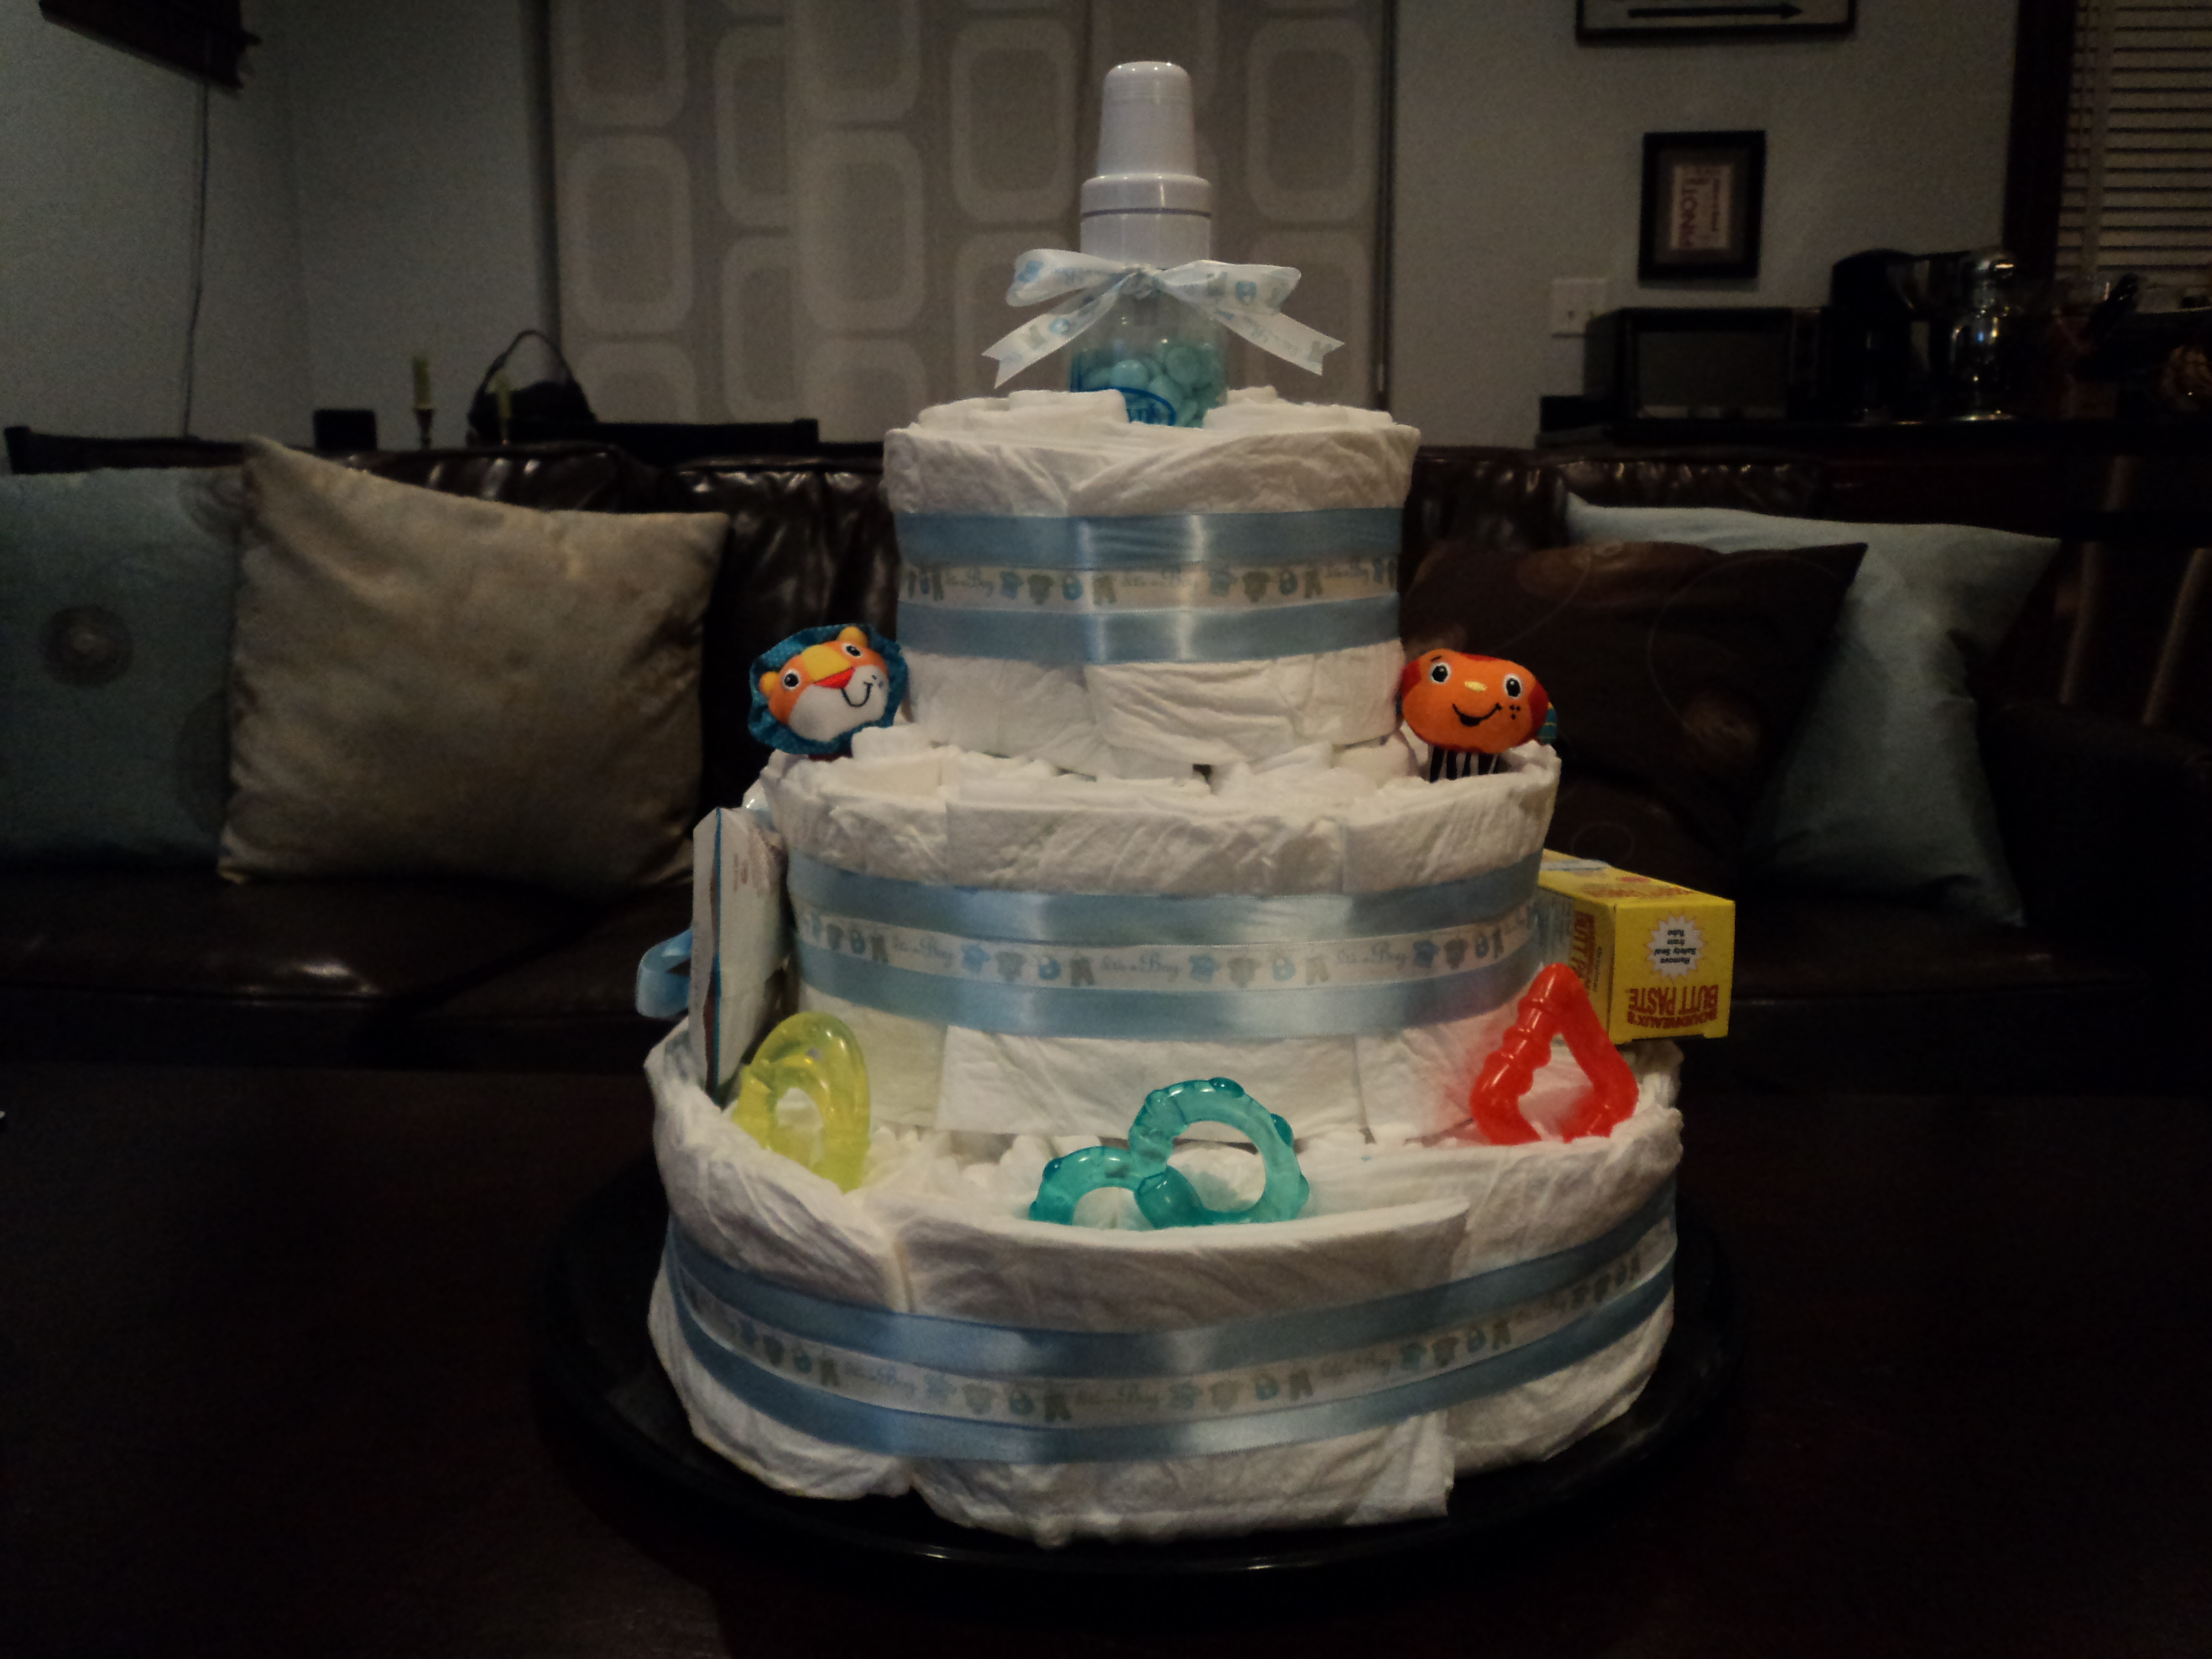
My little sister and I made a cake out of diapers for M’s baby shower.   My mom had the idea after seeing it at another baby shower.   She bought us all the supplies and we made it the night before M’s shower after looking at pictures of diaper cakes on-line.

Supplies (aka cake ingredients):

– about 100 diapers (we used the brands and size M asked for her on registry so she can actually use the diapers when baby is born)
– wooden skewer
– curling ribbon, string or rubber bands
– pretty ribbon (like thick pink or blue ribbon)
– large tray or cake plate (we used a large catering plastic plate)
– tape
– scissors
– small baby gifts/supplies- like a bottle, pacifiers, teething toys, rattles, and whatever you would like to anchor on your cake

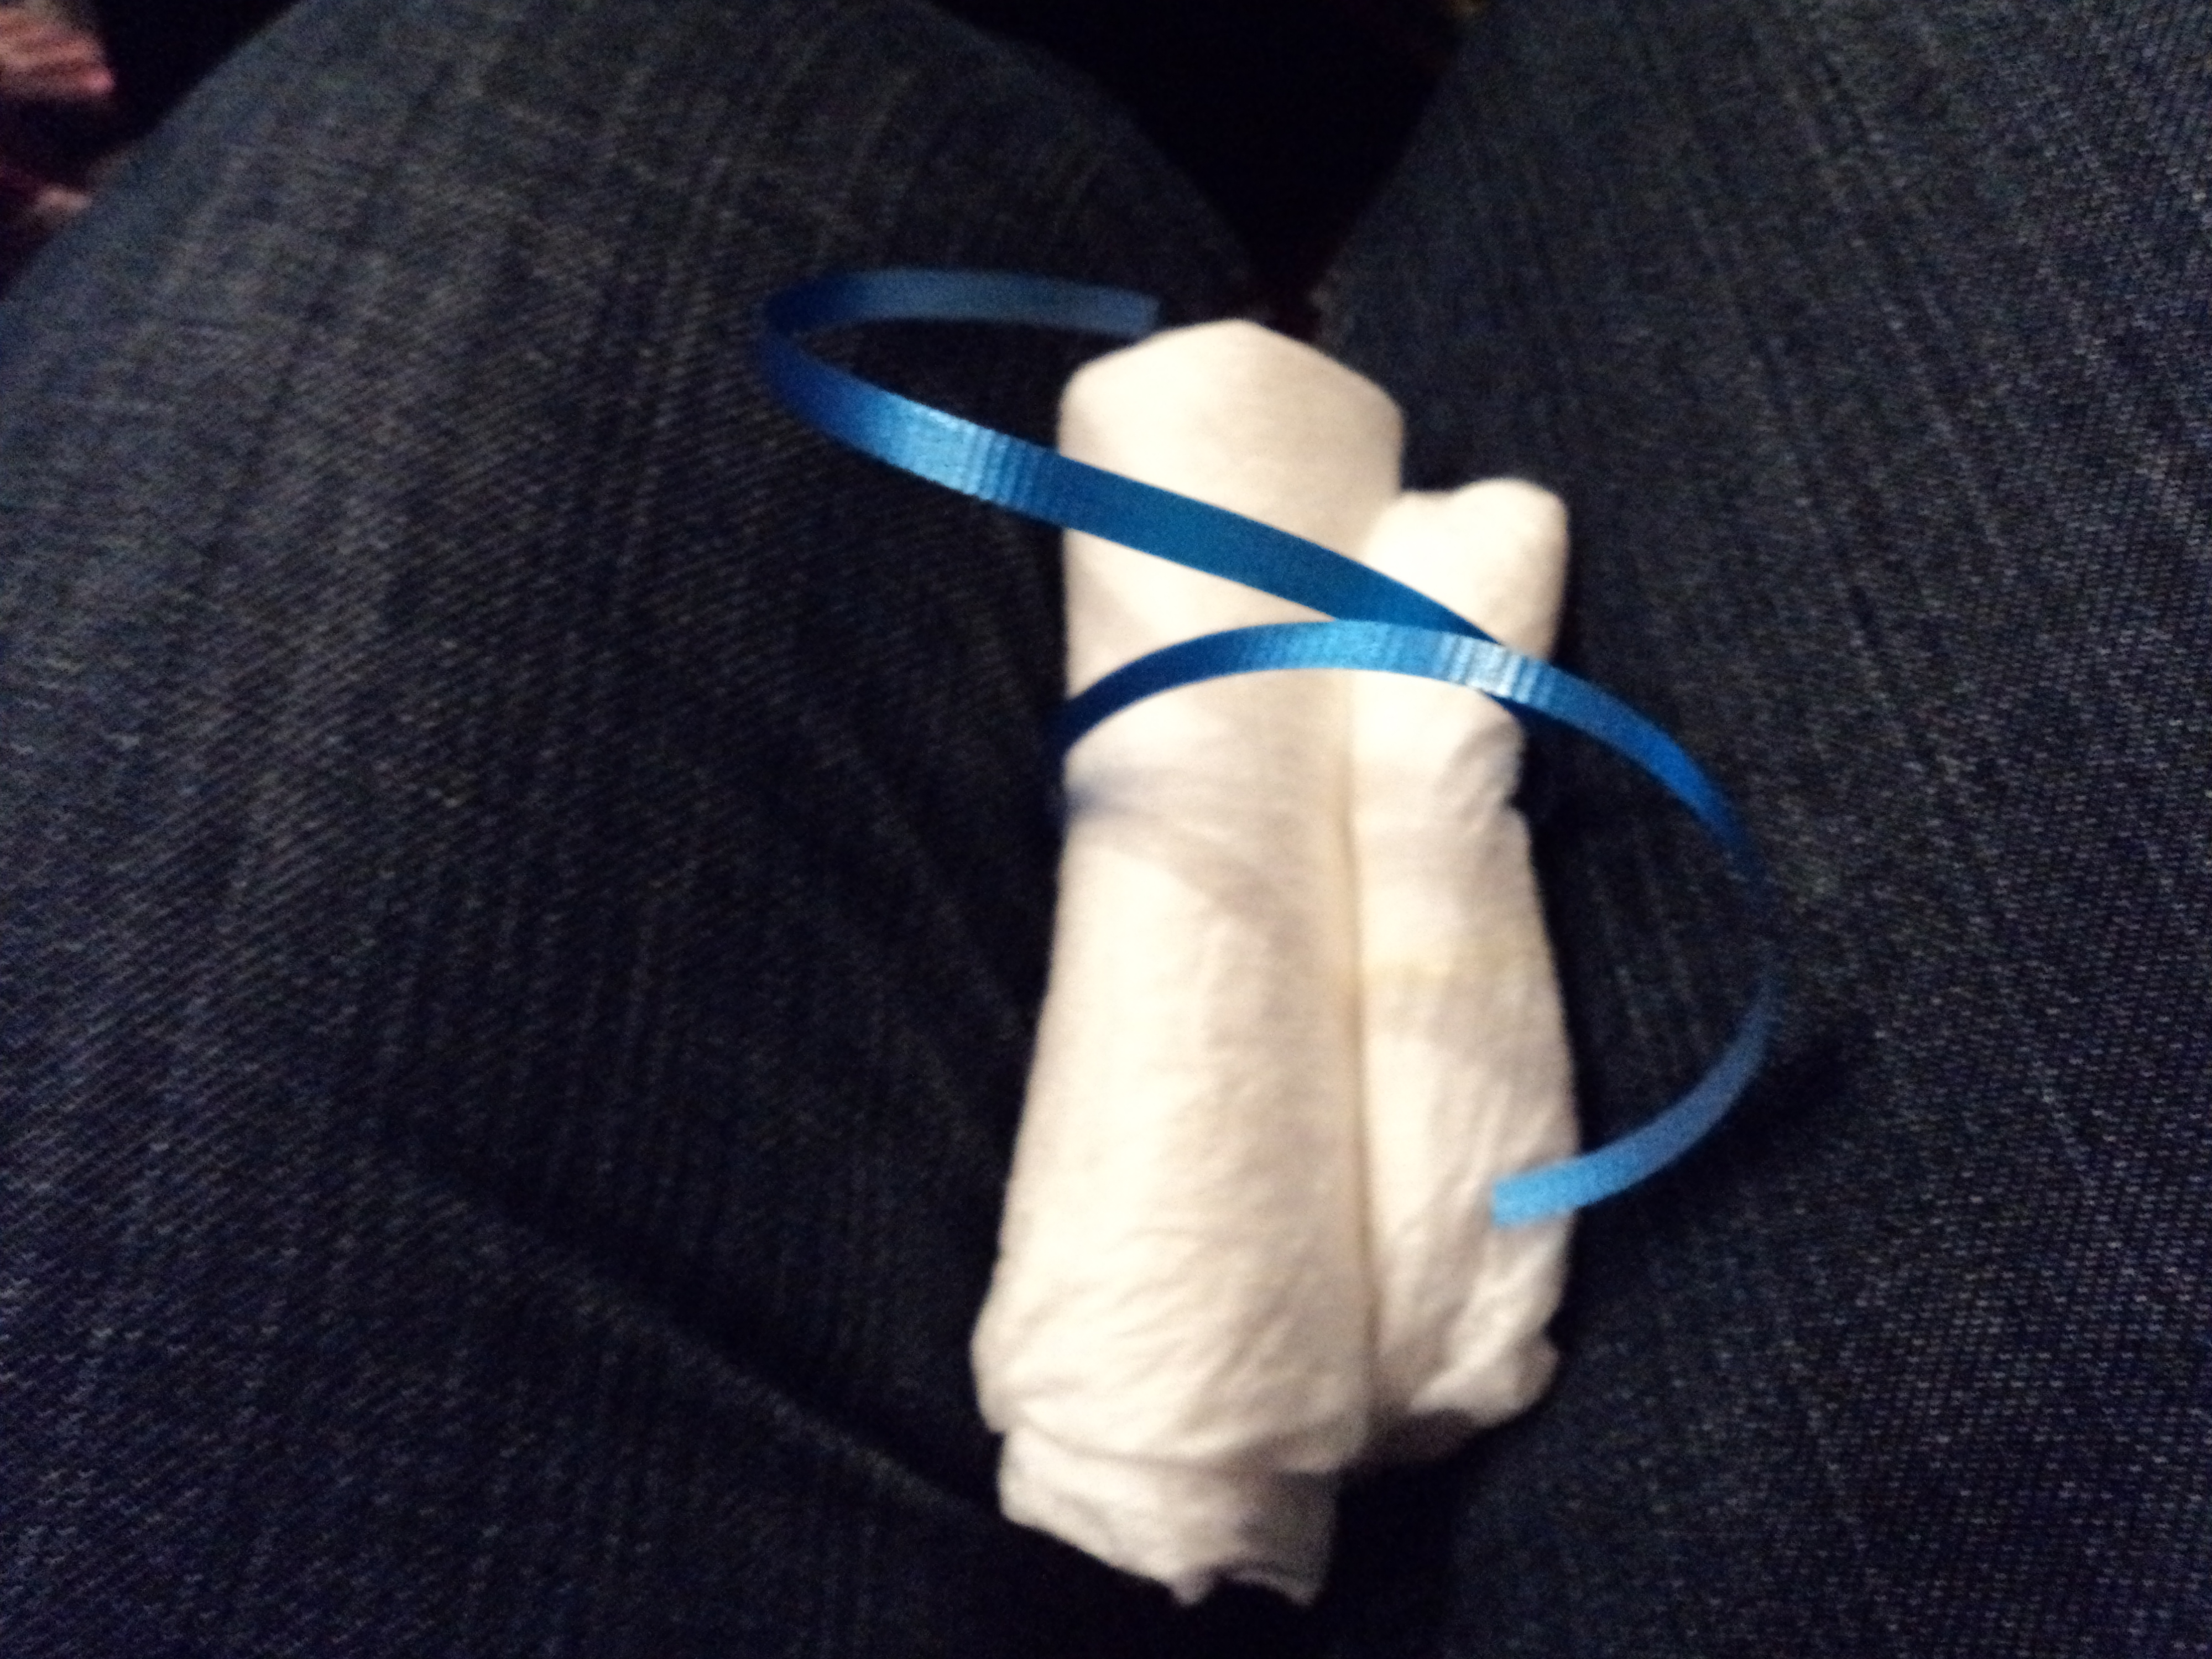
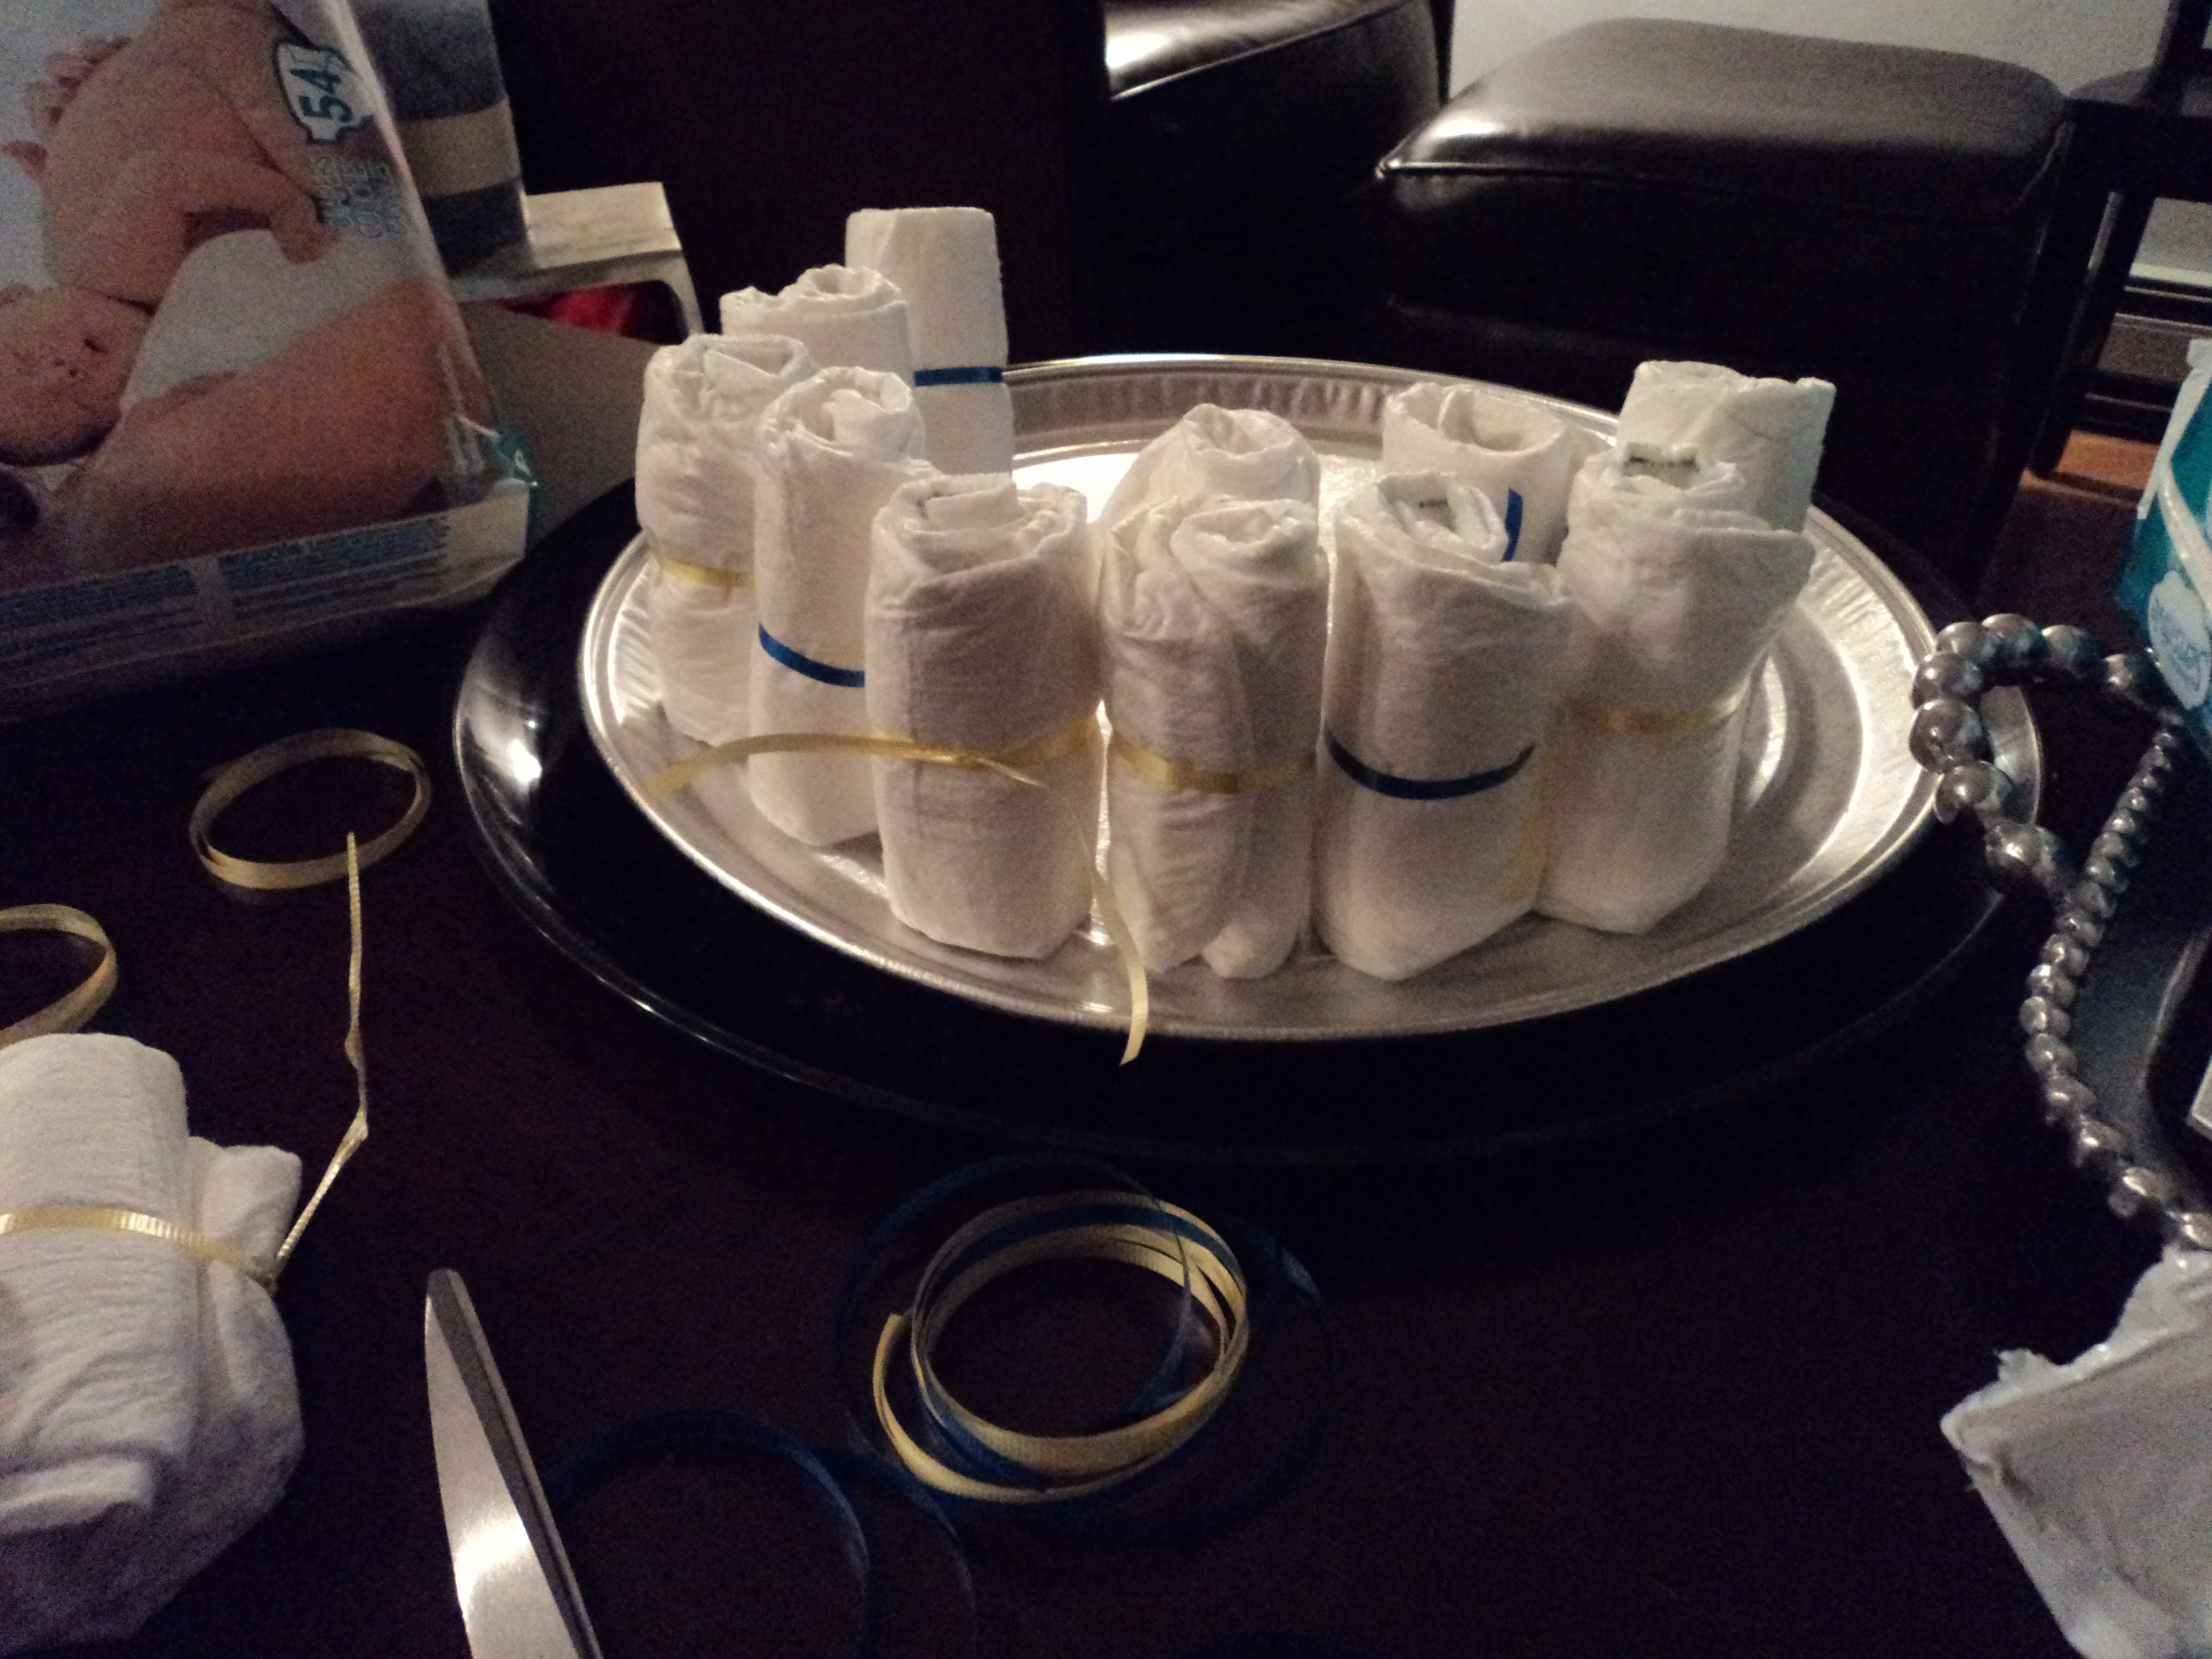
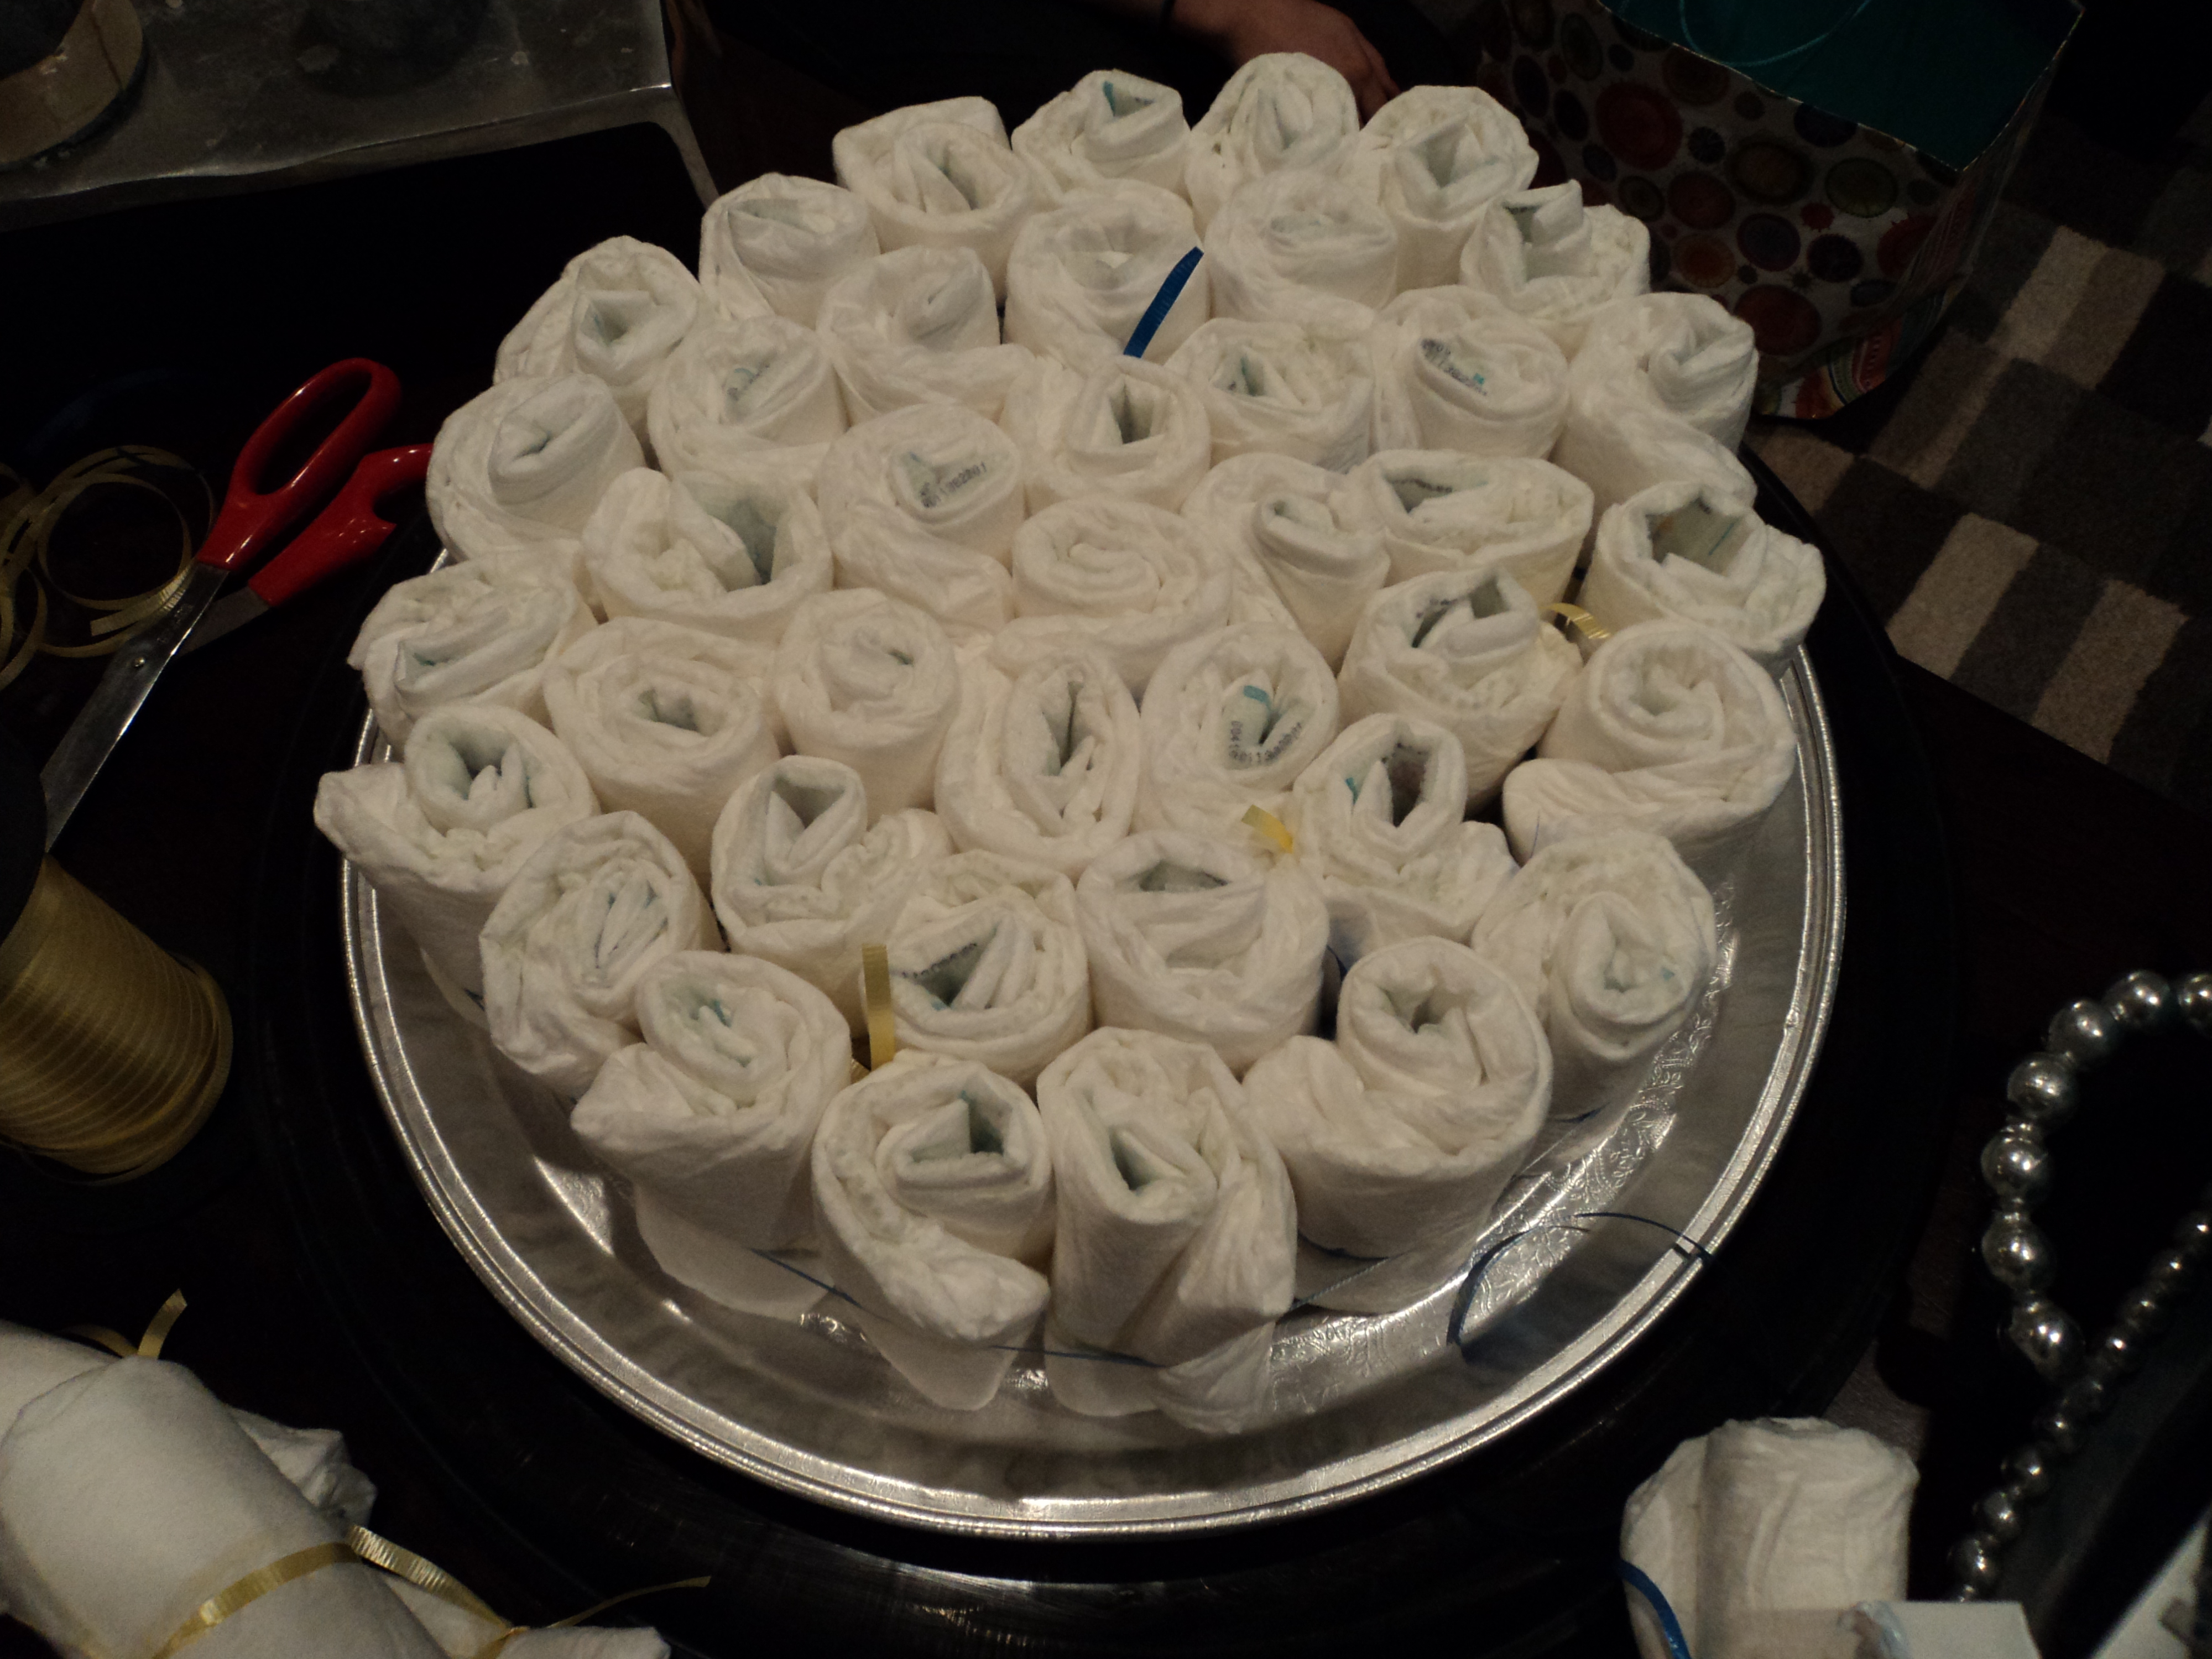
Start by rolling the diapers up, with the print to the inside (so you only see white)  and tie with the curling ribbon.   We found it easy to cut a bunch of curling ribbon to the right size in the beginning and then start rolling and tying the diapers up.

Keep tying the diapers until you can form about 12-15 together and to start the base. Tie curling ribbon around the 12-15 to hold them all together.  Next, start building around the bundle you have made until you have a base that fits your plate (or to whatever size you prefer).  Then, tie a larger curling ribbon around the outside to keep the whole base together.

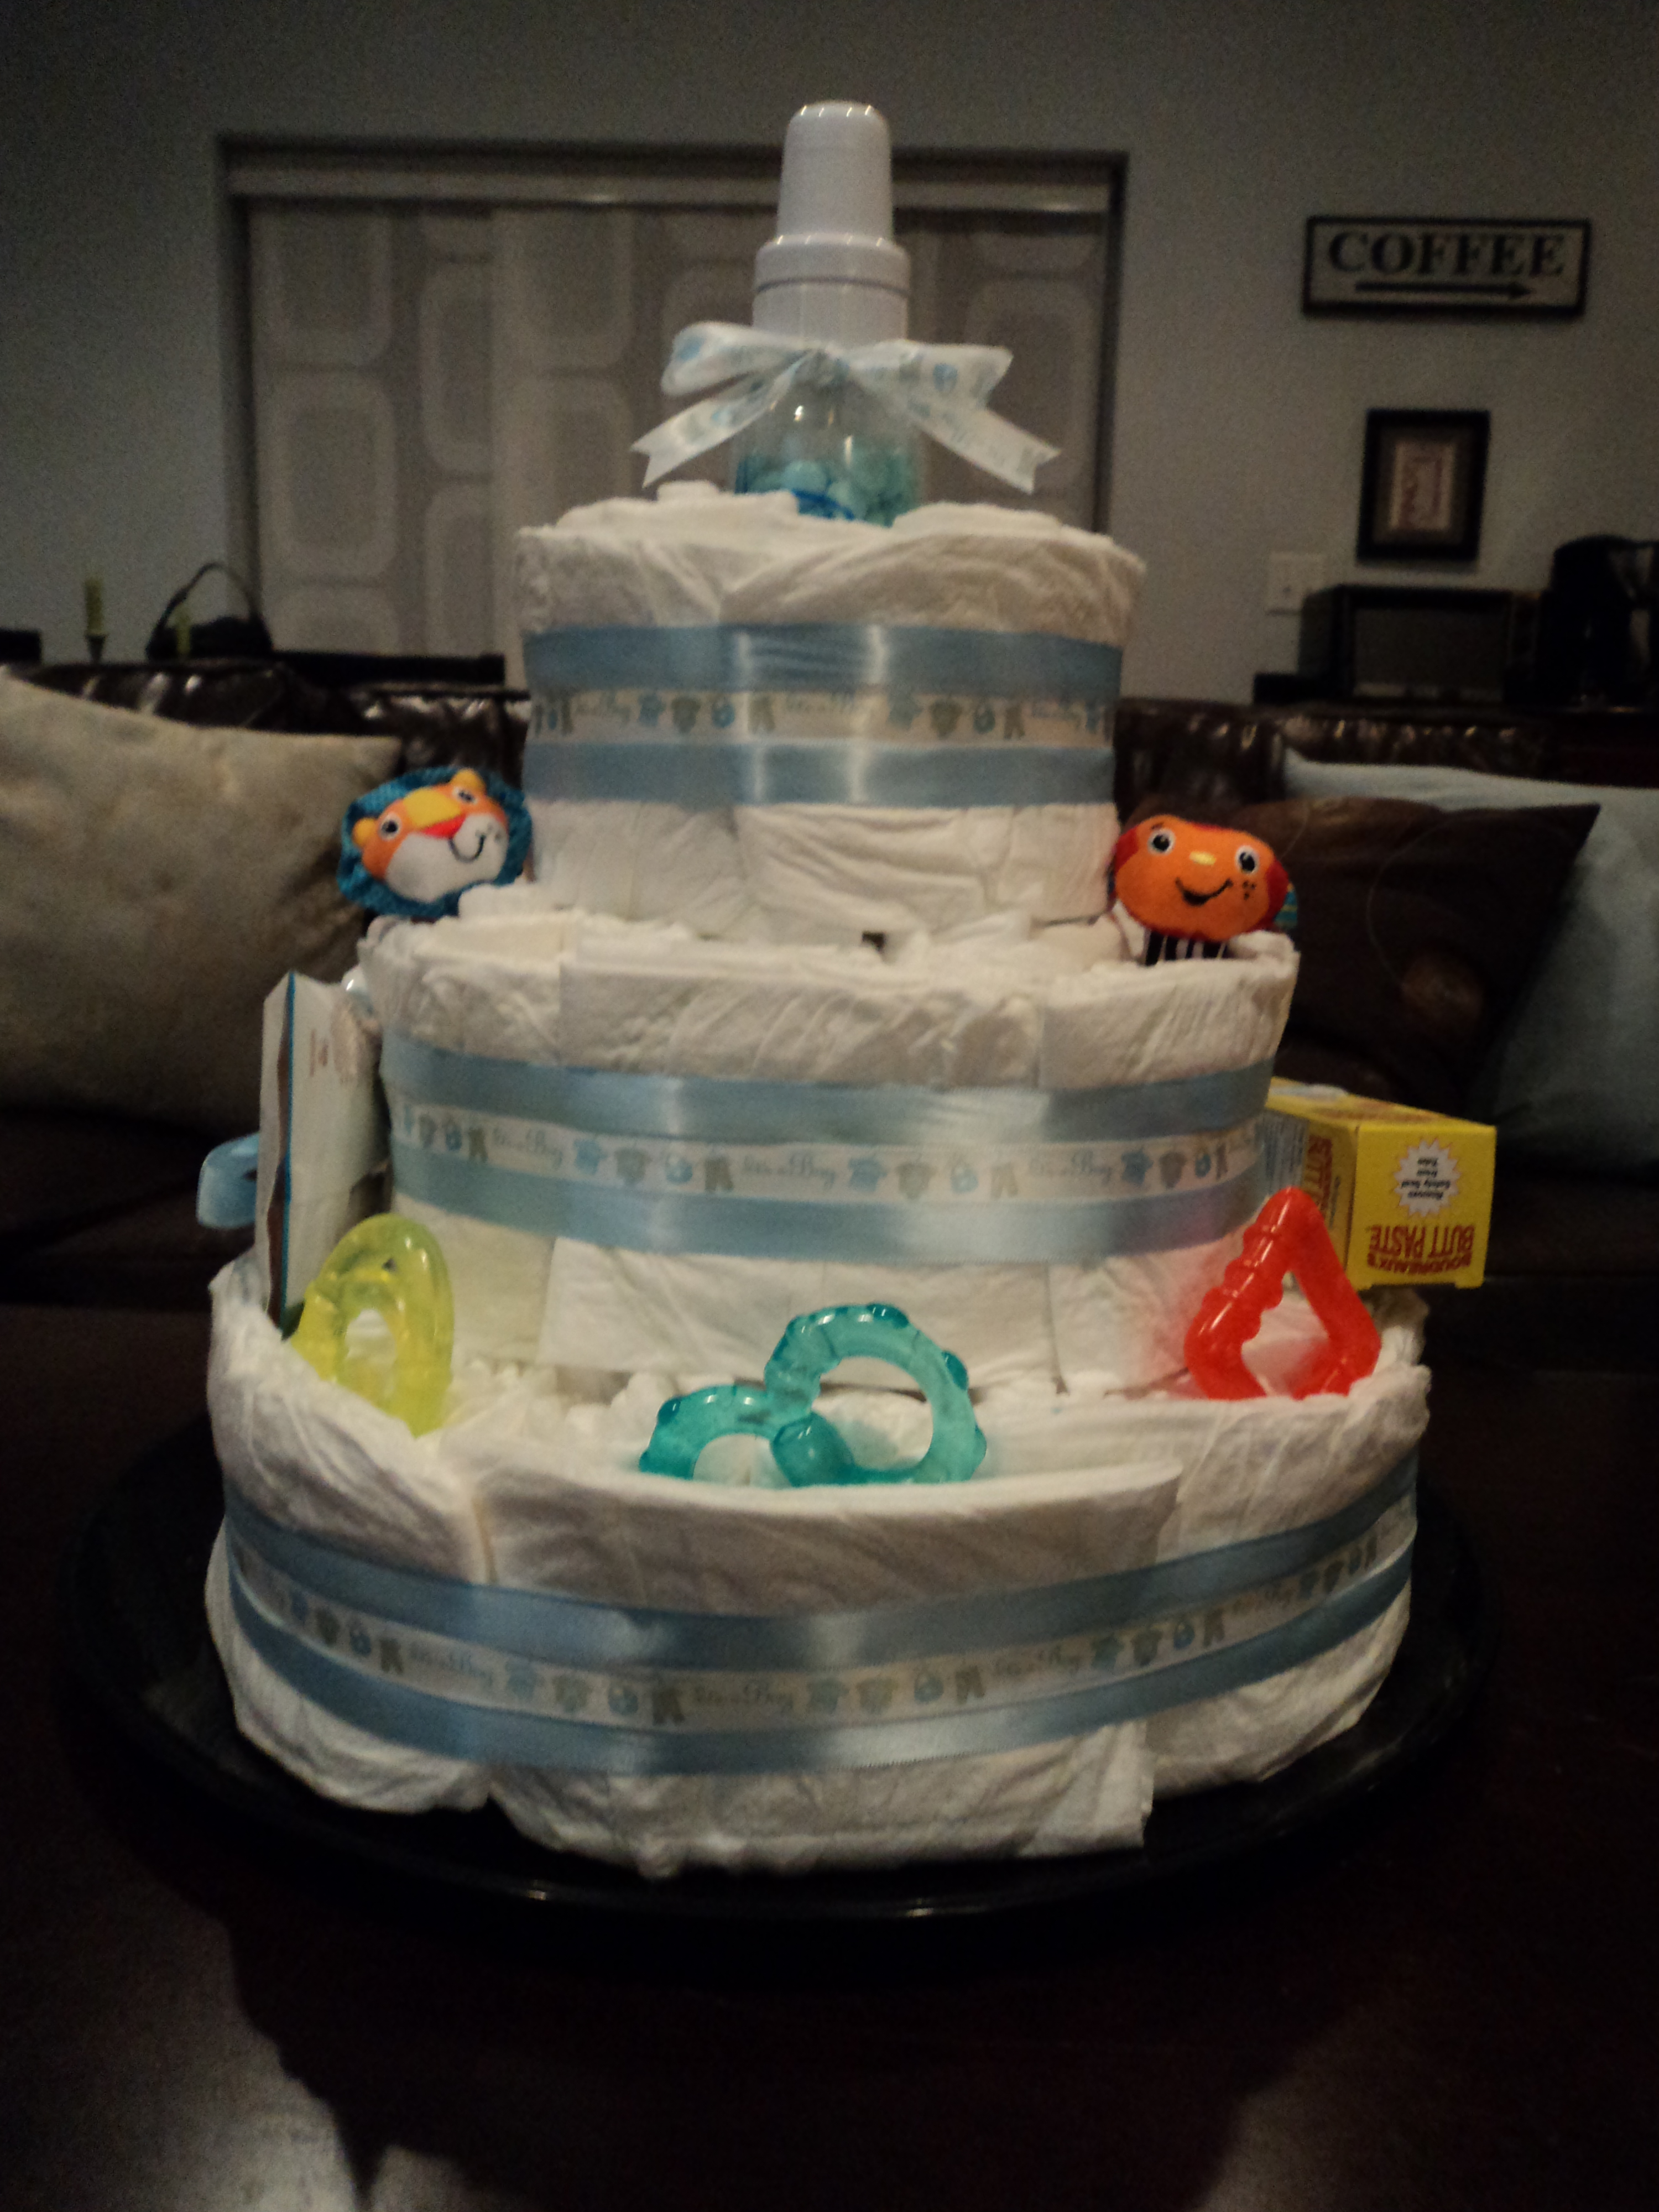
Next, we started on the middle layer just like we did the first layer, except making it about a row smaller to create a layered look to your cake.   When placing the second layer on the cake, we used a couple pieces of tape and then stuck a wooden skewer through the middle to hold it (we made sure not to pierce the diapers because we didn’t want to ruin them!)

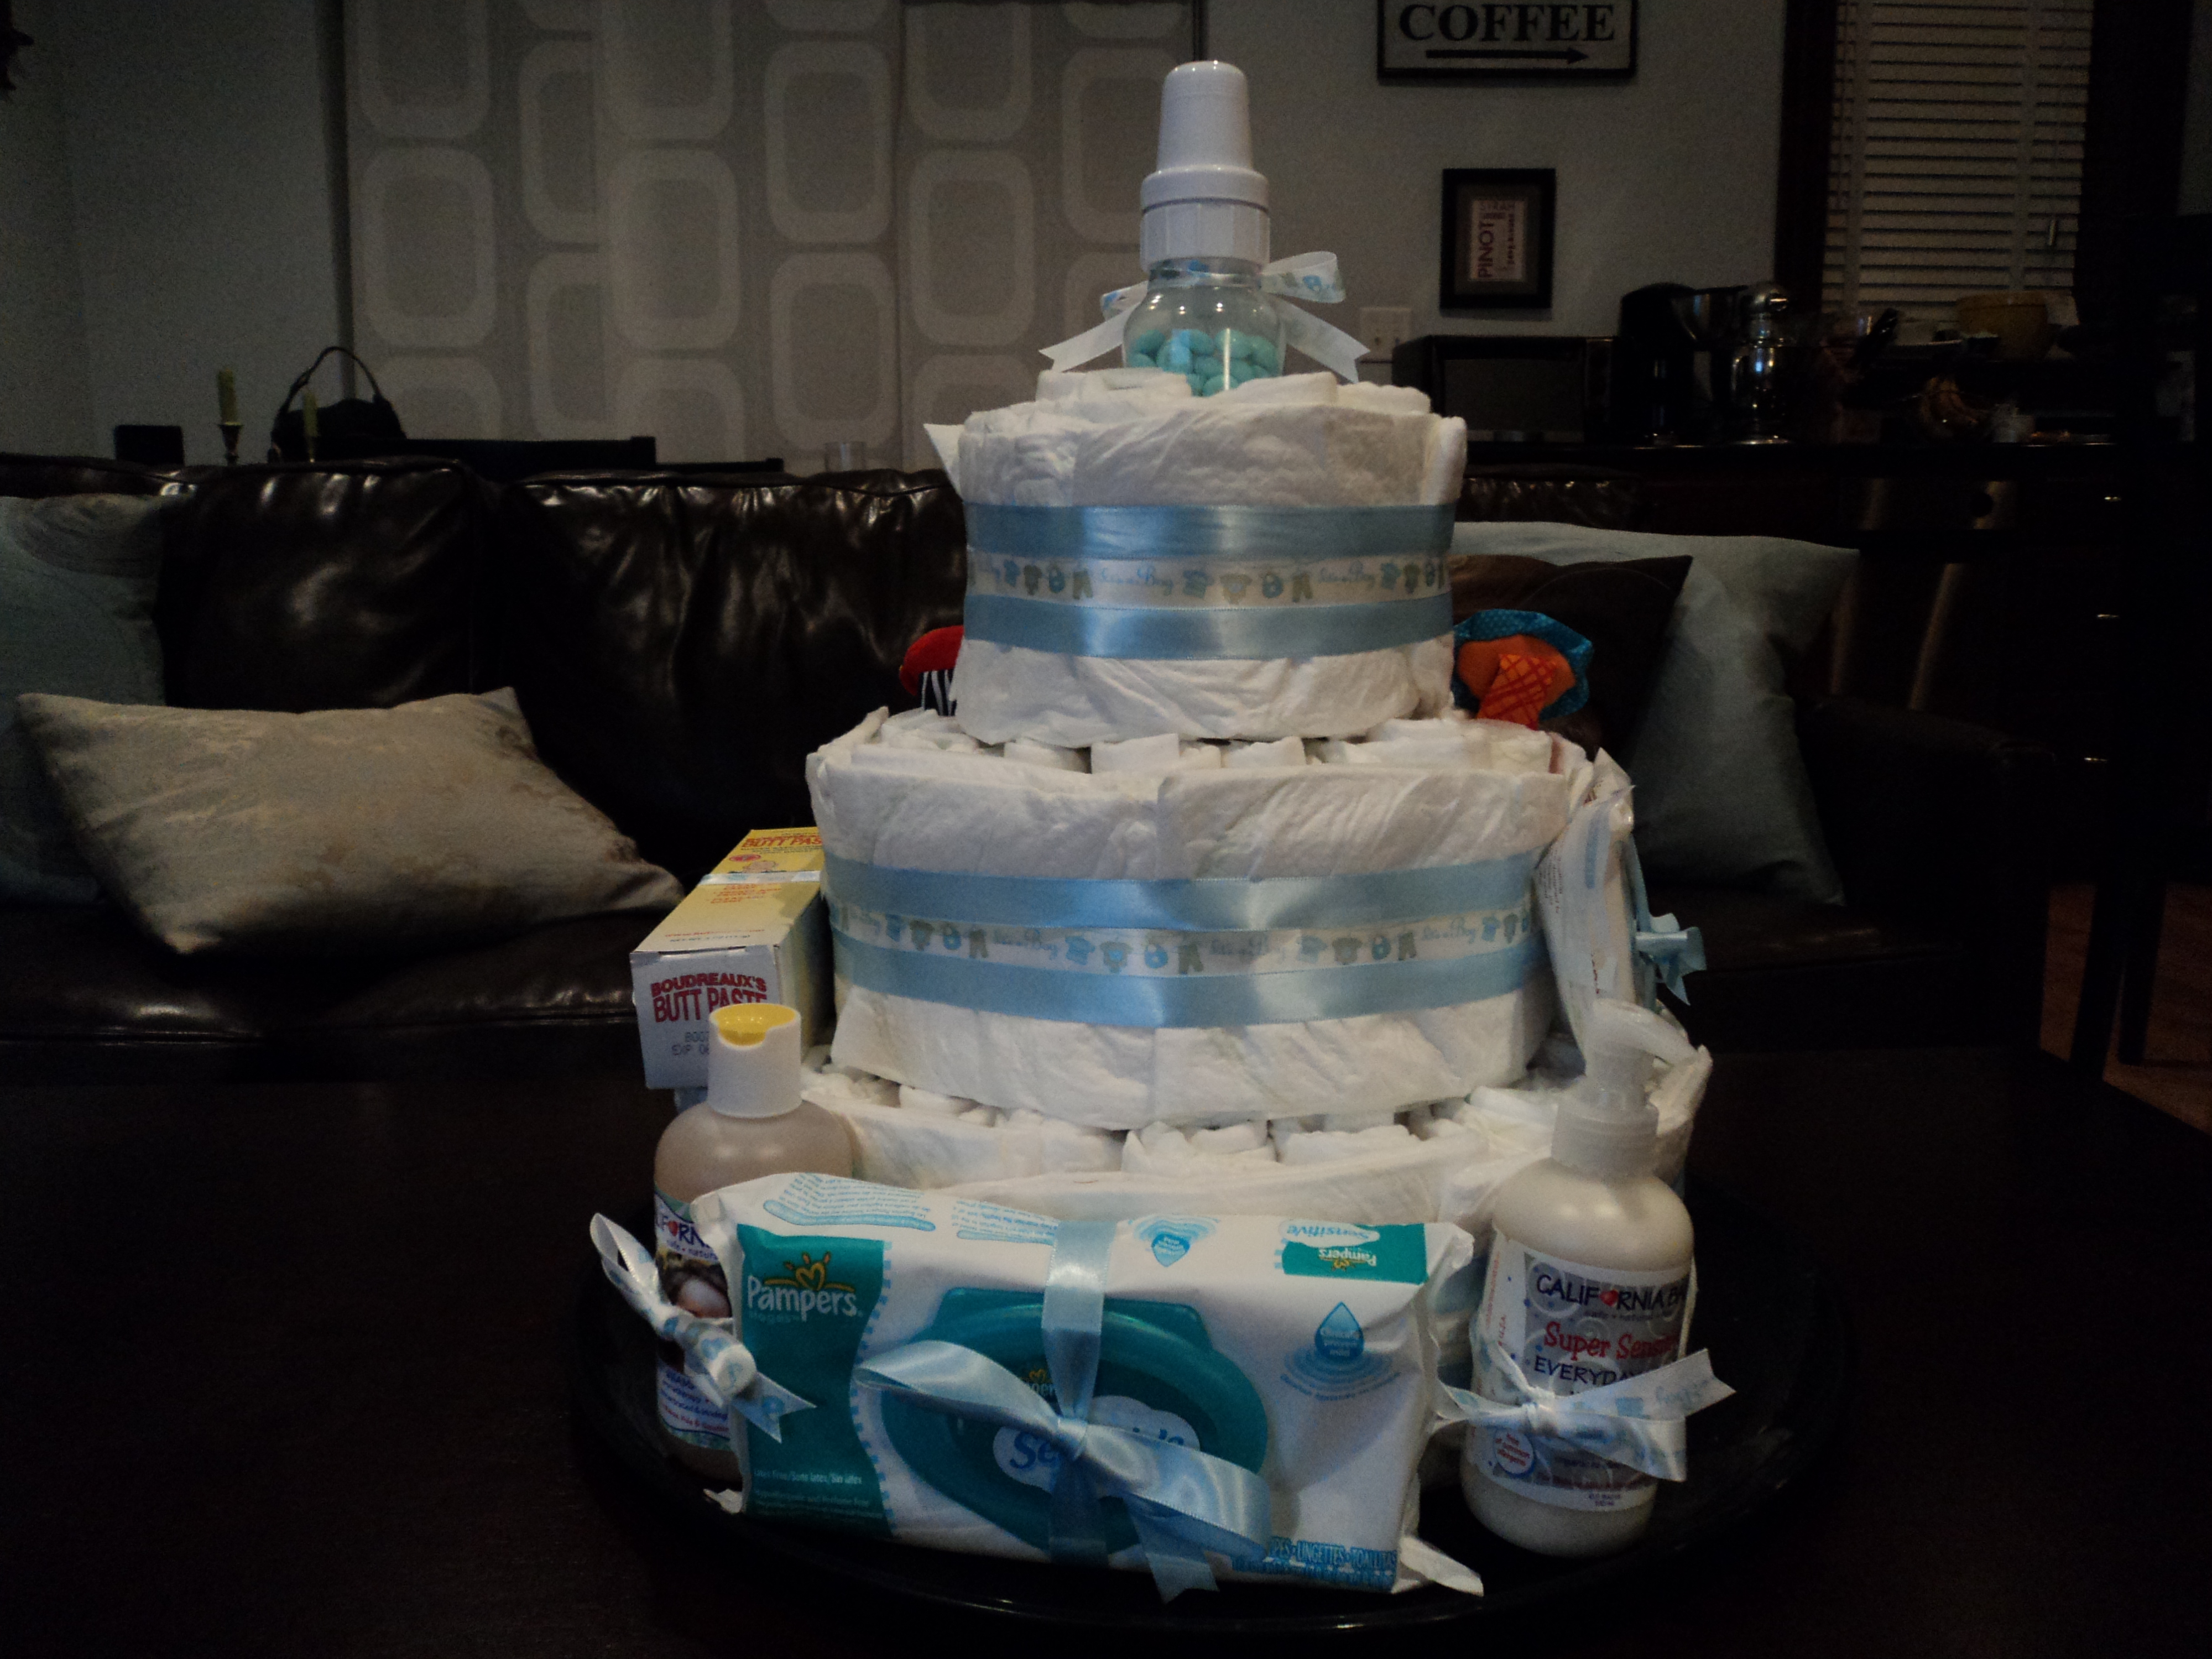
Then, we made the top of the cake the same way,  just smaller then the middle layer and we placed a bottle in the center filled with light blue M&Ms. You can use your own creativity here!  We decided we wanted  a smoother frosting look to our cake so we tied another layer of flat unrolled diapers around the outside and tied them there with the curling ribbon. Next, we put light blue and baby ribbon around the curling ribbon to cover it up and make it look like stripes on frosting. Finally, we tucked and tied the toys and other gifts around the cake.  Feel free to look at my pictures to get ideas!

Enjoy!

-K


Filed Under: Crafting & DIY, K's post, Party Ideas Tagged With: baby, baby shower, baby shower cake, baby shower diaper cake, diaper cake, getting ready for baby, how to make a diaper cake

Boston Baby Shower

Posted by Meaghan Barry on October 10, 2010

Last weekend, my husband’s aunt T, and my two friends B & L hosted a baby shower for me at the Longwharf Marriott in Boston.  I had such a great time and wanted to share a few pictures of the great party they organized.  The brunch itself was delicious and our waiter did an excellent job.

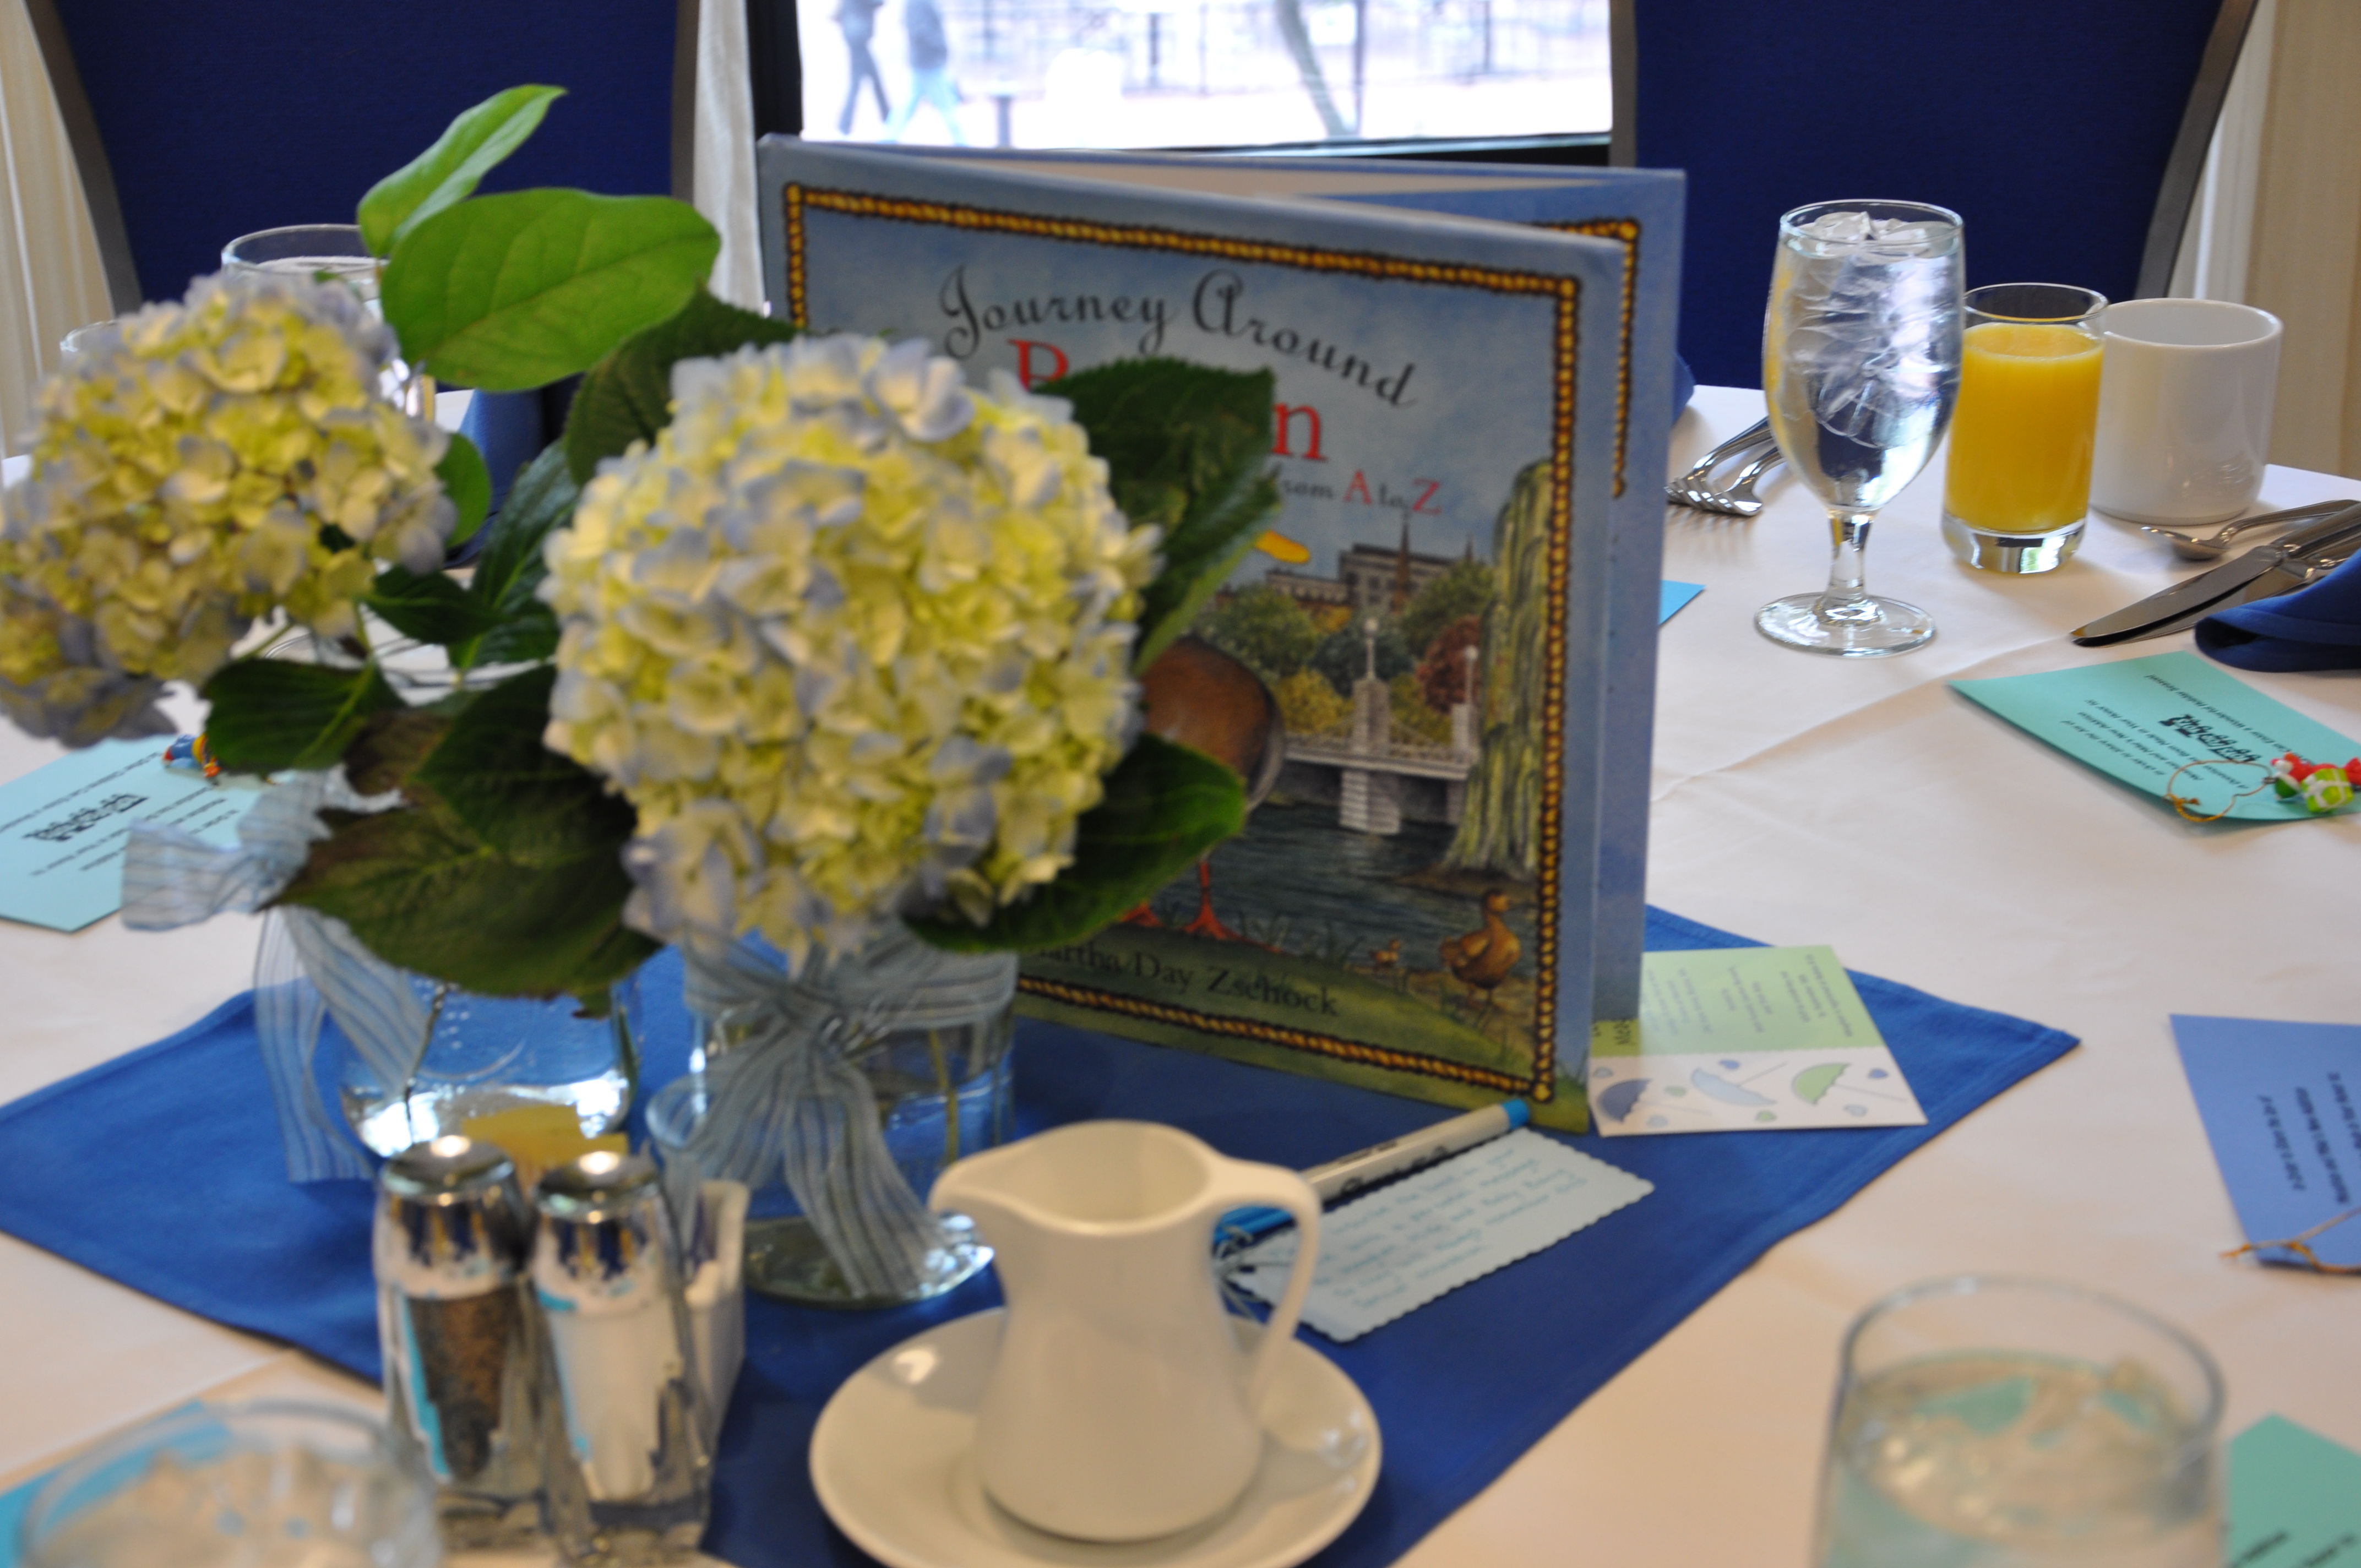
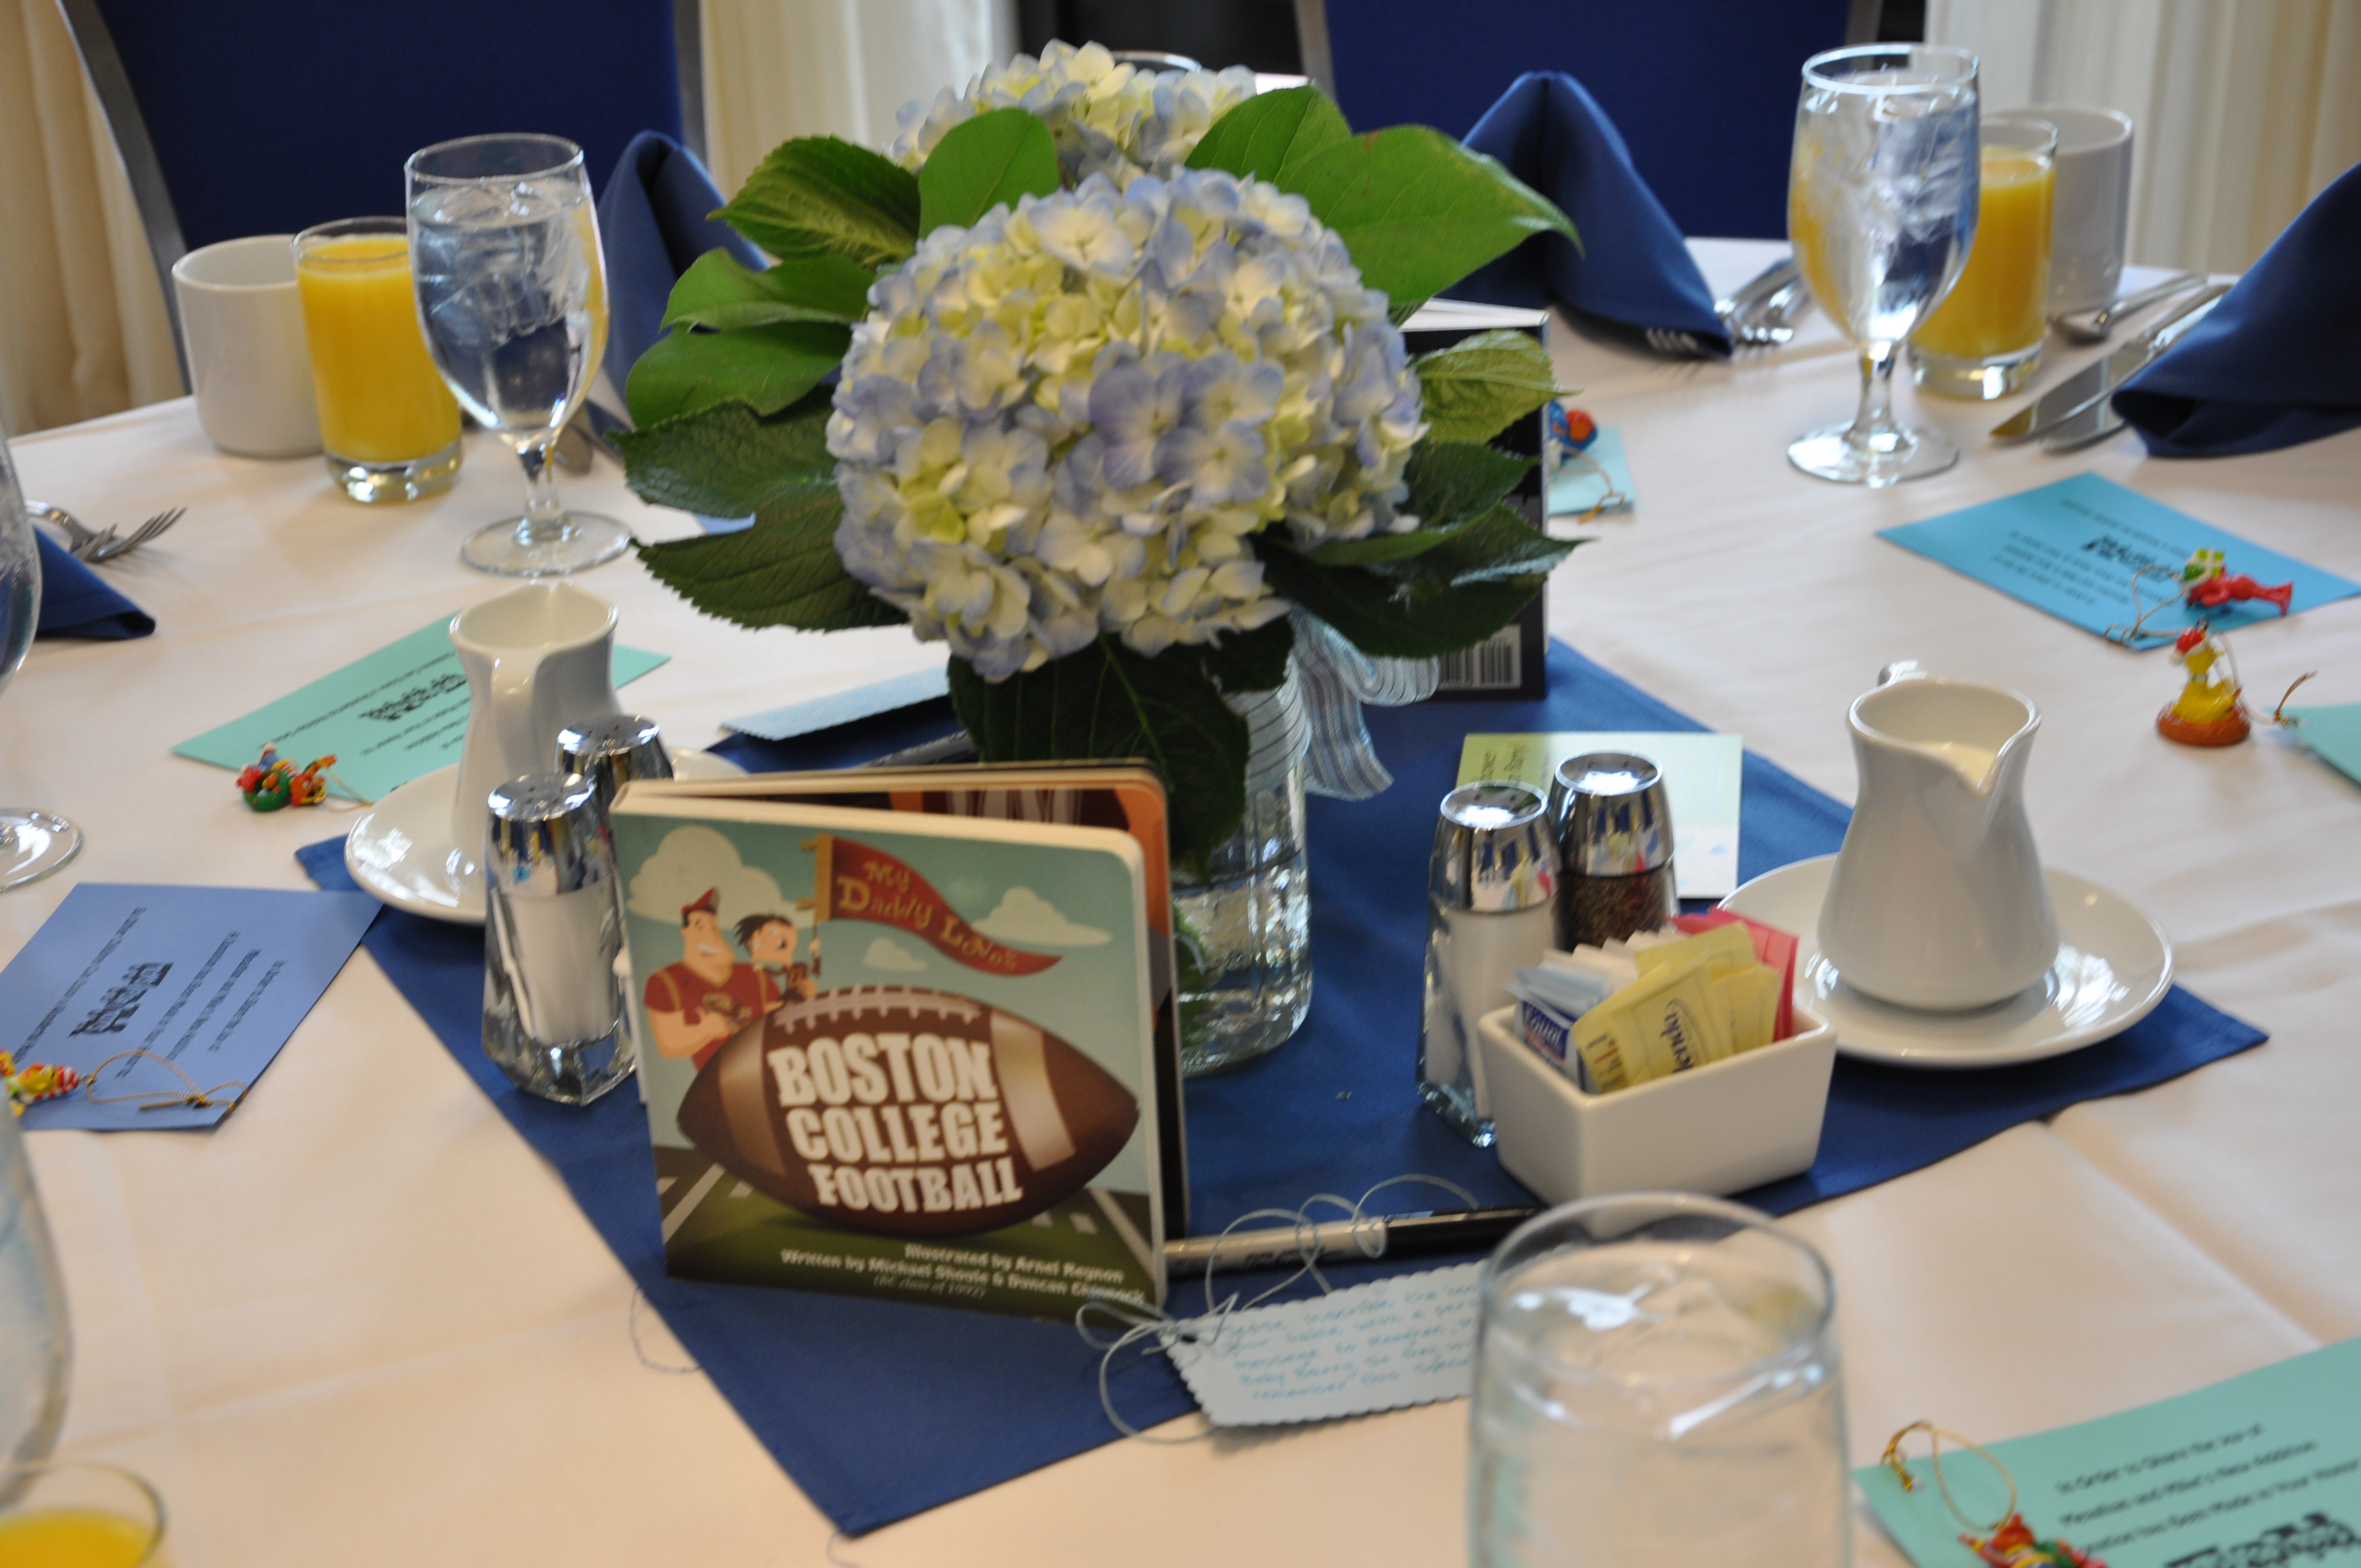
On each of the tables, they had Boston-based baby books (try saying that 10 times fast) and had left out sharpies for everyone to leave a note in them.  The centerpieces were beautiful hydrangea arrangements in mason jars with really cute ribbon.  For the favor, they made a donation for Toys for Tots and attached a small Sesame Street ornament to the note card at each table setting.

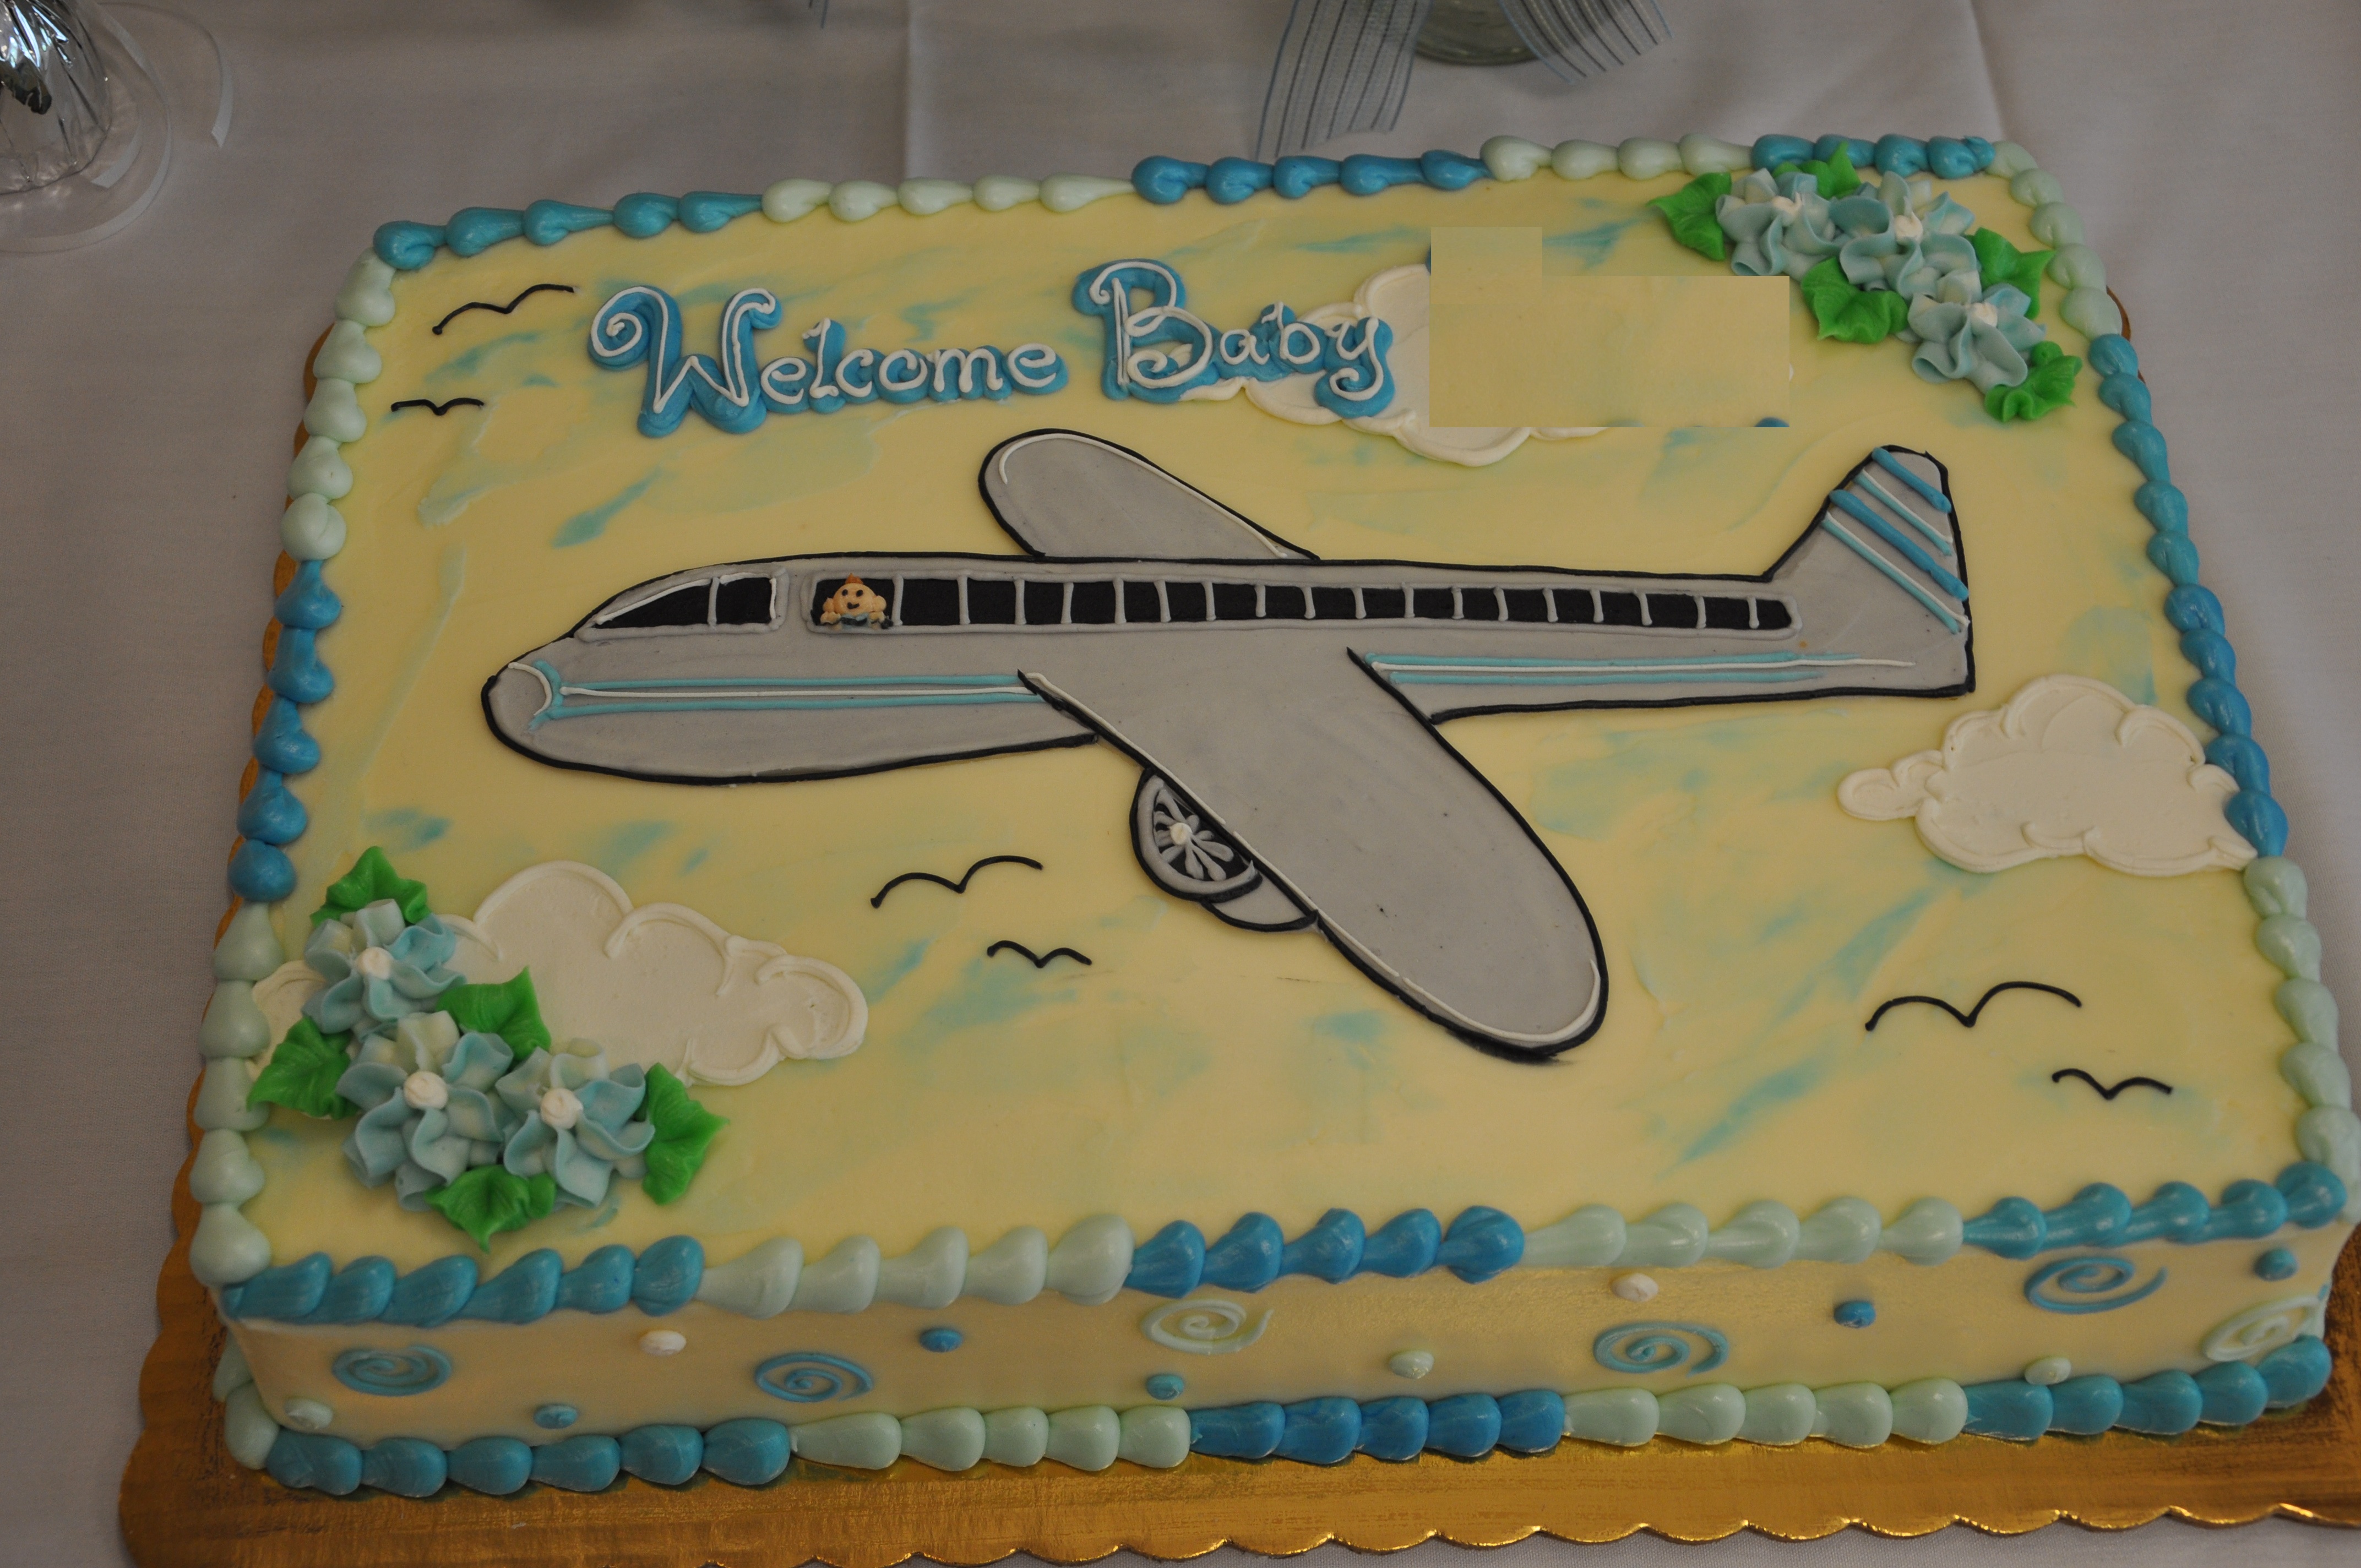
Husband M is really into planes (so we spend a lot of time watching them take off from the airport at Castle Island on our walks).  How cute is this cake from Concord Teacakes?  It was a vanilla cake with raspberry filling and buttercream frosting.  I love the baby looking out the airplane window!

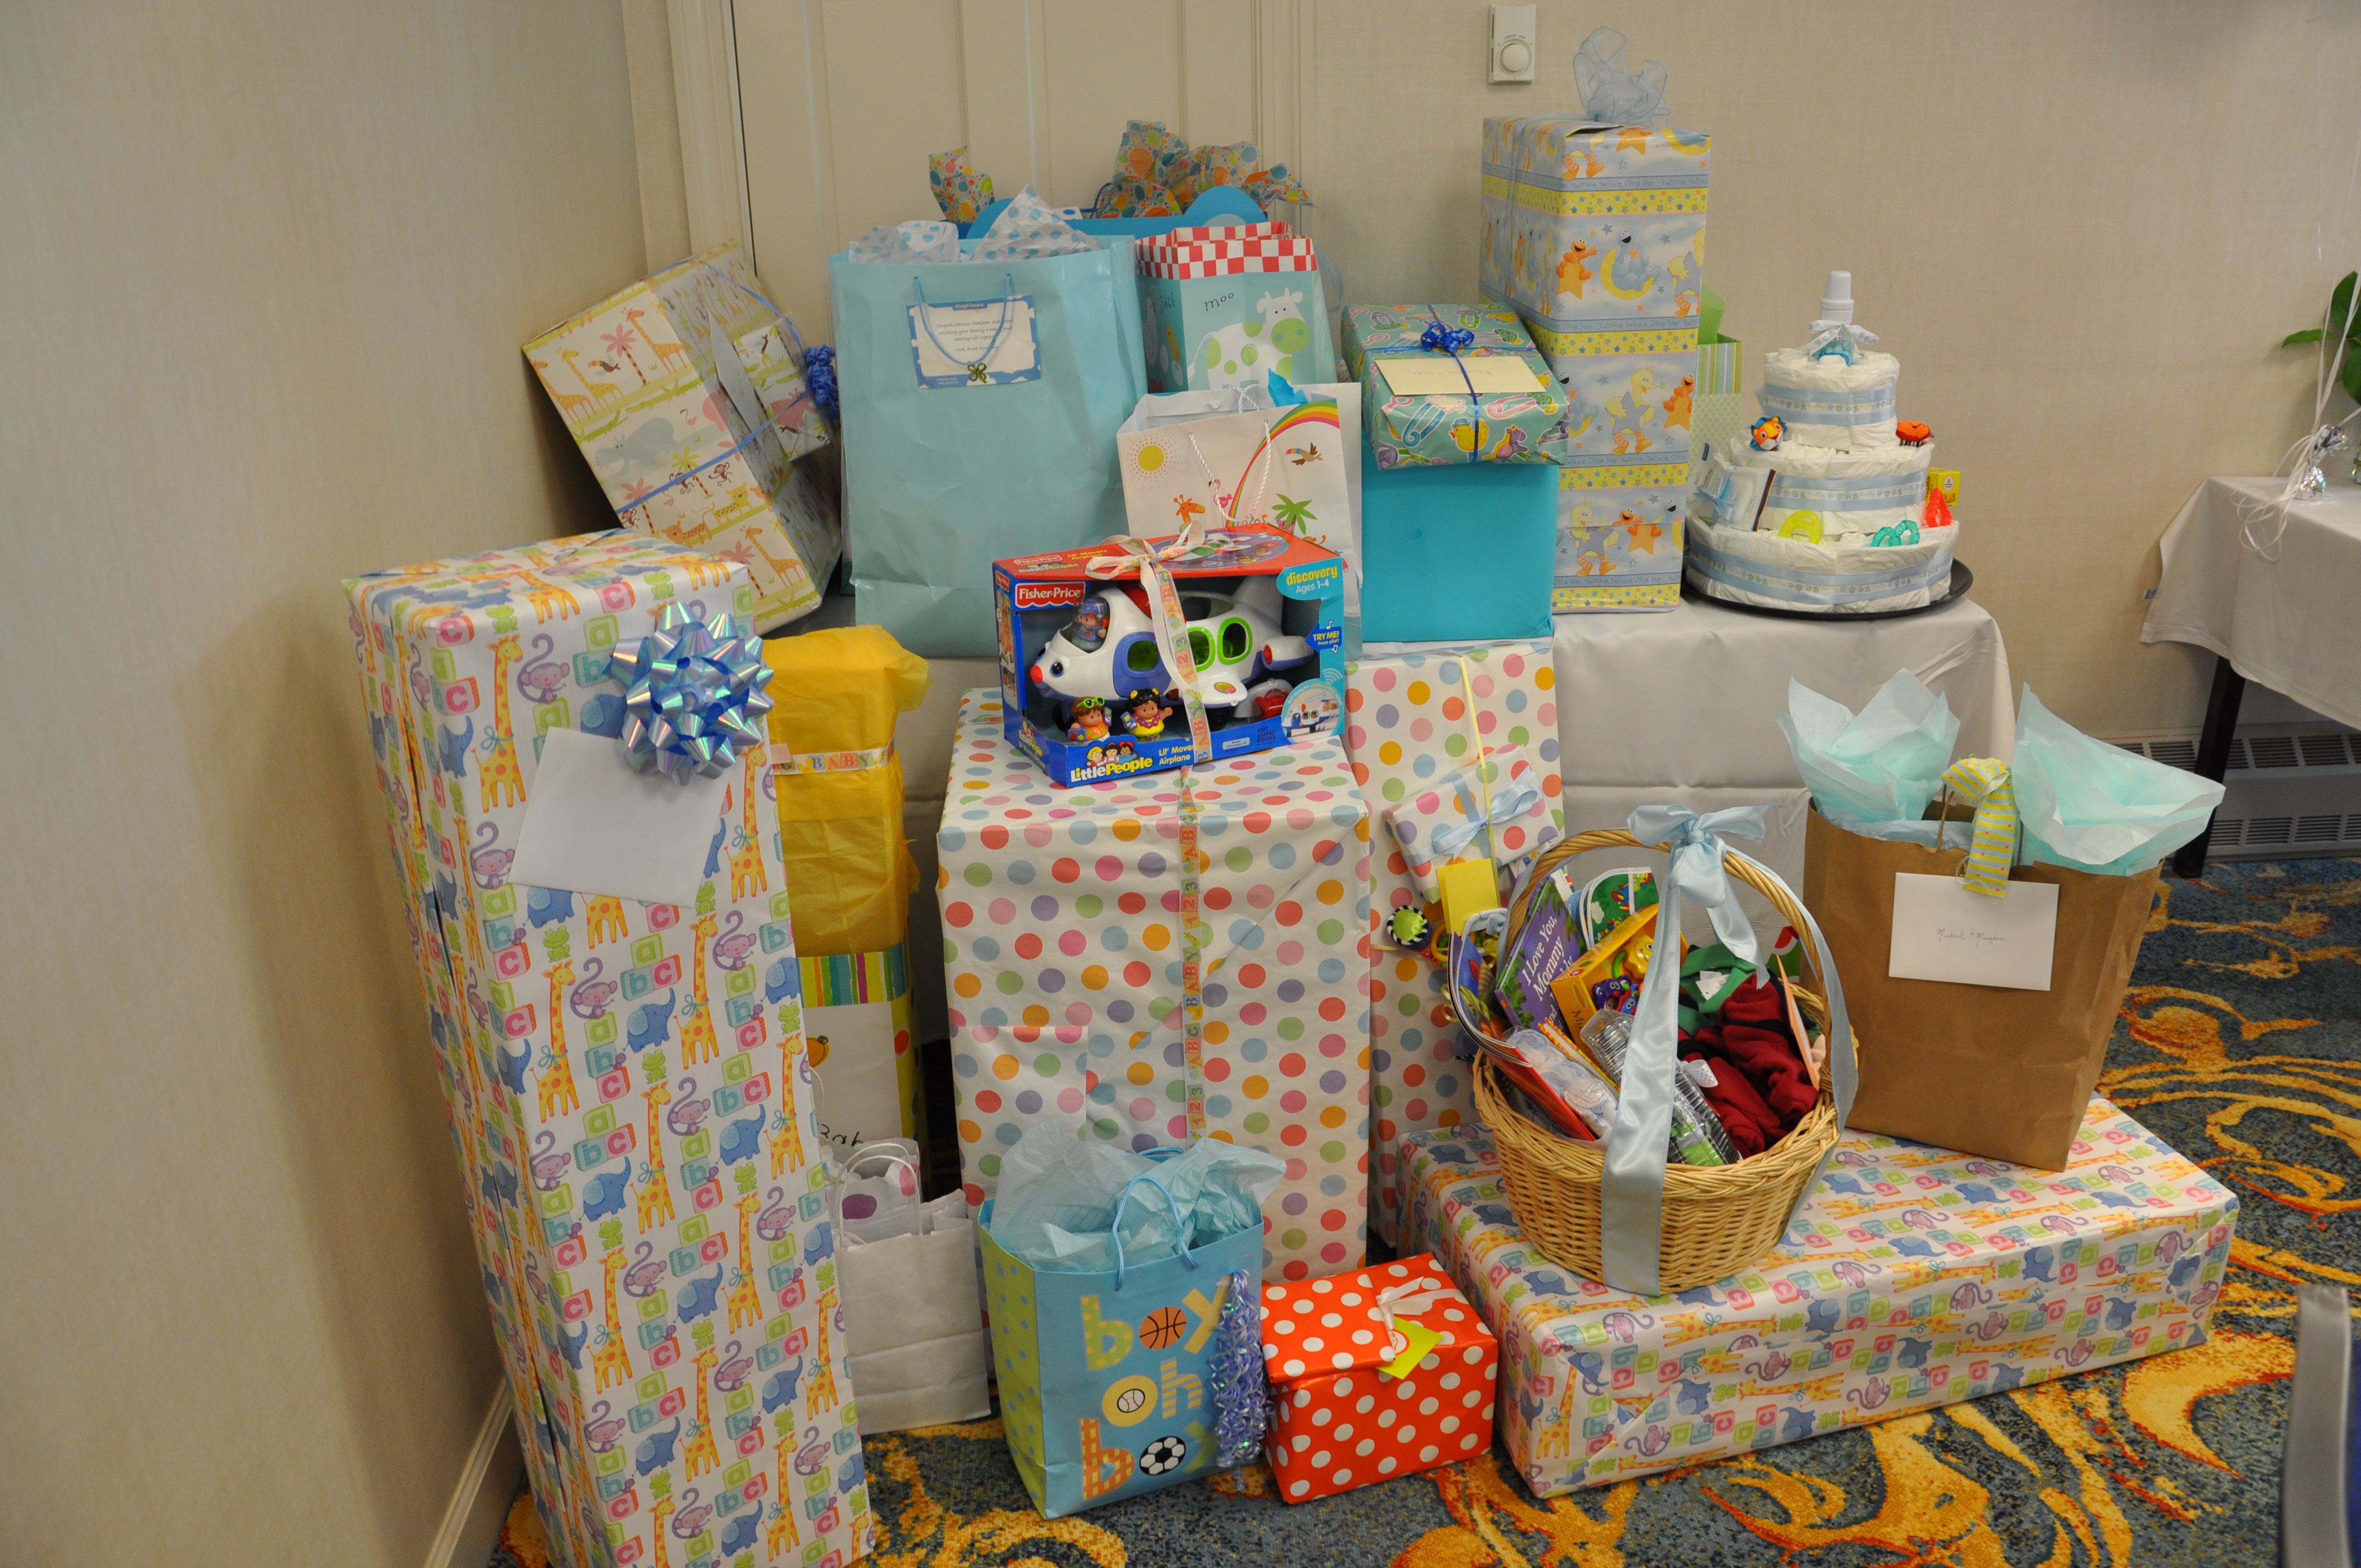
This week, I have been sorting out all the wonderful gifts we received.  Baby’s nursery is almost finished and I am feeling pretty prepared.  Check out the cool diaper cake on the right-hand side that sister K and sister M2 made for me.

Almost time for baby’s arrival- I will try to post final nursery pictures soon!

-m


Filed Under: M's post Tagged With: airplane-themed baby shower, baby shower, baby shower brunch, baby shower cake, baby shower centerpieces, Boston baby shower, diaper cake, getting ready for baby, Longwharf Marriott, pregnancy and baby resources, preparing for baby

Getting Ready for Baby Lists

Posted by Meaghan Barry on September 13, 2010

As the big day approaches, I have been starting to get ready for the baby’s arrival.  I’ve had a few lists passed on to me of things that other moms have written up of items they found to be useful.

Design Mom – Preparing for Baby

Babble– Baby Registry Guide

Liz’s Baby Basics

FOR MOM

  • Maternity Jeans – spend some money on these – you will live in them over the weekend
  • Maternity Pants – Gap made some really cute ones
  • Maternity Tops/Sweaters – don’t even need to buy them – just buy larger sizes at inexpensive stores like H&M, Limited, Gap
  • Nursing tank tops
    • The absolute best are Gilligan & O”Malley (Target carries them).  I swear by these.  They look just like a regular tank(black, white, pink or gray) and you can wear them under a cardigan. I wore these every single day while on maternity leave. Much easier than a nursing bra.  Never even bought a nursing bra.
  • BellaBand
    • This is a band that can extend the life of your pants.  You can wear pants unbuttoned and put band over to create seamless line.  Also great for when shirts/sweaters become too short b/c you just see the band which looks like a t-shirt underneath the shirt.
  • Disposable Lansonihl nursing pads
  • Lansonohl breast cream (purple tube for breasts)
  • Email list – put together mass email list for baby’s arrival announcement
  • Birth Announcements
    • Print labels before baby is born and select announcement so ready to go (I didn’t send mine out until baby was 6 months – wish I had done sooner)
    • Tinyprints.com – great selection of announcements
  • Monogrammed thank you cards – If you are really organized and know the baby’s name, you can order personalized thank you cards in advance b/c you will need them as soon as baby is born.  TinyPrints and PeekabooPumpkin have good selections.
  • Breast Pump ( Medela Pump in Style – borrow one if you can b/c you may not take to it)

FOR BABY

  • Swaddles (Kiddopotamus Velcro or any brand) – we used for first 3 months
  • Basic white tees (get the ones that have side snaps rather than ones that have to be pulled over head)
  • Basic onesies
  • Sleep Sacks or gowns – great for newborns b/c much easier to change diaper in middle of night
  • Zipper Footy PJs – once a bit older, I recommend PJs with zipper b/c easier than buttoned pjs to change in middle of night
  • Bibs (velcro on the side of neck is best b/c doesn’t chafe back of babies neck when being bed in cradle position)
  • Cheap burp clothes
    • I preferred the inexpensive ones b/c they were softer.  The cuter ones with patterns were too stiff to wipe babies mouth, so never used them.
  • Bottles (BornFree)
  • Nipples (Level 1 to start….at 3 months go to level 2 and at 6 months go to level 3)
  • Formula (Enfamil is good, so is Nestle Good Start or Similac)
  • Powdered formula containers (3 of them snap together and you can premeasure formula so all you need to do is pour into bottle of water – great for middle of the night!)
  • Pacifiers (try a few different brands to see what fits baby’s face)
  • Diapers (Pamper’s Swaddlers)– Size: Newborn
  • Wipes (Pamper’s Sensitive)
  • Travel size wipes for diaper bag
  • Thermometer (traditional is better – ear is not accurate read for babies)
  • Grooming kit (just basic with curved scissors, hair brush, toothbrush)
  • Changing pad (to put on table – all brands are the same)
  • Changing pad cover
  • PeeWee’s Disposable Multi-Use changing pads
    • These are essential.  If the baby goes to the bathroom while being changed, you don’t need to wash changing pad cover – just throw away disposable pads. I use these every day.
  • Sassy Diaper Bags – blue scented bags to throw dirty diapers in
    • We do not have a diaper genie and don’t even need one with these bags.  We never smell anything once diaper is in these disposable bags.
  • Dishwasher caddy (to put bottle parts in for washing)
  • Mustela Shampoo, Lotion, Bath Gel
  • Baby Tylenol/ Motrin
  • Saline nose drops (for when stuffed up/has cold)
  • Diaper ointment (A&D, Balmex, Mustela – any are fine)
  • Small/ soft washclothes ( not full size b/c too big for newborns)
  • Hooded towel for after bath

FOR BABY’S ROOM/ FURNITURE

  • Bambi Baby (www.bambibaby.com 877-882-2624)
    • I bought my baby furniture here and they will beat ANY price you find.  They beat Buy Buy Baby, Babies R Us, and other smaller local stores in price by a few hundred dollars.  And their customer service is fantastic.  You deal with the same person every time you call.
  • Glider – Microfiber Upholstered Glider (color: Sage) $379
    • We tried every chair and this one is SO comfortable!  The sage color goes really well in a boy’s or girl’s room and the chair is very comfortable for a man or woman.  Highly recommend.  Carried at Babies R Us…and I think Buy Buy Baby
  • Foot Stool – I found this to be very comfortable when feeding.  I still use it.
  • Co-Sleeper/Moses basket/bassinet
    • I loved the co-sleeper – nice to have baby right next to bed for first month or so before you move them into crib
  • Matress – any brand that meets regulations is fine (some people prefer Organic)
  • Waterproof mattress pad covers (for under crib sheet)
  • Mattress pad sheets
  • Crib Set
  • Hangers
  • Clothes Hamper (I like Kids Line Folding Hamper)
  • Trashcan (If you do not do Diaper Genie, which is not necessary, recommend just buying a SimpleHuman can that you can open with foot.  If using blue diaper bags, won’t smell in room at all.)
  • Baby Monitor (Fisher Price) – don’t need if live in an apartment
  • Nightlight

BABY ACCESSORIES/ TOYS

  • Stroller and car seat

o      Graco Snap & Go is great – definitely the easiest for city living

o      I’d recommend getting car seat for up to 30lbs so that you don’t need to trade up to larger size so quickly

  • Rain cover for stroller (any brand is fine)
  • Head positioner – put in stroller/car seat so head doesn’t bobble all around
  • Bundle Me – will need lightweight and fleece one for winter
  • Sun Shade for stroller – This is a must.  Protect-A-Bub Single Canapy is good and works on any stroller.
  • Stroller Caddy (recommend Joovy Cool Essentials on amazon.com)
    • This fits across handle bars of jogger strollers and is the best. You can put your wallet, phone, blackberry, keys, etc in it.  I wish I had bought this sooner b/c I hated having to put all this stuff in the carrying area below the baby.
  • Toy bar that attaches to stroller bar (for jog type stollers)
    • Kids love this – will play with it and kick at it as you walk
    • Recommend anything like Sunshine Kids AG Twirly Whirly or Whoozit Activity Spiral
  • Once you graduate from Snap & Go (which can be used up until 9-10 months depending on size of baby), recommend Phil & Ted’s if looking to do long walks or MacLaren for around town
  • Britax Car Seat – highly recommend for when baby is 1 year old
  • Bouncy Chair that vibrates (highly recommend Fisher Price Rainforest )
  • Swing ( never used one, but people swear by the Fisher Price Papasan)
  • Baby Bumbo chair (don’t need for first couple months)

o      Great for before they can sit up on own b/c gives them different vantage point – also great to use when feeding little babies before they graduate to high chair)

o      I got a different brand than Bumbo that I really liked – had a tray that attached with a toy that babies love

  • Activity Saucer
    • Highly recommend Evenflo 3-in-1 ExerSaucer Triple Fun
    • This is for babies about 4 months up – they LOVE it
  • Mobile for crib

o      Highly recommend Tiny Love Symphony or Delux Symphony in Motion

  • Boppy Pillow – for breastfeeding
  • Activity mat with overhanging toys (Recommend Gymini 3D or Baby Einstein- all babies love that at some point during first 6 months)
  • Pack and play and sheets for it (any Graco is fine – no need for most expensive….but it is nice to have the changing table)
  • Baby Einstein DVDS
    • These are priceless!  Babies love these from 2 months on.  You can buy entire boxset of 24 DVDs online for $95….or individually for $20/each
  • Bathtub
    • Any of the newborn ones are fine (I liked one that fit over kitchen sink)
    • The BEST one to buy once baby outgrows first tub (around 4-5 months) is the Primo Eurobath – it’s the only one to buy!
  • Leap Frog Learn & Groove Musical Table – this is for when they begin pulling themselves up on things…this is fantastic – hours and hours and hours of fun for baby
  • Highchair (Peg Perego Highchair is the Mercedes of highchairs – it’s a must)

THINGS WE DIDN’T LOVE OR NEED

  • Baby Bjorn – people swear by it, but we thought it was difficult to use
  • Bottle Warmer – baby doesn’t know difference and if you always do room temp, they will be fine with it.
  • Jumper for door way (I never used this – thought it was hard to put baby in/out)

RECOMMENDED BOOKS

  • What to Expect in the First Year (great)
  • Baby 411 (this is a MUST for every mom!  Includes answers at a glance to every question you will have in the first year.)
  • Baby Wise, The Baby Whisperer or other sleep book

Jill’s Baby Registry List

Bathtub and accessories:

  • Fisher Price Aquarium Bath http://www.buybuybaby.com/product.asp?order_num=-1&SKU=14994793&RN=7051&
  • The First Years Multi-Use Bathing Cushion (for you to kneel over big bathtub) http://www.buybuybaby.com/product.asp?order_num=-1&SKU=15002077&RN=7052&
  • Ocean Wonders Corner Cubby Bath Toy chest by Fisher Price http://www.buybuybaby.com/product.asp?order_num=-1&SKU=14845160&RN=7052&
  • Baby wash cloths (any brand) http://www.buybuybaby.com/product.asp?order_num=-1&SKU=115436&
  • Baby towels – you can use regular towel – you will definitely receive hooded towels as gifts
  • You can’t put the baby in the little tub until the umbilical cord comes off – some people get a giant sponge to rest them when you sponge bath.  Don’t bother, just make a cushion out of a bath towel.

Bottles, etc:

  • I don’t know anything about breast feeding and related accessories
  • I use Avent BPA free.
  • Avent sterilizer – if you have the counter space, this is awesome.  Also great for traveling because it makes it easy to clean bottles even in a hotel http://www.buybuybaby.com/product.asp?order_num=-1&SKU=14909168&RN=7065&
  • You need a drying rack – there are traditional ones but the Skip Hop is more attractive
  • Bottle brush (with built in nipple brush) http://www.buybuybaby.com/product.asp?order_num=-1&SKU=14990852&

Crib and bedroom:

  • Crib, dresser with changing table attachment/changing pad, some sort of rocker
  • Mobile http://www.buybuybaby.com/searchSKU.asp?order_num=-1&sstr=mobile&RN=7018&brnd=0&color=0&limit=0&IPPSearch=40
  • Bumper, dust ruffle and 1 cute sheet
  • 3 – 4 Ultimate crib sheets http://www.buybuybaby.com/product.asp?order_num=-1&SKU=14845488&
  • Breathable bumper (once the baby can move, you have to take out the bumper and this is a great compromise.  You can skip the cuter plush bumper and go straight to this one if you want to be practical) http://www.buybuybaby.com/product.asp?order_num=-1&SKU=15941456&
  • 2 changing pad covers
  • Baby monitor – video if it works in your apt/or some sort of digital.  The video has too much static for our apt so we have two Avent (Phillips) – one for each of the kid’s rooms… http://www.buybuybaby.com/searchSKU.asp?order_num=-1&SSTR=monitor&go=1&
  • Diaper pail and refill bags.  We used a diaper pail for Ethan but now we just use these diaper bags (multi-use for pee diapers but take out immediately for poop bags) http://www.buybuybaby.com/product.asp?order_num=-1&SKU=15127864&
  • Clothes hamper or laundry bag (suggest mesh) – we have this hanging inside the closet door because no extra room for a hamper.  Also suggest a small mesh lingerie bag for socks.

Stroller, car seat, play, travel, etc:

  • Bugaboo Cameleon (NY city people – not great for burbs because it doesn’t fold, you have to take it apart) http://www.buybuybaby.com/searchSKU.asp?order_num=-1&SSTR=bugaboo&go=1&
  • Bugaboo footmuff http://www.buybuybaby.com/searchSKU.asp?order_num=-1&sstr=bugaboo&LIMIT=0&COLOR=0&RNT=40&BRAND=445&IPPSearch=40&
  • Bugaboo sun canopy http://www.buybuybaby.com/searchSKU.asp?order_num=-1&sstr=bugaboo&LIMIT=0&COLOR=0&RNT=80&BRAND=445&IPPSearch=40&
  • 2 Bugaboo cup holders http://www.buybuybaby.com/product.asp?order_num=-1&SKU=14968636&
  • Graco SnugRide and car seat base http://www.buybuybaby.com/StylePage.asp?order_num=-1&rn=7021&rnt=0&
  • Graco attachment for Bugaboo http://www.buybuybaby.com/product.asp?order_num=-1&SKU=14971360&
  • Graco pack n play and 2 sets of sheets.  Also suggest getting a quilted sheet for extra cushion http://www.buybuybaby.com/searchSKU.asp?order_num=-1&sstr=pack+n+play&RN=0&brnd=329&color=0&limit=0&IPPSearch=40
  • Peg Perego high chair (you won’t need this for 4 – 5 months, and can return to Buy Buy Baby until you need it, but worth registering for it)  http://www.buybuybaby.com/searchSKU.asp?order_num=-1&sstr=pack+n+play&RN=0&brnd=329&color=0&limit=0&IPPSearch=40
  • ERGO or BabyBjorn carrier http://www.buybuybaby.com/StylePage.asp?order_num=-1&rn=7035&rnt=0&
  • Bouncer (you need immediately) http://www.buybuybaby.com/stylePage.asp?order_num=-1&RN=7082
  • Head rest – use in Bouncer and then later in Bugaboo when you convert from basinet to seat http://www.buybuybaby.com/searchSKU.asp?order_num=-1&SSTR=head+rest&go=1&
  • Exersaucer (you don’t need until around 5 months) http://www.buybuybaby.com/searchSKU.asp?order_num=-1&SSTR=exersaucer&go=1&
  • Mirror – crib/play http://www.buybuybaby.com/product.asp?order_num=-1&SKU=15126566&
  • Activity mat http://www.buybuybaby.com/stylePage.asp?order_num=-1&RN=7088
  • Umbrella stroller – Mclaren Quest or Triumph http://www.buybuybaby.com/StylePage.asp?order_num=-1&rn=7031&rnt=0&
  • 1-2 swaddle blankets – you will get more as gifts (Ethan hated being swaddled and broke out within 1 week but Sydney liked it) –  http://www.buybuybaby.com/searchSKU.asp?order_num=-1&SSTR=swaddle+blan+ket&go=1&.  I like the Aden guaze blankets – good for swaddling and for extra warmth, stroller, protection, etc.
  • Diaper bag

Stuff:

  • Pampers swadlers (Diapers.com)
  • Pampers sensitive wipes – get refills and one box of Huggies sensitive wipes (Huggies has a better box but Pampers makes better wipes) (Diapers.com)
  • Grooming kit http://www.buybuybaby.com/product.asp?order_num=-1&SKU=15131730&
  • Dreft (Diapers.com) and Shout gel (to clean stains)
  • A&D (day time ointment), Balmex (night time ointment), Aquaphor (Diapers.com)
  • Alcohol and baby q-tips (to clean around umbilical cord)
  • Cotton pads to clean for the first few weeks before you start using wipes
  • Saline nasal spray (to use with nasal aspirator – they usually give you the nasal aspirator at the hospital)
  • Thermometer
  • Cloth diapers to use as burp clothes, and pee diapers (cover boys while you change them because they pee upward).  http://www.buybuybaby.com/product.asp?order_num=-1&SKU=15010193&.  You will get nice burp clothes as gifts but can register or buy some as well http://www.buybuybaby.com/searchSKU.asp?order_num=-1&SSTR=burp+cloths&go=1&
  • Musela products (register or get at Diapers.com)

o      Derma cleansing body and hair http://www.buybuybaby.com/product.asp?order_num=-1&SKU=15097752&

o      Body lotion http://www.buybuybaby.com/product.asp?order_num=-1&SKU=15034700&

  • Face moisturizer http://www.buybuybaby.com/product.asp?order_num=-1&SKU=15034874&

Mom readers, what baby items did you find to be incredibly useful (or useless)?

-m

Related Posts Plugin for WordPress, Blogger...


Filed Under: M's post Tagged With: baby, baby list, baby registry, baby shower, getting ready for baby, pregnancy and baby resources, preparing for baby

Recent Posts

  • Easy Holiday Office Party Tips
  • 5 Steps to an Easy Football Party
  • Gingerbread Biscotti
  • Holiday Coffee Bar and Thanksgiving Recipes
  • Soft Sugar Pumpkin Cookies
  • Cinnamon Sugar Apple Cake
  • Hello Pumpkin Season!
  • Make Your Own Milkshake Party!
  • Mama’s Pickles
  • S’more Cookies

Categories

  • About 2 Sisters 2 Cities (7)
  • Books (8)
  • Crafting & DIY (22)
  • Design & Decorating (15)
  • Gardening (5)
  • Giveaway (14)
  • Guest Bloggers (8)
  • K's post (46)
  • K's Recipes (191)
    • K's Desserts (75)
    • K's Entrees (23)
    • K's Sides (24)
  • M's post (72)
  • M's recipes (167)
    • M's Entrees (21)
    • M's Sides (14)
    • M's Desserts (30)
  • Organizing (7)
  • Party Ideas (49)
  • Uncategorized (1)
  • Vacation (12)
Stitch Fix

Archives

Blogroll

  • Annie's Eats
  • Bake at 350
  • Baked Bree
  • Boston Harbor Beacon
  • Confections of a Foodie Bride
  • Cook Like a Champion
  • Erin’s Food Files
  • Forever and a Recipe
  • Framed Cooks
  • Oh Happy Day
  • On Common Ground
  • Pennies on a Platter
  • Pink Parsley
  • Recipe Girl
  • Sally's Baking Addiction
  • Simply Scratch
  • The Curvy Carrot
  • The Pioneer Woman
  • Tidy Mom
  • Two Peas & Their Pod
  • What’s Gaby Cooking
  • Young House Love
Increase your website traffic with Attracta.com

grab a 2 sisters button!


Copyright © 2014 ~ 2 Sisters 2 Cities | Blog Design by Minx Design