2 Sisters 2 Cities

Image Map
  • About 2 Sisters 2 Cities
  • Recipe Index
  • Project Index
  • Contact Us
  • Like us on Facebook
  • Follow m on twitter
  • Follow k on twitter
  • Follow 2S2C on Pinterest
  • Follow 2S2C on G+
  • rss
  • e-mail 2S2C

Double Chocolate Guinness Ice Cream

Posted by Meaghan Barry on March 13, 2014

Double Chocolate Guinness Ice Cream

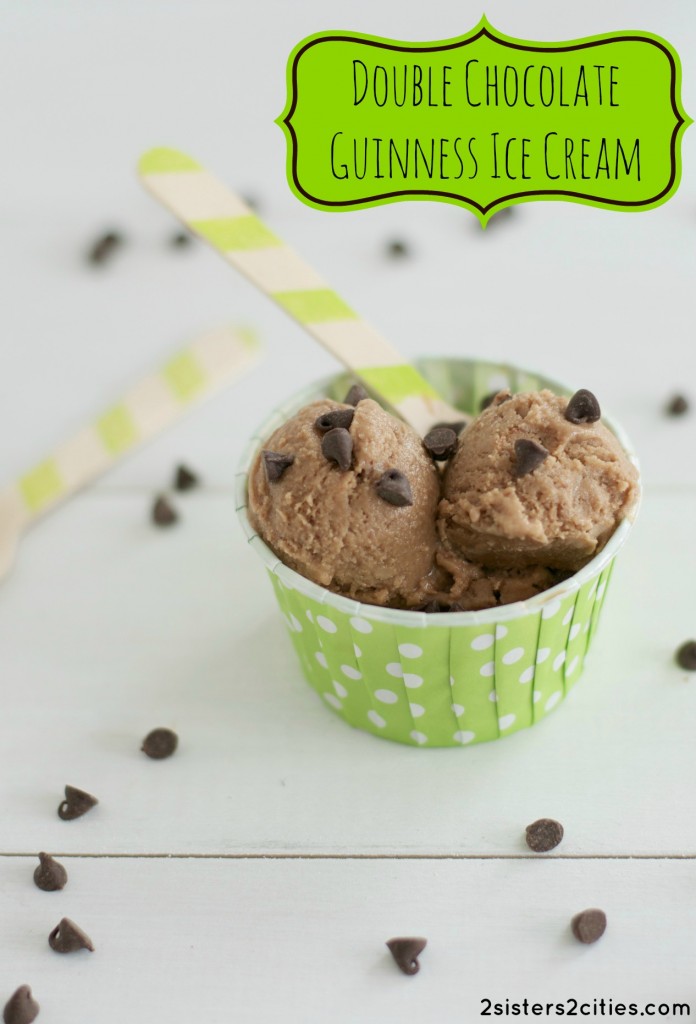
Even though it’s snowing today (ugh ugh ugh), I still wanted to make a batch of this Double Chocolate Guinness Ice Cream in anticipation of St. Patrick’s Day.  I found this recipe in David Lebovitz’s The Perfect Scoop ice cream cookbook and knew I had to make it for this weekend.  My husband and I both love Guinness, chocolate, and ice cream and this recipes incorporates all three!

Double Chocolate Guinness Ice Cream

This ice cream recipe incorporates milk chocolate and Guinness in its base flavor.  The milk chocolate balances well with the Guinness and neither one overpowers the other in terms of flavor.  I kicked the chocolate flavor up a notch by adding in mini chocolate chips towards the end of the mixing process to add a bit more chocolate goodness.  Plus, as K has mentioned before, the best part about cooking with Guinness is that there is always a bit left over to have a little sip for yourself!  If you are looking for a slightly different St. Patrick’s Day recipe this year, I highly recommend this Double Chocolate Guinness Ice Cream.

I’ve been so focused on organizing and working on a few house projects since the new year that I haven’t prioritized making new recipes and blogging about them.  I’m hoping  to share a few more of my favorite recipes that I’ve made recently soon.  It was a lot of fun to finally get back into it!  Now that baby N is almost 9(!) months old, I feel like things are finally starting to get a little easier around here…until he starts walking anyway!

Double Chocolate Guinness Ice Cream

Print
Double Chocolate Guinness Ice Cream
Author: 2 Sisters 2 Cities
Recipe type: ice cream
Serves: 6
 
Ingredients
  • 8 ounces milk chocolate chips
  • 1 cup whole or 2% milk
  • ½ cup sugar
  • pinch of salt
  • 4 large egg yolks
  • 1 cup heavy cream
  • ¾ cup Guinness (the rest is for you to sip!)
  • 1 teaspoon vanilla extract
  • ½ cup mini chocolate chips
Instructions
  1. Place the milk chocolate chips into a large bowl and set a mesh strainer over the top.
  2. Mix together the milk, sugar, and salt in a medium saucepan and warm over low heat. Whisk together the egg yolks in a medium-sized bowl. Pour the warm milk mixture into the egg yolks, whisking constantly, then scrape the entire mixture back into the saucepan.
  3. Stir the mixture constantly over medium heat with a wooden spoon, scraping the bottom as you stir, until the mixture thickens and coats the spoon. I recommend using a thermometer and removing the mixture from the heat when it reaches between 170-175 degrees Fahrenheit.
  4. Pour the custard through the strainer over the milk chocolate chips, then stir until the chocolate is melted. Once the mixture is smooth, whisk in the cream, Guinness, and vanilla. Stir until cool over an ice bath.
  5. Chill the mixture thoroughly in the refrigerator, then freeze it in your ice cream maker according to the manufacturer's instructions. Add the mini chocolate chips in the last few minutes of the mixing process.
3.2.2265

Source: Slightly adapted from The Perfect Scoop* by David Lebovitz (*Disclosure: This link is an affiliate link.)

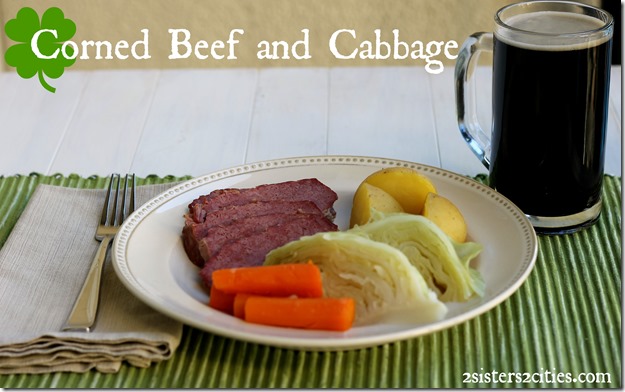
Looking for more St. Patrick’s day recipes?  Try these below!

DIY Shamrock Shake

Shamrock-Shake_thumb.jpg

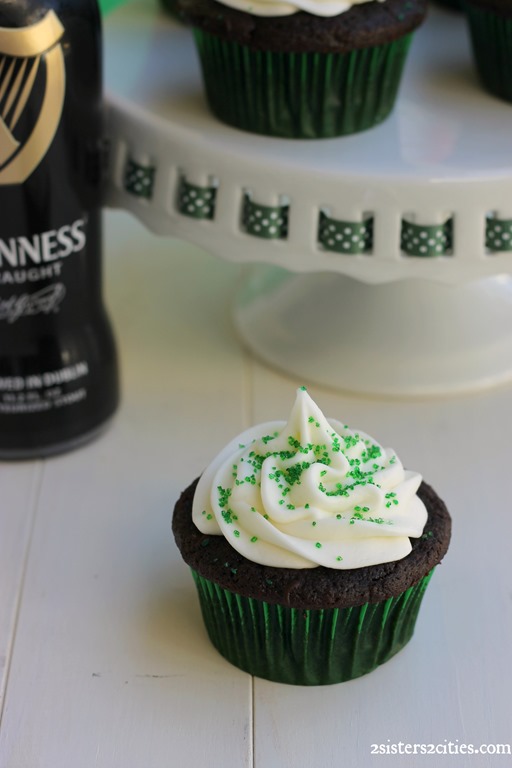
Guinness Chocolate Cupcakes Filled Chocolate Ganache and Topped With Cream Cheese Frosting

Guinness-Chocolate-Cupcakes.jpg

Chocolate Chip Soda Bread

st_patricks_day_chocolate_chip_soda_bread

Corned Beef and Cabbage

Corned-Beef-and-Cabbage-Dinner_thumb.jpg

Happy St. Patrick’s Day!

sister m signature


Filed Under: M's Desserts, M's recipes Tagged With: chocolate, guinness, homemade ice cream, ice cream, March, St Patrick's Day

Throwback Thursdays- The Root Beer Float

Posted by Keelin Hollenbeck on February 6, 2014

Root Beer Floats

Do you remember the days of letter jackets, Sadie Hawkins dances, and hanging out at the soda shop after school? Yeah I don’t… I wasn’t born yet.  I did have a poodle skirt and saddle shoes for a Halloween costume though.  I am also pretty sure I kept wearing the saddle shoes well after Halloween because I thought I was “wicked” cool.  (Wicked is a term used in the Syracuse and Boston area that in essence means really really or like totally… Yup that’s my technical definition.)

Vanilla Ice Cream for Float
Why am I referring to soda shops and saddle shoes? That’s because today’s recipe is the Root Beer Float, a favorite throwback recipe in my home.

Root Beer Poured into Float

My mom and I made some fantastic root beer floats when she came to visit in November.  Due to Thanksgiving sides, Christmas cookies, and appetizer craziness around here, I hadn’t had a chance to post about them.   While we were making the floats, we recalled how grandma called root beer floats, Brown Cows, and ones made with cola and vanilla ice cream, Black Cows.   This sparked a conversation and some googling to see what other types of floats are out there.

There are a lot of types of soda floats!  A Boston Cooler is when you made a float with ginger ale and vanilla ice cream (originated in Detroit not Boston- sorry M!)  A Snow White is a when you make a float with lemon-lime soda and vanilla ice cream.  Then, there is an Orange Cow with orange soda and Purple Cows with grape soda, both with vanilla ice cream.  You can get crazy with some Beer floats or Shakin’ Jesse, which is Guinness and vanilla ice cream.  Who knew you could make this many floats, but my favorite will always be the Root Beer Float!

Print
Root Beer Floats
Author: 2 Sisters 2 Cities
 
Ingredients
  • Root Beer
  • Vanilla Ice Cream
Variations:
  • Cola and Vanilla Ice Cream
  • Orange Soda and Vanilla Ice Cream
  • Grape Soda and Vanilla Ice Cream
  • Root Beer and Chocolate Ice Cream
  • Lemon-Lime Soda and Vanilla Ice Cream
  • Ginger Ale and Vanilla Ice Cream
Instructions
  1. In a glass add in two scoops of ice cream and then slowly pour in soda until glass is filled.
  2. Serve with a straw and a spoon.
3.2.2199

sisterk (2)


Filed Under: K's Desserts, K's Recipes Tagged With: Brown cow, drinks, Floats, ice cream, Ice Cream Floats, root beer, Root Beer Floats, Throwback Thursday

Buttered Pecan Ice Cream

Posted by Keelin Hollenbeck on September 8, 2013

Buttered Pecan Ice Cream

Where did the summer go already?   We apologize for being MIA lately on 2 Sisters 2 Cities.  Things have certainly been busy around here.   I visited M last week for a few days to meet baby N and see most of my family.   We had a really great time and had a lot of delicious food (which is always the case when my family comes together.)  I got to catch a glimpse of M’s day-to-day life with two babies and was it ever exhausting!   I give her a lot of credit for what she does all day!  The weekends leading up to the visit, I worked on making a quilt for my new nephew that would match his nursery color theme.   I found a blog on how to make a simple crib quilt and created it in about 2 weekends.   The results were so cute and M really loved the quilt.   I took pictures as I was creating it and I’m planning on sharing them with you after M reveals the nursery.

Cake Cone of Buttered Pecan Ice Cream

Before we go into pumpkin and soup recipes for fall, I wanted to share with you one more summer ice cream recipe I made with my ice cream maker.    After making the pistachio ice cream and  the s’more ice cream,   I decided it was time to make another nut-based ice cream.  Buttered pecan ice cream is one of my favorites and it was really easy to create in my ice cream maker.   I bought cake cones at the grocery store for this batch of ice cream and enjoyed a cone for dessert every few nights.   New to making ice cream?  Try this one first, it’s so easy!

Bowl of Buttered Pecan Ice Cream

Print
Buttered Pecan Ice Cream
Author: 2 Sisters 2 Cities
 
Ingredients
  • 1 cup packed light brown sugar
  • ½ cup water
  • ⅛ tsp. salt
  • 2 large eggs
  • 2 tbsp. unsalted butter
  • 1 cup whole milk
  • 1 tsp. vanilla extract
  • 1 cup heavy cream
  • 1 cup chopped toasted pecans
Instructions
  1. In a saucepan, mix together brown sugar, water, and salt and bring to a boil. Stir until sugar dissolves. Let syrup boil for 2 minutes.
  2. Next, in a medium heatproof bowl beat eggs together. Slow beat the syrup mixture in to the egg mixture.
  3. Add egg mixture to a double boiler or a heat proof bowl rested on a sauce pan with a few inches of water. Stir constantly until mixture reaches 175 degrees F and coats a spoon. Stir in unsalted butter and stir until melted.
  4. Strain the mixture into a medium bowl, cover with plastic wrap, and let cool in the refrigerator.
  5. Once cold, mix in milk and vanilla extract.
  6. In the bowl of a mixer fitted with whisk attachment, whisk the heavy cream until it forms soft peaks. Fold the whipped cream into the egg mixture.
  7. Pour the custard into an ice cream maker and follow the manufacturer’s instructions. Once the ice cream is done, fold in the chopped toasted pecans. Transfer to an ice cream container and place in the freezer to harden further. Enjoy!
3.2.1753

Source- Adapted from Brown Eyed Baker

sisterk (2)


Filed Under: K's Desserts, K's Recipes Tagged With: buttered pecan, buttered pecan ice cream, cold treats, homemade ice cream, ice cream, ice cream maker, ice cream recipes, nuts, pecans

S’more Ice Cream

Posted by Keelin Hollenbeck on July 3, 2013

S'more Ice Cream for Dessert

Happy Fourth of July everyone!   I hope you have a great menu planned for your long weekend . I am sure with all this time off, my boyfriend and I will be cooking/baking up a storm.   Here is a last minute dessert idea to celebrate your Independence Day with.

Last weekend I tested out another new flavor of ice cream with my new ice cream maker.  The pistachio ice cream I made first had turned out so well I was excited to try another flavor. Since it is Fourth of July weekend,  I thought it would be the perfect opportunity to make some s’more ice cream.   This ice cream has toasted marshmallow-flavored ice cream with graham cracker pieces and fudgy layers, making it the perfect dessert for summer time.   I could have really just stopped at the toasted marshmallow ice cream because the flavor was incredible!  It would also be the perfect ice cream to make s’more ice cream sandwiches with, by layering the marshmallow ice cream between a layer of Hershey’s chocolate squares and graham cracker halves.  However you decide to make this ice cream, you will be happy with the results!  I scream, you scream, we all scream for ice cream!!  (If you look close enough to my picture you can see my boyfriend watching tv in the background..whooops!)

S'more Ice Cream

Print
S'more Ice Cream
Author: 2 Sisters 2 Cities
 
Ingredients
For Toasted Marshmallow Ice Cream:
  • 1 bag marshmallows, preferably large but small will do
  • 1 tbsp. vanilla bean paste
  • 2 cups whole milk
  • 5 egg yolks
  • ½ cup sugar
  • Pinch of salt
  • 1 cup heavy cream
  • 1 tsp. vanilla extract
For the Fudge Layers
  • ½ cup granulated sugar
  • ½ cup water
  • ⅓ cup light corn syrup
  • 6 tbsp. Dutch-process cocoa powder
  • ½ teaspoon vanilla extract
To add to Ice Cream:
  • 1½ cups coarsely chopped honey graham crackers
Instructions
  1. Line a baking sheet with parchment paper. Place marshmallows on baking sheet. Place the pan under the broiler for 30 seconds to 1 minute until toasted, watch closely because they will burn easily. Turn marshmallows over and toast the other side the same way. Once both sides are toasted, place marshmallows in a blender and set aside.
  2. Add milk to a medium saucepan, add in vanilla bean paste and slowly bring mixture to a simmer.
  3. In a large heatproof bowl beat the egg yolks, sugar and salt together with a whisk. Slowly add warmed milk to the egg mixture and return to saucepan. Heat mixture over medium-low heat stirring the entire time with a heat proof rubber spatula. Stir until the custard thickens and easily coats the spatula (around 170-175 degrees F.) Pour the custard through a metal strainer into a large bowl. Let cool for 15 minutes.
  4. Add the custard into the blender (where the toasted marshmallows are) and blend together until the marshmallows are completely broken down. Add heavy cream and vanilla extract to blender and blend for 10-15 second to combine. Pour the mixture into lidded container and refrigerate overnight.
  5. To make Fudge Layers: In a medium saucepan set over medium heat, whisk together sugar, water, corn syrup, and cocoa powder. Whisk the entire time, until the mixture comes to a low boil. Allow mixture to boil for one minute, continuing to whisk. Remove the chocolate sauce from heat and stir in vanilla extract. Add mixture to a jar or an air-tight container and let cool before covering. Place in the refrigerator and let cool for at least 2 hours before layering into ice cream.
  6. Before adding the custard to the ice cream maker, stir vigorously until mixture is smooth. Add custard to your ice cream maker and churn ice cream according to manufacturer’s instructions. When ice cream is done, gently fold in chopped graham crackers with a rubber spatula. On the bottom of the container you plan to store ice cream in, add a layer of fudge sauce to the bottom. Scoop the ice cream into the container, adding layers of the fudge sauce between layers of ice cream (do not stir the ice cream at this point since you will want the layers of fudge.) Continue layering ice cream and fudge sauce, ending with an ice cream layer. Cover container and freeze ice cream until firmer, about 2-3 hours.
3.2.1753

Source-  Adapted from Brown Eyed Baker

sisterk (2)


Filed Under: K's Desserts, K's Recipes Tagged With: fancy s'mores, fourth of july, fudge sauce, ice cream, ice cream recipes, S'more, s'more ice cream, s'mores, s'mores recipes, toasted marshmallow ice cream

Pistachio Ice Cream

Posted by Keelin Hollenbeck on July 1, 2013

Pistachio Ice Cream

I finally indulged in a KitchenAid ice cream maker attachment for my mixer the other weekend.   I was planning to wait for my birthday that is in a few weeks, but I found a really great deal on one that I could not say no to.  It was extremely difficult to decide on what flavor ice cream I wanted to create first.    I read through lists and lists of flavors as my boyfriend and I drove to the grocery store.   My favorite type of hard ice cream is chocolate with peanut butter swirl, which we happened to have a pint of in the freezer.  We decided to go my boyfriend’s favorite flavor, pistachio nut.

I found an awesome recipe online and picked up the ingredients while we were grocery shopping.   I was able to find shelled pistachios which only came in salted.  I rinsed the salt off of the 1 and 1/3 cups of pistachios that were going to soak in the milk/cream mixture and then baked them for 5 minutes in the oven to dry them out.   I kept the other pistachios that were added to the ice cream salted and it seemed to work out perfectly.   I added a small amount of green dye to the ice cream to make it looks like the classic pistachio ice cream.  This is optional of course.

The custard tasted like delicious pistachio ice cream right away so we anxiously waited for it to chill, churn into ice cream and then freeze all the way in the freezer.  When we finally got to taste the end results, it was awesome!   I was very impressed with my first ice cream making experience.   I am not over-exaggerating when I say thi,s but it was the best pistachio ice cream I had ever tasted!

Homemade Ice Cream

Print
Pistachio Ice Cream
Author: 2 Sisters 2 Cities
 
Ingredients
  • 1⅓ cups shelled roasted pistachio nuts
  • ¾ cup sugar
  • 2 cups heavy cream
  • 1 cup whole milk
  • pinch of salt
  • 6 large egg yolks
  • 1 tsp. vanilla extract
  • ½ tsp. almond extract
  • Green food coloring
  • ¾ cups pistachios, roughly chopped
Instructions
  1. If your pistachios are salted- follow this first step. Rinse 1⅓ cup of pistachios with water in a colander. Dry nuts on a towel and spread out on a baking sheet lined with parchment papers. Place in oven heated to 350 degree and place in the over for five minutes to dry.
  2. Add nuts to a food processor and grind into small pieces. Set aside.
  3. In a medium sauce pan; add milk, sugar, 1 cup of cream, and salt. Heat on medium-low heat until warmed. Take off heat and stir in ground pistachios. Let soak for 30 minutes.
  4. Strain the nut mixture liquid with a mesh strainer, apply pressure to the nuts to make sure all the liquid comes out. Dispose the nuts and add milk mixture back into sauce pan.
  5. In a large heat proof bowl add the remaining 1 cup of cream to bowl and place cleaned mesh strainer on top.
  6. In a medium sized bowl beat 6 egg yolks with a whisk. Slowly whisk egg yolks into sauce pan with milk mixture. Heat mixture over medium heat stirring the entire time with a heat proof rubber spatula. Stir until the custard thickens and easily coats the spatula.
  7. Pour the custard through the strainer into the cream in the large bowl. Stir to combine.
  8. Mix in the vanilla and almond extract into custard.
  9. Add custard to an air-tight container and refrigerate until completely chilled.
  10. Add chilled custard to your ice cream maker and follow the manufacturer’s instructions. Once ice cream is churned add in green food coloring, adding a few drops at first and working up to the green color you prefer (this is optional, it does not add to the flavor.)
  11. Gently stir in roughly chopped pistachios and place back into an airtight container. Freeze for an addition 3-4 hours until complete frozen. Serve and enjoy!
3.2.1753

Bowl of Pistachio Ice Cream

 Source: slightly adapted from Brown Eyed Baker

sisterk (2)


Filed Under: K's Desserts, K's Recipes Tagged With: dessert recipe, desserts, frozen dessert, homemade ice cream, hot weather treats, ice cream, ice cream maker, ice cream recipes, Pistachio Ice Cream, pistachios, summer recipes, summer treats

Hot Fudge Sauce

Posted by 2 Sisters 2 Cities on August 8, 2012

Hot fudge sauce
I happened to be reading a book on the couch one Sunday afternoon when the book mentioned a couple sharing a hot fudge sundae.  For the life of me, I could not stop thinking about hot fudge sundaes and I decided to look up what I needed to make hot fudge sauce.   I happened to have all of the ingredients and my boyfriend ran out to get whipped cream and light vanilla ice cream.   The hot sauce came together so quickly and I was soon back to my book eating a hot fudge sundae like the characters in my book.

I don’t always make what I am thinking about because if I did I would be eating bad foods all the time.   I just happened to be going home later that week and needed a dessert that did not have gluten in it for my little sister.  The hot fudge sauce fit perfectly into a medium sized mason jar and after we had some on our ice cream, I put it away in the refrigerator to store for later. Then later that week when we were traveling to Syracuse, I just put the chilled fudge sauce in our cooler and took it with us.   The sauce heats up in the microwave very easily in 30 second intervals.

Print
Hot Fudge Sauce
Author: K
 
Ingredients
  • 4 oz. unsweetened chocolate, chopped
  • 3 tablespoons unsalted butter
  • ⅔ cup water
  • ⅓ cup of sugar
  • ¼ cup plus 2 tablespoons of corn syrup
  • Pinch of salt
  • 1 tsp. vanilla extract
Instructions
  1. In a double-boiler or a heatproof bowl set over simmering water in a sauce pan, add in chocolate and butter. Stir until melted and smooth.
  2. In another sauce pan heat boil the ⅔ cup of water. Stir in the melted chocolate/butter mixture into the boiling water.
  3. Mix in sugar, corn syrup and salt until smooth.
  4. Increase the heat until the chocolate sauce comes to a boil. Boil for 9 minutes, stirring occasionally.
  5. Take off heat and let cool for 15 minutes. Stir in vanilla extract. Serve warm on top of ice cream. Store in an airtight container in the refrigerator. To heat up, microwave in 30 second intervals, stirring in between intervals until heated.
2.2.8

Source- Adapted from Annie’s Eats from Smitten Kitchen, originally from Silver Palate Cookbook

Hot Fudge Sundae

Related Posts Plugin for WordPress, Blogger...


Filed Under: K's Desserts, K's Recipes Tagged With: chocolate recipe, frozen treat, hot fudge sauce, hot fudge sauce recipe, hot fudge sundae, ice cream, ice cream topping, summer dessert, summer recipe

Recent Posts

  • Easy Holiday Office Party Tips
  • 5 Steps to an Easy Football Party
  • Gingerbread Biscotti
  • Holiday Coffee Bar and Thanksgiving Recipes
  • Soft Sugar Pumpkin Cookies
  • Cinnamon Sugar Apple Cake
  • Hello Pumpkin Season!
  • Make Your Own Milkshake Party!
  • Mama’s Pickles
  • S’more Cookies

Categories

  • About 2 Sisters 2 Cities (7)
  • Books (8)
  • Crafting & DIY (22)
  • Design & Decorating (15)
  • Gardening (5)
  • Giveaway (14)
  • Guest Bloggers (8)
  • K's post (46)
  • K's Recipes (191)
    • K's Desserts (75)
    • K's Entrees (23)
    • K's Sides (24)
  • M's post (72)
  • M's recipes (167)
    • M's Entrees (21)
    • M's Sides (14)
    • M's Desserts (30)
  • Organizing (7)
  • Party Ideas (49)
  • Uncategorized (1)
  • Vacation (12)
Stitch Fix

Archives

Blogroll

  • Annie's Eats
  • Bake at 350
  • Baked Bree
  • Boston Harbor Beacon
  • Confections of a Foodie Bride
  • Cook Like a Champion
  • Erin’s Food Files
  • Forever and a Recipe
  • Framed Cooks
  • Oh Happy Day
  • On Common Ground
  • Pennies on a Platter
  • Pink Parsley
  • Recipe Girl
  • Sally's Baking Addiction
  • Simply Scratch
  • The Curvy Carrot
  • The Pioneer Woman
  • Tidy Mom
  • Two Peas & Their Pod
  • What’s Gaby Cooking
  • Young House Love
Increase your website traffic with Attracta.com

grab a 2 sisters button!


Copyright © 2014 ~ 2 Sisters 2 Cities | Blog Design by Minx Design