2 Sisters 2 Cities

Image Map
  • About 2 Sisters 2 Cities
  • Recipe Index
  • Project Index
  • Contact Us
  • Like us on Facebook
  • Follow m on twitter
  • Follow k on twitter
  • Follow 2S2C on Pinterest
  • Follow 2S2C on G+
  • rss
  • e-mail 2S2C

S’more Cookies

Posted by Keelin Hollenbeck on July 1, 2014

S'more Cookies

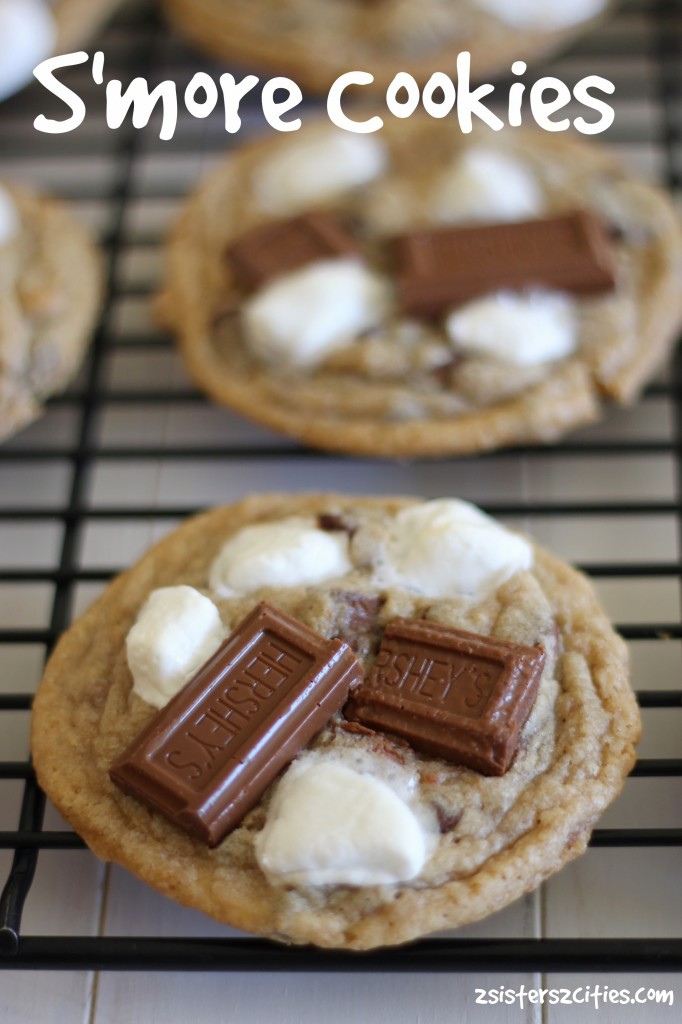
Well, it is officially the week of Fourth of July and you know what that means..S’more season is here!   What is better then (or equal to a s’more,) but a S’more Chocolate Chip Cookie combination.

S'more Chocolate Chip Cookies.jpg

The boyfriend and I have a bit of an obsession with chocolate chip cookies.  I feel like we haven’t baked much of anything else this year except for white sandwich bread and chocolate chip cookies.  My boyfriend has become a chocolate chip cookie baking-pro over here.  While he was gone today, I decided to make a new cookie recipe.  We had this bakery near our old house in New Jersey that sold really good cupcakes and cookies.  They had the most amazing S’more Cookies and ever since then I have been trying to recreate them.  This recipe is pretty darn close!

Plate of S'more Cookies.jpg

One Thanksgiving, my mom was making Martha Stewart’s recipe for Sweet Potato Casserole and asked me to cut up large marshmallows to put on top because that is what the recipe called for.  We joked that maybe Martha didn’t realize they made mini marshmallows.  This particular cookie recipe calls for mini marshmallows, which of course I forgot at the grocery store.  Luckily, I had large marshmallows and got to cut them up like old times!

More S'more Cookies.jpg

Print
S'more Cookies
Author: 2 Sisters 2 Cities
 
Ingredients
  • ¾ cup unsalted butter, softened
  • ½ cup white sugar
  • ½ cup brown sugar, packed
  • 1 egg
  • 1 tsp vanilla extract
  • 1¼ cup AP flour
  • 1 cup graham crackers crumbs
  • ¼ tsp. salt
  • ½ tsp baking soda
  • ½ cup semi sweet chocolate chips
  • ½ cup milk chocolate chips
  • 3-4 Hershey Bars broken into squares
  • 1 cup of mini marshmallows or large marshmallows cut up
Instructions
  1. Preheat oven to 375 degrees.
  2. In the bowl of a mixer, cream butter and then add both sugars. Once mixed, add in egg and vanilla extract.
  3. In a separate bowl, combine flour, graham cracker crumbs, salt, and baking soda.
  4. Add the dry mix into the wet mixture, scraping down the sides to make sure everything is incorporated.
  5. Mix in chocolate chips (not the Hershey's squares yet.)
  6. Scoop the cookie dough into 24 balls and spread out on two cookie sheets lined with a silicone baking mat or parchment paper.
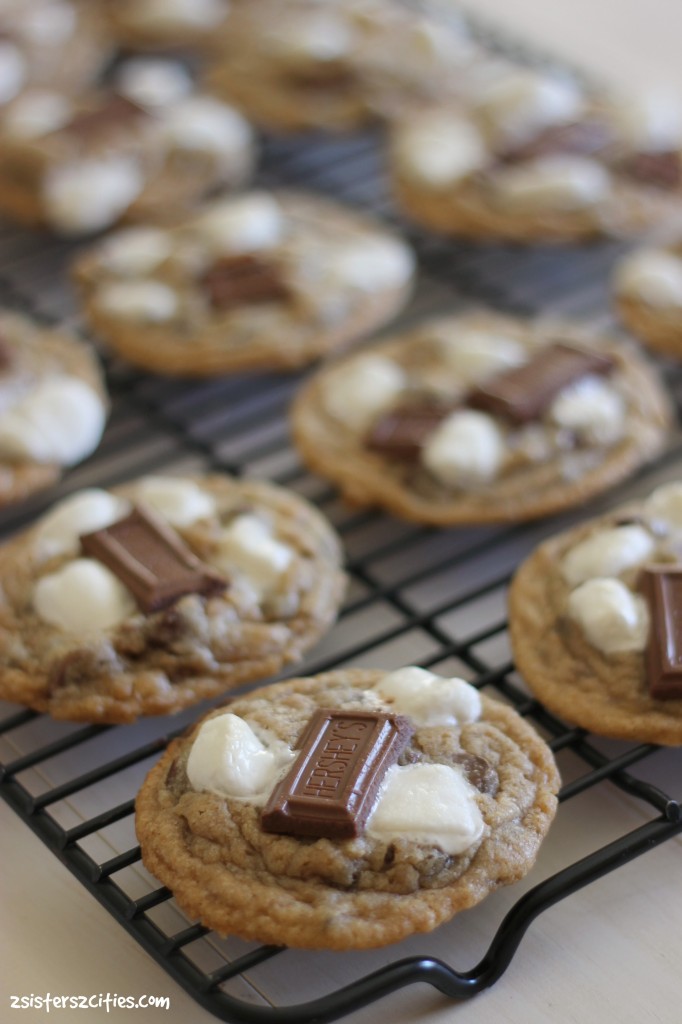
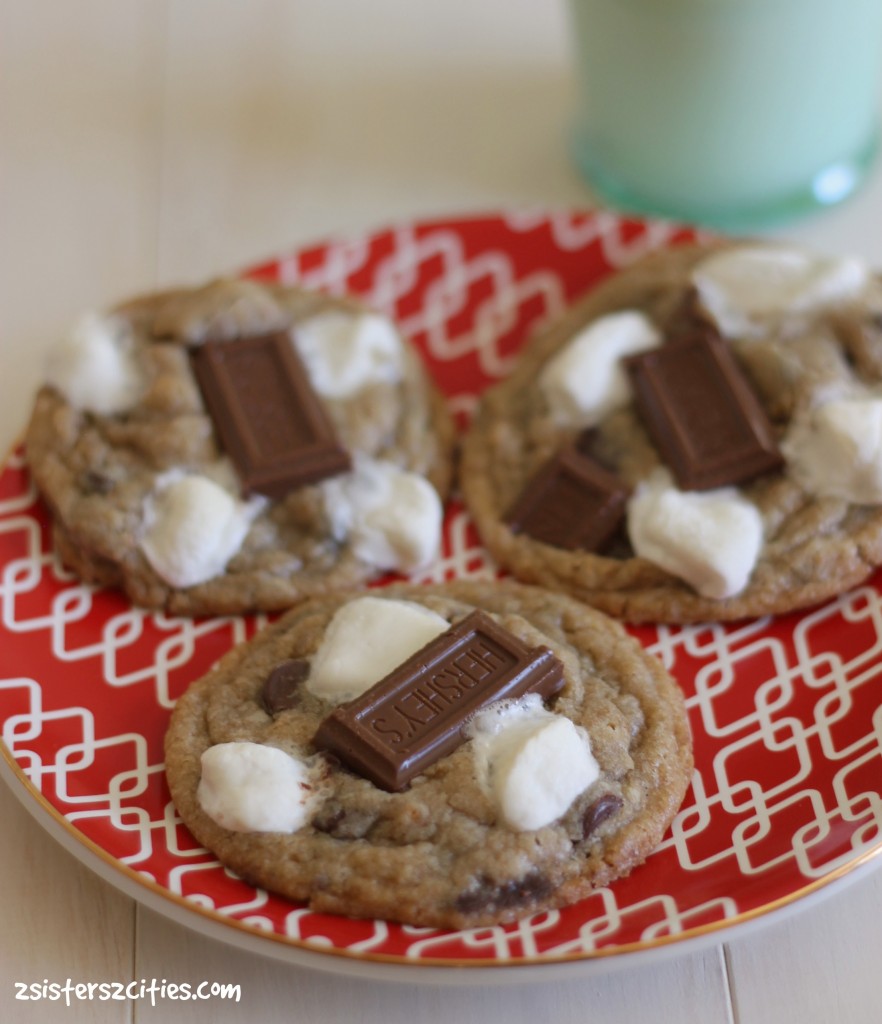
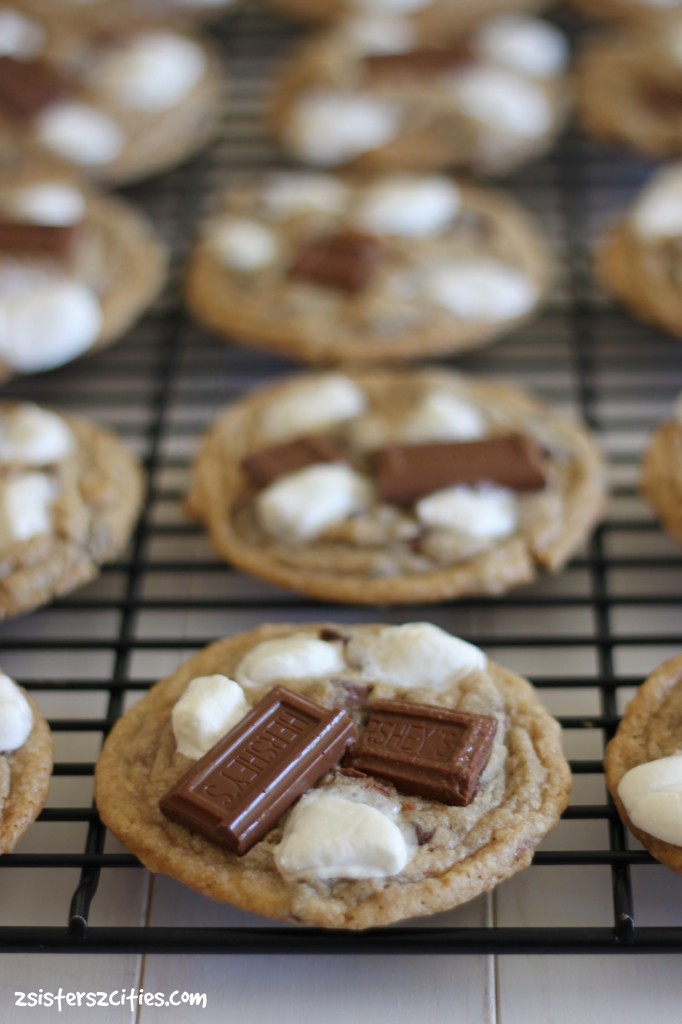
  7. Bake one tray at a time for 8 minutes, take out of the oven, closing the oven door so you do not lose heat. Press marshmallows and Hershey's squares into the top of the cookies (I did 1-2 squares and then 3-4 marshmallows in each cookies). Put tray back in the oven and bake for an additional 3-4 minutes. Repeat for second tray.
  8. Let cookies cool for 5-10 minutes and then move to cooling tray. Store in an airtight container.
3.2.2499

Source- Adapted from Carl’s Bad Cravings Blog

Looking for more S’more desserts?  Try these:

Smore-Ice-Cream.jpgS’more Ice Cream

raspberry_truffle_smores

Raspberry Truffle S’mores

Frozen Cupcake S'mores {from 2 Sisters 2 Cities}Frozen Cupcakes S’mores

sisterk (2)


Filed Under: K's Desserts, K's Recipes Tagged With: 4th of july, 4th of july menu, fourth of july, s'more cookies, s'mores, summer desserts, summer recipes

Peanut Butter Cream Pie

Posted by Keelin Hollenbeck on May 25, 2014

Peanut Butter Cream Pie

This weekend is Memorial Day Weekend, the unofficial start to summer!   I am so excited for summer for the nice weather, the fresh produce, and the chilled desserts!  My boyfriend and I have been taking advantage of the longer days and have started running.  We have a park within walking distance from our house so we started a Couch to 5k Challenge.   There is still a lot of running/walking, but we are half way through the program.   It is so nice to be outside and taking advantage of the beautiful park we live near.


Peanut Butter Pie

I made this pie a few weeks ago and it was the perfect cold dessert.  I love the peanut butter/chocolate combination of the pie and topping it with chopped peanut butter cups makes it even more amazing.  This pie would be the perfect Memorial Day dessert because you can make it ahead and it is cold and delicious.   It’s actually even better the next day so feel free to make it a day ahead of time and chill completely in the refrigerator.  Hope you all have a Happy Memorial Day Weekend!

Slice of Peanut Butter Cream Pie

Print
Peanut Butter Cream Pie
Author: 2 Sisters 2 Cities
Serves: 8
 
Ingredients
For Crust
  • 16 Oreo cookies
  • 4 tbsp. butter, melted
For Filling
  • ½ cup peanut butter
  • 8 oz. cream cheese (I used ⅓ fat kind), at room temperature
  • ¾ cup confectioners' sugar
  • 2 tbsp. milk
  • ½ cup chopped roasted peanuts
  • 3 cups of heavy cream
  • ½ cup chopped peanut butter cups, for topping
Instructions
To make Pie Crust-
  1. Preheat oven to 350 degrees. In a food processor pulse the Oreo cookies until finely ground. Pour the melted butter over the crumbs and pulse until butter is incorporated. In a 9" pie pan spray with non-stick spray. Dump the cookie crumbs into pie pan, spread evenly and work in to an even crust on the sides and bottom. Bake crust for 10-15 minutes until pie crust is set. Let cool completely before adding filling.
To make filling:
  1. In the bowl of your mixer fitted with a whisk attachment whip two cups of heavy cream until thick and fluffy. Put the whipped cream in a separate bowl and set aside for a later step.
  2. Add cream cheese and confectioners' sugar to empty mixer bowl and mix together until smooth.
  3. Beat in peanut butter, milk and chopped peanuts and beat together for about 1-2 minutes.
  4. Gently fold in 2 cups of the whipped cream by hand until everything is combined.
  5. Pour the filling out into the cooled crust and spread evenly. Refrigerate for at least two hours.
  6. When serving, whip remaining whipped cream and top each slice with whipped cream and chopped peanut butter cups.
3.2.2499

Peanut Butter Cream Pie with Chocolate Crust.jpg

Source- Adapted from Emeril Lagasse

sisterk (2)


Filed Under: K's Desserts, K's Recipes Tagged With: chilled dessert, dessert, memorial day, memorial day recipes, memorial day weekend, peanut butter cup pie, peanut butter cups, pie

Soft Heart Sugar Cookies with Buttercream Frosting

Posted by Keelin Hollenbeck on February 14, 2014

Valentine's Day Soft Sugar Cookies

The most popular type of dessert in this house is by far cookies. It seems we have tried every type of chocolate chip cookie and frosted sugar cookie there is. I am always saving the latest and greatest recipes I find. While I was thinking about what I was going to make for Valentine’s Day, I knew that a soft fluffy cut-out sugar cookie with buttercream frosting was in order. Last years cutout sugar cookies with buttercream frosting were such a hit that I thought soft heart cookies would be worth a try. I made soft sugar cookies with buttercream frosting a couple years ago for a bake sale and they were heavenly. My mom made them for Christmas this year and between my boyfriend and I we ate at least half the batch! These heart shaped soft sugars are right up there with the my other two favorite recipes!

Cut Out Soft Sugar Cookies with Buttercream Frosting
I divided the original recipe in half because it made 6 dozen cookies. Since there is only the two of us in my house and we are both on Weight Watchers, we really did not need 6 dozen cookies!

Soft Cut Out Sugar Cookies

After decorating these cookies with pink frosting and Valentine’s Day sprinkles, I realized how similar these looked to last year’s cookies! I should have tried to make red or purple frosting, but oh well! They were delicious anyways.

Heart Cut Out Cookies
Happy Valentine’s Day!

Print
Soft Heart Sugar Cookies with Buttercream Frosting
 
Ingredients
For Cookies:
  • 3 cups of All Purpose Flour
  • ½ tsp. baking soda
  • ½ tsp. baking powder
  • ¼ tsp. salt
  • ½ cup unsalted butter (1 stick), at room temperature
  • 1 cup granulated sugar
  • 2 small eggs or 1 and ½ large eggs
  • 1 tsp. vanilla extract
  • ¾ cup sour cream or light sour cream
For Frosting:
  • ½ cup unsalted butter (1 stick), at room temperature
  • ½ tsp. vanilla extract
  • 2 cups confectioners' sugar
  • Smidgen of salt
  • 3 tbsp. heavy cream
  • food coloring, optional
  • sprinkles, optional
Instructions
For Cookies:
  1. In the bowl of your stand mixer, mix the butter and sugar together until light and fluffy. Add in egg and mix until combined. Add in vanilla extract and sour cream and stir until everything is incorporated.
  2. In a separate medium-sized bowl, whisk together the flour, baking soda, baking powder, and salt.
  3. Slowly mix dry ingredients into the butter mixture, with your mixer on low and making sure to scrape down the sides. Once all combined, divide dough into two. The dough will be sticky so you may want to lightly oil or flour your hands to prevent sticking. Place each dough half on a piece of plastic wrap and flatten to about 1 ½ inches thickness. Wrap completely, repeat for second half, and chill both halves for at least 2 hours.
  4. Preheat oven to 425 degrees. Line two baking sheets with parchment paper or silicone baking mats.
  5. Flour countertops and roll out the first dough slab to about a ¼th inch thickness. You may need to flour the top of a dough a little too if it gets too sticky. Lightly flour your cookie cutter and cut out your shapes, place each cookie on prepared baking sheet and leave about 2 inches between each cookie. Repeat until you use up all the dough. This recipe should make about 3 dozen but that all depends on the size of your cookie cutter (mine was about a 3 inch heart.)
  6. Bake for 7-8 minutes until cookies start to turn golden on the edges. Using a spatula, gently move your cookies over to a cooling rack.
For Frosting:
  1. Cream together butter and vanilla extract in the bowl of you stand mixer set at a low speed. Slowly add confectioners’ sugar and a smidgen of salt (half a pinch) until smooth. Add in heavy cream a tablespoon at a time and continue to beat on medium for 1-2 minutes until the frosting has a light and fluffy consistency. Add your desired food coloring and mix in.
For Assembly:
  1. Once the cookies are cool, frost them with 1-2 tsp. of frosting with a offset spatula or a butter knife. If desired, add sprinkles to frosting right after before it begins to set. Enjoy!
3.2.2265

Source- Adapted from Two Peas and Their Pod
sisterk (2)

Follow my blog with Bloglovin


Filed Under: K's Desserts, K's Recipes Tagged With: cookie recipe, cookies, cutout sugar cookies, soft sugar cookies, sugar cookies, sugar cookies with buttercream frosting, valentine's day

Throwback Thursdays- The Root Beer Float

Posted by Keelin Hollenbeck on February 6, 2014

Root Beer Floats

Do you remember the days of letter jackets, Sadie Hawkins dances, and hanging out at the soda shop after school? Yeah I don’t… I wasn’t born yet.  I did have a poodle skirt and saddle shoes for a Halloween costume though.  I am also pretty sure I kept wearing the saddle shoes well after Halloween because I thought I was “wicked” cool.  (Wicked is a term used in the Syracuse and Boston area that in essence means really really or like totally… Yup that’s my technical definition.)

Vanilla Ice Cream for Float
Why am I referring to soda shops and saddle shoes? That’s because today’s recipe is the Root Beer Float, a favorite throwback recipe in my home.

Root Beer Poured into Float

My mom and I made some fantastic root beer floats when she came to visit in November.  Due to Thanksgiving sides, Christmas cookies, and appetizer craziness around here, I hadn’t had a chance to post about them.   While we were making the floats, we recalled how grandma called root beer floats, Brown Cows, and ones made with cola and vanilla ice cream, Black Cows.   This sparked a conversation and some googling to see what other types of floats are out there.

There are a lot of types of soda floats!  A Boston Cooler is when you made a float with ginger ale and vanilla ice cream (originated in Detroit not Boston- sorry M!)  A Snow White is a when you make a float with lemon-lime soda and vanilla ice cream.  Then, there is an Orange Cow with orange soda and Purple Cows with grape soda, both with vanilla ice cream.  You can get crazy with some Beer floats or Shakin’ Jesse, which is Guinness and vanilla ice cream.  Who knew you could make this many floats, but my favorite will always be the Root Beer Float!

Print
Root Beer Floats
Author: 2 Sisters 2 Cities
 
Ingredients
  • Root Beer
  • Vanilla Ice Cream
Variations:
  • Cola and Vanilla Ice Cream
  • Orange Soda and Vanilla Ice Cream
  • Grape Soda and Vanilla Ice Cream
  • Root Beer and Chocolate Ice Cream
  • Lemon-Lime Soda and Vanilla Ice Cream
  • Ginger Ale and Vanilla Ice Cream
Instructions
  1. In a glass add in two scoops of ice cream and then slowly pour in soda until glass is filled.
  2. Serve with a straw and a spoon.
3.2.2199

sisterk (2)


Filed Under: K's Desserts, K's Recipes Tagged With: Brown cow, drinks, Floats, ice cream, Ice Cream Floats, root beer, Root Beer Floats, Throwback Thursday

1 Roly-Poly Santa Cookies

Posted by Keelin Hollenbeck on December 24, 2013

Roly-Poly Santas

Here we are, our last cookie of the 2013 2 Sisters 2 Cities’ Cookie Countdown!   The last cookie is always the hardest to pick.  Since we photograph the number of cookies that correlate with the day of the countdown (if you haven’t noticed yet), having one cookie in a photo can be boring!   I knew that the last cookie had to be something special so when I saw these Roly-Poly Santa Cookies on Better Homes and Gardens’ website I was sold.  The funny thing is that  M and I both had these cookies on our 2013 cookie brainstorming list.

Roly-Poly Santa

Although these cookies are so cute, they are a little bit more labor-intensive than your average cookie.  I think this would be a great recipe to gift to kids.  I wanted to save one for my nephew T, but I knew they would never last in my luggage on the way home.

Roly-Poly Santas are made up with 11 red and white dough balls, then embellished with mini chocolate chips, red hots, and frosting.   I was worried that my red dye wouldn’t make a true red color.  I always get a bright pink when I try to make red frosting, but I’ve heard this happens to a lot of people.  From my research, I discovered that Americolor’s Super Red soft gel paste does the trick.  I was happy with the red color that my Santa cookies came out in and I did not taste any dye in them.

Print
Roly-Poly Santas
Author: 2 Sisters 2 Cities
Recipe type: cookies
 
Ingredients
For Cookies
  • 1 cup of butter, softened
  • ½ cup of sugar
  • 1 tablespoon of milk
  • 1 teaspoon of vanilla
  • 2¼ cups of all-purpose flour
  • Red paste food coloring
  • Miniature semisweet chocolate pieces
  • 1 recipe of Snow Frosting
  • Red cinnamon candies
White Frosting
  • ¼ cup of shortening
  • ¼ tsp. of vanilla
  • 1 cup plus 2 tbsp. of confectioners' sugar
  • 1½ tsp. of milk
Instructions
For Cookies:
  1. Preheat oven to 325 degrees F.
  2. In the bowl of your mixer, beat butter on medium speed for about 30 seconds. Add sugar to butter and continue to beat until combined.
  3. Beat in milk and vanilla, scraping down sides until all is combined.
  4. Next mix in as much of the flour as you can with the mixer. Stir in any remaining flour by hand. Remove 1 cup of the dough and place in a separate bowl . With the remaining dough, tint red with food coloring gel in mixer.
  5. For each Santa (this should make 10-12 cookies), shape red dough into twelve- 1-inch ball and sixty -1/2-inch balls(one 1-inch red dough ball, and five ½-inch red dough balls per Santa cookie.)
  6. Shape plain dough into twelve- ¾-inch ball and forty-eight- ¼-inch balls (one ¾-inch plain dough ball, and four-1/4 inch plain dough balls)
  7. Line 2 baking sheets with baking mat or parchment paper.
  8. Place the red 1-inch ball on a baking sheet, flattening the dough ball until about ½ inch thick. Attach the plain ¾-inch ball for head, flattening until ½ inch thick.
  9. Next, attach four of the red ½-inch balls for arms and legs and then attach the plain ¼-inch balls for hands and feet. Pinch the remaining ½-inch red ball into a Santa hat and attach to head.
  10. Repeat steps to create the rest of the Santas. Add the mini-chocolate chips as eyes and buttons.
  11. Bake Santa cookies for 12 to 15 minutes until edges are lightly browned.
  12. Let the cookies cool on baking sheet. Be careful because the are extremely fragile. Once cooled, gently move to a wire cooling rack.
  13. To create beard, put frosting in a piping bag with a small star tip (recipe below). Attach the red hot for the nose. Let sit until frosting sets.
For Frosting-
  1. In the bowl of you mixer, beat together shortening and vanilla for around 30 seconds. Gradually mix in around ½ cups of the confectioners' sugar until smooth. Next beat in 1½ tsp. milk. Continue to mix in remaining confectioners' sugar until the consistency for piping.
3.2.2199

Source- Slightly Adapted from BHG.com

sisterk (2)


Filed Under: K's Desserts, K's Recipes Tagged With: 12 cookies of Christmas, Christmas Cookies, cookie recipe, cookies, holiday baking, santa

2 Pecan Sandies

Posted by Keelin Hollenbeck on December 22, 2013

I know M and I have been saying this the whole time, but I cannot believe we are only three days away from Christmas.  All the cookies are made and we are so excited to share the the last two with you.  Today’s cookies are the Pecan Sandies, a delicious butter cookie with a hint of sweetness and a whole lot of pecans!  I actually picked out this recipe last February when I got the Bouchon Bakery cookbook.  When you know you have to make 12 new types of cookies in December, you definitely  need to plan ahead!

Pecan Sandies

This recipe closely resembles my family’s recipes for Mexican Wedding Cakes, the only difference is that these are made with pecans instead of walnuts, and the cookies are pressed down instead of just cooked in ball shape. I wouldn’t refuse either with a cup of tea or coffee…mmmmmmm.

2 Pecan Sandies

Print
2 Pecan Sandies
Author: 2 Sisters 2 Cities
Serves: 24-30
 
Ingredients
  • 1¾ cups plus 2 tsp. all purpose flour
  • ¾ cup coarsely chopped pecans
  • ¾ cup unsalted butter (1½ sticks)
  • ¾ cup plus 2 tbsp. confectioners' sugar, additional for sprinkling finished cookies
Instructions
  1. Preheat oven to 350 degrees F.
  2. In the bowl of your mixer, beat butter for 1-2 minutes until smooth. Add confectioners' sugar and mix together until light and fluffy.
  3. In a separate bowl combine pecans and flour.
  4. Mix dry ingredients into butter until combined, scraping down the side of the bowl to make sure all ingredients are incorporated.
  5. Roll dough into 1 to 1½ inch balls. Place dough balls at least 2 inches away from on a baking sheet lined with a silicone baking mat or parchment paper. Lightly flour the backside of a measuring cup, press dough ball into ½ inch thick disk.I
  6. Bake for 15-20 minutes until cookies are lightly golden on edges, rotating the baking sheet halfway through baking. Let cool on a wire rack and lightly sprinkle with additional confectioners' sugar.
3.2.2199

Source- Slightly adapted from Bouchon Bakery cookbook

sisterk (2)


Filed Under: K's Desserts, K's Recipes Tagged With: 12 days of christmas cookies, Christmas Cookies, cookies, holiday baking, holiday cookies, pecan sandies

4 Oatmeal Chocolate Mint Cookies

Posted by Keelin Hollenbeck on December 18, 2013

Oatmeal Chocolate Mint Cookies

Was that a misprint?  An oatmeal cookie with mint?  No mistake here, these two flavors are a hidden treasure.  San Francisco is know for an ice cream sandwich from IT’s-IT Ice Cream which is vanilla, mint, chocolate, or cappuccino ice cream in between two old-fashioned oatmeal cookies and then dipped in dark chocolate.  We found them at the grocery store recently and have tried both the vanilla and mint sandwiches.  I have to say my favorite is the mint.  The classic oatmeal cookie with the cool refreshing taste of mint ice cream all pulled together with the bitter dark chocolate is something truly to write home about.

IT'S-IT Inspired Cookies

I was inspired to try to make a cookie version of this ice cream sandwich after eating some of Hershey’s Holiday Mint Truffle Kisses.  I searched through my cookbooks for a basic oatmeal cookie recipe and decided to tuck the kiss inside the cookie versus placing on top.  When the cookies came out of the oven, the flavor was almost perfect but missing something.  I had leftover melted chocolate from the chocolate-dipped shortbread cookie recipe so I drizzled some chocolate on top.  With the addition of the chocolate, the cookie instantly tasted just like the ice cream sandwich.

My boyfriend told me that they were best of all the holiday cookies I created, which is a huge feat after our favorite shortbread recipe.  I was a little worried about bringing them into work because of the weird combo, but my co-workers went nuts over them and they were gone quickly.   Take a chance this holiday season and make these cookies before those truffle kisses run out!

4 Oatmeal Chocolate Mint Cookies

Print
4 Oatmeal Chocolate Mint Cookies
Author: 2 Sisters 2 Cities
 
Ingredients
  • 1 cup of unsalted butter (2 sticks), at room temperature
  • 1 cup packed light brown sugar
  • 1 egg
  • 1 tsp. vanilla extract
  • 1 ¾ cup all purpose flour
  • 1 tsp. Cinnamon
  • ½ tsp. salt
  • 2 ½ cups old fashioned oats
  • 30-36 Hershey’s Mint Truffle Kisses, unwrapped
  • ¼ cup Bittersweet chocolate chips
Instructions
  1. In the bowl of you mixer, beat together butter and brown sugar until its fluffy and light yellow in color. Scrape down the sides of the bowl and add in egg and vanilla extract, mix for about 1 minute.
  2. In a separate bowl mix together flour, cinnamon, and salt. Add in oats.
  3. With mixer on low speed add dry ingredients to butter mixture. Mix for about 30 seconds and then finish the rest with a rubber spatula.
  4. Cover bowl with plastic wrap and place in the refrigerator for at least 1 hour or up to 12 hours.
  5. After at least an hour of chilling, preheat oven to 350 degrees
  6. Taking about 2 teaspoon of dough in your hand, flatten into a disk and place a mint kiss in the middle. Fold sides up around the kiss and top with an additional teaspoon of dough so that the kiss is completely sealed in the dough ball. Place on a baking sheet lined with a silicone baking mat or parchment paper, leaving at least 2 inches between each cookie.
  7. Bake for 14-16 minutes or until set. Let cool on baking sheet a couple of minutes before moving to a wire cooling rack.
  8. Once cookies have cooled top with chocolate drizzle.
  9. For Drizzle- In a small heat proof bowl, add chocolate chips. Microwave in 20 second intervals, stirring in between until melted. To drizzle, take a spoon of melted chocolate, tip the spoon to get a small stream of chocolate going and move back and forth over the cookies so you get zig zags over the cookies.
3.2.2199

Have you been following our entire 2013 Cookie Countdown?  Catch up below if you have missed any!

5 Sprinkle Cookies
6 Chocolate-Dipped Shortbread Cutouts
7 Chocolate Hazelnut Coins
8 Italian Lemon Drops
9 Chocolate Toffee Crackers
10 Cranberry Pistachio Shortbread Cookies
11 Christmas Snickerdoodles
12 Chocolate Raspberry Thumbprints

sisterk (2)


Filed Under: K's Desserts, K's Recipes Tagged With: 12 days of christmas cookies, baby shower brunch, chocolate, cookie recipe, cookies, holiday baking, it's it, mint, oatmeal, san francisco

5 Sprinkle Cookies

Posted by Keelin Hollenbeck on December 17, 2013

Sprinkle Cookies

Today we bring you 5 sprinkle cookies! Can you tell that I am in a sprinkle mood after cookie number 6?   I ended up buying two huge containers of sprinkles at the store when I ran out last weekend for the chocolate-dipped shortbread cookies.  During the week I had a very productive night: getting home, working out, and making dinner all before 8.  I decided to get ahead and make another batch of cookies for our cookie countdown.

I found a recipe for Italian Sprinkle cookies and since these happened to be my most favorite of the Italian variety, I knew I had to make them.  Better yet, this recipe was so easy to make!  The recipe has lemon zest in it which may seem weird to you.  My boyfriend was very skeptical about this addition but it adds a really great flavor to the cookies.  We ate so many of these cookies that I was lucky to have five cookies left to take a picture!

5 Sprinkle Cookies

Print
5 Sprinkle Cookies
 
Ingredients
  • 1½ cup all-purpose flour
  • 1½ tsp. baking powder
  • ½ tsp. kosher salt
  • 1½ sticks of unsalted butter (12 tbsp.), at room temperature
  • ¾ cup of granulated sugar
  • 2 tsp. vanilla extract
  • Zest of ½ of a lemon
  • 1 egg
  • 1 cup of sprinkles
  • 1 egg white, light beaten
Instructions
  1. In the bowl of your mixer, combine butter and sugar for about 2 minutes, until light and fluffy.
  2. Sir in vanilla, lemon zest, and egg into the butter mixture until smooth.
  3. In a separate medium-sized bowl whisk together flour, baking powder, and salt.
  4. Add dry ingredients to the butter, and mix until just combined.
  5. Line a baking sheet with silicone baking mat or parchment paper.
  6. Roll dough into 1" balls and place on baking sheet at least 2 inches away from each other.
  7. With the back side of clean measuring cup, dust lightly with flour and press down each cookie ball in disk. Continue to flour the bottom of the measuring cup as needed to prevent the dough from sticking
  8. Refrigerate the cookie disk for 30 minutes.
  9. Preheat the oven to 375 degree F.
  10. Place sprinkles in one bowl and egg white in another bowl.
  11. With a pastry brush, brush each cookie with egg white and then dip into sprinkles, pressing lightly to get sprinkles to adhere. Place each cookie back on baking sheet.
  12. Bake for about 10 minutes until each cookie is set.
  13. Let cool and serve! Keep in a airtight container for 3 days or freeze for up to 3 months,
3.2.2199

Source- Adapted from Saveur.com

Looking for more cookie recipes?  Check out our countdown so far:

6 Chocolate-Dipped Shortbread
7 Chocolate Hazelnut Coins
8 Italian Lemon Drops
9 Chocolate Toffee Crackers
10 Cranberry Pistachio Shortbread
11 Christmas Snickerdoodles
12 Chocolate Raspberry Thumbprints

sisterk (2)


Filed Under: K's Desserts, K's Recipes Tagged With: 12 days of christmas cookies, Christmas Cookies, cookie recipes, holiday baking, Italian cookies, sprinkles

Homemade Candy

Posted by Keelin Hollenbeck on December 16, 2013

Slow Cooker Candy

Today we are taking a break from the cookie countdown, but we are still focusing on Christmas treats!  This year for my co-workers’ holiday gifts, I am giving mason jars filled with two kinds of homemade candy inside.   I have given my co-workers Christmas cookies in the past, but I decided to change it up this year.  I have been bringing the cookies into work right after I make them to give us a little break from being surrounded by Christmas cookies 24/7.  I love the idea of mason jars and how they can be used for some many things.  Leftovers, soups, vases, glasses, and gift packaging!  I purchased my jars at Target for around $8 for 12, but they also sell them on Amazon for $9.99 with Prime shipping if you can’t find them around where you live.

Slow Cooker Candies

The first candy I made was one that I have been seeing all over Pinterest called “Crockpot Candy.”  This candy is made with a slow cooker.  It is really easy to make and is super addictive!  They are like a chocolate-covered nut cluster with a softer more tastier chocolate mixture.  I used mini cupcake liners to put the chocolate candies in instead of the regular sized liners called for in the original recipe.  I found Christmas cupcake liners at both Target and my grocery store.  The original recipe also asks for white almond bark, which they do not sell anywhere around here.   After googling some resolutions, I found out that you can use Candiquik vanilla melting chocolate in replacement of white almond bark.  I had seen this product at Target when I was looking for the bark.  If you can’t find either, just use white chocolate.

For a quicker hardening stage- stick your trays outside (if it’s cold out).  It has been record breaking cold over hear in the Bay Area, which would be regular cold everywhere else, but its considered cold here.  I know what M is thinking now- we grew up with Syracuse winters… toughen up K!  Right M?

Print
Slow Cooker Candies
Author: 2 Sisters 2 Cities
Recipe type: Candy
Prep time:  20 mins
Cook time:  2 hours 30 mins
Total time:  2 hours 50 mins
Serves: 50-60 candies
 
Ingredients
  • 1 pound dry-roasted salted peanuts
  • 2 oz. German Chocolate, broken into squares
  • 1 cup Semi-sweet chocolate
  • 1¼ pounds Candiquik vanilla melting chocolate, broken into squares
Instructions
  1. In your slow cooker add peanuts followed by German sweet chocolate, semi-sweet chocolate chips and then topped with the candiquik vanilla melting chocolate.
  2. Cover slow cooker and turn on low. Cook untouched for 2½ hours.
  3. While the chocolate is heating, line a baking sheet with mini cupcake liners. You will need about 50-60 liners.
  4. After 2½ hour cooking time, stir the chocolate until all combined. Keep the heat on low while dividing.
  5. Using a teaspoon or a small cookie scoop, scoop candy mixture into each liner. Half way through filling. Tap tray against counter to force the chocolate to settle into the liners. Repeat when finished filling the remainder of liners.
  6. Let candies cool complete before eating. Keep in an air tight container.
3.2.2199

Source- Adapted from Home Cooking with Trisha Yearwood via foodnetwork.com

Peanut Brittle

The second type of candy I am packaging this year is my all time favorite holiday candy, Peanut Brittle.  My mom made this recipe growing up and I am such a huge fan.  I had posted this recipe when we first started this blog, but I didn’t have any photos of it and it is pretty buried in our history.  The key to this recipe is finding raw, blanched peanuts.  This, my friends, is not an easy task.  I have been searching for raw blanched peanuts for the last four years!  Wegmans used to carry then and Whole Foods has them occasionally,  but I haven’t seen them in either for awhile.  You can buy these on-line for sure, I just never got to ordering them ahead of time.  This year while  getting my produce at a store called Sprouts, I found the peanuts in the bulk nut section!   I couldn’t believe it!  I quickly filled a bag with the peanuts and knew I had to make my favorite peanut brittle again.

Print
Peanut Brittle
Author: 2 Sisters 2 Cities
 
Ingredients
  • 1 cup sugar
  • 1 cup light corn syrup
  • 2 cups raw blanched peanuts
  • 1 tsp. Baking Soda
  • 1 tsp. vanilla extract
Instructions
  1. Prepare a cookie sheet by spraying with cooking spray and set aside. Also spray a heat resistant rubber spatula or regular spatula with spray; it will come in handy when spreading the sticky mixture.
  2. In a sauce pan over medium-high heat, stir together sugar and light corn syrup.
  3. Once melted together, add in raw peanuts. Stir constantly for 12-15 minutes, until peanuts start to turn brown (often the signal that it’s ready is a puff of smoke, but I am yet to see this puff.)
  4. Stir in vanilla extract and baking soda quickly before the candy starts to harden.
  5. Once all the ingredients are completely stirred together, pour mixture onto greased baking sheet, using greased spatula to spread it out. Spread candy out as far as you can without making holes so that there is a single layer of peanuts.
  6. After this is spread, leave for about 1 or 2 hours until completely hardened then break into small pieces. Store in an airtight container.
3.2.2199

Source- A 2s2c original
sisterk (2)


P.S. Looking for more holiday edible gift ideas besides homemade candy?  Try our homemade hot chocolate mix!

Homemade Hot Chocolate Mix


Filed Under: K's Desserts, K's Recipes Tagged With: candy, christmas gift ideas, crockpot candies, diy christmas project, DIY gifts, edible stocking stuffers, homemade candy, Peanut Brittle, stocking stuffers

6 Chocolate-Dipped Shortbread Cutouts

Posted by Keelin Hollenbeck on December 14, 2013

Chocolate Dipped Shortbread Cutouts

On the sixth day of Christmas cookies my true love gave to me… 6 chocolate-dipped shortbread cutouts!   Aww, thanks!  I love love this recipe for shortbread.  It is one of my favorite cookies.  I feel like I say that a lot, but what can I say, I love me some cookies.  My boyfriend and I make them year-round in different shapes based on the season.  He will make the dough and put it in the refrigerator, and do the dishes, and then I will roll it out, cut them out, bake them and dip them in chocolate.   When I am feeling festive, I add sprinkles!  I love the longer “jimmie” sprinkles rather than the nonpareil sprinkles.

Chocolate Dipped Shortbread Cutouts

I happened to only have the later when I was making these cookies so I ran out the grocery store to get some  more.  I later discovered that I also had no confectioners’ sugar left to make my next cookie!  Don’t you hate when that happens!  I had every type of sugar – granulated, light brown, dark brown, and even superfine!  I had to change my next cookie recipe up because I was not about to go back to the store.  Sprinkles and chocolate are optional and if this recipe looks familiar to you, it’s just a variation of the recipe I use for linzer cookies.

Chocolate Dipped Shortbread Cookies

These cookies are great to come home to after a long day of last-minute shopping.  Not to toot my own horn, but I don’t have any last minute shopping to do because I bought everything on-line last week…Toot TOOT!  I do have some serious baking to do this weekend though!
Chocolate Dipped Shortbread Cutouts
Print
6 Chocolate Dipped Shortbread Cutouts
 
Ingredients
  • 1½ cups of Butter (3 sticks), at room temperature
  • 1 cup granulated sugar
  • 1 teaspoon vanilla extract
  • 3½ cups AP flour
  • ¼ teaspoon salt
  • 2 cups bittersweet or semi-sweet chocolate chips
  • 1 cup sprinkles (optional)
Instructions
  1. In the bowl of a mixer, add in butter and sugar and mix until combined (using the paddle attachment.) Mix in vanilla extract.
  2. In a separate bowl whisk together flour and salt.
  3. With mixer on low, add the dry ingredients into the butter and mix until combined.
  4. Take dough out on to a floured surface and form into a disk. Wrap in plastic wrap and place in the refrigerator for 30 minutes.
  5. Preheat oven to 350 degrees F.
  6. On a floured surface, roll out dough with a rolling pin to ¼-1/2 inch thickness.
  7. Using a 3 inch cookie cutter, cut out shapes and place them on a silicone baking mat or parchment paper lined baking sheet. Space cookies at least 2 inches away from one another.
  8. Bake for 15-20 minutes until cookies start to brown on edges.
  9. To melt chocolate-- In a microwave safe bowl place chocolate chips. On a 50% power setting on the microwave heat the chocolate for 1-1½ minutes. Stir chocolate then continue to heat until melted in 20 seconds intervals until completely smooth or melted.
  10. Dip cookies in melted chocolate, using a off-set spatula to scrape the chocolate off the bottom of the cookie. Lie on parchment paper. Add sprinkles immediately before chocolate starts to dried. Repeat for all cookies. Let dry before repacking cookies. Eat within three days or freeze.
  11. *I would recommend higher quality chocolate chips for this process because although I am a huge fan of Nestle chips and Costco chips in cookies, they have added more wax in their chips in the last few years and they do not melt as smoothly. I used Ghiradelli Bittersweet Chocolate chips and they melted perfectly. For smoother chocolate you can even used baking bars of chocolate which have even less wax in them resulting in smoother chocolate.
3.2.2199
sisterk (2)
Related Posts Plugin for WordPress, Blogger...


Filed Under: K's Desserts, K's Recipes Tagged With: 12 days of christmas cookies, chocolate, chocolate dipped cookies, christmas cookie, cookie recipe, cookies, holiday baking, shortbread, sprinkles

  • 1
  • 2
  • 3
  • …
  • 8
  • Next Page »

Recent Posts

  • Easy Holiday Office Party Tips
  • 5 Steps to an Easy Football Party
  • Gingerbread Biscotti
  • Holiday Coffee Bar and Thanksgiving Recipes
  • Soft Sugar Pumpkin Cookies
  • Cinnamon Sugar Apple Cake
  • Hello Pumpkin Season!
  • Make Your Own Milkshake Party!
  • Mama’s Pickles
  • S’more Cookies

Categories

  • About 2 Sisters 2 Cities (7)
  • Books (8)
  • Crafting & DIY (22)
  • Design & Decorating (15)
  • Gardening (5)
  • Giveaway (14)
  • Guest Bloggers (8)
  • K's post (46)
  • K's Recipes (191)
    • K's Desserts (75)
    • K's Entrees (23)
    • K's Sides (24)
  • M's post (72)
  • M's recipes (167)
    • M's Entrees (21)
    • M's Sides (14)
    • M's Desserts (30)
  • Organizing (7)
  • Party Ideas (49)
  • Uncategorized (1)
  • Vacation (12)
Stitch Fix

Archives

Blogroll

  • Annie's Eats
  • Bake at 350
  • Baked Bree
  • Boston Harbor Beacon
  • Confections of a Foodie Bride
  • Cook Like a Champion
  • Erin’s Food Files
  • Forever and a Recipe
  • Framed Cooks
  • Oh Happy Day
  • On Common Ground
  • Pennies on a Platter
  • Pink Parsley
  • Recipe Girl
  • Sally's Baking Addiction
  • Simply Scratch
  • The Curvy Carrot
  • The Pioneer Woman
  • Tidy Mom
  • Two Peas & Their Pod
  • What’s Gaby Cooking
  • Young House Love
Increase your website traffic with Attracta.com

grab a 2 sisters button!


Copyright © 2014 ~ 2 Sisters 2 Cities | Blog Design by Minx Design