2 Sisters 2 Cities

Image Map
  • About 2 Sisters 2 Cities
  • Recipe Index
  • Project Index
  • Contact Us
  • Like us on Facebook
  • Follow m on twitter
  • Follow k on twitter
  • Follow 2S2C on Pinterest
  • Follow 2S2C on G+
  • rss
  • e-mail 2S2C

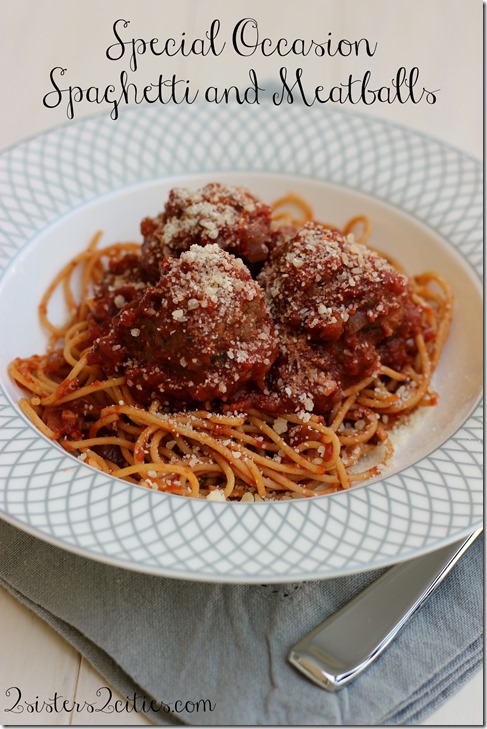
Special Occasion Spaghetti and Meatballs

Posted by Keelin Hollenbeck on September 15, 2013

Special Occasion Spaghetti and Meatballs

My boyfriend loves spaghetti and meatballs.  If it were up to him, we would have this for dinner every night with the occasional meatball sub sprinkled in.   I use this basic recipe for meatballs with my favorite easy sauce every few weeks for our regular spaghetti and meatball weeknight recipe.  Since there is only two of us and we are usually watching our weight, I always freeze my leftover meatballs (before putting them in sauce.)   I love being able to make a really quick tomato sauce on weekdays and then just pop in the meatballs we need for dinner that night.
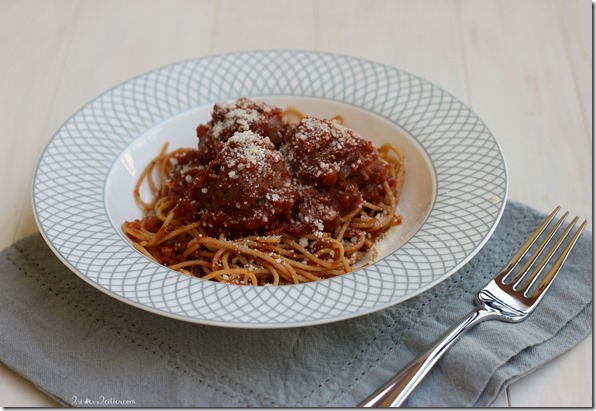
Spaghetti and Meatballs

However on the weekends when we are not busy, I like to try a new meal that take longer to pull together and that is really special.  We usually likes to do themed nights with the food and have drinks, an appetizer or bread, dinner, and a dessert all in the same “genre” if you will.  Italian night is a popular ones because there are so many options.  Since we have been on a Ina Garten kick lately, I decided to try her “Real Meatballs and Spaghetti”  with some minor changes to make it to our liking.

We paired it with a fresh loaf of Italian bread with some olive oil to dip it in, some prosciutto and sharp provolone rolled together, and or course, a bottle of wine.  For dessert, my boyfriend made us Italian Spritz cookies.  It was the perfect date night and so delicious!  I froze the extra meatballs and with the leftover meatballs that had been cooked in the sauce, I made the best meatball subs with the leftover Italian bread and a garlic spread to make it into garlic bread for lunch the next day.
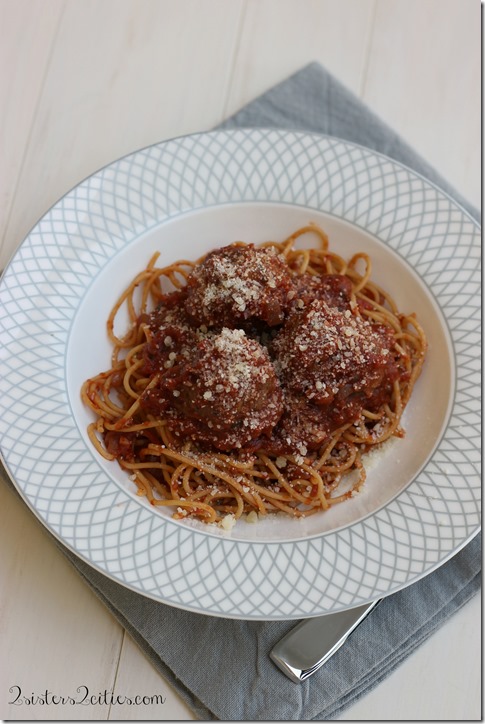
Meatballs

I say that this recipe is a special occasion meal because buying ground veal, pork and beef can get expensive!   I don’t have a butcher and I often question the meats at my grocery store.  Recently, I have been getting my meats at Costco for steaks and chicken breast and then Whole Foods for ground meat and fish.   It’s a little more expensive, but I find that it’s worth if for the quality.  An extra plus is that at Whole Foods you can get the ground meat by weight so you can buy exactly what you need for these meatballs.  Do you have a recipe that you love to make for special occasions or date nights?

Print
Special Occasion Spaghetti and Meatballs
Author: 2 Sisters 2 Cities
 
Ingredients
For the meatballs:
  • ½ pound ground veal
  • ½ pound ground pork
  • 1 pound ground beef
  • 1 cup fresh white bread crumbs
  • ¼ cup seasoned dry bread crumbs
  • 2 tbsp. chopped flat-leaf parsley
  • ½ cup freshly grated Parmesan cheese
  • 2-3 cloves garlic, chopped
  • 2 tsp. kosher salt
  • ½ tsp. freshly ground pepper
  • 1 large egg
  • ¾ cup warm water
  • Canola oil
  • Olive oil
For the sauce:
  • 1 tbsp. olive oil
  • 1 cup chopped yellow onion
  • 1½ tsp. minced garlic
  • ½ cup dry red wine (I used the Cabernet I was drinking)
  • 1 28 oz. can crushed tomatoes
  • 1 tbsp. chopped fresh flat-leaf parsley
  • 1½ tsp. kosher salt
  • ½ tsp. freshly ground pepper
Instructions
  1. In a large bowl add in ground meats, both types of bread crumbs, parsley, Parmesan, garlic, salt, pepper, egg, and warm water. Combine with hands until just mixed then form 1½ inch balls.
  2. In a 12-inch skillet pour in equal amounts of canola and olive oil so that there is a ¼ inch of oil in the pan. Heat oil over medium-low heat. Line a platter with a few layers of paper towels. In several batches, carefully cook the meatballs in oil, browning them on each side. Don’t overcrowd and be very careful when turning the meatballs. Each batch should take about 10 minutes. Move cooked meatballs onto paper towels and repeat for next batch. Once done with cooking meatballs discard the oil but leave the pan for sauce steps.
  3. For the sauce, heat olive oil in the pan. Heat the pan to medium heat and sauté onions for 5-10 minutes until translucent. Add the garlic and cook until fragrant, about 1 minute. Add in wine to pan and turn heat up to high. As wine heats up scrape all the brown bits in the pan and cook until almost all the wine is evaporated. Stir in tomatoes, parsley, salt and pepper.
  4. Return meatballs to pan, cover, and simmer on low heat for about 20-30 minutes. Serve with cooked spaghetti, grated Parmesan, and fresh Italian bread.
  5. *If not using all the meatballs for the meal, freeze the meatballs after they cool and before you place them in the sauce. The next time you make sauce throw frozen meatballs into sauce and cook for 20-30 minutes.
3.2.1753

Source- Adapted from Ina Garten’s Barefoot Contessa Family Style

sisterk (2)


Filed Under: K's Entrees, K's Recipes Tagged With: date night, Italian, italian recipes, meatballs, spaghetti and meatballs, special occasion dinner

Chicago-Style Hot Dogs

Posted by Keelin Hollenbeck on July 7, 2013

Chicago-Style Hot Dog

As I mentioned in my post about Chicago Deep Dish Pizza and my homemade hot dog bun recipe, my entire family met up in Chicago for my cousin’s wedding a few months ago.  My boyfriend and I had some time to walk around before the rehearsal dinner, so we set out to find hot dogs “dragged through the garden”  (or a hot dog with everything as I now call them).

Chicago Style Hot Dog
Chicago-style hot dogs (with everything) are a delicious steamed hot dog on a steamed poppy seed bun, then topped with mustard, relish, chopped onions, a slice of dill pickle, tomato wedges, sport peppers, and celery salt.   They are quite an amazing concoction and I had been craving them since our trip.   After discovering the recipe for hot dog buns with poppy seeds, I decided that we could try to recreate them.

I am obsessed with dill pickles (Claussen is the only type people- let’s get serious here) so I happened to have them on hand, as well as sweet green relish, onions, mustard, tomatoes and celery salt.   I ran out to the store and picked up some Nathan’s Original beef hot dogs, since the Chicago Vienna hot dogs with natural casing are not available around here.  Nathan’s is an East coast brand, but for some reason they carry them out here which I am thankful for. I couldn’t find sport peppers either so I picked up some pepperoncini peppers and sliced them on top.  I know this isn’t the traditional pepper, but I think these ingredients are hard to find outside of the Chicago area.

Print
Chicago-Style Hot Dogs
Author: 2 Sisters 2 Cities
Serves: 2
 
Ingredients
  • 2 all beef hot dogs
  • 2 poppy seed hot dog buns
  • yellow mustard
  • sweet green relish
  • yellow onions, chopped
  • 2 dill pickle spears (Claussen)
  • 4 tomato wedges
  • celery salt
  • sport peppers, or pepperoncini peppers if you live outside the Chicago area
Instructions
  1. In a medium sauce pan, add ½ inch of water to the pan. Heat on medium until a small simmer starts. Add in the hot dogs and cook for about 8 minutes rolling them back and forth every few minutes.
  2. Once hot dogs are cooked take out them out and set aside. Place a steaming basket or metal colander above the water. Place hot dog buns in the steaming basket/colander for a minute or two, covering, until steamed and softened.
  3. Add the hot dogs to the buns. Top with mustard, onions, and green relish (all to your liking) Stick a dill pickle spear on one side between the hot dog and bun, then on the other side wedge the tomato wedges. Top with sport peppers or sliced pepperoncini and finish with celery salt.
3.2.1753

Delicious Hot Dog Buns

sisterk (2)


Filed Under: K's Entrees, K's Recipes Tagged With: chicago, Chicago recipes, Chicago Style Hot Dogs, dragged through the garden, hot dog recipes, hot dogs, hot dogs with everything, Nathan's Hot Dogs, pickles, poppy seed hot dog buns, relish
Homemade Hot Dog Buns

Posted by Keelin Hollenbeck on June 23, 2013

Homemade Hot Dog Buns

The other week, my boyfriend and I were craving the Chicago-style hot dogs that we experienced on our first trip to Chicago a few months ago.    We were reading recipes online and I found a recipe for homemade hot dog buns.   I got really excited about this because I have been wanting to make my own hot dog roll for some time now.  Also, I could easily make these homemade buns into some poppy seed buns that are required for Chicago hot dogs.

Although the hot dog bun recipe has poppy seeds on them, you can make these plain by skipping the topping instructions.   Bread-making wise, these are really easy to make and you won’t believe how good they taste!  Make them now and put them in the freezer for your Fourth of July party.  Your friends and family will be super impressed when you say “ Yeah I made these, no biggy!” (yes I totally just made up this scenario, but it could happen!)

Poppy Seed Hot Dog Buns

Print
Homemade Hot Dog Buns
Author: 2 Sisters 2 Cities
Serves: 8-10
 
Ingredients
  • 1 tbsp. granulated sugar
  • 1 tbsp. active dry yeast
  • ¼ cup warm water
  • 1 cups warm milk
  • 1 tbsp. vegetable oil
  • 1 tsp. salt
  • 3 cups (plus more if needed) all-purpose flour
  • 1 egg
  • 1 tbsp. of cold water
  • 2 tbsp. poppy seeds (optional)
Instructions
  1. In the bowl of stand mixer fitted with the paddle attachment, mix together sugar, yeast, and warm water. Let the yeast mixture sit for 5 minutes. It should get foamy.
  2. Add in warm milk, vegetable oil, salt and 1 &1/2 cup of the flour to the yeast mixture. Mix on medium-high for about 2 minutes. Switch to the dough hook attachment and turn mixer onto low. Work in additional flour, ¼ cup at a time, until the dough come together and pulls away from sides of the bowl.
  3. Let the mixer go to 8-10 minutes on low to knead the dough.
  4. Oil a large bowl. Form dough into a ball and place into the oiled bowl, turning to coat. Cover bowl with a clean towel or plastic wrap and let rise for 1 hour. It should double in size.
  5. Ones the dough has risen, punch out the dough on to slightly floured surface. Divide the dough into 8-10 equal sized balls. (I used my kitchen scale and measured the dough to divide it. I also made 8 rolls and they were a little big for normal sized hot dogs.)
  6. Roll the dough balls into long rolls in your hands. You will want them to be about 4 and ½ inches long, then flatten each slightly with your palm.
  7. If using topping, sprinkle baking sheet with poppy seeds and lightly roll each dough piece in poppy seeds.
  8. Place the rolls on baking sheet so that they are equally spread out. Cover with towel and let rest for about 45 minutes.
  9. When there is 15 minutes left to the dough resting, preheat the oven to 400 degrees.
  10. Whisk together the egg and water in a small bowl to prepare egg wash. Brush the top of each roll with the egg wash and sprinkle each with poppy seeds (if using.)
  11. Place the roll in the oven and bake the rolls for 20 minutes. The roll will be lightly golden brown when done. Remove from baking sheet and let cool on wire rack
  12. When ready to serve rolls, slice lengthwise pulling the knife only ⅔ the way through, leaving other side closed. Store in airtight bag or container.
3.2.1753

Source– Adapted slightly from Curvy Carrot

Chicago Style Hot Dog

Recipe for Chicago-style hot dogs to come!

Delicious Hot Dog Buns


Mmmmmm….
sisterk (2)


Filed Under: K's Entrees, K's Recipes Tagged With: bbq, Chicago Style Hot Dogs, cookout, fourth of july, fourth of july menu ideas, fourth of july recipes, homemade buns, Hot Dog buns, hot dogs, poppy seeds, summer, summer recipes

Carnita Tacos

Posted by Keelin Hollenbeck on May 14, 2013

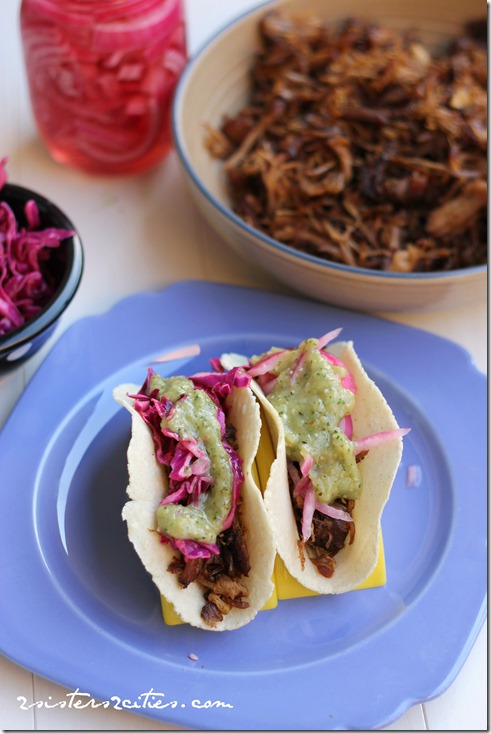
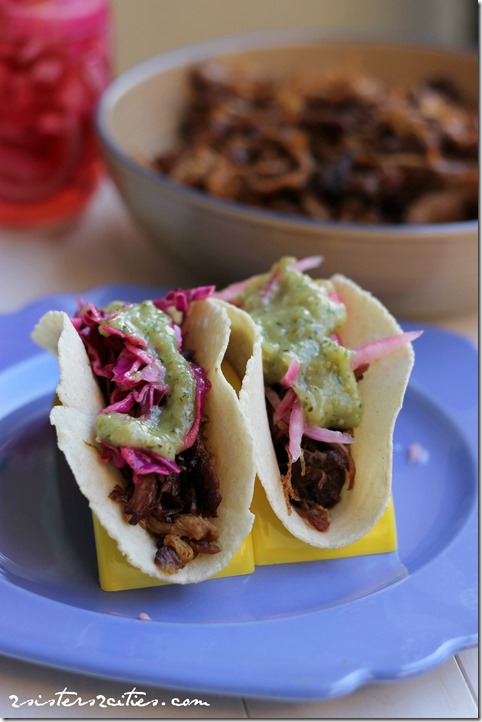
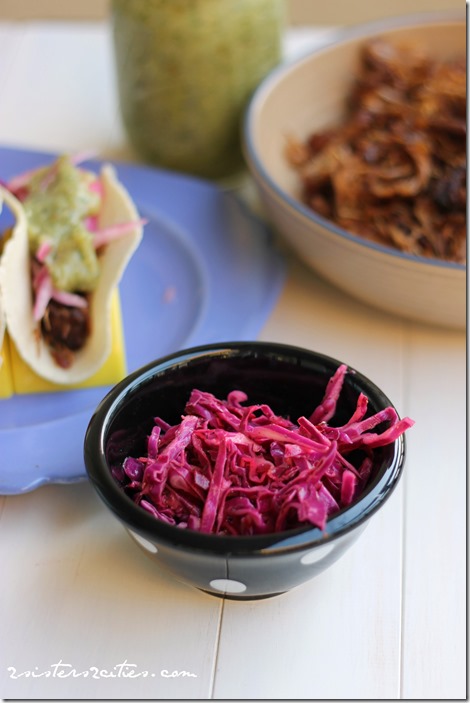
Carnitas Tacos with Pickled Onions

Well, I missed the Cinco de Mayo train with this recipe.  I was getting ready to post this last Sunday, but I got into a cleaning mood all Sunday morning and completely cleaned every surface in my house.  I even vacuumed my balcony.  Who does that?   It was one of those moments when your realize that you are totally turning into your mom.   I am having those a lot lately!

I feel like May is going by so fast.  I was shocked the other day that it was already May and now we are already halfway through.   We are on summer time already apparently.   I know it’s no longer Cinco de Mayo, but one of the great thing about Mexican food is that you can eat it all year round.

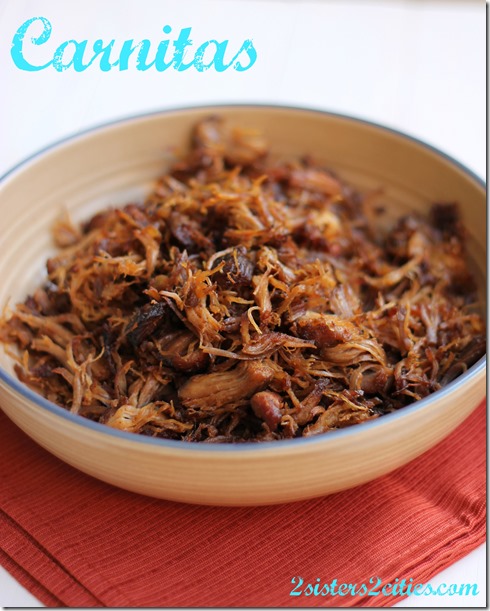
Carnitas

Since I have moved to California, Carnitas have become my favorite kind of taco.  What are Carnitas you ask?  Carnitas are the Mexican version of pulled pork.  The pork is shredded and then cooked a little longer to caramelize.  What’s better than carnitas?   Well I would say carnitas in a corn tortilla topped with salsa verde and your choice of pickled onions or cabbage slaw.   Oh yeah, that’s what I am talking about.

Carnitas Tacos

Print
Carnita Tacos
Author: 2 Sisters 2 Cities
 
Ingredients
  • 4-6 lbs. bone-in pork shoulder
  • 2 tablespoons canola oil
  • 1 lime, juiced
  • 1 orange, juiced
  • 1 teaspoon chile powder
  • 1 teaspoon ancho chile powder
  • 2 bay leaves
  • ½ teaspoon cumin
  • 3 cloves garlic, thinly sliced
  • 1 medium onion, chopped
  • Kosher salt
Instructions
  1. The night before- Cut pork shoulder into 3-4 inch pieces, trimming off the excess fat. Sprinkle pieces of the the pork with kosher salt and stick in a large sealable bag to refrigerate overnight.
  2. The day of- Preheat your oven to 350°F.
  3. In a large Dutch oven or pot heat oil over medium-high heat. Sear pork pieces on all sides about 2-3 minutes on each side. You may need to do this in 2 parts to lay all the pork pieces down flat. Remove the browned pork to a plate.
  4. In a 1 cup measuring cup squeeze a lime and orange and fill remaining cup with water. Pour into the Dutch oven and scrape the brown bits off the bottom. Add in chili powders, bay leaves, cumin, garlic, onions, and a pinch of kosher salt to the liquid. Return the pork back into the pot and then add water so that ⅔rds of pork is covered.
  5. Place in oven to cook for 2½ to 3 hours without a lid. Turn the pork a few times during the cooking time. The pork is cooked when most of the liquid is gone and pork falls apart easily with a fork.
  6. Shred the pork with two forks. Return pork back to the oven and cook until pork crispy and caramelized. This will take 15-20 minutes.
3.2.1753


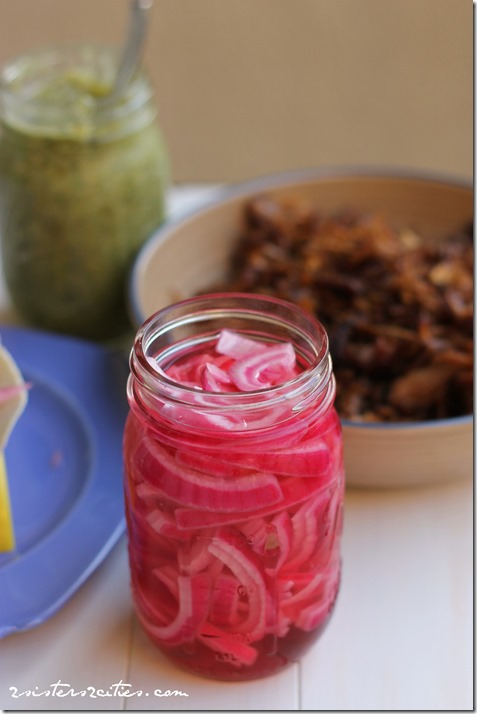
Pickled Onions

Print
Pickled Onions
Author: 2 Sisters 2 Cities
 
Ingredients
  • 1 red onion, sliced thin
  • ½ cup vinegar, apple cider or white
  • 1 cup warm water
  • 1 tbsp. sugar
  • 1½ tsp. Kosher salt
Instructions
  1. Mix vinegar, warm water, sugar and salt in a small bowl until sugar is dissolved. Add onions into a mason jar or sealable container. Add vinegar mixture to jar and refrigerate for at least day.
3.2.1753

Cabbage Slaw

Print
Cabbage Slaw
Author: 2 Sisters 2 Cities
 
Ingredients
  • 1 cup Shredded red cabbage
  • juice from ½ lime
  • fresh cracked salt and pepper, to taste
Instructions
  1. In a container stir together cabbage, lime juice, salt and pepper. Refrigerate for at least 30 minutes.
3.2.1753

Source- Carnitas and Pickled Onions adapted from Shared Appetite, Cabbage slaw adapted from Skinnytaste

sisterk (2)


Filed Under: K's Entrees, K's Recipes Tagged With: cabbage slaw, carnitas, cinco de mayo, mexican, mexican food, pickled onions, pork carnitas, tacos

Chicago-Style Deep-Dish Pizza

Posted by Keelin Hollenbeck on April 28, 2013

Chicago Style Deep Dish Pizza

Last weekend, my family and I went to Chicago for our cousin’s wedding.   It was a great trip for several reasons.  First, I got to see my family for the first time since Christmas and my extended family since Fourth of July weekend.   Secondly, both my boyfriend and I had never been to Chicago before so it was all new to us.

My boyfriend and I had a better time of getting to Chicago than the rest of our family.  The majority of my family’s flights out of Syracuse got canceled because of flooding in Chicago (which oddly enough didn’t affect me coming from California.)  My two sisters (Our very own M and little M), my brother-in-law, and my nephew (plus soon-to-be nephew) were locked down in Boston because of the search for the Marathon Bomber suspect #2.  One second, I was so excited to see my family and the next my mom called to tell me no one except me, my boyfriend, and my sister C were going to make it to the wedding.  Of course this was right before take-off so for the whole four and a half hour flight, my boyfriend had to console a very sad and disappointed K.   Upon landing, the texts started to come in that everyone scrambled to get new flights and would be coming staggered throughout the weekend, but would all be there for the wedding.

Excited and hungry we got off our non-dramatic SFO-to-Chicago flight and cabbed it into the city.  We quickly checked into the hotel, dropped off our stuff and were on our way to find some Chicago-style grub.   It was windy and cold mixed with a little snow/hail as we walked to find Al’s Deli,  which in my mind is how I imagined Chicago all my life.   Our hotel was in the middle of everything so it was only about a 10-15 minute walk.

Our cousin had listed some places to visit for food in Chicago on her wedding site and Al’s Beef for a “hot dog dragged through the garden”  was one.  As we were ordering, we ordered an Italian Beef Sandwich with hot peppers and I then asked for a “hot dog dragged thru the garden.”  The girl looked at me strange and said “I don’t know what you are talking about,  dragged thru the garden?”  I then explained that I didn’t know what it meant, but my cousin said I had to get it.   The check-out girl went to go ask her manager and he responded with “yeah, that means everything.”  Rest assured, I got my hot dog “dragged thru the garden”  or as I will now just call it “everything.”  We split both and liked them,  but were especially impressed with the hot dog.

Right across the way from Al’s Deli is Portillos.  This place wasn’t on our list, but it looked pretty hopping.  After checking it out on our iPhones, we realized it was also pretty famous for their hot dogs and Italian beef as well.   We decided we had enough room to split another hot dog so we proceeded to do so.  Also very delicious,  and we both sort of liked it more then our first!  Sorry Al!

As we headed back to hotel, we saw all the places for Chicago-style pizza like the original Pizzeria Uno’s.   I promised Matt that we would try some the next day because there was no way I was going to eat more before the rehearsal dinner that night.   The next day, my sister C, my mom, and I got our hair done at this awesome Blow Dry Bar called Blow-By Blow, highly recommended if you are ever in the area.   I also think I found my new love for Blow Out Bars,  mimosas and getting my hair shampooed and styled…ummm, yes please!    My boyfriend and dad went out to get more hot dogs and to possibly try to get a pizza to bring back to the hotel.   The pizza places all had a 45 minute wait for pizzas because that is how long they take to make.   They ended up not having enough time to wait so they brought back more hot dogs for all.   We never did have time for the Chicago-Style Deep-Dish pizza.

The week we got back, I decided to surprise my boyfriend by making a deep dish pizza since we never did get any.    It was surprisingly easy to make and so tasty!   I had one piece and I was so full!   I put turkey pepperoni on ours because that is what we had in the fridge- that’s why its sort of curling up, but you can top with whatever you like.

Slice of Deep Dish Pizza

Print
Chicago-Style Deep-Dish Pizza
Author: 2 Sisters 2 Cities
 
Ingredients
Dough:
  • 1 ½ cup plus 2 tbsp. all-purpose flour (in-between 8.1-8.2 oz. on scale)
  • ¼ cup yellow cornmeal (Not corn starch M!)
  • ¾ tsp. salt
  • 1 tsp. sugar
  • 1⅛ tsp. instant yeast
  • ½ cups plus 2 tbsp. water, at room temperature (5 oz.)
  • 1½ tbsp. unsalted butter, melted
  • 1 tsp. olive oil
  • 2 tbsp. unsalted butter, softened
Sauce:
  • 1 tbsp. unsalted butter
  • 2 tbsp. grated onion,
  • ⅛ tsp. dried oregano
  • ½ tsp. salt
  • 3 cloves garlic, minced
  • 1 14.5 oz. can crushed tomatoes
  • ⅛ tsp. sugar
  • 2 tbsp. fresh basil, coarsely chopped
  • 1½ tsp. extra-virgin olive oil
  • Additional Salt and fresh ground pepper, to taste
Assembly:
  • 2 tbsp. olive oil
  • 2 cups shredded mozzarella cheese
  • 3 tbsp. shredded Parmesan cheese
  • Sliced pepperoni (optional)
Instructions
Dough:
  1. Combine flour, cornmeal, salt, and yeast into the bowl of your mixer. With dough hook attachment mix on low speed for about 1 minutes until all ingredients are combined.
  2. Slowly add in water and melted butter and continue to mix on low speed for about 1-2 minutes. Make sure to scrape down the sides to get all ingredients incorporated.
  3. Increase the speed of the mixer to medium and knead the dough for about 4-5 minutes. The dough should become smooth and glossy.
  4. Take a large bowl and add in 1 tsp. olive oil. Using your hands coat the oil on the bowl and add the dough ball to the bowl. Cover the bowl tightly with plastic wrap and place at room temperature in an area without drafts, for about 1 hour.
  5. To laminate the dough, turn the dough out onto a dry work surface. Form dough into an 8- by 6-inch rectangle. Using a spatula or butter knife spread the 2 tbsp. of softened butter evenly on the dough leaving about a ½ inch of un-buttered dough around the edges. Stating at the 6-inch side, roll the dough tightly into a cylinder shape, pinching the ends together. Place the seam side down and flatten the dough into 9- by 2-inch rectangular. Fold dough into thirds, folding up the bottom side and then folding the top side over. Pinch the seams to form a ball. Place the dough ball back in the oiled bowl, cover with plastic wrap and place in the refrigerator. Let set for 40-50 minutes, or until doubled in size.
Sauce:
  1. This can be done while the dough is rising. Melt 1 tbsp. of butter to a medium-sized sauce pan over medium heat. Add in onions, oregano, and salt. Stirring occasionally, cook onions until golden brown, about 4-5 minutes. Add in garlic and cook for about 30 seconds. You should be able to smell garlic. Stir in the tomatoes and sugar and increase the the heat to about medium high. Bring the sauce to a simmer, lower heat to medium-low and keep at simmer for about 25 minutes. The sauce should thicken and reduce to about 1¼ cup. Take the sauce off heat and stir in basil and 1½ tsp. olive oil. Set aside.
Assembly:
  1. Preheat oven to 425 degrees.
  2. Coat a 9-inch cake pan with 2 tbsp. of olive oil. Take dough out on to a dry clean work surface and roll into a 13- inch wide circle. Place the dough in the cake pan and lightly press into the corners and up the sides so that it just reaches the top edge of the pan.
  3. Add the mozzarella cheese to the surface of the dough. Top with the tomato sauce and spread with a rubber spatula so it covers all of the cheese. Sprinkle with Parmesan cheese and then add desired toppings.
  4. Bake for 20-30 minutes until crust in golden brown. Let rest for at least 10 before cutting and serving. Enjoy!
3.2.1753

Source- adapted from Annie’s Eats, originally from Cook’s Illustrated

Deep Dish Pizza

sisterk (2)


Filed Under: K's Entrees, K's post, Vacation Tagged With: chicago, chicago-style deep dish pizza, chicago-style pizza, deep-dish pizza, family reunion, homemade pizza, pepperoni pizza, pizza dough, pizza recipe, travel, Vacation, weddings

Minestrone Soup

Posted by Keelin Hollenbeck on April 18, 2013

Delicious Minestrone Soup

I know it’s getting towards spring, but it is still cold in parts of the country so I am sharing my new favorite recipe for minestrone soup.  It’s not actually cold where I live…it was actually 75 degrees last weekend and in the 80’s this weekend.  You still got to have soup though!   I made this soup twice in the last few months.

Minestrone Soup

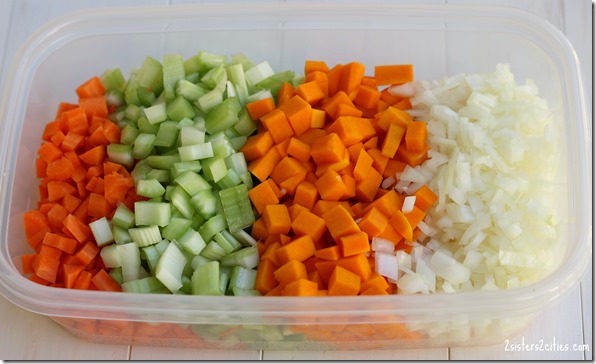
My boyfriend loves minestrone soup so I am always experimenting with new recipes and versions.  I, on the other hand, can take it or leave it.  I usually enjoy minestrone soup the first time around, but then I am over it by leftover time.   I loved this minestrone soup recipe the whole time probably because of the addition of pancetta and pesto.  I whipped up my super quick recipe for French bread for the side and it was some happy eating.  I happened to have enough leftover pesto in the freezer for both batches I made.  It also gave me an excuse to use my new Le Cruiset Dutch Oven I won in a raffle at my work’s sample sale.  Woot woot!  She’s a beauty, isn’t she?Chopped Veggies for Soup

Print
Minestrone Soup
Author: 2 Sisters 2 Cities
 
Ingredients
  • 2 tbsp. Olive Oil
  • 4 oz. pancetta, diced
  • 1½ cup chopped onion
  • 2 cups diced carrots
  • 2 cups diced celery
  • 2½ cups diced peeled butternut squash
  • 1½ tbsp. minced garlic
  • 2 tsp. chopped fresh thyme
  • 28 oz. canned diced tomatoes
  • 6-8 cups chicken stock
  • 1 bay leaf
  • 1 tbsp. kosher salt
  • 1½ tsp. fresh cracked pepper
  • 1 15-oz. can of cannellini beans, drained and rinsed
  • 1 cup uncooked small pasta, like tubetti
  • 8-10 oz. fresh baby spinach
  • ½ cup dry white wine
  • 2 tablespoon store-bought pesto
Instructions
  1. Heat olive oil in large pot or Dutch oven over medium heat. Add pancetta to the pan and cook for 5-7 minutes, stirring occasionally, until lightly browned. Next add in onions, carrots, celery, squash, garlic and thyme, cooking for 8-10 minutes, stirring occasionally until vegetables are softened.
  2. Add diced tomatoes, 6 cups of chicken stock, a bay leaf, salt, and pepper into the pot. Bring soup to a boil and then lower the heat to simmer for 30 minutes. Cook pasta in a separate pot according to package directions.
  3. Throw out the bay leaf. Add in cooked pasta and beats and allow them to heat up in the soup. If the soup gets too thick, add in additional chicken stock. Add spinach to soup and stir until spinach starts to wilt. Stir in white wine and pesto. Sprinkle with Parmesan cheese and serve with warm fresh bread. Enjoy!
3.2.1753

Source– Adapted from Ina Garten’s Barefoot Contessa Foolproof

More Soup Please!
sisterk (2)


Filed Under: K's Entrees, K's Recipes Tagged With: french bread recipe, minestrone, Minestrone Soup, pancetta, pesto, quick french bread, soup, soup recipes, spring recipes, winter recipes

Slow-Roasted Beef

Posted by 2 Sisters 2 Cities on March 24, 2013

Slow-Roasted Beef with Horseradish Cream Sauce

About a year ago, my mom gave my sisters and me a lesson on how to make a slow roasted beef from an inexpensive eye of round cut of beef. Cooked incorrectly, this cut can become very tough, but by dry-brining with salt the night before and slowly roasting this beef, it comes out a tender, juicy, and delicious roast beef.  I made a creamy whipped horse radish sauce to pair with this beef that is absolutely to die for!

Are you intimidated by cooking with beef?  This recipe would be a good place to start, all you need is a roasting rack and a meat thermometer.  Remember to use refrigerated horseradish in the cream sauce since it is stronger and fresher. Not a fan of horseradish? You sir/mam are missing out!  Serve this meal for Easter dinner with cheesy potatoes, green beans, and fresh dinner rolls.

Print
Slow-Roasted Beef
Author: 2 Sisters 2 Cities
Serves: 4 to 8
 
Ingredients
For Roasted Beef-
  • 1 (3½ to 4½ lbs.) boneless eye-round
  • 4 tsp. kosher salt
  • 2 tsp. + 1 tbsp. canola oil
  • 2 tsp. fresh cracked pepper
For Horseradish Cream Sauce-
  • ½ cup heavy cream
  • ½ cup refrigerated horseradish
  • 1 tsp. salt
  • ⅛ tsp. fresh cracked pepper
Instructions
For Roasted Beef-
  1. The night before serving, salt beef round with 3-4 tsp. of kosher salt (depending on the size of your roast) wrap tightly in plastic wrap, place in a bowl or container, and refrigerate for 18-24 hours.
  2. With oven rack in the middle of oven, preheat oven to 225 degrees. Pat dry the eye-round with paper towel. Rub with 2 tsp. of oil and then season with the fresh cracked pepper evenly on all sides.
  3. Heat 1 tablespoon of oil in a 12- inch skillet over medium-high heat on your stove-top. The oil will just start to smoke when it is hot enough (but don’t let the oil burn!) Take the roast and seer every side of the meat until it has browned. This should take about 12 minutes.
  4. Place the roast on a roasting rack placed on a rimmed baking sheet. Place in the oven and roast for 75-105 minutes until the roast’s center registers 115 degrees with a meat thermometer (for medium-rare) or 125 degrees (for medium, which you may need to add on 30 more minutes of cooking to get to this temperature.) Try not to keep the door open long because you do not want to lose the heat in the oven.
  5. Once the roast reaches 115 degrees or 125 degrees(for medium), with the roast still in the oven, turn off the oven and leave the door shut (This is also the best time to start your horseradish cream sauce.) The meat will cook for an additional 30 to 50 minutes longer until the center temperature reaches 130 degrees for medium-rare or 140 degrees for medium. I would not recommend cooking this cut of meat anymore than medium because it will be too tough.
  6. Take out roast once it reaches your preferred temperature and let rest for 15 minutes on your cutting board. After resting period, slice the roast as thinly as possible. Serve with horseradish cream sauce.
For Horseradish Cream Sauce-
  1. In a medium bowl, whisk the heavy cream until it thickens but not yet holding soft peaks. This will take about 2-3 minutes of whisking.
  2. With a rubber spatula, lightly fold in horseradish, salt and pepper.
  3. Add to a container with a cover and refrigerate for at least 30 minutes but no longer than 1 hour before serving.
3.2.1682

Source: Slightly adapted from Cook’s Illustrated Cookbook

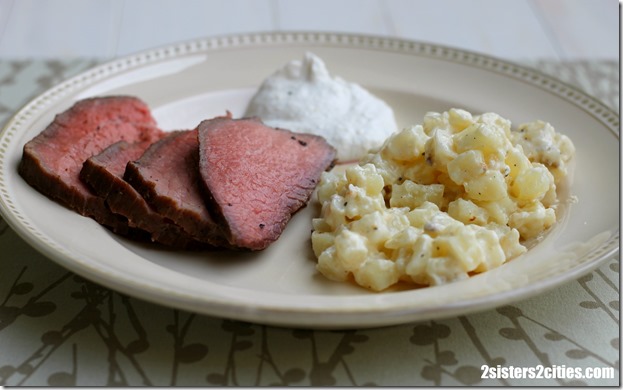
Roast Beef with a side of Cheesy Potatoes

sisterk (2)


Filed Under: K's Entrees, K's Recipes Tagged With: beef, easter, easter dinner, entree, holiday dinner, holiday entree, horseradish, horseradish cream sauce, slow-roasted beef

Thousand Island Dressing

Posted by 2 Sisters 2 Cities on March 17, 2013

Homemade Thousand Island Dressing

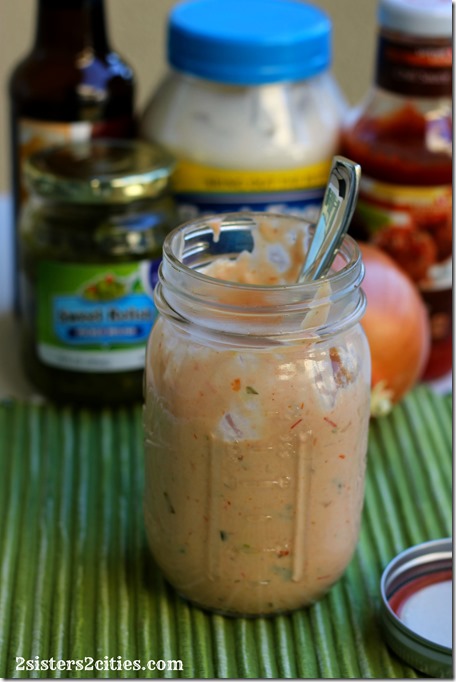
Are you wondering what to do with your leftover corned beef from St Patrick’s Day dinner?  Reuben’s are a tasty way to use up that corned beef and tastes even better with homemade Thousand Island Dressing.   It is really simple to make and you will never want to buy the bottled stuff again.

Thousand Island Dressing

Print
Thousand Island Dressing
Author: 2 Sisters 2 Cities
 
Ingredients
  • 1 cup mayonnaise
  • ¼ cup bottled chili sauce (like Heinz)
  • 3 tablespoons sweet pickle relish
  • 2 tablespoons finely chopped onion
  • 1 tsp. Worcestershire sauce
Instructions
  1. In a small bowl stir together the mayo and chili sauce until there are no more streaks of chili sauce left
  2. Add in relish, onion, and Worcestershire sauce and mix until combined.
  3. Chill for at least 30 minute.
  4. Store in a jelly jar or air tight container for up to 1 week in the refrigerator
3.2.1682

Source– Adapted from Better Homes and Garden’s New Cookbook 

Homemade Reuben's

How to Make a Reuben-

Ingredients- Rye Bread, Sauerkraut, Sliced Corned Beef, Sliced Swiss Cheese, and Thousand Island Dressing

Directions-  Toast Rye Bread,  spread Thousand Island Dressing on both sides of bread,  place a layer of corned beef followed by warm sauerkraut and top with slice of Swiss cheese.  Place bottom part of sandwich on a foil-lined baking sheet and broil for 2-3 minutes until cheese is melts.   Put the other piece of bread on top and slice into two.   Serve immediately.

Looking for some last minute St. Patrick’s Day recipes?

Corned-Beef-Dinner_thumb.jpg

Try our Corned Beef and Cabbage Dinner


Chocolate-Guinness-Cupcakes_thumb.jpg

For dessert, you can have these Chocolate Guinness Cupcakes with Cream Cheese Frosting

Shamrock-Shake-Knock-Off_thumb.jpg

Or a DIY Shamrock Shake– Go Green!

st_patricks_day_chocolate_chip_soda_bread

And here’s a recipe for Homemade Chocolate Chip Soda Bread.

Hope everyone has a great St. Patrick’s Day!

sisterk (2)


Filed Under: K's Entrees, K's Recipes Tagged With: Homemade Dressing, leftover corned beer, Reuben, St. Patrtick's Day, Thousand Island Dressing

Corned Beef and Cabbage

Posted by Keelin Hollenbeck on March 12, 2013

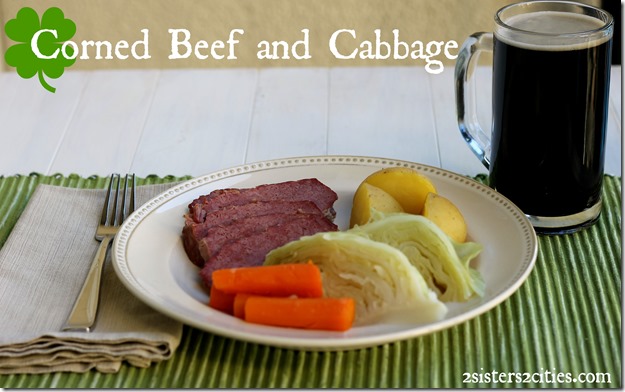
Corned Beef and Cabbage Dinner

Well believe it or not, it is already mid-March and this upcoming weekend  is St. Patrick’s Day.  Not only is St. Patrick’s day a day to have fun and drink green beer, but also a day for those of you that are Irish (like M and I) to pay homage to our heritage and our ancestors.  Our family actually came over to America during the potato famine like so many Irish families did.  They had to work really hard to prove themselves in America and helped with building many things like the canals and railroad systems we have today.  St. Patrick’s Day is a way to honor them.

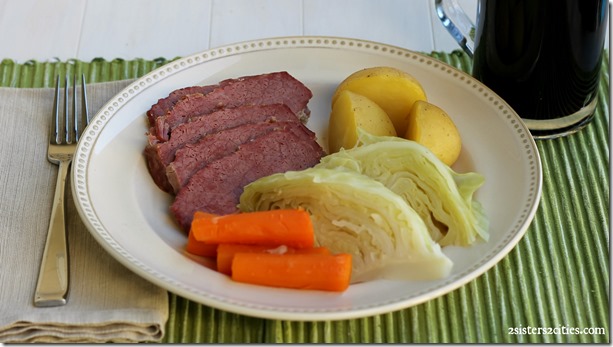
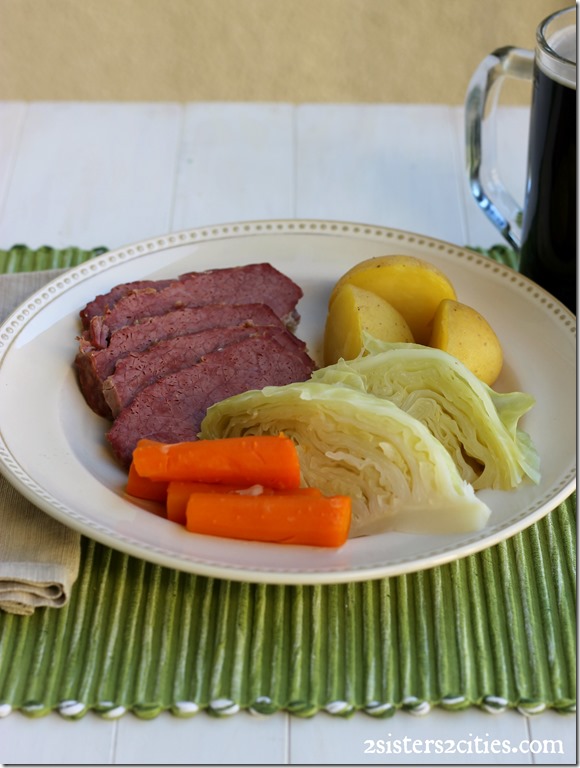
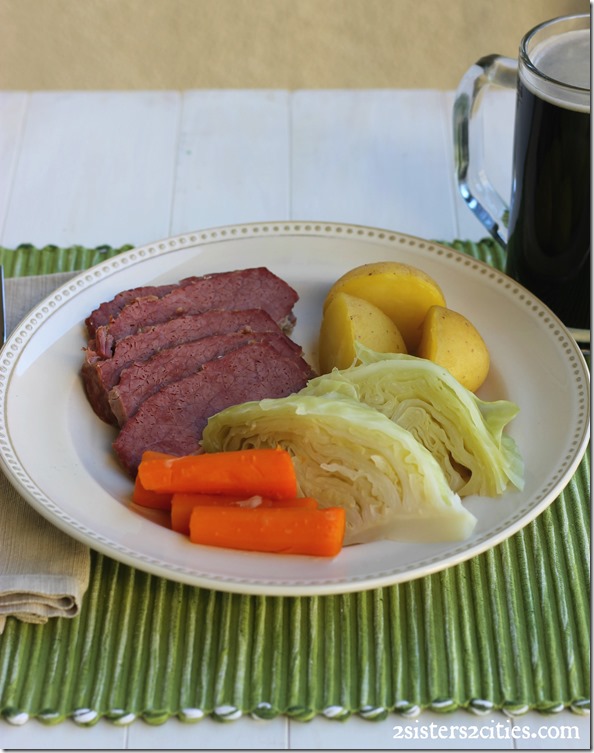
Corned Beef Dinner

Every St. Patrick’s Day growing up ,our mom would make corned beef and cabbage for dinner.  She would also boil some potatoes, carrots, and onions with the meal.

Our local milk brand, Byrne Dairy, would sell green milk.  Similar to the shamrock shake, this was mint-flavored milk,  except it tasted a thousand times better!!  {They stopped selling this green milk like 10 years ago so if you are reading this now, Byrne Dairy,  bring back the green milk! } Although it wouldn’t do me much good out here in Cali so maybe I should be asking this of Berkeley Farms or Clover Farms.  Along with the green milk and traditional corned beef and cabbage, my mom also made us these cut-out sugar cookies in shamrock shapes with green frosting and green sugar sprinkles for when we came home from school.

St. Patrick's Day Traditional Corned Beef Dinner

For the last three years, I happened to visit my parents in Syracuse with my boyfriend on St. Patrick’s Day weekend.    My mom made us the corned beef dinner when we visited so my boyfriend also has an appreciation for the meal.  Armed with my mom’s recipe, I attempted to make my first corned beef and cabbage meal over the weekend.  I made it a weekend early just so I could share it with all of you.

I was worried at first that my grocery store wouldn’t carry the corned beef brisket or round.  I guess I never looked for it before because every store had this including Target, Costco and Safeway.  Happy St. Patrick’s Day everyone!

Corned Beef and Cabbage Dinner with Guinness

Does anyone else have something traditional they do on St. Patrick’s Day?

If not, why not start one this year by making this meal.  It is really easy to make and delicious.  Did I mention leftover corned beef is perfect to make reuben sandwiches?

Print
Corned Beef and Cabbage
Author: 2 Sisters 2 Cities
Serves: 4-6
 
Ingredients
  • 2 lbs. corned beef brisket or round
  • 1 bay leaf
  • 1 cooking onion
  • 1 crushed clove of garlic
  • 7-10 peppercorns
  • 6 carrots
  • 5-6 white or gold potatoes (small to medium sized)
  • 1 head of cabbage
  • 2-3 small onions
Instructions
  1. Take corned beef out of package and dry with a paper towel. If there is fat on the back of corned beef, you can cut it down with a sharp knife. Leave a small amount on there to add flavor to the cooking broth (Be careful with your hands!)
  2. In a large pot or Dutch oven, place brisket. Fill pot with cold water so that the brisket is covered with water, plus an extra inch of water.
  3. Cut cooking onion in fourths and add to water along with bay leaf, peppercorns, and garlic.
  4. Bring to a boil, turn down heat and simmer (covered) for one hour and forty minutes.
  5. Fifteen minutes before the timer end, start to prepare the vegetables. Peel carrots and cut them in halves or thirds. Wash the potatoes and cut them in half. Peel onion and cut in fourths. Rinse cabbage and peel off first layer. Cut into eight slices with part of the core divided in each to hold the cabbage together while it cooks.
  6. Skim fat off the top of the corned beef water and add carrots, potatoes, and onion. Cook for twenty minutes with lid closed.
  7. Pull out corned beef and place on a plate and cover with aluminum foil. Skim additional fat off the top.
  8. Add cabbage to water with vegetables and cook for an additional 15 minutes.
  9. Slice the corned beef in thin slices, and drain vegetables (or pull vegetables out with a slotted spoon or tongs). Serve on a a platter and enjoy!
3.2.1682

Source–  Adapted from our Mom!
sisterk (2)


Filed Under: K's Entrees, K's Recipes Tagged With: cabbage, carrots, corned beef and cabbage, dinner ideas, guinness, holiday meals, ireland, irish, Irish food, irish meal, potatoes, St Patrick's Day

Recipe Redo- Black Bean Burritos

Posted by 2 Sisters 2 Cities on February 17, 2013

Black Bean Burritos

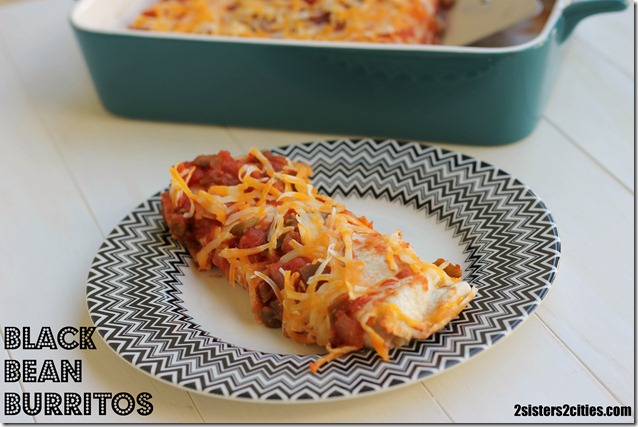
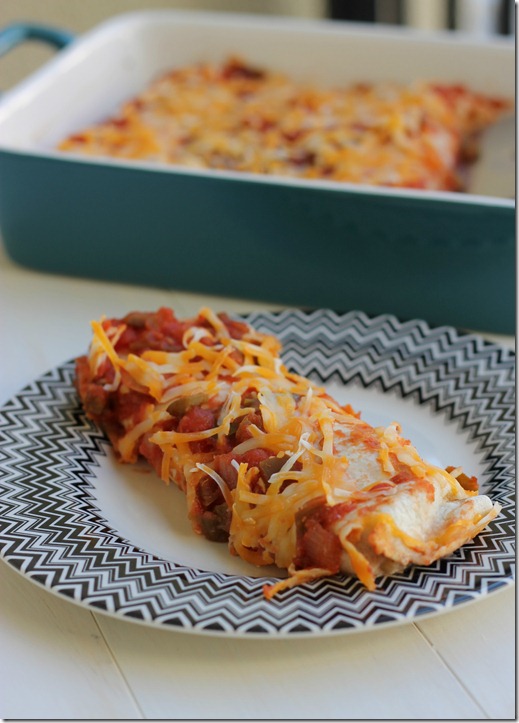
A couple years ago, I posted this recipe for black bean burritos on our blog because it was a great quick meal that I made often.   I just started making these burritos again to pack up for lunches during the work week.  They re-heat really well and are delicious!   I thought I would redo the recipe for all of you to give it a fresh face, plus add in all the changes I have made over the years.

The key to this recipe is a good tortilla.  I previously used whole wheat tortillas, until I found a great white tortilla by La Tortilla Factory that is light and has less calories then the wheat ones I used previously.  I also have been using these tortillas for my favorite fajitas and they are so good!

Black Bean Buritto Casserole

Print
Black Bean Burrito Bake
Author: 2 Sisters 2 Cities
Recipe type: Dinner
Serves: 4
 
Ingredients
  • 1 chipotle pepper in adobo sauce
  • ½ cup of light or fat free sour cream
  • 2 tbsp. finely chopped onions
  • 1 cup of frozen corn, thawed
  • 1 14.5oz. can of black beans, rinsed
  • 4- 8 inch tortilla
  • Cooking spray
  • 1 cup jarred salsa
  • ½ cup shredded colby jack cheese
Instructions
  1. Preheat oven to 350 degrees.
  2. Chop up the chipotle pepper finely and place in a medium sized bowl.
  3. Add in ½ cup of sour cream to the chopped chipotle pepper and mix until combined. Let set for 10 minutes.
  4. While the sour cream pepper mix sets, take half of the black beans in a small bowl and smash with a fork or potato masher.
  5. Add crushed black beans, black beans, corn, and chopped onions to the sour cream mixture.
  6. Take a 2 quart casserole dish and spray with cooking spray
  7. Take 1 tortilla and place ¼ mixture in the center of tortilla, roll the tortilla tightly and places seam down in the casserole dish.
  8. Repeat with remaining tortillas
  9. With all 4 tortillas in the casserole, spray the tops with the cooking spray.
  10. Top with 1 cup of jarred salsa then sprinkle with shredded cheese
  11. Bake in oven for 20 minutes. Serve with additional salsa and sour cream if desired
  12. *I place them in separate to go containers and place in the fridge to bring to work all week. I reheat for 2-3 minutes in the microwave and then it’s a delicious filling lunch. Mmmmmm.
3.2.1652

sisterk (2)

Related Posts Plugin for WordPress, Blogger...


Filed Under: K's Entrees, K's Recipes Tagged With: black bean burrito, black bean burritos, bring lunch to work, Burritos, easy lunch, lunch, lunch ideas, lunch recipe, lunch to pack for work, mexican, recipe redo

  • 1
  • 2
  • 3
  • Next Page »

Recent Posts

  • Easy Holiday Office Party Tips
  • 5 Steps to an Easy Football Party
  • Gingerbread Biscotti
  • Holiday Coffee Bar and Thanksgiving Recipes
  • Soft Sugar Pumpkin Cookies
  • Cinnamon Sugar Apple Cake
  • Hello Pumpkin Season!
  • Make Your Own Milkshake Party!
  • Mama’s Pickles
  • S’more Cookies

Categories

  • About 2 Sisters 2 Cities (7)
  • Books (8)
  • Crafting & DIY (22)
  • Design & Decorating (15)
  • Gardening (5)
  • Giveaway (14)
  • Guest Bloggers (8)
  • K's post (46)
  • K's Recipes (191)
    • K's Desserts (75)
    • K's Entrees (23)
    • K's Sides (24)
  • M's post (72)
  • M's recipes (167)
    • M's Entrees (21)
    • M's Sides (14)
    • M's Desserts (30)
  • Organizing (7)
  • Party Ideas (49)
  • Uncategorized (1)
  • Vacation (12)
Stitch Fix

Archives

Blogroll

  • Annie's Eats
  • Bake at 350
  • Baked Bree
  • Boston Harbor Beacon
  • Confections of a Foodie Bride
  • Cook Like a Champion
  • Erin’s Food Files
  • Forever and a Recipe
  • Framed Cooks
  • Oh Happy Day
  • On Common Ground
  • Pennies on a Platter
  • Pink Parsley
  • Recipe Girl
  • Sally's Baking Addiction
  • Simply Scratch
  • The Curvy Carrot
  • The Pioneer Woman
  • Tidy Mom
  • Two Peas & Their Pod
  • What’s Gaby Cooking
  • Young House Love
Increase your website traffic with Attracta.com

grab a 2 sisters button!


Copyright © 2014 ~ 2 Sisters 2 Cities | Blog Design by Minx Design