2 Sisters 2 Cities

Image Map
  • About 2 Sisters 2 Cities
  • Recipe Index
  • Project Index
  • Contact Us
  • Like us on Facebook
  • Follow m on twitter
  • Follow k on twitter
  • Follow 2S2C on Pinterest
  • Follow 2S2C on G+
  • rss
  • e-mail 2S2C

Caramel Layered Brownies

Posted by 2 Sisters 2 Cities on November 30, 2012

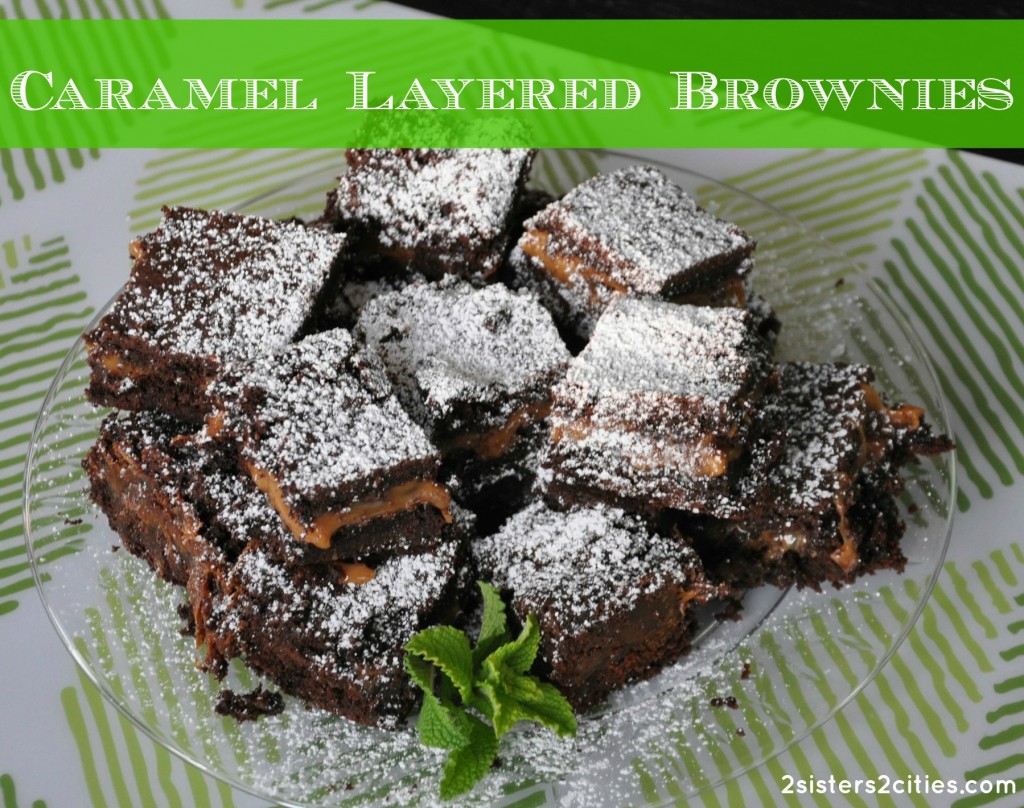
Caramel Layered Brownies

I made these Caramel Layered Brownies for an event over the summer and I neglected to post about them.  Before we kick off our 12 Days of Christmas Cookies in December, I figured I would throw in one more dessert option for the holidays!  This recipe is originally from The Pioneer Woman and she calls them Knock You Naked Brownies.  I’m not sure how the name was originally derived, but I decided to rename them Caramel Layered Brownies to keep our site family-friendly- ha!

The first time I made these (for the Super Bowl earlier this year), I ran into a lot of trouble getting the top brownie layer off of my work surface.  It stuck to the surface and got all torn when I tried to transfer it to the brownie pan.  I remedied this the second time around by shaping the top brownie layer on a sheet of wax paper and flipping it over onto the caramel layer.

If this brownie recipe doesn’t do it for you, be sure to check out K’s favorite recipe: Extreme 3-Layer Brownies (originally called Slutty Brownies- can someone tell me what is up with all these promiscuous brownie names?)  These Sea Salt Caramel Brownies  are also a crowd pleaser. However, this recipe for Caramel Layered Brownie is a bit easier to make since it starts off with boxed cake mix and wrapped caramel candies.

Print
Caramel Layered Brownies
Author: 2 Sisters 2 Cities
Recipe type: Dessert
Prep time:  15 mins
Cook time:  30 mins
Total time:  45 mins
Serves: 12
 
Ingredients
  • 1 box (18.5 Ounce) German Chocolate Cake Mix
  • ⅓ cup Evaporated Milk
  • ½ cup Evaporated Milk (additional)
  • ½ cup Butter, Melted
  • Cooking spray
  • 60 whole Caramels, Unwrapped
  • ⅓ cup Semi-Sweet Chocolate Chips
  • ¼ cup Powdered Sugar
Instructions
  1. Preheat oven to 350 degrees.
  2. In a large bowl, mix together cake mix, ⅓ cup evaporated milk, and melted butter. Mix together until combined.
  3. Use cooking spray to grease a 9x9 inch square baking pan. Press half the mixture into the pan. Bake for 8 to 10 minutes. Remove pan from oven and set aside.
  4. Meanwhile, in a double boiler (or a small pan set over a saucepan of boiling water) melt caramels with the additional ½ cup evaporated milk. When melted, pour over pre-cooked brownie base. Sprinkle chocolate chips as evenly as you can over the caramel.
  5. Place remaining uncooked brownie dough on a sheet of wax paper. Use your hands to press it into a large square a little smaller than the pan. Pick up the whole sheet of way paper and flip over the brownie layer on top of the caramel and chocolate chips. Remove the wax paper from the top of the brownie layer.
  6. Bake for 20 to 25 minutes. Remove from pan and allow to cool to room temperature, then cover and refrigerate for several hours. Before serving, sift powdered sugar on the brownies. Cut into twelve squares and remove from the pan.
3.1.09

 Source: Slightly adapted from The Pioneer Woman

What’s your favorite brownie recipe?

sister m signature


Filed Under: M's Desserts, M's recipes Tagged With: brownie recipe, brownies, caramel, chocolate, chocolate caramel brownies, dessert, pioneer woman recipes

Mickey Mouse Cupcakes

Posted by 2 Sisters 2 Cities on November 8, 2012

Mickey Mouse Cupcakes

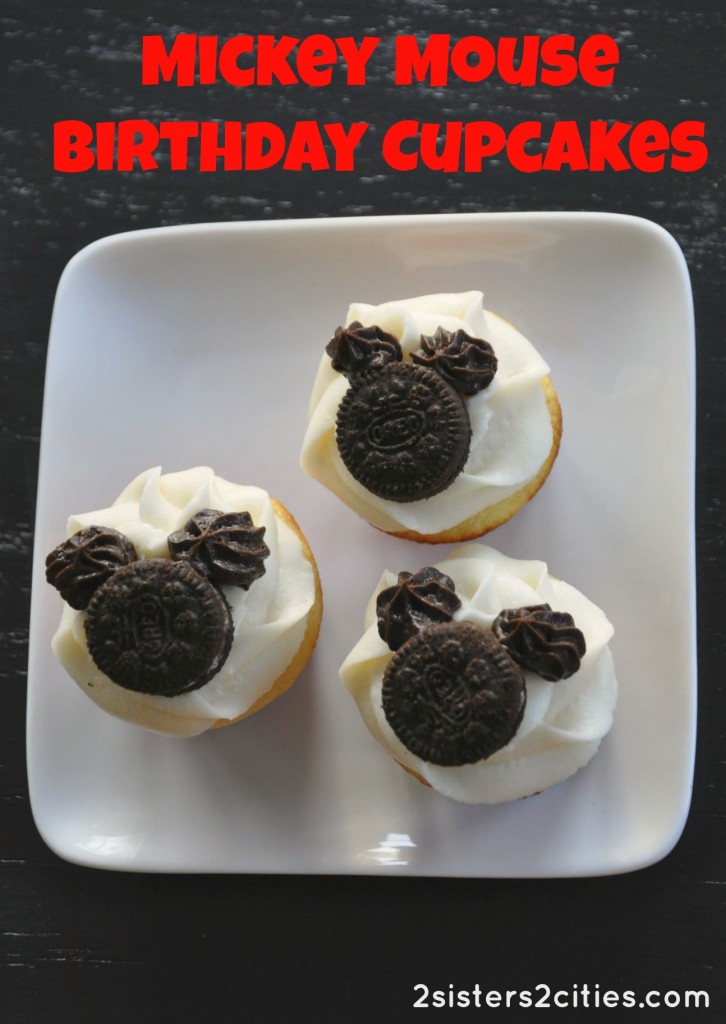
As promised in my last post about T’s Mickey Mouse birthday party, I wanted to follow up with a post about making Mickey Mouse cupcakes.  T loves mini cupcakes so I opted to make the Mickey cupcakes on a smaller scale (but a large quantity!)  There are so many cute Mickey Mouse cupcakes on Pinterest and a lot of them involve Oreo cookies.  Since my cupcakes were going to be mini, I decided to incorporate mini Oreos.

For the cupcake and frosting recipe, I opted to use our hands-down favorite cupcake recipe- the Magnolia Vanilla Cupcake recipe with Vanilla Buttercream Icing.  While this recipe usually makes about two dozen full-sized cupcakes, I found it made about 75 mini cupcakes per batch.  The baking time is reduced to about 10 minutes.  I found mini red, white, and black polka-dotted cupcake liners at Michael’s.

To frost the cupcakes, I highly recommend reading this cupcake icing tutorial.  I used about 80% of the vanilla icing to frost the tops of the cupcakes.  For the remaining 20%, I mixed it with a couple tablespoons cocoa powder and set it aside to use later for the ears.  I used a large closed star tip to ice the cupcakes with plain vanilla frosting.  I then placed a mini Oreo in the middle of the frosted cupcake.  I then used the reserved chocolate icing to pipe two “ears” on top of the Oreos using a small open star tip.

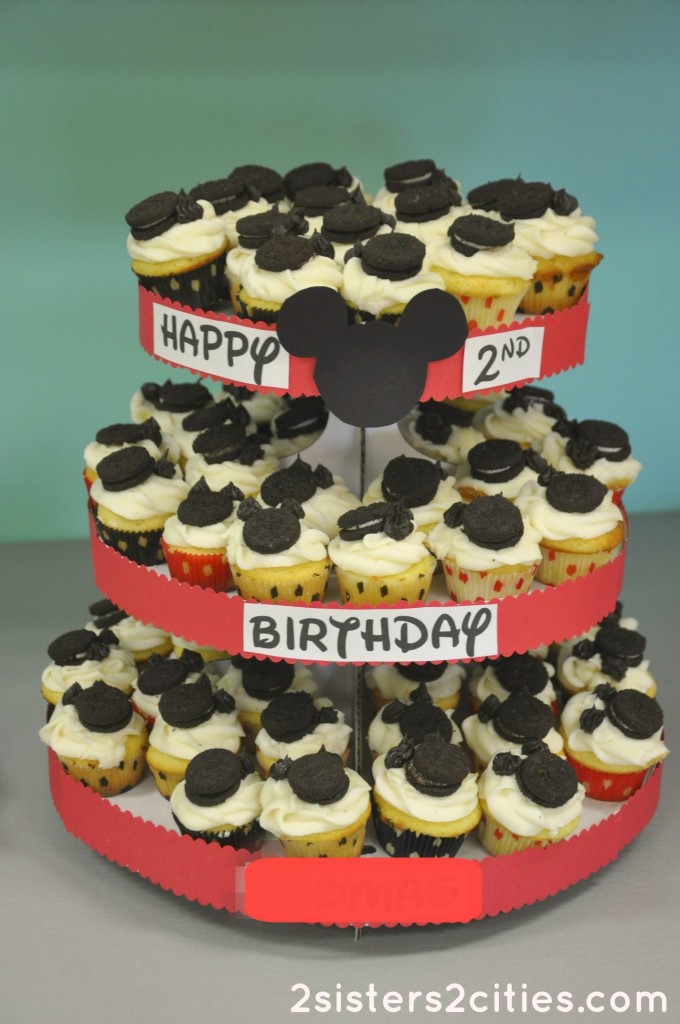
I then placed the mini Mickey Mouse cupcakes in my customized 3-tier cupcake stand (more details in the birthday post about how I made this.)

Mickey Mouse Cupcake Stand

Have you ever made cupcakes for a theme party?

sister m signature


Filed Under: M's Desserts, M's recipes, Party Ideas Tagged With: 2nd birthday party, baby t, Magnolia's Vanilla Cupcakes, mickey mouse, mickey mouse birthday party, mickey mouse cupcake holder, mickey mouse cupcakes, mini cupcakes

Half Moon Cookies – Our Family Recipe

Posted by 2 Sisters 2 Cities on October 19, 2012

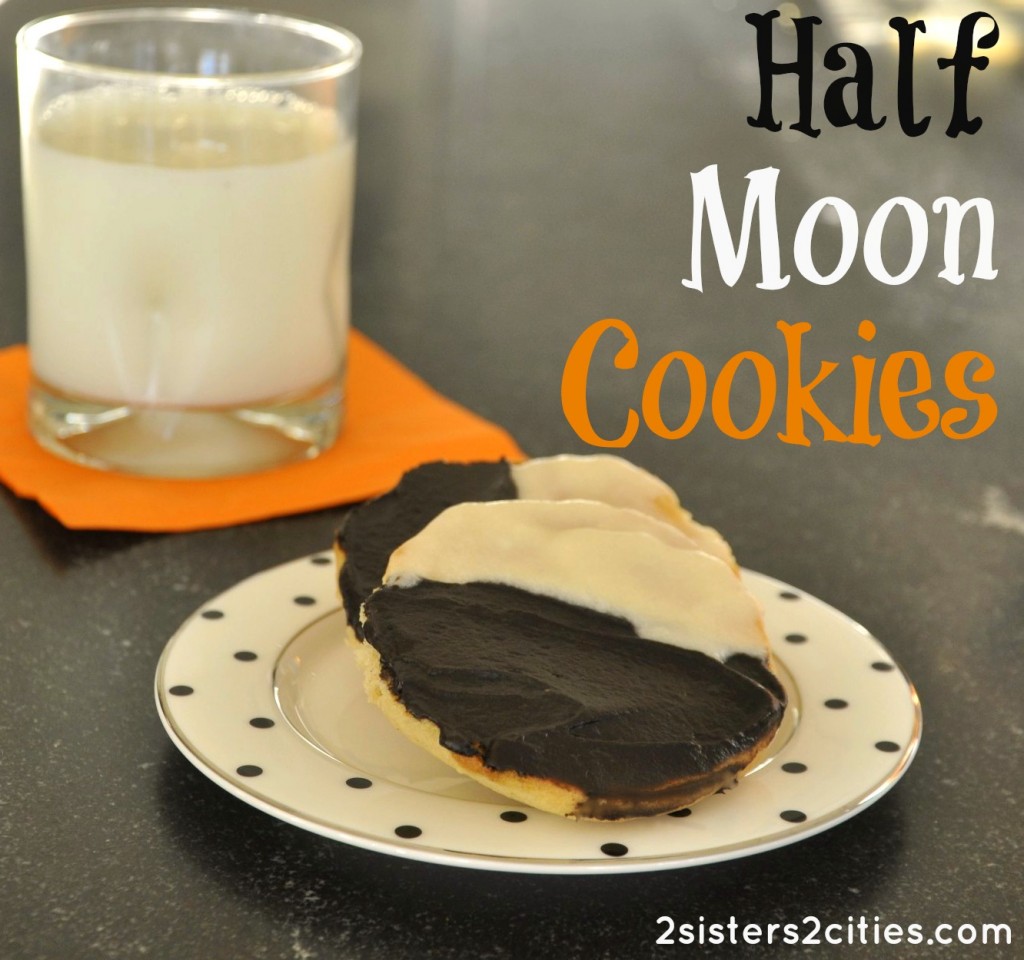
half moon cookies

I have been wanting to post the recipe for my grandma’s half moon cookies for a long time and I finally got a chance to make them yesterday.  I thought the timing was also appropriate because they make great cookies for Halloween as well!  I loved having these cookies growing up- we called them half moon cookies.  When I moved to Boston, I realized most people around here call them black and white cookies (Wikipedia claims otherwise, but I have yet to meet a non-upstate NYer that calls them half moon cookies.)

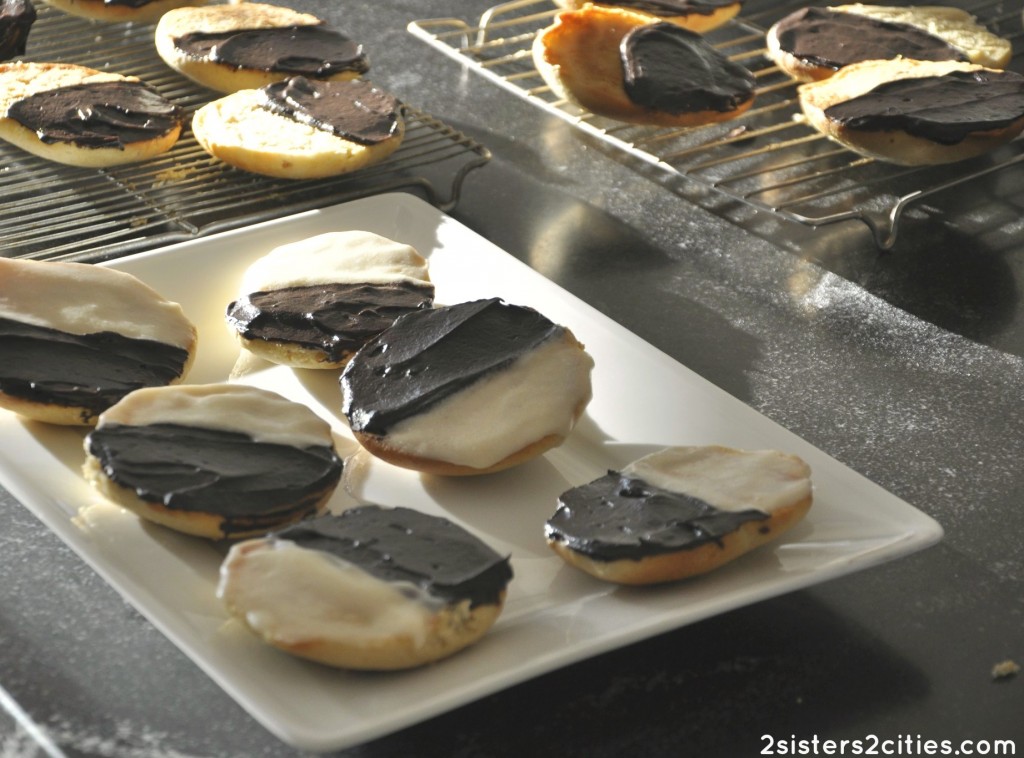
half moon cookies on a cooling rack and plate

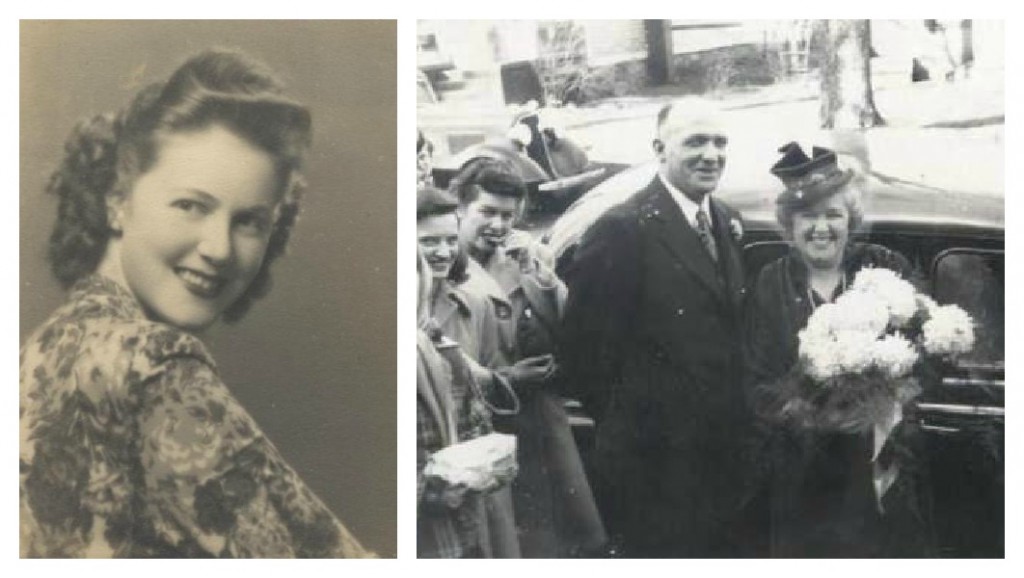
The half moon cookie originated in Utica, NY, but this recipe is from the now-defunct Mattot Bakery in Oswego, NY.  My step-great-grandmother got the half moon cookie recipe before the bakery closed and passed it along to my grandmother.  My grandma then passed along the recipe to us- it’s now published in our family cookbook.  Here are a couple of historical family photos.  The first is of my grandmother.  The second photo is my great-grandfather’s and my step-great-grandmother’s wedding in 1946:

historical family photos

Here is the recipe for the half moon cookies.  I updated two of the ingredients in the cookie recipe based on more contemporary ingredients, but I include the original ingredients in parentheses if you are interested.  I also created my own frosting recipe based on a few that I found.

Print
Half Moon Cookies
Author: 2 Sisters 2 Cities
Recipe type: cookie
Prep time:  35 mins
Cook time:  10 mins
Total time:  45 mins
Serves: 20
 
The original half moon cookie recipe from Mattot Bakery in Oswego, NY.
Ingredients
  • Cookie Ingredients:
  • 1 cup sugar
  • ½ cup butter (original recipe: margarine)
  • 2 eggs
  • ½ cup buttermilk (original recipe: sour milk or a vinegar milk combination)
  • 2 and ¼ cups flour
  • 1 tsp baking soda
  • 1 tsp baking powder
  • ½ tsp salt
  • 1 tsp vanilla
  • ⅛ tsp nutmeg
  • Frosting Ingredients:
  • 6 tablespoons butter, softened
  • 2 and ½ cups confectioner's sugar
  • ⅓ cup milk
  • 1 teaspoon vanilla
  • ¼ cup cup cocoa powder
Instructions
  1. Mix sugar, butter, eggs, and vanilla in a medium bowl. Combine flour, baking soda, baking powder, salt, and nutmeg in a separate bowl. Add dry ingredients to butter mixture and mix together. Chill for at least 30 minutes, up to 24 hours.
  2. Preheat oven to 350 degrees F. Drop cookie batter from tablespoon onto ungreased cookie sheet. Bake for 12 minutes.
  3. Meanwhile, make the frosting. Cream the butter in a small bowl. Mix in the confectioner's sugar, vanilla, and milk alternatively. Beat until the frosting consistency is smooth (no lumps.) Remove half the frosting into a separate bowl (this will be the vanilla frosting.) Mix in the cocoa powder with the remaining frosting to make the chocolate frosting.
  4. Once the cookies are cool, frost the flat bottoms with vanilla frosting on one half and chocolate frosting on the other half.
3.1.09

Do you have any family recipes that have been passed down that you still like to make?

sister m signature


Filed Under: M's Desserts, M's recipes Tagged With: black and white cookies, cookie recipe, cookies, family history, family recipe, half moon cookies, halloween, heirloom recipes, mattot bakery, upstate NY

Raspberry Truffle S’mores

Posted by 2 Sisters 2 Cities on May 28, 2012

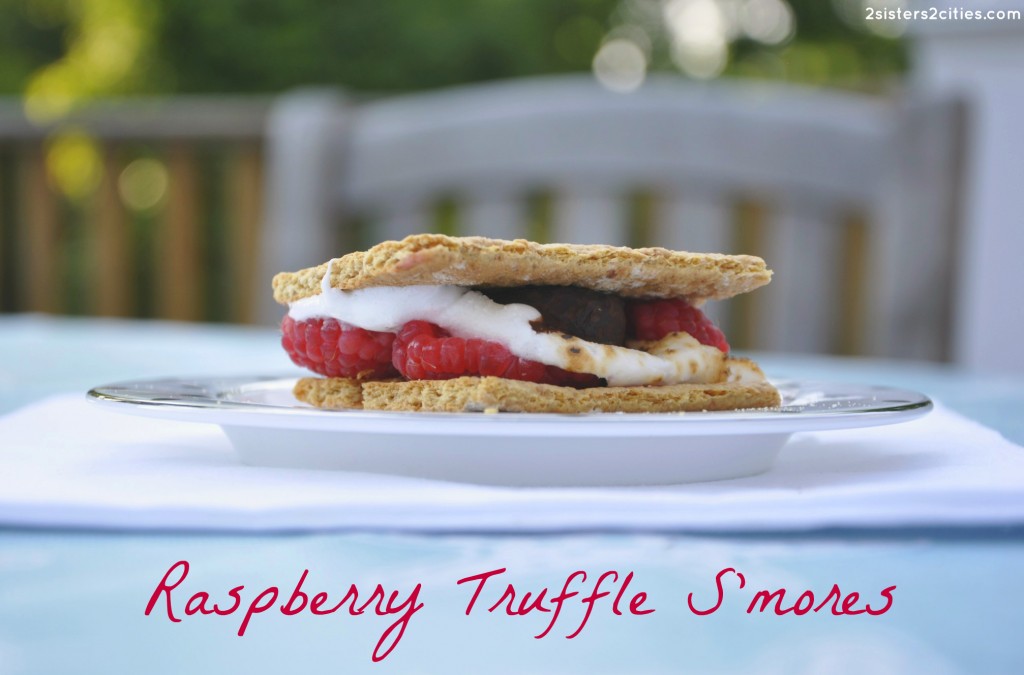
Clearly I have one thing on my mind this Memorial Day weekend- s’mores!  The other day, I made Frozen Cupcake S’mores and today I am making Raspberry Truffle S’mores.  Don’t get me wrong, there’s nothing wrong with just a regular s’more, with a chocolate square and toasted marshmallow stuck between two graham cracker squares.  I just can’t stop thinking of different s’more variations, hence my Raspberry Truffle S’more creation.

How can you go wrong with the perfect pairing of chocolate and raspberries?  I made this Martha Stewart Everyday Food Chocolate-Raspberry Tart a couple of summers ago and I loved the flavor combination.  Here’s an easier way to get to that same raspberry-chocolate goodness:

Print
Raspberry Truffle S'mores
Author: m
Recipe type: Dessert
Prep time:  3 mins
Cook time:  2 mins
Total time:  5 mins
Serves: 4
 
Ingredients
  • 8 graham cracker squares
  • 4 marshmallows
  • 4 chocolate truffles, cut in half (I find these at Whole Foods near the gourmet cheese section)
  • 12 raspberries, gently washed
Instructions
  1. Set out graham cracker squares. Place the halved chocolate truffles over 4 of the squares. Over a campfire (or an oven range), toast a marshmallow using a stick or kebob skewer. Once toasted to your desired level, remove marshmallow from stick/skewer and place on top of one of the graham cracker square with the chocolate truffles. Place 3 raspberries on top. Top off with a graham cracker square. Repeat with the rest of the marshmallows. Enjoy immediately.
2.2.6

What are your Memorial Day plans for the day?


Filed Under: M's Desserts, M's recipes Tagged With: campfire recipes, chocolate and raspberries, fancy s'mores, raspberry recipes, raspberry truffle s'mores, s'mores, s'mores recipe, summer desserts, summer recipes

Frozen Cupcake S’mores

Posted by 2 Sisters 2 Cities on May 26, 2012

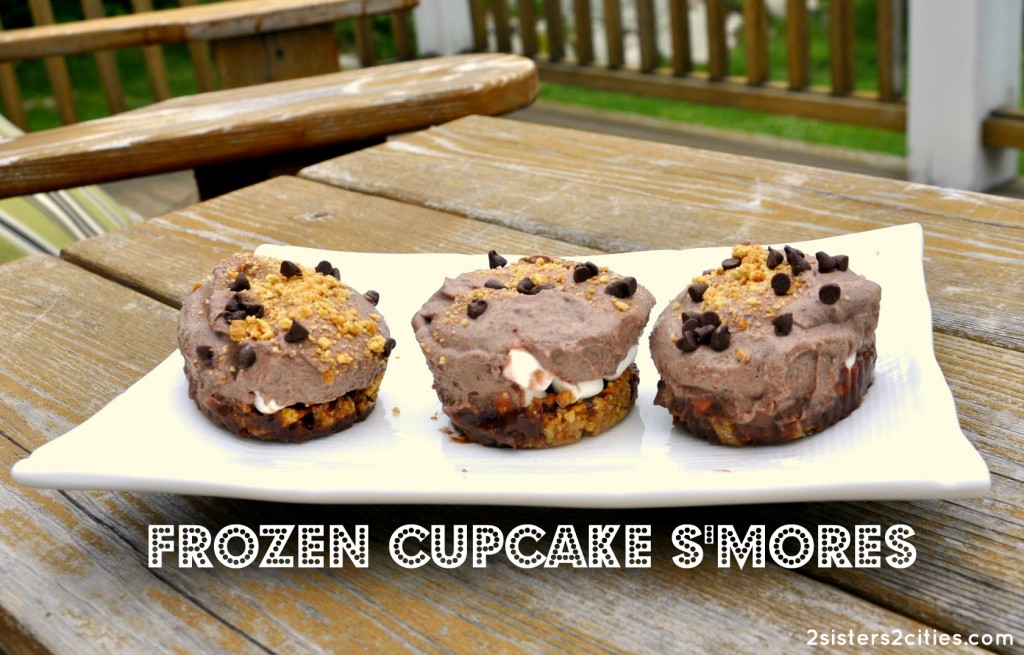
I tried another recipe today that I found via Pinterest- Frozen Cupcake S’mores.  I changed up the original recipe I found a little bit and I would have to say it was a great cold treat on what is turning out to be a really hot day.  Baby T was sobbing during the photo shoot because he wanted to try one of the frozen s’mores.  I finally caved and gave him one in his outdoor highchair- I think I will be cleaning up the chocolate mess he made for the next few weeks!

5.0 from 1 reviews
Print
Frozen Cupcake S'mores
Author: m
Recipe type: Dessert
 
Ingredients
  • 18 graham cracker squares (9 sheets), crumbled into fine crumbs
  • ⅓ cup butter, melted
  • ½ cup milk chocolate chips
  • ¼ cup heavy cream
  • 1 cup mini marshmallows
  • 1 and ½ cup cold milk
  • 1 box (3.9oz) instant chocolate pudding
  • 1 cup Cool Whip, thawed
  • ¼ cup mini chocolate chips
Instructions
  1. Line a muffin pan with 12 baking cups. Mix graham cracker crumbs (reserve a few tablespoons for a topping) and melted butter in a small bowl. Divide the graham cracker mixture into each of the 12 cups and mash down with the bottom of a small glass.
  2. Meanwhile, place milk chocolate chips and whipping cream and melt in microwave in 30 second increments, Stir in between increments until just melted and smooth. Pour chocolate mixture evenly over the 12 graham cracker crusts. Top chocolate mixture with a layer of mini marshmallows.
  3. Combine the pudding mix and cold milk in a large bowl and whisk together with a wire whisk for 2 minutes. Once pudding has thickened, add the Cool Whip and stir together. Spoon pudding mixture evenly over the 12 cups.
  4. Top each cupcake s'more with some graham cracker crumbs and mini chocolate chips. Place in the freezer for at least a few hours. Serve straight from the freezer.
2.2.6

Source: Adapted from easybaked


Filed Under: M's Desserts, M's recipes Tagged With: chocolate dessert, cold dessert, cooking from pinterest, freezer s'mores, frozen cupcake s'mores, frozen dessert, frozen s'mores, pinterest recipes, summer dessert

Nan’s Nutella Cookies

Posted by 2 Sisters 2 Cities on April 20, 2012

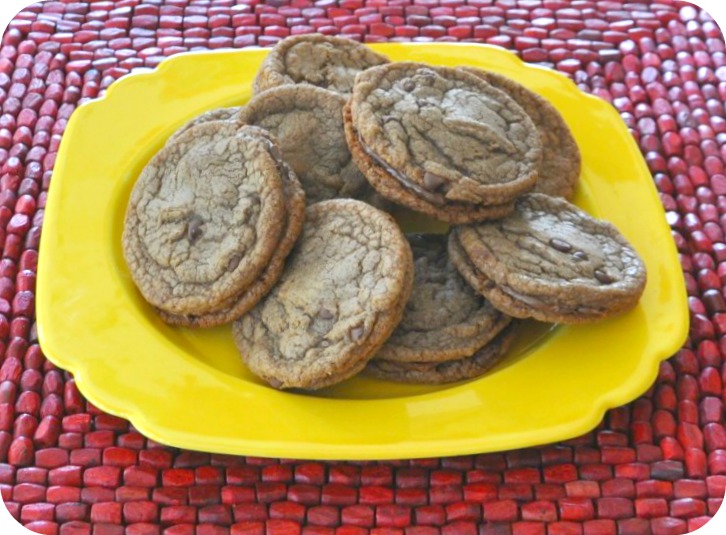
I spent a few days this week visiting my parents out in upstate NY so they could see Baby T.  It was great to visit them and get a little mini-vacation for myself.  It’s a nice break from the constant cleaning, cooking, and chasing baby boy, and it’s also fun to catch up with my parents.  My mom made these Nutella sandwich cookies for my visit and I couldn’t get enough of them!  I have never tried Nutella before, but I have been converted…definitely on my to-do list to stock up on some back home!

Print
Nan's Nutella Cookies
Recipe type: Cookies
Prep time:  10 mins
Cook time:  14 mins
Total time:  24 mins
Serves: 9
 
Ingredients
  • ½ cup unsalted butter, at room temperature
  • ½ cup granulated sugar
  • ½ cup firmly packed light brown sugar
  • 1 cup Nutella
  • 1 egg
  • ½ tsp vanilla
  • 1 and ½ cups flour
  • 1 tsp baking soda
  • ¼ tsp salt
  • ½ cup mini chocolate chips
Instructions
  1. Preheat oven to 350F.
  2. Cream butter with mixer for about 1 minute until smooth. Add in granulated and light brown sugar. Beat with the mixer on high speed for 3 minutes until light & fluffy.
  3. Add the egg, vanilla, and ½ cup of the Nutella and mix well on low speed.
  4. In a separate small bowl, whisk together the flour, baking soda, and salt. Add the dry ingredients into wet ingredients, and continue to mix on low speed until combined. Increase the mixer speed to medium and mix just until the dough is smooth. Fold in chocolate chips.
  5. Using a melon scooper, scoop out balls of dough and place on greased cookie sheet. Bake for 6-7 minutes. Transfer to a rack to cool completely. Once cooled, take a cookie and spread generously Nutella. Top with another cookie. Continue to make cookie "sandwiches" out of the remaining cookies with the Nutella.
Nutrition Information
Serving size: 2 cookies
2.2.6

Source: Adapted from Erin’s Food Files


Filed Under: M's Desserts, M's recipes Tagged With: cookie recipe, cookies, nutella, nutella cookies

Baking with Baby: Chocolate Chip Cookies

Posted by 2 Sisters 2 Cities on March 29, 2012

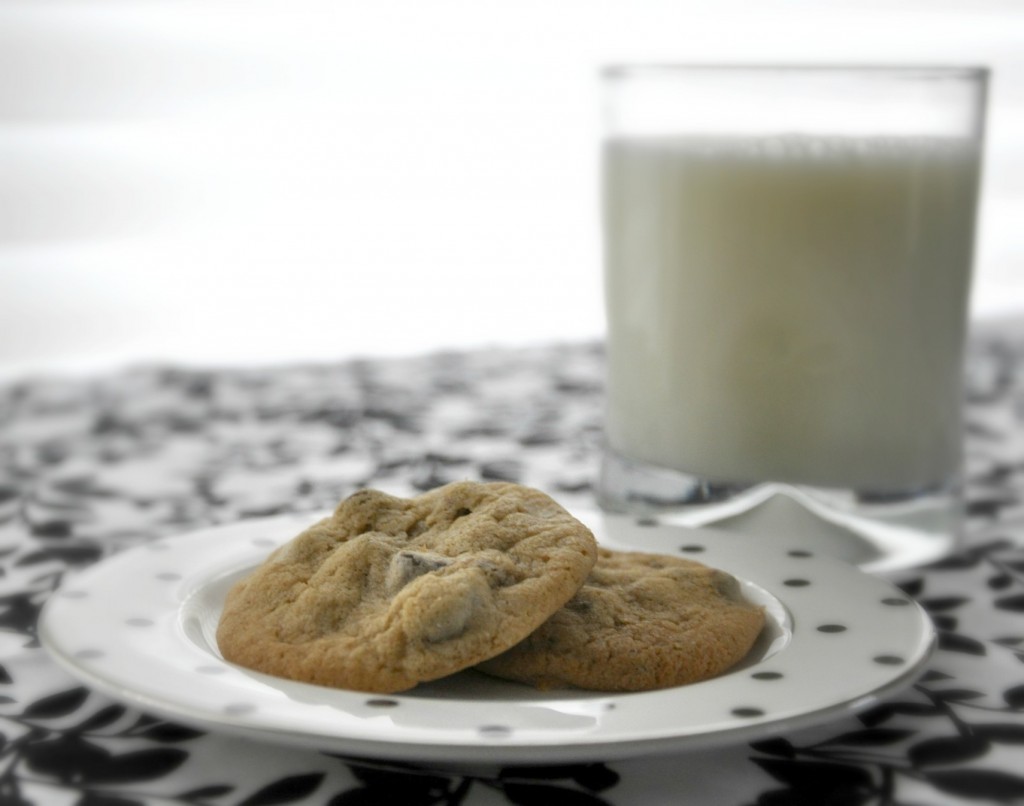
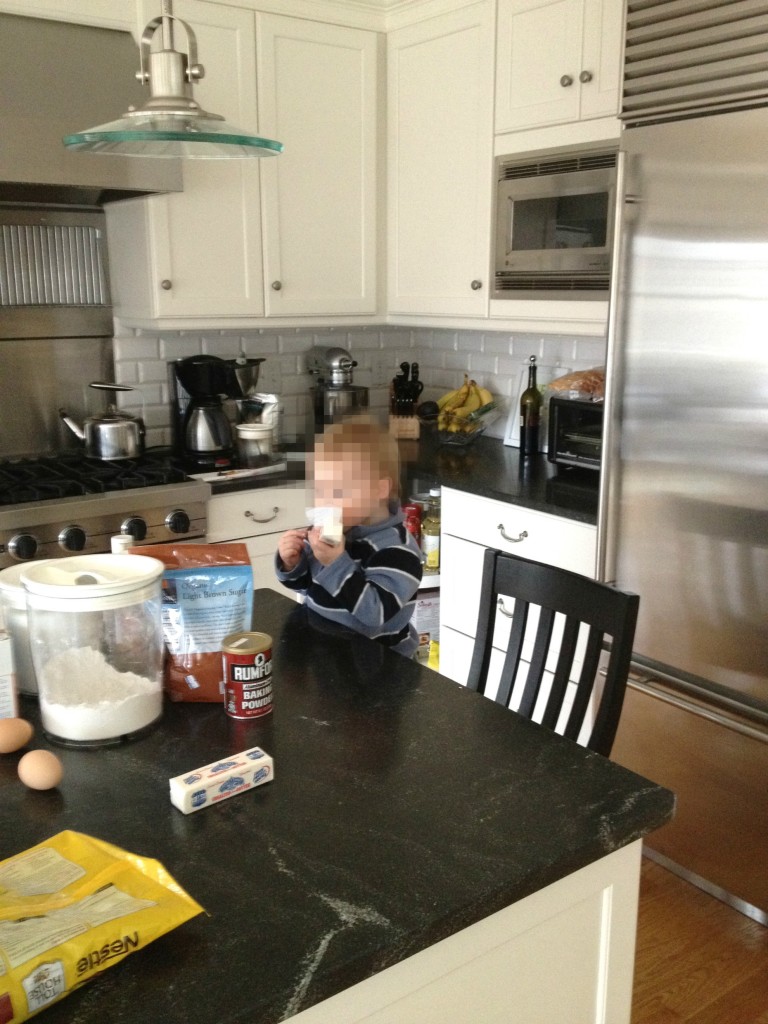
This weather this week has been a bit of a shock to the system after the mild weather we had experienced the past few weeks.  Yesterday afternoon, Baby T and I had nowhere to go so I decided to make a batch of chocolate chip cookies.  The recipe I follow is nothing special- it’s pretty much from the back of the Nestle Toll-House chocolate chip bag.  It was my first time letting T stand up on a chair next to the counter to “help.”  I knew it wasn’t going to be incident-free (he may or may not be licking a stick of butter in the following picture), but we had a fun time:

Print
Chocolate Chip Cookies
Author: m
Recipe type: dessert
Prep time:  30 mins
Cook time:  10 mins
Total time:  40 mins
Serves: 30
 
The classic recipe for chocolate chip cookies
Ingredients
  • 2¼ cups all-purpose flour
  • 1 teaspoon baking soda
  • 1 teaspoon salt
  • 1 cup (2 sticks) butter, softened
  • ¾ cup granulated sugar
  • ¾ cup packed brown sugar (I used dark)
  • 1 teaspoon vanilla extract
  • 2 large eggs (bring to room temperature)
  • 2 cups semi-sweet chocolate chip cookies
Instructions
  1. Preheat oven to 375° F.
  2. Combine flour, baking soda and salt in small bowl. Beat butter, granulated sugar, brown sugar and vanilla extract in large mixer bowl until creamy. Add eggs, one at a time, beating well after each addition. Gradually beat in flour mixture. Stir in chocolate chips. Use a spoon or melon scooper to form small balls of dough and place onto ungreased baking sheets (I use parchment paper on top of the baking sheets to help prevent sticking and assist with clean-up).
  3. Bake for 9 to 11 minutes or until golden brown. Cool on baking sheets for 2 minutes; remove to wire racks to cool completely. Serve to smiling baby boy with a washcloth nearby for instantaneous messy, chocolatey hands.
Notes
Source: Slightly adapted from Original NESTLÉ® TOLL HOUSE® Chocolate Chip Cookies recipe
2.2.6


Filed Under: M's Desserts, M's recipes Tagged With: baking with a toddler, baking with baby, chocolate chip cookie recipe, chocolate chip cookies, Mom's recipe, mommy blogging, nestle toll house chocolate chip cookie recipe

Leap Day Birthday Cake

Posted by 2 Sisters 2 Cities on February 29, 2012

Chances are today is not your birthday. However, it is mine! And since February 29th only comes around once every four years, we should all celebrate. I decided to make a cake for my birthday because you only turn 8 once! If it’s not your birthday today, here are some other reasons to celebrate Leap Day. If you watch 30 Rock, you may have also seen their Leap Day-themed episode:

“Nothing is impossible on Leap Day!”

I decided to make a traditional vanilla birthday cake! I was originally of a really rich Devil’s Food Cake with a Coconut Frosting or a Dark Chocolate Salted Caramel Layer Cake, but this description of the vanilla cake in the Magnolia Bakery Cookbook really struck a chord:

“Frost with pink buttercream icing and lots of colored sprinkles as we do, and feel as though you’re at your seventh birthday party all over again!”

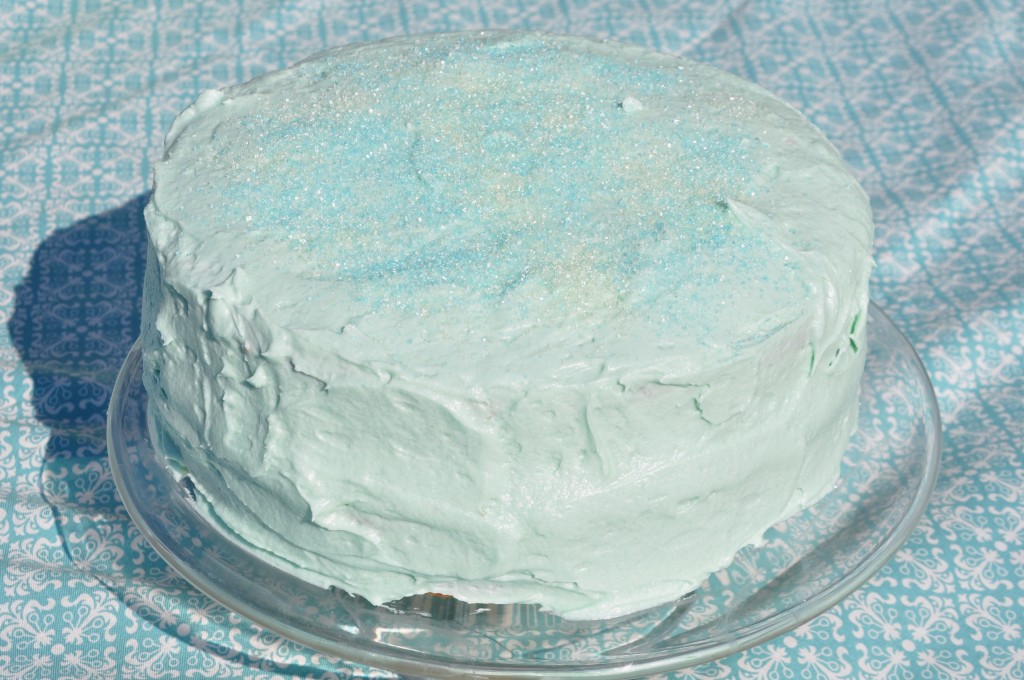
This cake definitely brought out the spirit of my inner eight-year old! I went with a blue-green shade of buttercream:

Leap Day Vanilla Birthday Cake

Ingredients:
1 cup (2 sticks) unsalted butter, softened
2 cups sugar
4 large eggs, at room temperature
2 and 3/4 cup all-purpose flour
2 tsp baking powder
1/4 tsp salt
1 cup milk
1 teaspoon vanilla extract

Directions:
Preheat oven to 350 degrees. Grease and lightly flour two 9×3 springform cake pans.

In a large mixing bowl, use an electric mixer on medium speed to cream the butter until smooth. Add the sugar gradually and beat until fluffy, about 3 minutes Add the eggs one a time, beating well after each egg is added. Combine the flour, baking powder, and salt in a separate bowl. Add to the butter mixture in four parts, alternating with the milk and vanilla extract, beating well after each addition.

Divide the batter among the cake pans. Bake for 30-35 minutes or until a toothpick inserted into center of cake comes out clean. Let cakes cool in pans for 10 minutes. Remove from pans and cool completely on a wire rack.

When cake has cooled, ice between the layers, then ice top and sides of cake with buttercream frosting. Top with sanding sugar.

Leap Day Vanilla Buttercream

Ingredients:
1 cup (2 sticks) unsalted butter, very soft
8 cups confectioners’ sugar
1/2 cup milk
2 teaspoons vanilla extract

Place the butter in a large mixing bowl. Add 4 cups of the sugar and then the milk and the vanilla extract. Beat until smooth and creamy. Gradually add the remaining sugar, 1 cup at a time, until icing is thick enough to be of good spreading consistency (you may very well not need all of the sugar). If desired, add a few drops of food coloring and mix thoroughly. Use and store icing at room temperature, as icing will set if chilled. Can store in an airtight container for up to three days.

Source: Adapted from The Magnolia Bakery Cookbook: Old-Fashioned Recipes from New York’s Sweetest Bakery (this cookbook can be found in our Amazon store under the Products We Love tab)


This post is linked at:

Cast Party Wednesday


Filed Under: M's Desserts, M's recipes Tagged With: birthday, birthday cake, leap day, leap day birthday, Magnolia Bakery, traditional vanilla birthday cake

Chocolate-Covered Strawberries and Valentine’s Day Menu

Posted by 2 Sisters 2 Cities on February 14, 2012

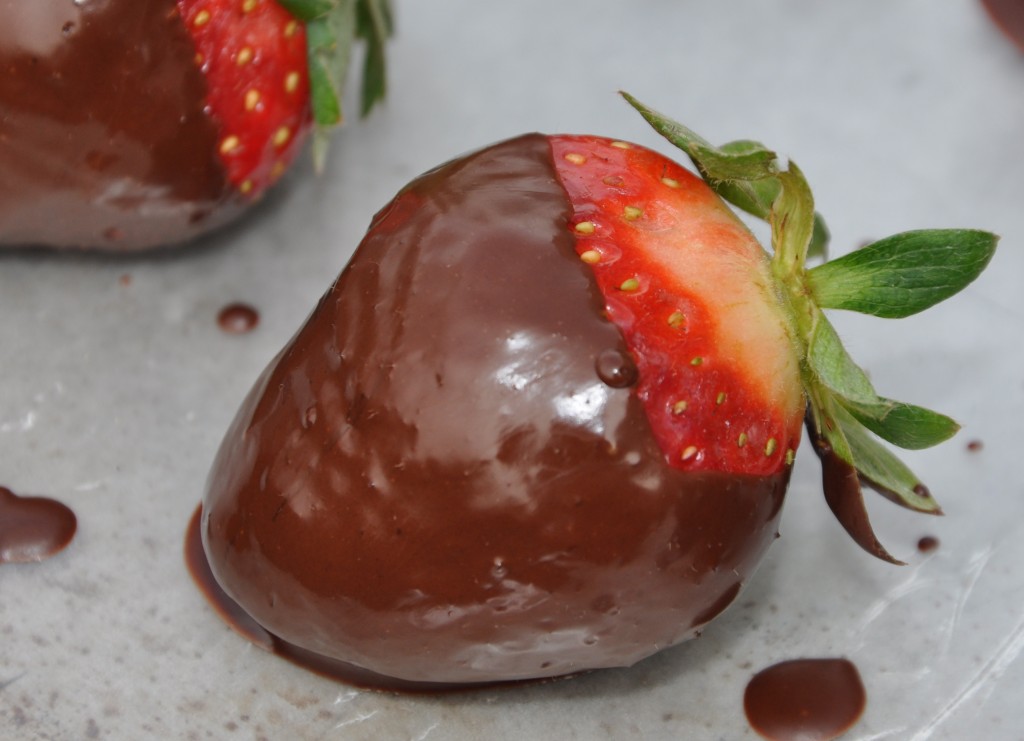
Happy Valentine’s Day!  I had hoped to make heart cut-out cookies like Sara did at forever and a recipe, but I ran out of time.  I did decide at the last-minute to make chocolate-covered strawberries to go on the side of the dessert planned for tonight.  This is a very simple recipe, but I have a couple warnings:

1.  If you don’t have a double-boiler and are just holding a pot over another pot of boiling water, don’t freak out if the water bubbles out at you and fling a chocolate strawberry all over yourself and the kitchen.

2.  If you have already flung a chocolate strawberry all over yourself and kitchen, don’t answer the door for the dry cleaning delivery man.  I did not realize I had spilled chocolate all over my shirt.  Everywhere.  I must have looked like such a hot mess when I answered the door.

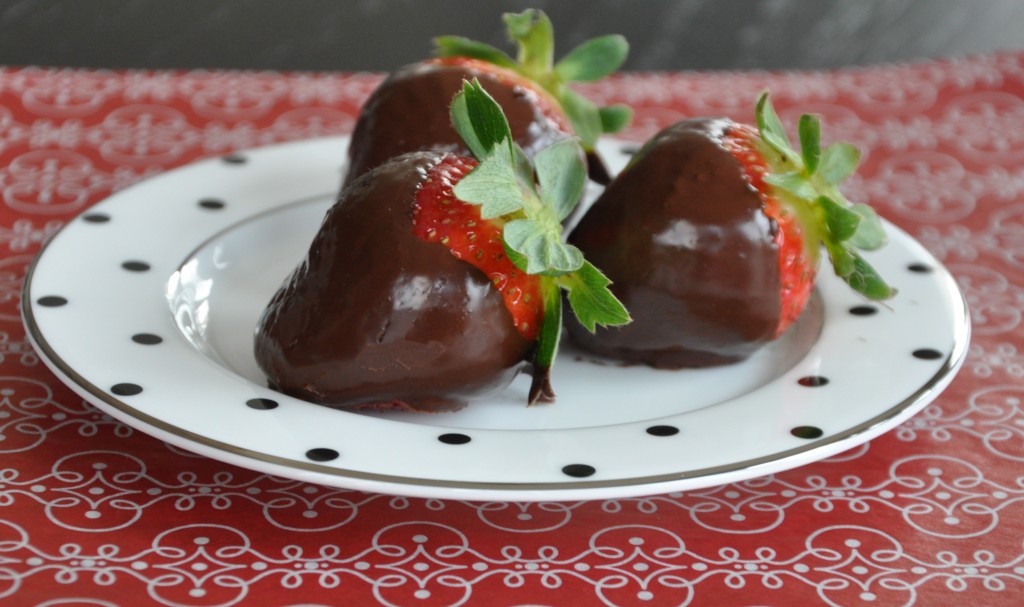
Chocolate-Covered Strawberries

Ingredients:
-1 pound strawberries, rinsed and patted dry
-8 oz 70% cacao chocolate bar, chopped into small pieces
-1/2 inch square paraffin
-1 tablespoon butter
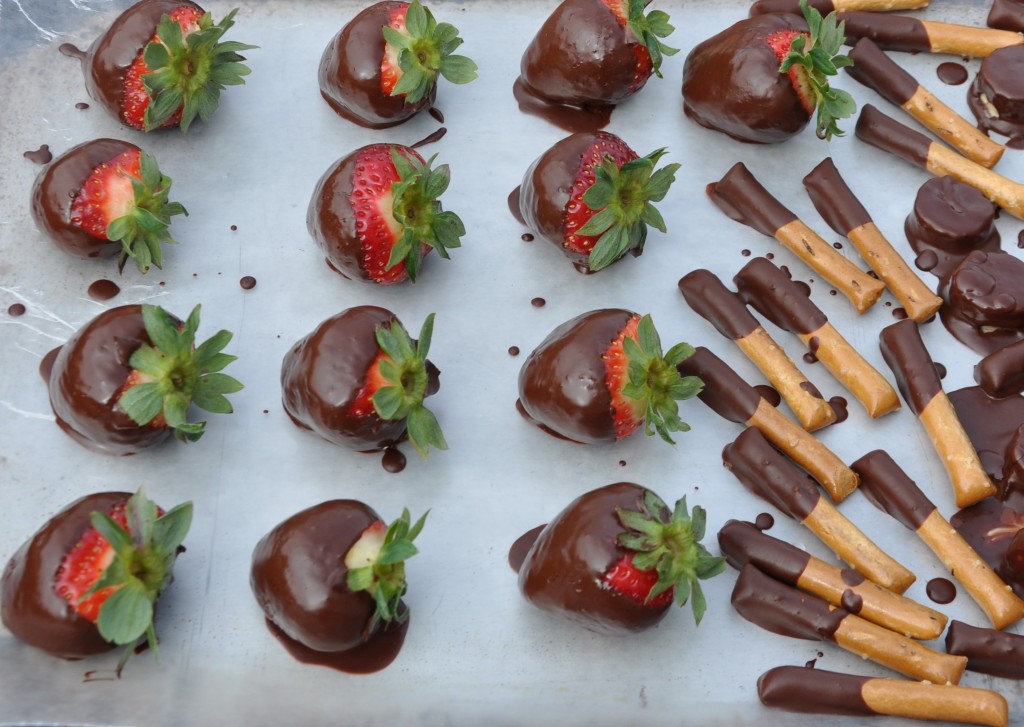
-Any other ingredients you want to dip in chocolate (I used bananas and pretzels)

Directions:
Combine the chocolate, paraffin, and butter in the top portion of a double boiler (or a small sauce pan if you don’t have one).  Allow the water in the bottom portion of a double boiler (or a larger sauce pan) to boil.  Hold the small pan over the boiling water (don’t let it touch the bottom of the larger pan) and continually stir the chocolate mixture until everything is fully melted.

Holding the strawberry by the stem, dip the strawberry into the melted chocolate and roll it around until 85% of it is covered with the chocolate.  Place the strawberry on a baking sheet covered with wax paper.   Once the strawberries are done, dip any other ingredients you want in the chocolate. Place the baking sheet in the fridge for an hour or until chocolate has set.

I also made some chocolate-covered pretzels and bananas.  When I think of chocolate-covered bananas, I always think of the Bluth family banana stand on Arrested Development:

Tonight’s V’day dinner menu is:
-Whole Foods pre-made crab cakes with homemade tartar sauce
-Moroccan-spiced rack of lamb with pomegranate reduction (from the Bon Appetit Fast Fresh Easy cookbook)
-Couscous with pine nuts and mint
-Baked acorn squash with yogurt and mint
–Molten chocolate cake with chocolate-covered strawberries on the side

Do you have any plans for tonight?

-m


Filed Under: M's Desserts, M's recipes Tagged With: chocolate-covered strawberries, DIY gifts, edible holiday gifts, gift ideas, valentine's day, Valentine's Day menu

Molten Chocolate Cake

Posted by Meaghan Barry on February 22, 2010

Following my belated Valentine’s Day dinner, I made Molten Chocolate Cake for dessert.  Although it sounds intimidating to make (and isn’t this the dessert you have to pre-order before your meal at most restaurants?!), it was actually pretty easy to make.  I got this recipe from the blog Closet Cooking:

Molten Chocolate Cake

(makes 4 servings)
Printable Recipe

Ingredients:
4 ounces bittersweet chocolate
1/2 cup unsalted butter
3 egg yolks
1/4 cup sugar
3 egg whites

Directions:
1. Lightly grease 4 ramekins with butter.
2. Melt the chocolate into the butter in a double boiler and let cool a bit.
3. Beat the egg yolks and sugar and mix into the chocolate.
4. Beat the egg whites in a bowl until they form soft peaks.
5. Fold the chocolate into the egg whites.
6. Pour the batter into the ramekins, no more than 2/3rds full.
7. Bake in a preheated 400F oven for 7-10 minutes. The outside will be set and possibly crack and the inside will still be liquid.
8. Let cool for a few minutes and then run a knife around the edges and tip onto a plate. (Optional; Feel free to eat it right out of the ramekin with a spoon.)

I sifted a little powdered sugar on top and ate it straight from the ramekin (I think this was the first time I have actually even used my ramekins!)  Husband M recommends adding a couple raspberries to the top as well.

-Sister M

Related Posts Plugin for WordPress, Blogger...


Filed Under: M's Desserts, M's recipes Tagged With: chocolate, special occasion dinner

  • « Previous Page
  • 1
  • 2
  • 3

Recent Posts

  • Easy Holiday Office Party Tips
  • 5 Steps to an Easy Football Party
  • Gingerbread Biscotti
  • Holiday Coffee Bar and Thanksgiving Recipes
  • Soft Sugar Pumpkin Cookies
  • Cinnamon Sugar Apple Cake
  • Hello Pumpkin Season!
  • Make Your Own Milkshake Party!
  • Mama’s Pickles
  • S’more Cookies

Categories

  • About 2 Sisters 2 Cities (7)
  • Books (8)
  • Crafting & DIY (22)
  • Design & Decorating (15)
  • Gardening (5)
  • Giveaway (14)
  • Guest Bloggers (8)
  • K's post (46)
  • K's Recipes (191)
    • K's Desserts (75)
    • K's Entrees (23)
    • K's Sides (24)
  • M's post (72)
  • M's recipes (167)
    • M's Entrees (21)
    • M's Sides (14)
    • M's Desserts (30)
  • Organizing (7)
  • Party Ideas (49)
  • Uncategorized (1)
  • Vacation (12)
Stitch Fix

Archives

Blogroll

  • Annie's Eats
  • Bake at 350
  • Baked Bree
  • Boston Harbor Beacon
  • Confections of a Foodie Bride
  • Cook Like a Champion
  • Erin’s Food Files
  • Forever and a Recipe
  • Framed Cooks
  • Oh Happy Day
  • On Common Ground
  • Pennies on a Platter
  • Pink Parsley
  • Recipe Girl
  • Sally's Baking Addiction
  • Simply Scratch
  • The Curvy Carrot
  • The Pioneer Woman
  • Tidy Mom
  • Two Peas & Their Pod
  • What’s Gaby Cooking
  • Young House Love
Increase your website traffic with Attracta.com

grab a 2 sisters button!


Copyright © 2014 ~ 2 Sisters 2 Cities | Blog Design by Minx Design