2 Sisters 2 Cities

Image Map
  • About 2 Sisters 2 Cities
  • Recipe Index
  • Project Index
  • Contact Us
  • Like us on Facebook
  • Follow m on twitter
  • Follow k on twitter
  • Follow 2S2C on Pinterest
  • Follow 2S2C on G+
  • rss
  • e-mail 2S2C

12 Days of Christmas Cookies (The Past)

Posted by 2 Sisters 2 Cities on December 1, 2013

Why hello there December 1st!  I could have sworn Thanksgiving was a mere three days ago.  Time to put those pumpkin pie pans away and get ready for some Christmas baking!  We are so excited to kick-off our 3rd year of our annual 12 Days of Christmas Cookies.  Before we start our series for 2013, I wanted to highlight our 24 Christmas cookies from the past two years.

12 Days of Christmas Cookies {from 2 Sisters 2 Cities}

12 DAYS OF CHRISTMAS COOKIES 2012

  • Twelve Oreo Truffles
  • Eleven Mini Pecan Pie Bites
  • Ten Crisp Toffee Chocolate Bars
  • Nine Raspberry Linzer Cookies
  • Eight Kolacky
  • Seven Italian Butter Spritz Cookies
  • Six Chocolate Velvet Butter Balls
  • Five Peppermint Bark Cookies
  • Four Nutella and Sea Salt Stuffed Sugar Cookies
  • Three Heath Bar Butter Cookies
  • Two Mini Gingerbread Men with Cream Cheese Icing
  • One Salted Chocolate Chip Caramel Cookie Bars


12 days of Christmas cookies- 2011 {from 2 Sisters 2 Cities}

12 DAYS OF CHRISTMAS COOKIES 2011

  • Twelve Salted Caramel Chocolate Shortbread Bars
  • Eleven Buckeyes
  • Ten Glazed Lemon Cookies
  • Nine Mexican Wedding Cakes
  • Eight White Chocolate Ginger Drops
  • Seven Peanut Butter Temptations
  • Six Chocolate Crinkly Cookies
  • Five Candy Cane Kiss Cookies
  • Four Pieces of Salted Peppermint Bark
  • Three Scandinavian Almond Bars
  • Two Coconut-Lime Bars
  • One Cut-out Sugar Cookie

Happy Baking!

sister m signature


Filed Under: K's Desserts, K's Recipes, M's Desserts, M's recipes Tagged With: 12 days of christmas cookies, 2011, 2012, christmas, Christmas Cookies, christmas past, cookie recipes, cookies, holiday, holiday baking

Sweet Potato Casserole

Posted by Keelin Hollenbeck on November 27, 2013

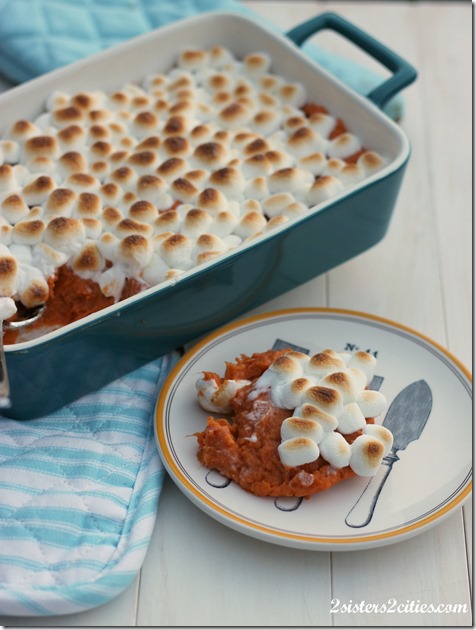
Sweet PotatoYam Casserole

Speaking of classic Thanksgiving recipes, this is the classic baked sweet potatoes or yam casserole recipe.  I know there are a lot of new moderns versions of this side, but I love this original marshmallow-covered one too much to give it up.  When we were younger my mom made the mistake of trying to update the sweet potato recipe to a more modern version which was topped with candied walnuts or pecans.  I am sure it would have been delicious, but my sisters and I threw such a fuss that she ended up having to put marshmallows on half.

What can I say?  To me it wouldn’t be Thanksgiving without marshmallow-covered candied yams/ sweet potatoes or canned jelled cranberry sauce (sliced at the can ring lines…. Not mashed up!) I call this sweet potatoes, but really I use yams because they are cheaper.  Preparing this dish is so easy, you will never use yams out of a can again!

Yams!

Print
Sweet Potato Casserole
Author: 2 Sisters 2 Cities
 
Ingredients
  • 2-3 pounds of yams or sweet potatoes
  • ¼ cup brown sugar
  • ¼ cup butter, melted
  • 2 tbsp. maple syrup
  • 2-3 cups marshmallows
Instructions
  1. Peel and cut sweet potatoes up into 1-1/2 inch pieces. Place in a large pot and cover with water. Bring to a boil and cook for about 10-12 minutes until sweets potatoes are tender.
  2. Drain sweet potatoes
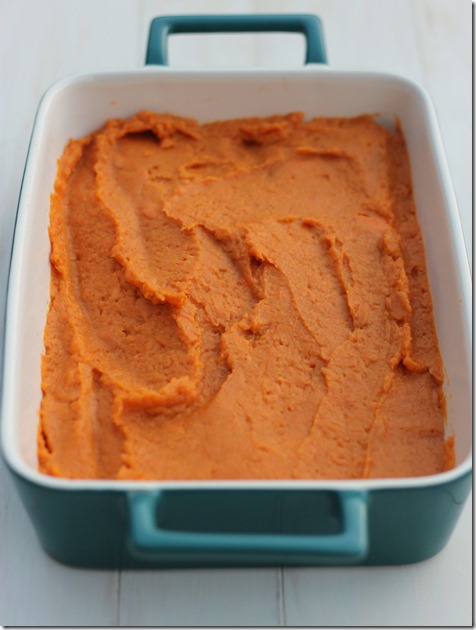
  3. In a large bowl add cooked sweet potatoes, butter, maple syrup, and brown sugar. Mix together until combined and smooth.
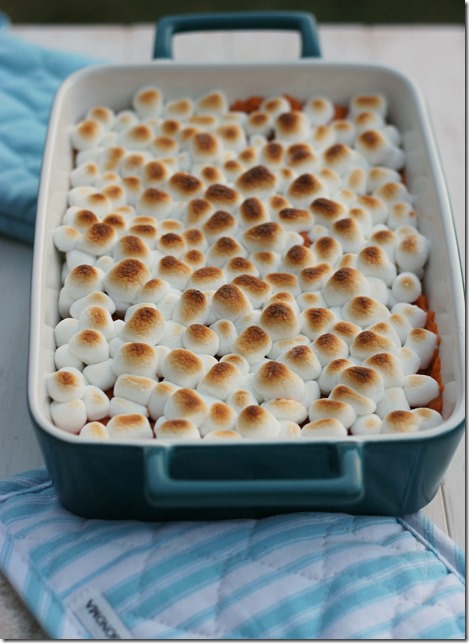
  4. Spread out sweet potatoes in casserole dish. Bake for 20-25 minutes at 375 degrees until sides are bubbling. Add marshmallows on the top during the last 5 minutes. To get the toasted marshmallow effect, turn broiler on for the last 2 minutes. Be careful because they can burn easily!
  5. These yams can be made ahead, up until the baking step and then refrigerated or frozen. You will need to add extra time to the baking to make sure they heat thoroughly.
3.2.2124

Baked Yams with Marshmallows
sisterk (2)


Filed Under: K's Sides, K's Recipes Tagged With: candied yams, holiday, side dish, sides, sweet, sweet potato, Thanksgiving, thanksgiving menu, thanksgiving recipe, yams

Chorizo Cornbread Stuffing

Posted by Meaghan Barry on November 26, 2013

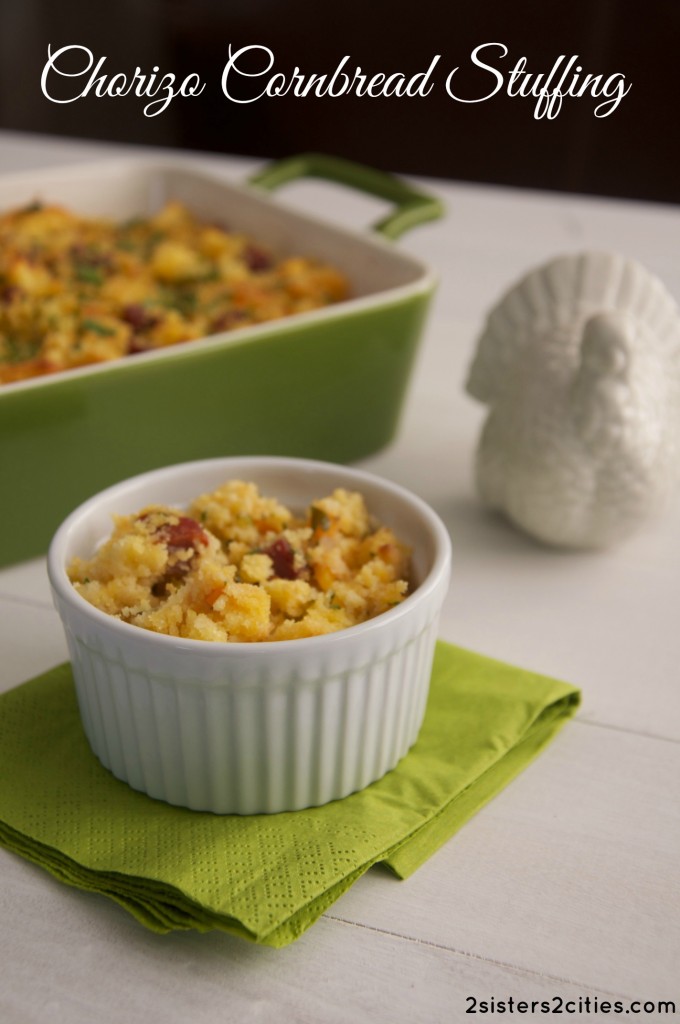
Chorizo Cornbread Stuffing

I know K has already touched on this, but seriously, how is it already late November already?  I am really trying to enjoy Thanksgiving as it’s own holiday, but with December 1st right around the corner, it’s hard not to start thinking about Christmas. But first, we must keep our focus on a truly great holiday- Thanksgiving.  And I have a truly special dish to commemorate this holiday, Chorizo Cornbread Stuffing.

While I always enjoy a serving of regular stuffing on Thanksgiving, I think I could enjoy this chorizo cornbread version year-round.  A local restaurant has a version of this recipe on it’s menu and my husband and I order it as a side dish every time we go.  I was so pleased that I was able to recreate a very similar version in my own kitchen!

If you are looking to mix it up with some non-traditional Thanksgiving recipes this year, I highly recommend making this version.  Or, if you wanted to go all out for the stuffing lovers out there, you could make traditional stuffing and Chorizo Cornbread Stuffing…just let me know what time to stop by!

Print
Chorizo Cornbread Stuffing
Prep time:  20 mins
Cook time:  35 mins
Total time:  55 mins
 
Ingredients
  • 1 tablespoon olive oil
  • 6 oz. dried Spanish chorizo (I used a smoked version), cut into small cubes
  • 1 medium white onion, chopped
  • 1 medium carrot, peeled and finely chopped
  • 1 celery stalk, finely chopped
  • 3 garlic cloves, pressed or minced
  • 3 cups cornbread, cut into cubes (you can buy it from pre-made or try this recipe for cornbread)
  • ¼ cup parsley, chopped (plus more for garnish if desired)
  • cooking spray
  • ¼ cup parsley, chopped
  • ½ cup low-sodium chicken broth or stock
Instructions
  1. Preheat the oven to 350 degrees F.
  2. Heat a large skillet on medium heat and heat the olive oil. Once hot, sauté the chopped chorizo for a few minutes. Add the onion, carrot, celery, and garlic and cook until the vegetables start to brown (8-10 minutes.) Add the cut-up cornbread pieces and chopped parsley (reserving some for garnish if you like.) Stir well to combine. Stir in ½ cup of chicken broth (add more if the stuffing appears too dry.)
  3. Meanwhile, use the cooking spray to prepare a medium-sized casserole dish. Add the stuffing to the dish and bake for about 20 minutes (look for it to be lightly golden on top.) Garnish with additional parsley before serving.
3.2.2124

Source: Adapted from Aaron Sanchez for Food Network Magazine

 sister m signature


Filed Under: M's Sides, M's recipes Tagged With: chorizo, corn bread, holiday recipes, side dish, stuffing, Thanksgiving, thanksgiving menu, thanksgiving recipe, thanksgiving sides

Grandma’s Sweet Refrigerator Rolls

Posted by Keelin Hollenbeck on November 25, 2013

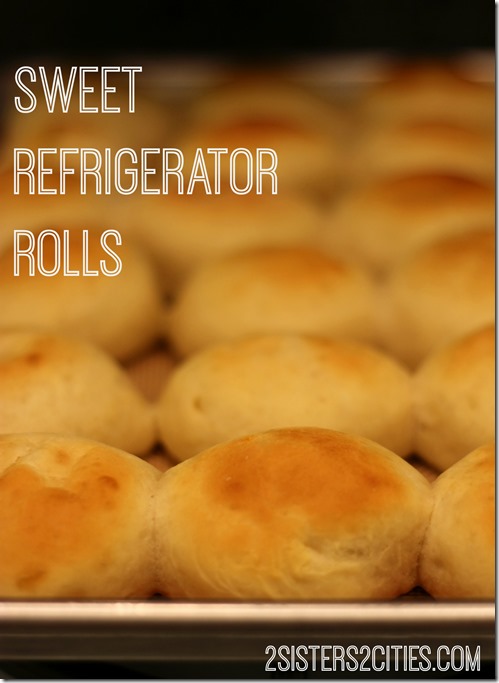
Sweet Refrigerator Rolls

What is Thanksgiving without homemade rolls?  This recipe is from our family cookbook that my aunt put together for everyone many, many years ago.  We are actually on our second edition and I use both cookbooks in my kitchen all of the time.  It’s great to have all my favorite family recipes in one place.  This recipe for sweet rolls is really special to me and M, it is our Grandma’s recipe for rolls that she made for Thanksgiving each year. We lost our grandma a few years ago, but we still have her recipes and family tradition that lives on.

These rolls not only have a place in our heart, but they are really tasty!  Their sweet taste goes perfectly with a small amount of butter and of course a thanksgiving dinner.   Make these rolls for your holiday meal this year!

These rolls can be frozen or the dough can be made the day before and then rolled and baked an hour before dinner (if you have extra oven space.)  I made these rolls over the weekend and froze them for my work Thanksgiving lunch Friday.  We are all about making things ahead here around here!  In the past when I was only cooking for four people, I cut the recipe in half and it turned out great.

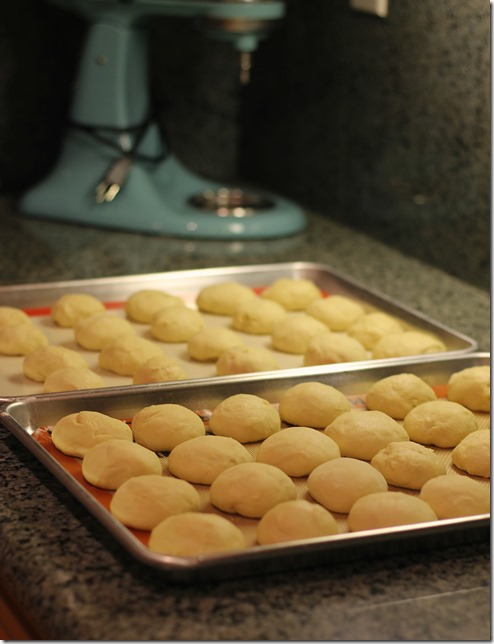
Homemade Rolls Rising

The rolls rising for 30 minutes before baking (plus my mixer in the background, isn’t she so pretty?)

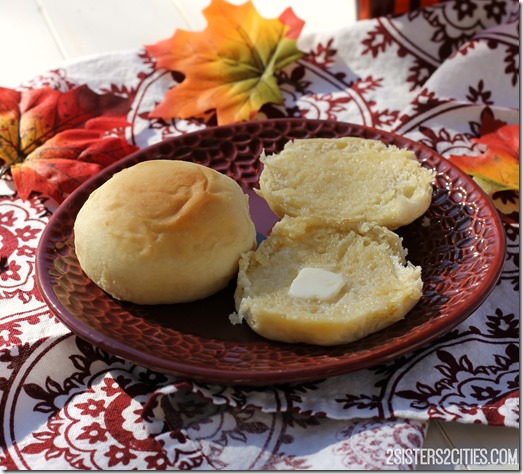
Sweet Rolls

Mmmm rolls…..

Print
Grandma's Sweet Refrigerator Rolls
Author: 2 Sisters 2 Cities
Serves: 30-36 rolls
 
Ingredients
  • ¾ cup butter
  • 1 cup boiling water
  • ⅓ cup sugar
  • 4½ tsp. active dry yeast
  • 1 cup luke warm water
  • 2 eggs
  • ⅓ cup sugar
  • 6 cups flour
  • 2 tsp. salt
Instructions
  1. Combine butter and 1 cup of boiling water. Stir until butter is melted.
  2. In the bowl of your mixer with paddle attachment add ⅓ cup of sugar, yeast, and 1 cup luke warm water. Combine on low.
  3. Once the butter reaches room temperature, add into yeast mixture and mix until combined.
  4. Add in eggs and another ⅓ cup of sugar, mix well.
  5. Next add in flour and salt. Combine completely.
  6. Cover bowl with plastic wrap and place in the refrigerator for at least 4 hours or overnight. If leaving overnight, punch the dough down before you go to bed so it doesn’t overflow in your fridge.
  7. One hour before dinner, turn dough out on a floured surface. The dough will be sticky so make sure your hands and surface are well floured.
  8. Preheat the oven to 400 degrees F. Form dough 30-36 rolls evenly sized. Place rolls 1-inch apart on a silicone mat lined baking sheet, you may need 2 baking sheets.
  9. Allow to rise for 30 minutes, then bake for 10-12 minutes. For best results cook each baking sheets one at a time.
  10. Serve immediately or store in an airtight container once cooled. Rolls can be frozen for up to 2 months.
3.2.2124

Source-  Adapted from Grandma H’s original recipe
sisterk (2)


Filed Under: K's Sides, K's post Tagged With: Bread, family recipe, grandma's sweet rolls, rolls, Sweet Refrigerator rolls, Sweet rolls, Thanksgiving, thanksgiving sides

Make-Ahead Turkey Gravy

Posted by 2 Sisters 2 Cities on November 24, 2013

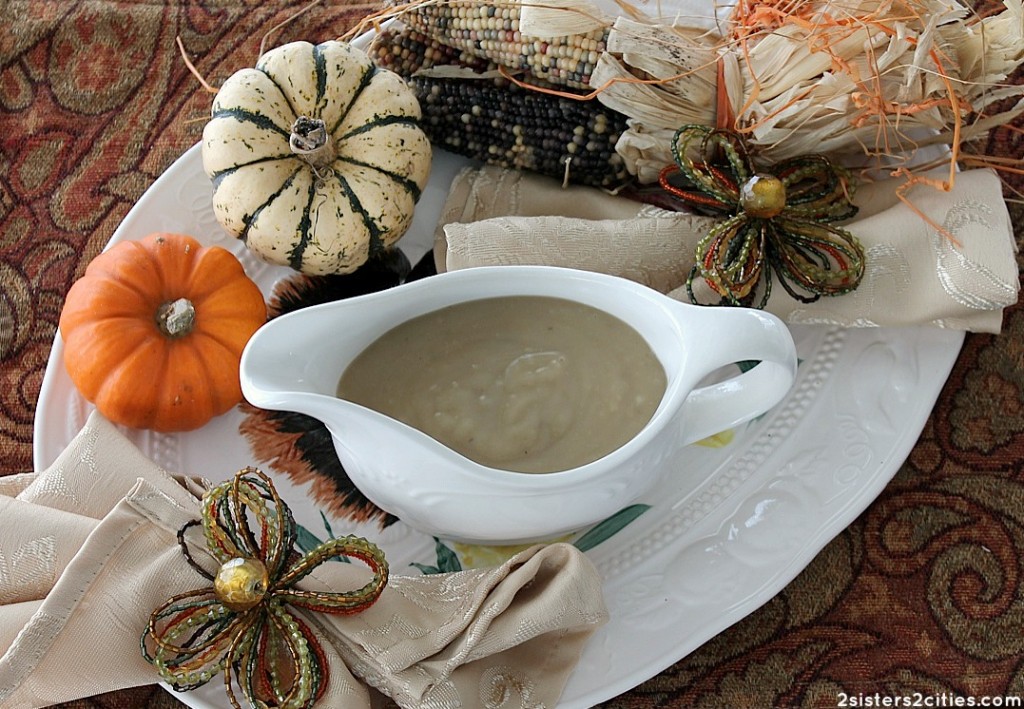
K and I are both cooking up a storm in our kitchens this weekend so we asked our mom to do a guest post on her traditional make-ahead turkey gravy recipe.  By completing this step ahead of time, it cuts down on a lot of the cooking time (and stress!) on Thanksgiving day.  Take it away mom!

Make-Ahead Turkey Gravy {from 2 Sisters 2 Cities}

I love to get many of the sides for Thanksgiving dinner done ahead of time. There are so many tasks to complete towards the end  of the cooking session that this recipe is a great time saver and delicious, too!  Before I  found this recipe, roasting a turkey dinner and then making gravy was a dreaded event. After nearly four decades of cooking for my husband and family, I have resolved that part of my holiday stress.

On a calm day in early November, this  recipe comes together easily – don’t let all the steps scare you. Most of the time is spent smelling the awesome vegetable -turkey broth simmering on the stove.  Easy enough to place in a couple quart mason jars, and freeze up to 1 month. Then, take out two days before Thanksgiving, put in refrigerator to thaw. The final steps of reheating can easily be delegated to a willing guest or one of my four daughters in my case!

Print
Make-Ahead Turkey Gravy
Author: 2 Sisters 2 Cities
Recipe type: Sauce
Cuisine: American
Prep time:  30 mins
Cook time:  3 hours
Total time:  3 hours 30 mins
Serves: 10
 
Makes 6-7 cups Planning tip: Freeze up to 1 month then refrigerate 2 days to thaw. Reheat in saucepan, whisking to combine.Turkey drippings from roast pan can be added at that time.
Ingredients
  • 4 turkey wings ( 3-4 lbs)
  • 2 medium onions, peeled and quartered
  • 8 cups chicken broth ( RESERVE 2 CUPS)
  • 1 cup dry white wine or water
  • 1 cup sliced carrots
  • 3 peeled garlic cloves
  • ½ tsp. dried thyme
  • ¾ cup flour
  • 2 Tbsp butter
  • salt and pepper to taste
Instructions
  1. Heat oven to 400 degrees. Put wings in a single layer in a roasting pan. Scatter the onions on top. Roast 1 and ¼ hours or until wings are nicely browned.
  2. Put roasted wings and onions in a 5- to 6-qt. pot. Add 1 cup of the broth to the roasting pan and scrape any of the brown bits from the bottom. Add this back to pot with 5 more cups chicken broth,( Keep the remaining 2 cups broth in the frig until later), carrots, garlic and thyme. Bring to a boil, reduce heat and simmer gently, uncovered 1 and ¼ hours.
  3. Remove wings from broth. Optional: When cool, pull off skin and can save meat for another use. Otherwise discard.
  4. Strain broth through fine mesh strainer, pressing vegetables to extract as much broth as possible. Discard vegetables. Skim fat off broth ( easy way to do this if time permits, refrigerate overnight and remove any solidified fat.)
  5. Whisk the flour into the reserved chicken broth until well blended and smooth.
  6. Bring strained broth to a gentle boil. Whisk in flour mixture. Whisk until thickened and boiling. Boil 3-4 minutes to cook out any flour taste. Stir in butter , season to taste.
  7. On Thanksgiving, after the turkey is removed from the roasting pan, you can spoon the fat off the drippings and add 1-2 cups of the drippings to the gravy as it is being reheated.
3.2.2124

Have a wonderful Thanksgiving!!

-2S2C Mom


Filed Under: Guest Bloggers Tagged With: gravy, guest post, holiday planning, make-ahead, mom, Thanksgiving, thanksgiving menu, thanksgiving recipe, turkey

Rosemary Parmesan Popcorn

Posted by Meaghan Barry on November 22, 2013

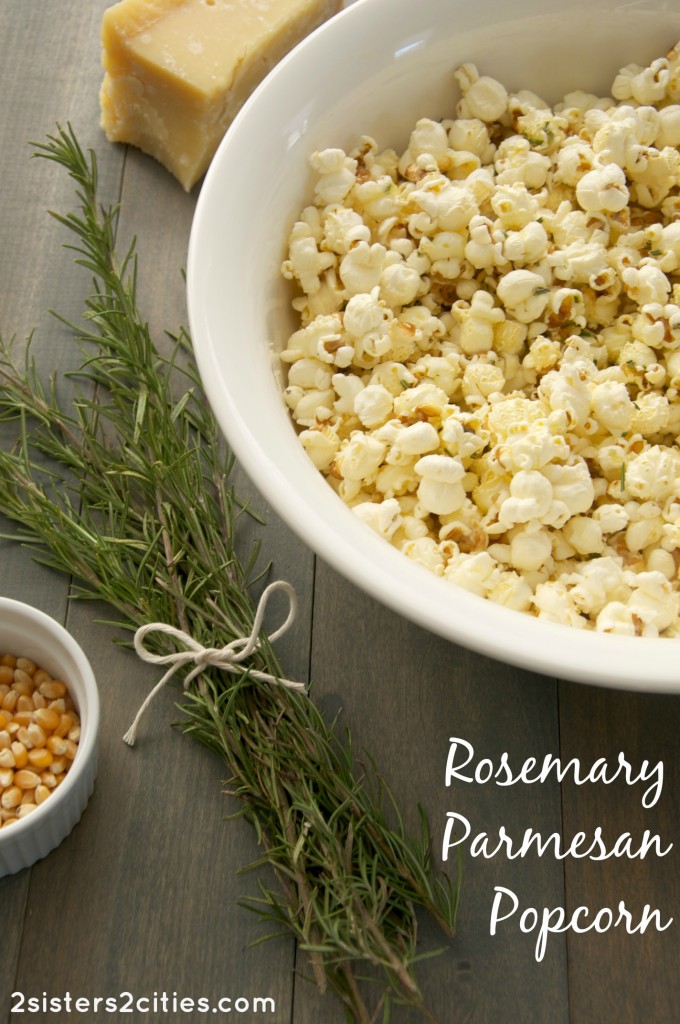
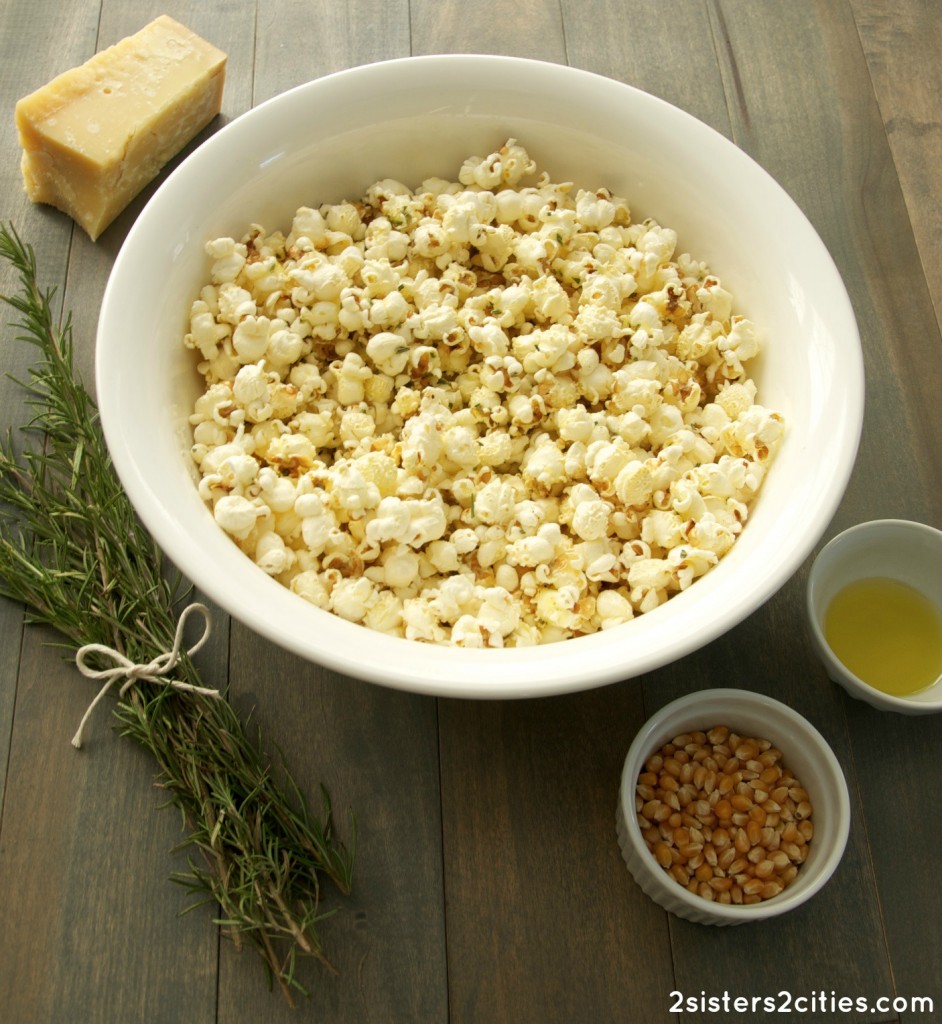
rosemary parmesan popcorn

It’s time to discuss Thanksgiving Day eating strategies!  While you want to be hungry for the big meal, you don’t want to be ravenous and cranky leading up to the main event.  I like to have a variety of light appetizers available for my guests so they can pick and nibble at snacks throughout the day.

Popcorn is such an easy treat to prepare and I decided to create a savory recipe for Thanksgiving: Rosemary Parmesan Popcorn.  I usually like my butter/salt popcorn combo so much that I rarely make any other popcorn recipes, but I had a very difficult time removing my hand from the vicinity of the popcorn bowl with this version.  I highly recommend investing in a Whirley Pop* if you don’t know own already.  It makes popping popcorn a cinch.

Rosemary Parmesan Popcorn

Save Print
Rosemary Parmesan Popcorn
Prep time:  5 mins
Cook time:  3 mins
Total time:  8 mins
 
A savory popcorn recipe
Ingredients
  • 1 tablespoon coconut oil (you could also use canola or vegetable oil, but coconut is a healthier oil)
  • ½ cup popcorn kernels, popped (yields 14-16 cups popped popcorn)
  • 5 tablespoons extra virgin olive oil
  • 3 tablespoons grated Parmigiano Reggiano
  • 1 tablespoon rosemary, finely chopped
  • ½ teaspoon fine sea salt
Instructions
  1. Use the coconut oil and popcorn kernels to pop 14-16 cups popcorn (I recommend using a Whirley Pop*.) Pour popped popcorn into a large serving bowl.
  2. Whisk together olive oil, grated cheese, rosemary and sea salt in a small bowl.
  3. Pour olive oil mixture over popcorn and stir well to combine.
3.2.2124

If you prefer a sweeter popcorn recipe for an appetizer or snack, I highly recommend K’s Lightened-Up Caramel Corn:

Lighter-Version-of-Caramel-Corn_thumb.jpg

 What’s your favorite appetizer to eat/serve before the big Thanksgiving meal?

sister m signature


Disclosure: This post contains affiliate links, but all opinions are my own.


Filed Under: M's recipes Tagged With: appetizer, parmesan, popcorn, popcorn recipes, rosemary, thanks, Thanksgiving, thanksgiving recipe

Homemade Apple Sauce

Posted by Keelin Hollenbeck on November 21, 2013

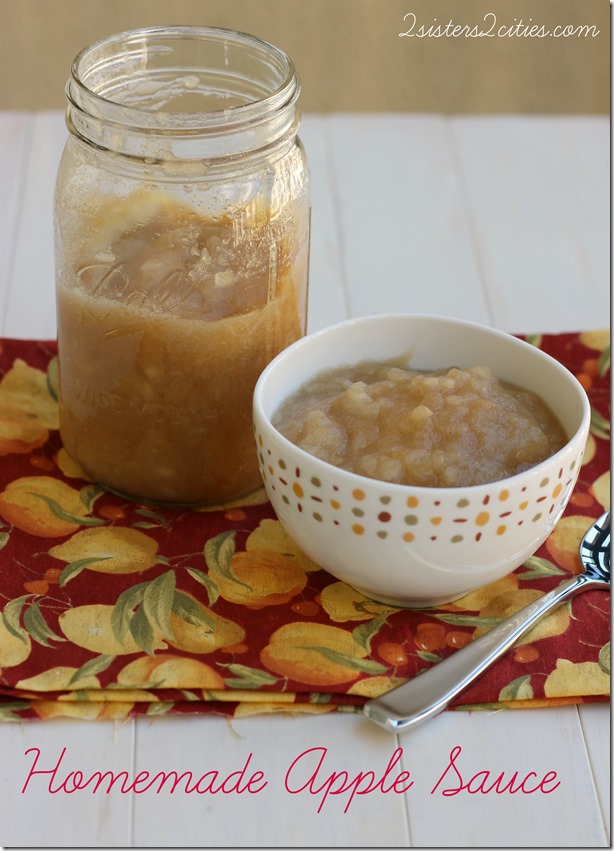
Homemade Apple Sauce
Oh dear, where have I been for the last few months?  This is a great question!  I have been busy moving… again!  I didn’t move across the country again, just across the bay.  I moved from the South Bay of San Francisco to the East Bay which equals a shorter commute for me and a larger kitchen! A win-win in my book.  I have over 1-2 hours back in my life each day,  which is beyond amazing.  People who don’t commute in major cities probably wouldn’t understand the excitement of moving from a 2-hour commute each way to a little bit less than an hour each way, but it is life altering!
I can’t believe next week is Thanksgiving, but I also can’t believe it’s almost December!  No fear the 2 sisters in 2 cities are here to help you with you last minute holiday meal planning.
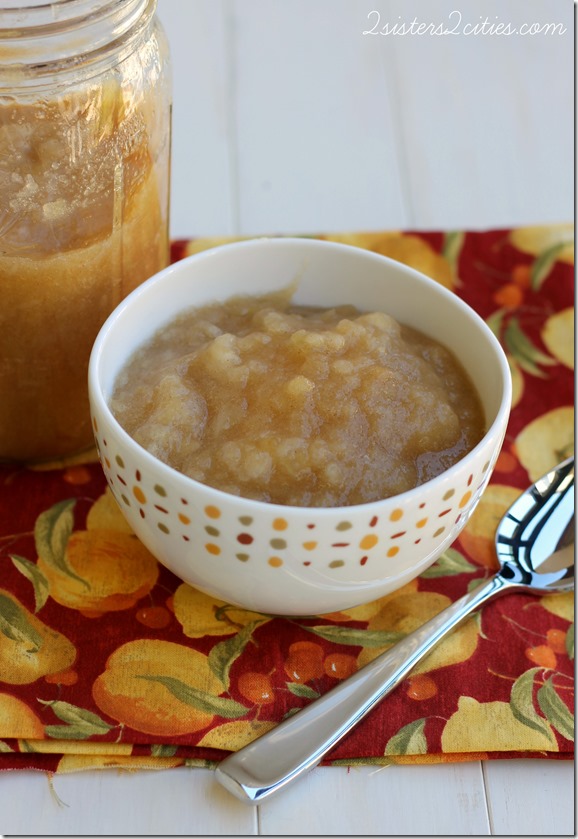
One of my favorite sides for a holiday meal is homemade apple sauce.  It is so easy to make and 1000 times better than store-bought apple sauce.  Homemade apple sauce is like eating the inside of an apple pie- so delicious!  You don’t have to use the most expensive apples to make apple sauce.  You can use a variety of apples and they don’t need to be perfect.

What do you need?
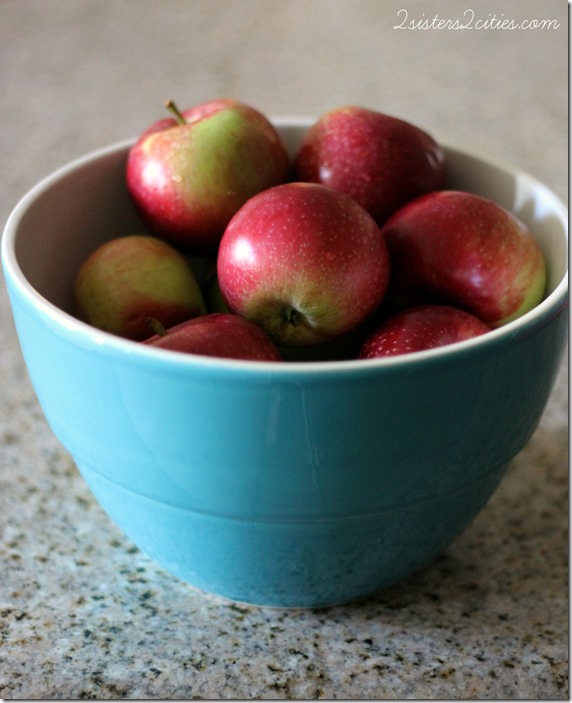
Apples for Apple Sauce
A bunch of apples is a must!  Get those apples that have been chilling in your fruit drawer for weeks.
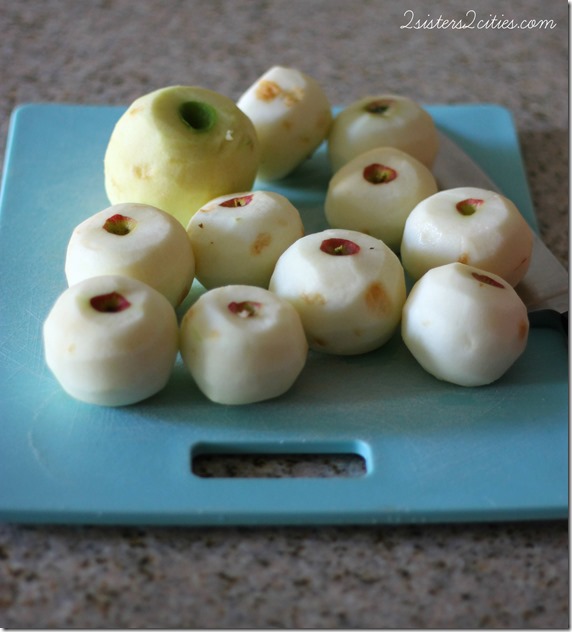
Peeled Apples for Apple Sauce
Peel those apples… bruises are okay!
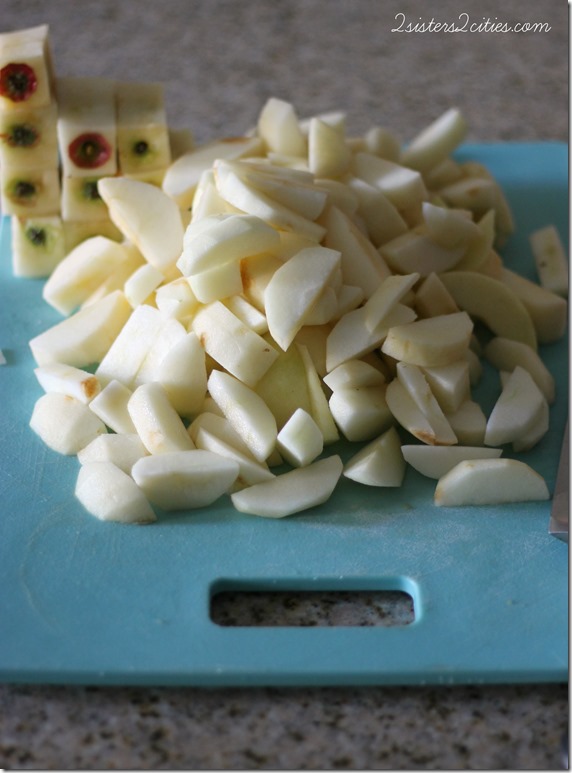
Slice Apples for Apple Sauce
Slice the apples evenly (and meticulously stack your apples cores.)
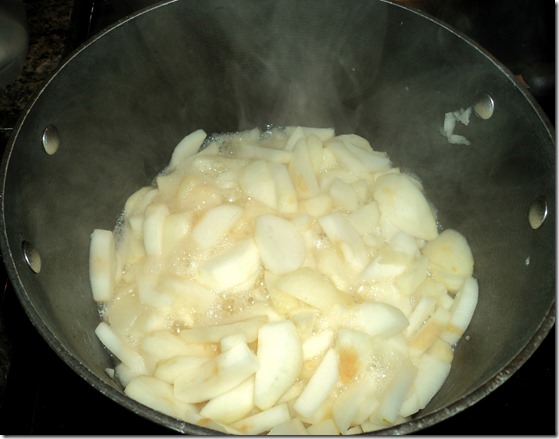
Cooking Apple Sauce
Cook those apple slices with water until softened.
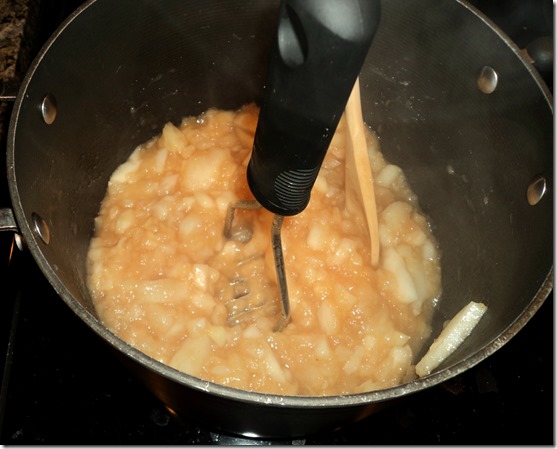
Mash Apples for Apple Sauce
Mash the apples once softened.
Apple Sauce
Tada!

Print
Apple Sauce
Author: 2 Sisters 2 Cities
 
Ingredients
  • 8-10 apples
  • ½ cup water
  • ¼ –1/2 cup granulated sugar (to taste)
  • ¼ tsp. cinnamon
Instructions
  1. Peel all the apples. Cut apples into evenly sized slices. Throw your peels and cores in your compost pile.
  2. Place sliced apples into a large pot. Add in water to pot and cook over medium heat. Put on cover and cook for 10-20 minutes until apples soften. Turn heat down if the apples start to boil.
  3. Apples should be easily mashed with a fork or potato masher when cooked. Mash apples to preferred thickness.
  4. Add in sugar, to taste, and cinnamon. Stir and cook for a few more minutes. Serve warm or cold and store in an air tight container in the refrigerator.
3.2.2124

sisterk (2)


Filed Under: K's Sides, K's Recipes Tagged With: apple sauce, apples, autumn, autumn recipes, easy sides, fall, fruit, holiday sides, homemade sides, sides, Thanksgiving, thanksgiving recipe

Personalized Gifts for Kids

Posted by Meaghan Barry on November 12, 2013

At my book club the other evening, I was discussing how baby N received so many personalized gifts with his name on it.  I really cherish these customized gifts because they are unique keepsakes.  It’s such a fun trend and there are so many different, creative options out there.

I also love that you can have these items made with any name.  The spelling of my name is somewhat unique and it was very hard to find personalized items with the spelling of my name growing up.  These days, any child can easily have personalized items with their name made on it!

With the holiday season quickly approaching, Bright Star Kids asked me to pull together a list of some of my favorite personalized gifts that I have seen lately.

 Bright Star Kids

  1. Personalized clothing- Bright Star Kids offers so many adorable personalized baby & kid clothes.  I love that you can order any of their customized designs and have it printed on a onesie, t-shirt, or bib (and it is 100% organic cotton.)  I am totally swooning over this Christmas Truck design…it’s so sweet!  I also love the big and little brother t-shirt designs.  One of my only complaints about having boys is the lack of cute boy clothing out there…Bright Star Kids may be changing my mind on that one!  I think T and N may be getting a few of these fun clothing items under our Christmas tree this year.bright star kids shirts
  2. Custom labels for kids- I ordered some of these for T as his nursery school teachers recommend that all kids label their coats, shoes, mittens, hats, cups, etc. so they don’t get mixed up.  I love that they don’t come off in the washing machine or dishwasher.  Bright Star kid also offers their own line of name labels.  These would make a great stocking stuffer for all your favorite preschoolers.
  3. Baby & toddler books- I recently ordered this baby book for N and this toddler memory book for T.  I love the customized front covers of these books.  It’s so much more personable that just some generic baby book from a store.  The inside pages are really nice as well.
  4. Customized name burp clothes- We go through a lot of burp clothes in our household and one of my favorites is a personalized one from Moonbeam Baby.  It’s basically a monogrammed diaper cloth embellished with some decorative fabric.  Who knew spitting up could be so cute?
  5. Name Puzzle Step Stool- Another gift that Baby N received was a personalized name puzzle step stool.  Right now only T uses it, but it’s such a cute gift idea.  Plus, T has already learned how to spell N’s name since he has put the puzzle together so many times.  T uses it to brush his teeth, wash his hands, and whenever he needs a little boost to get to counter height.

If you are looking for more personalized gift ideas for kids this holiday season, be sure to also check out my Pinterest board on the topic!  What are some of your favorite personalized gifts to give kids?

 bsk boy

sister m signature


Be different this Christmas & get the kids a super cute gift personalized especially for them! Save 15% when you use the code “GIFT” in the shopping cart. Min spend $30. Expires December 15, 2013.

This is a sponsored conversation written by me on behalf of Bright Star Kids. The opinions and text are all mine.


Filed Under: M's post Tagged With: bright star kids, christmas, gift ideas, kids, personalized gifts, sponsored post

Campbell’s Dinner Sauces

Posted by Meaghan Barry on November 5, 2013

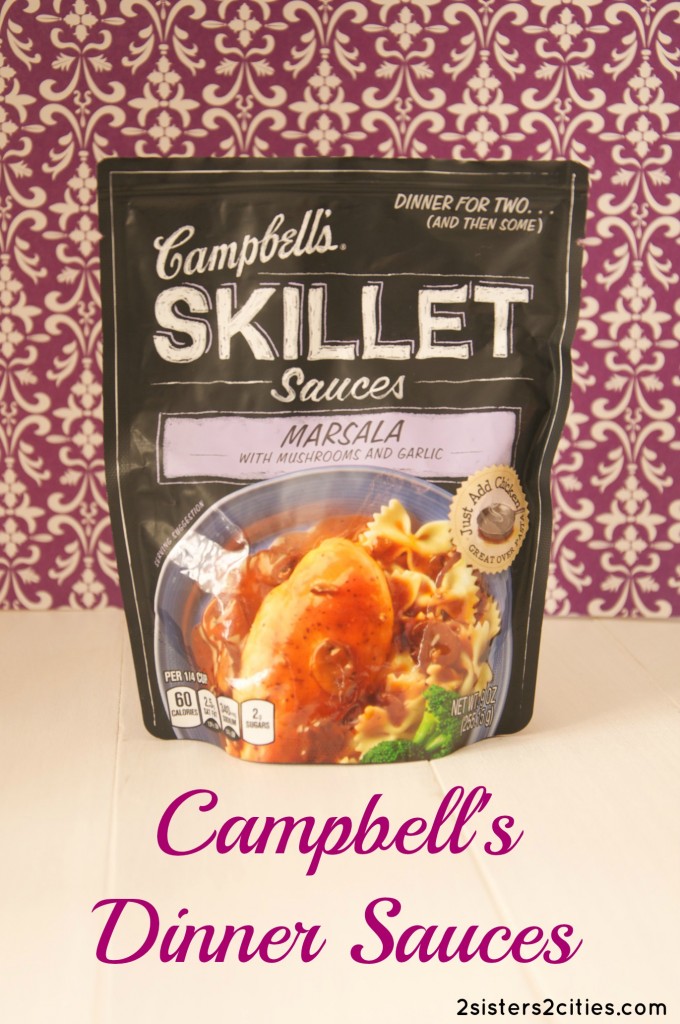
Campbell's Dinner Sauces

K and I are always on the look-out for easy to prepare dinner ideas.  K is usually tired when she gets home from her long workday and commute.  I am also looking for easy dinner solutions when 5:00 rolls along after taking care of my two crazy boys all day.   We were recently asked to try Campbell’s line of skillet sauces and slow cooker sauces.  I was excited about the prospect of an easy dinner idea to add to our weekly menu!

Campbell’s has an entire line of skillet sauces, in addition to a line of slow cooker sauces.  They include:

Campbell’s Skillet Sauces

  • Marsala
  • Toasted Sesame
  • Scampi
  • Thai Green Curry

Campbell’s Slow Cooker Sauces

  • Tavern Style Pot Roast
  • Sweet Korean BBQ
  • Apple Bourbon BBQ
  • Hawaiian Luau
  • Mexican Red Chile Taco
  • Moroccan Spiced Stew

Campbell's Marsala Skillet Sauce

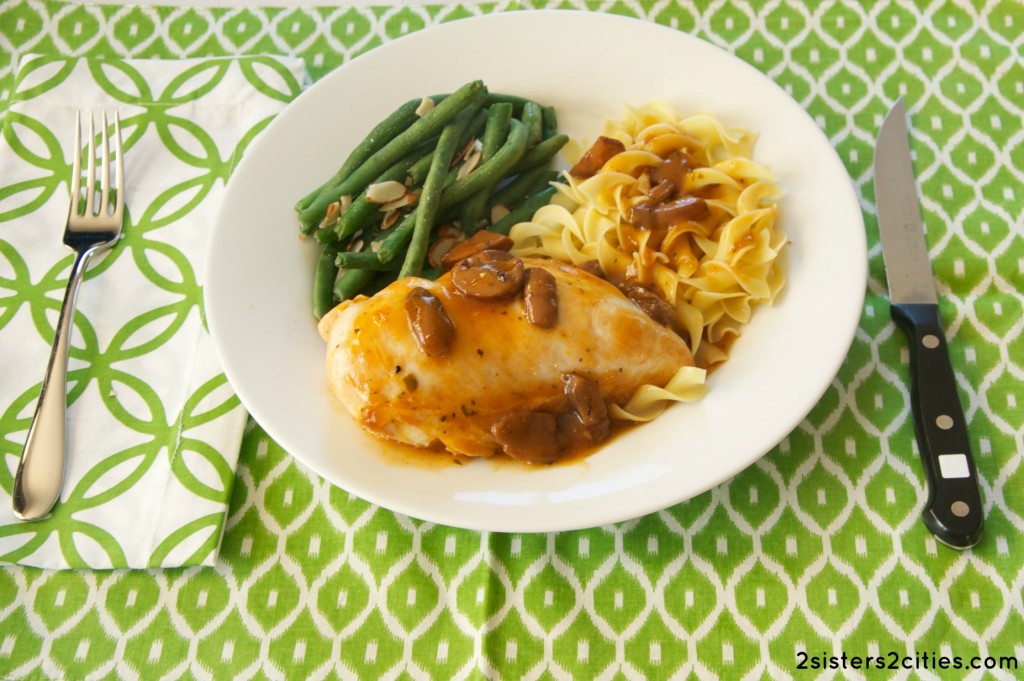
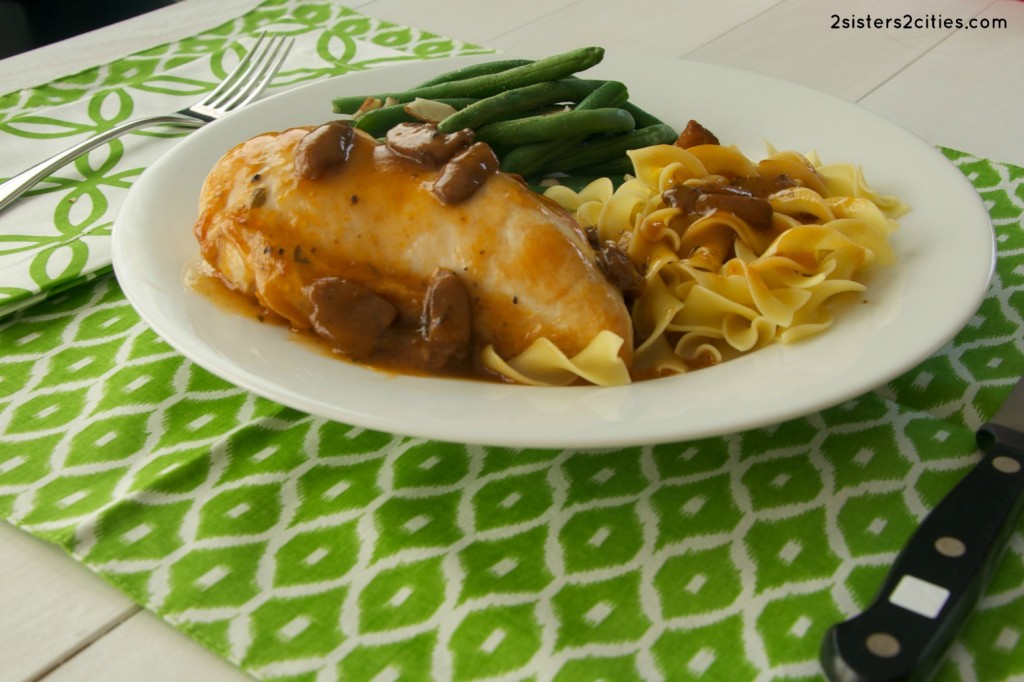
I decided to try the Campbell’s Marsala Skillet Sauce as I have not had chicken marsala in quite awhile.  It was extremely easy to pull together.  I heated up a little vegetable oil in my skillet, browned the chicken for a few minutes, added the Marsala Skillet Sauce, and then allowed the chicken to finish cooking in the sauce.  I paired it with steamed green beans and some egg noodles.  So easy!  I usually try to pull together dinner during the boys’ naptime, but this meal was easy enough to make with both of them up.

Campbell's Marsala Skillet Sauce

The final result: so delicious!  I’m so happy to have come across an easy and satisfying dinner option to feed our family.  Sometimes I feel such pressure to pull a nice dinner together and it’s nice to know that I will always have Campbell’s dinner sauces as an option in my back pocket.

I’m looking forward to trying more of the Campbell’s dinner sauces…next up I plan to try the Sweet Korean BBQ Slow Cooker Sauce.  The back of the pouch features Korean Tacos- shredded beef, cabbage, and spicy sour cream rolled up in a flour tortilla…sign me up!

Which of the  Campbell’s dinner sauces sound appealing to you?

sister m signature


Disclosure: This post brought to you by Campbell’s Dinner Sauces. Weekend-worthy dinners with only weekday-level effort needed! Learn more at http://www.campbellsauces.com/.


Filed Under: M's post Tagged With: campbell's, campbell's skillet sauces, campbell's slow cooker sauces, chicken marsala, dinner recipe, easy dinner ideas, marsala, quick dinners, sponsored post, sponsorship

Pumpkin Bread

Posted by Meaghan Barry on November 4, 2013

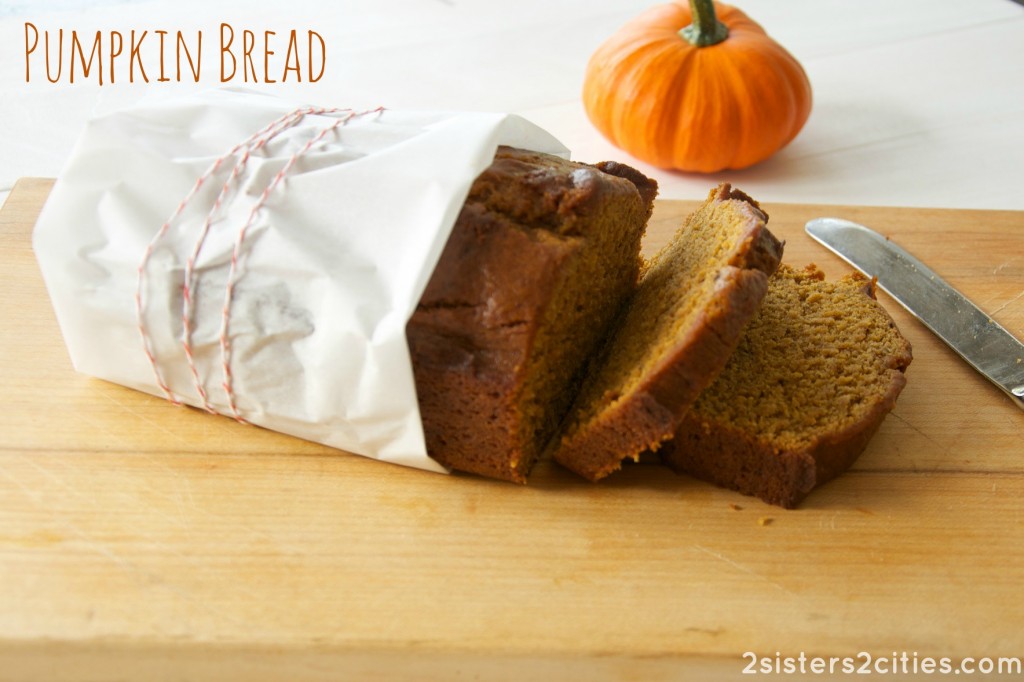
pumpkin bread

I have been attempting to start this post for pumpkin bread the entire month of October, but it just didn’t happen.  Our laptop computer keyboard is currently out of commission for the letters r, f, v, and the number 4 (and also the hyphen key, but that’s a bit more manageable.)  You never realize how often the letter r comes up in the English language!  It definitely makes writing posts more challenging.  Here’s hoping Santa brings me a new laptop this Christmas.

Even though Halloween is now in the past, it’s never too late for pumpkin recipes in my opinion.  I came across this recipe for pumpkin bread on Pinterest and the pin claimed it was Starbucks’ recipe for pumpkin bread.  I don’t know if that’s true, but I think it tastes pretty close!

Print
Pumpkin Bread
Prep time:  10 mins
Cook time:  65 mins
Total time:  1 hour 15 mins
 
Ingredients
  • cooking spray
  • 1 and ½ cups all purpose flour
  • ½ tsp ground cinnamon
  • ½ tsp salt
  • ½ tsp baking soda
  • ½ tsp baking powder
  • ¼ tsp ground cloves
  • ¼ tsp ground nutmeg
  • ⅔ cup sugar
  • ⅔ cup brown sugar
  • ¼ cup milk
  • 3 egg whites
  • 1 cup canned pumpkin
Instructions
  1. Preheat oven to 350 Fahrenheit. Grease a glass loaf pan with cooking spray and set aside.
  2. Whisk together the flour, cinnamon, salt, baking soda, baking powder, cloves, and nutmeg in a medium-sized bowl.
  3. Then, mix the sugar, brown sugar, milk, egg whites, and pumpkin together in a large bowl. Stir ingredients together until fully mixed.
  4. Add the dry ingredients to the pumpkin mixture. Stir until completely incorporated.
  5. Pour into loaf pan and bake for 65 minutes or until center is set. Allow to cool on a wire rack.
3.2.2124

Source: Slightly adapted from The First Year Blog

If you are like us and can’t get enough pumpkin recipes this fall, here are a few more from the 2 Sisters 2 Cities archives:

  • Baked Pumpkin Donuts
  • Mini Pumpkin Muffins with Cream Cheese Frosting
  • Pumpkin Granola
  • Pumpkin Mousse
  • Turkey, White Bean, and Pumpkin Chili

sister m signature

Related Posts Plugin for WordPress, Blogger...


Filed Under: M's recipes Tagged With: fall recipe, pumpkin, pumpkin bread, pumpkin recipe, starbucks

  • « Previous Page
  • 1
  • …
  • 4
  • 5
  • 6
  • 7
  • 8
  • …
  • 50
  • Next Page »

Recent Posts

  • Easy Holiday Office Party Tips
  • 5 Steps to an Easy Football Party
  • Gingerbread Biscotti
  • Holiday Coffee Bar and Thanksgiving Recipes
  • Soft Sugar Pumpkin Cookies
  • Cinnamon Sugar Apple Cake
  • Hello Pumpkin Season!
  • Make Your Own Milkshake Party!
  • Mama’s Pickles
  • S’more Cookies

Categories

  • About 2 Sisters 2 Cities (7)
  • Books (8)
  • Crafting & DIY (22)
  • Design & Decorating (15)
  • Gardening (5)
  • Giveaway (14)
  • Guest Bloggers (8)
  • K's post (46)
  • K's Recipes (191)
    • K's Desserts (75)
    • K's Entrees (23)
    • K's Sides (24)
  • M's post (72)
  • M's recipes (167)
    • M's Entrees (21)
    • M's Sides (14)
    • M's Desserts (30)
  • Organizing (7)
  • Party Ideas (49)
  • Uncategorized (1)
  • Vacation (12)
Stitch Fix

Archives

Blogroll

  • Annie's Eats
  • Bake at 350
  • Baked Bree
  • Boston Harbor Beacon
  • Confections of a Foodie Bride
  • Cook Like a Champion
  • Erin’s Food Files
  • Forever and a Recipe
  • Framed Cooks
  • Oh Happy Day
  • On Common Ground
  • Pennies on a Platter
  • Pink Parsley
  • Recipe Girl
  • Sally's Baking Addiction
  • Simply Scratch
  • The Curvy Carrot
  • The Pioneer Woman
  • Tidy Mom
  • Two Peas & Their Pod
  • What’s Gaby Cooking
  • Young House Love
Increase your website traffic with Attracta.com

grab a 2 sisters button!


Copyright © 2014 ~ 2 Sisters 2 Cities | Blog Design by Minx Design