2 Sisters 2 Cities

Image Map
  • About 2 Sisters 2 Cities
  • Recipe Index
  • Project Index
  • Contact Us
  • Like us on Facebook
  • Follow m on twitter
  • Follow k on twitter
  • Follow 2S2C on Pinterest
  • Follow 2S2C on G+
  • rss
  • e-mail 2S2C

Britax Advocate 70-G3 Review & Giveaway

Posted by Meaghan Barry on October 14, 2013

britax contest

I realize that at 2 Sisters 2 Cities, we usually focus on recipe posts and DIY projects.  However, I was recently asked to review the Britax Advocate 70-G3 car seat and I agreed to it as car seats are a major part of our life now!  There would be no trips to the grocery store or craft store without our trusty carseats!  And the best part is that Britax is also giving away a Britax Advocate 70-G3 convertible car seat to one lucky 2S2C reader (keep reading this post for more details…)

As an owner of two other Britax car seats (the Britax Advocate 70-CS and the Britax Marathon 70), I was excited to try the latest and greatest product from Britax.  In addition, baby N Hates (with a capital H!) his infant bucket carseat. He cries almost non-stop whenever we are in the car…it is torture to listen to my poor little guy cry his heart out.  It’s funny to hear about people taking their babies for car rides to get them to sleep.  That would never happen in our household!  I was thinking about moving him to a convertible car seat to see if he tolerated the car better.  The timing could not have been better to try out the Advocate 70-G3!

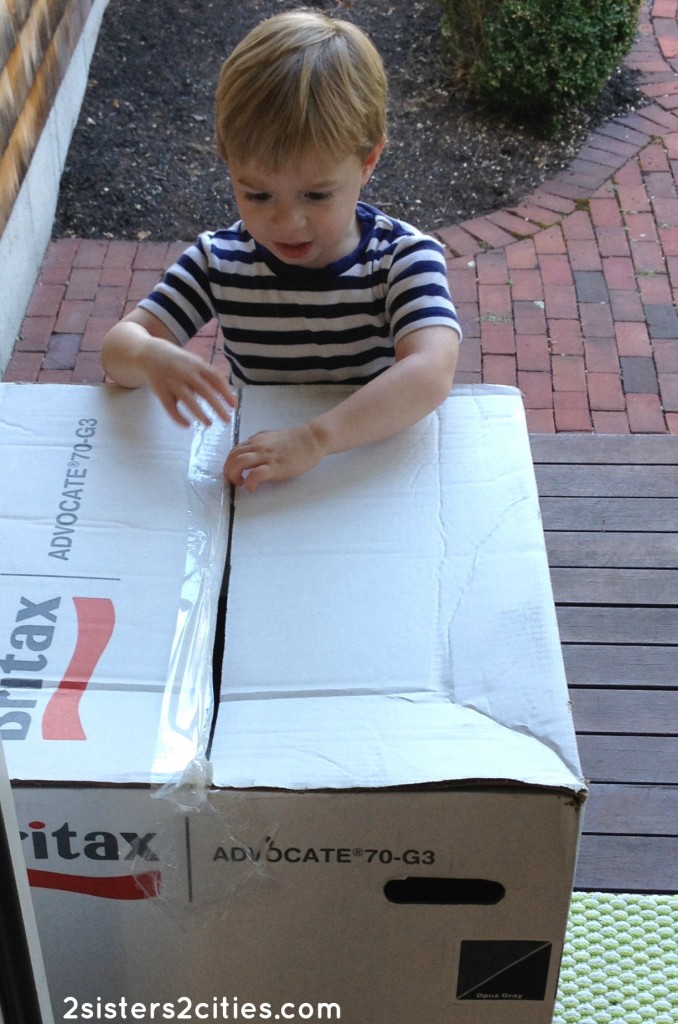
When the car seat arrived, T ran out the front door to check it out.  What can I say…we get really excited about safety in our house!
britax_delivery

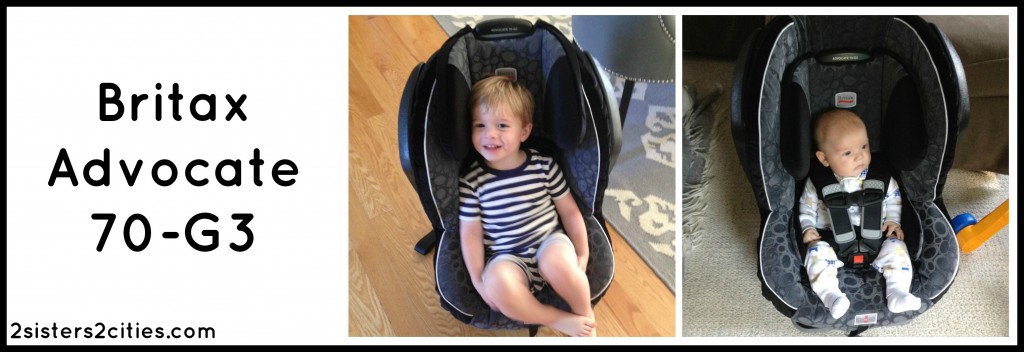
After watching an episode of Curious George in the new car seat, T agreed to let baby N have a try.  Both 3-year old T and 3-month old N are able to use this car seat as Britax convertible car seats can be used rear-facing from 5 to 40 pounds and forward-facing from 1 year and 20 pounds, up to 70 pounds.  With the Quick-Adjust Harness system, it’s super easy to adjust the shoulder height for each kid (no re-threading of straps necessary!)  Everyone seemed to be a fan of the Britax Advocate 70-G3 during our dry run in the house.
britax advocate 70g3

Next up was installing the Advocate 70-G3 in the car.  While admittedly this is not my favorite task in the world, it was actually pretty easy to install with the LATCH system.  I had the bucket seat out and the new convertible car seat installed in less than five minutes.

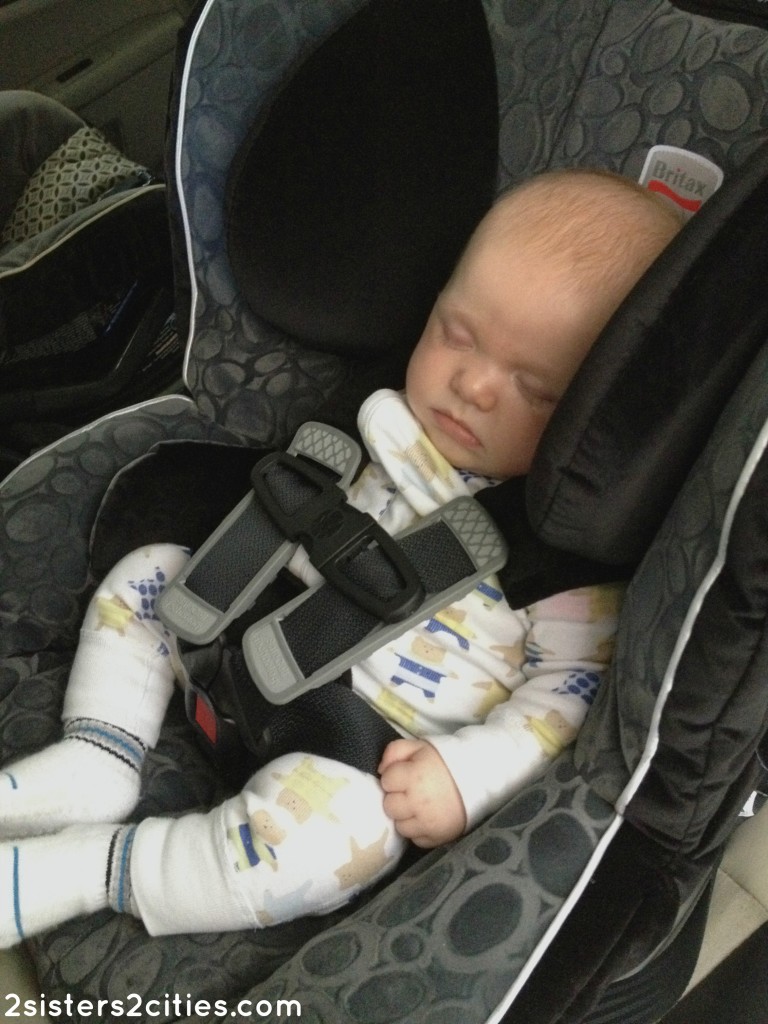
The real trial was up taking baby N on his first car ride in the new convertible car seat.  The result: definite improvement!  While he still cries about 50% of car trips we take, he seems to like the new seat a lot better.  And the best result (besides a safe car ride,) a sleeping baby!
britax_sleeping_baby

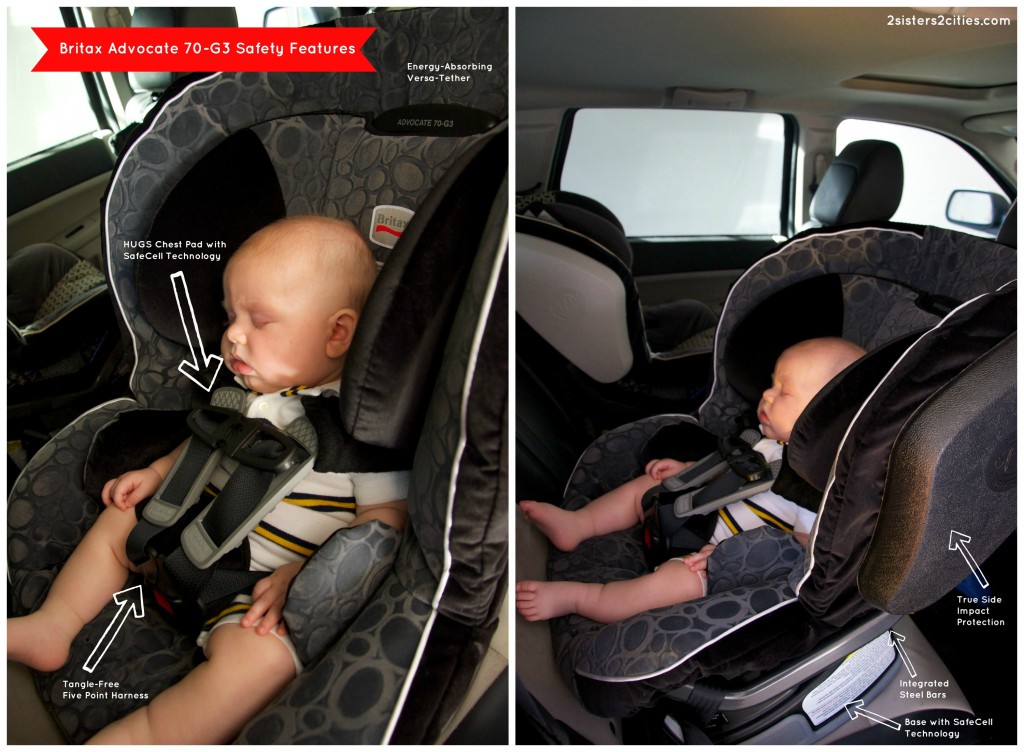
The best part of the Britax Advocate 70-G3 are all the amazing safety features that are incorporated into the seat.  One of Britax’s car seat taglines is “Safety You Can See” as all of their safety features are in plain sight.  They include:

  • True Side Impact Protection is deep side walls with energy-absorbing EPP foam along with a head restraint which offers a double layer of EPP foam to distribute crash forces, shield from vehicle intrusion, and contain the head, neck and body while keeping them “in true” or aligned
  • HUGS Chest Pads with SafeCell Technology are affixed to the seat shell to ensure proper positioning while SafeCells compress to manage energy and provide resistance to the forward movement of your child in a crash, reducing the risk of head injury
  • Base with SafeCell Technology features SafeCells designed to compress in a crash, significantly lowering the center of gravity and counteracting the forward rotation of the child seat which normally propels the child toward the front seat
  • Integrated Steel Bars strengthen the connection to the vehicle and reduce forward flexing of the child seat during a crash
  • Energy-Absorbing Versa-Tether features a staged-release tether webbing to slow the forward movement, reducing the crash forces reaching the child, and a two-point attachment to minimize forward rotation while anchoring the top of the child seat
  • Click & Safe® Snug Harness Indicator is an audible aid that provides extra assurance when the harness is within range of appropriate snugness
  • Tangle-Free, Five-Point Harness distributes crash forces across the strongest parts of the body and provides a secure fit
britax advocate 70g3 safety features

I was especially impressed with the new HUGS Chest Pads.  T has a tendency to pull the chest clip down and remove the straps from his shoulders when he gets bored in the car.  This new feature would definitely prevent (or at least make it more difficult) to lower the chest clip.  I also definitely like the True Side Impact Protection that would provide extra protection if we ever got into a car accident.

One of the drawbacks of switching baby N to the Advocate 70-G3 is that I can’t simply unlatch the seat and carry him in it if he falls asleep.  I usually have to transfer him to his bassinet or the Moby Wrap if we are out and about and he usually wakes up.  This is more of an issue of an infant bucket seat vs. a convertible car seat however.

Another limitation is that the seat is pretty bulky and wide.  If you have a small car, this carseat might be a tight squeeze.  Traveling with the Advocate 70-G3 might be a bit cumbersome for airline travel.  In the past, we have used the Britax Car Seat Travel Cart to tote T and his car seat around the airport.  It’s always a bit tricky then installing a large convertible car seat into a tiny airplane seat.  I have not yet attempted it with this car seat, but I imagine it would also be a bit tight on certain airline carriers.  However, all of the great safety features greatly outweigh these drawbacks in my opinion.

Now it’s your chance to try the Britax Advocate 70-G3…enter this giveaway through the Rafflecopter widget below.  Good luck and safe travels!

a Rafflecopter giveaway

sister m signature


Safety matters when it comes to car seats. I want one that will protect my child. And Britax convertible car seats have so many safety features — and knowing that makes me feel like my child is safe while in the car. Click here to learn more about Britax safety features.

This is a sponsored conversation written by me on behalf of Britax. The opinions and text are 100% mine.


Filed Under: M's post Tagged With: baby, baby n, baby t, britax, britax carseat, car, carseat, grocery shopping, parenthood, safety, sponsored post, toddler, travel

Introducing Baby N!

Posted by Meaghan Barry on July 3, 2013

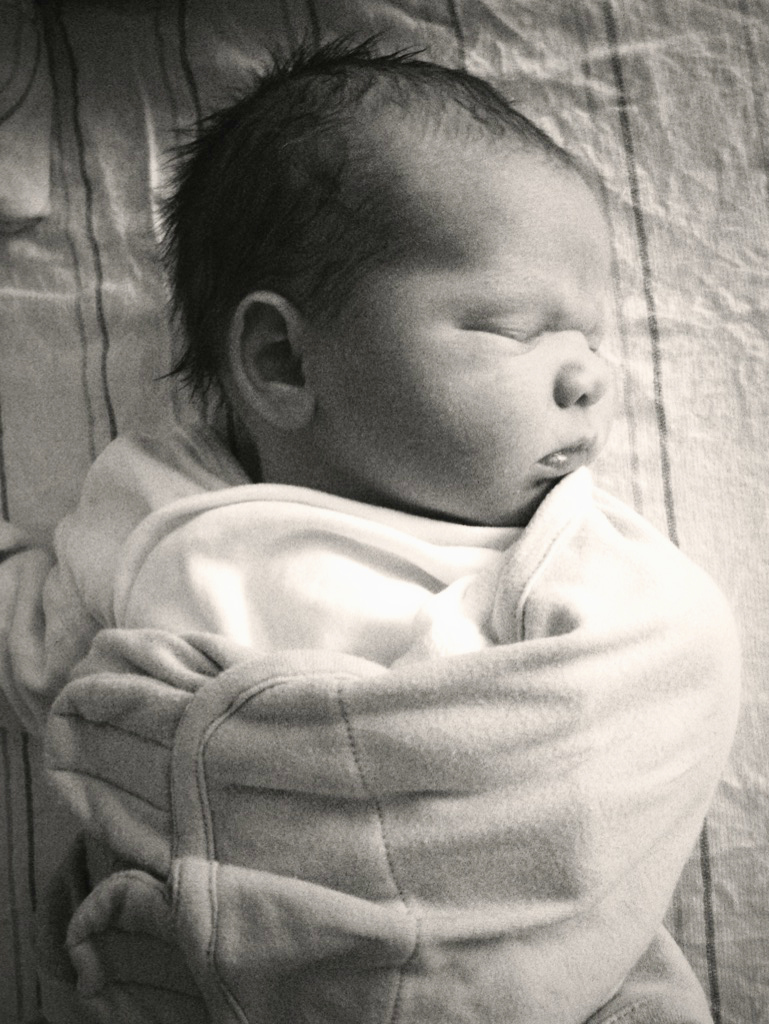
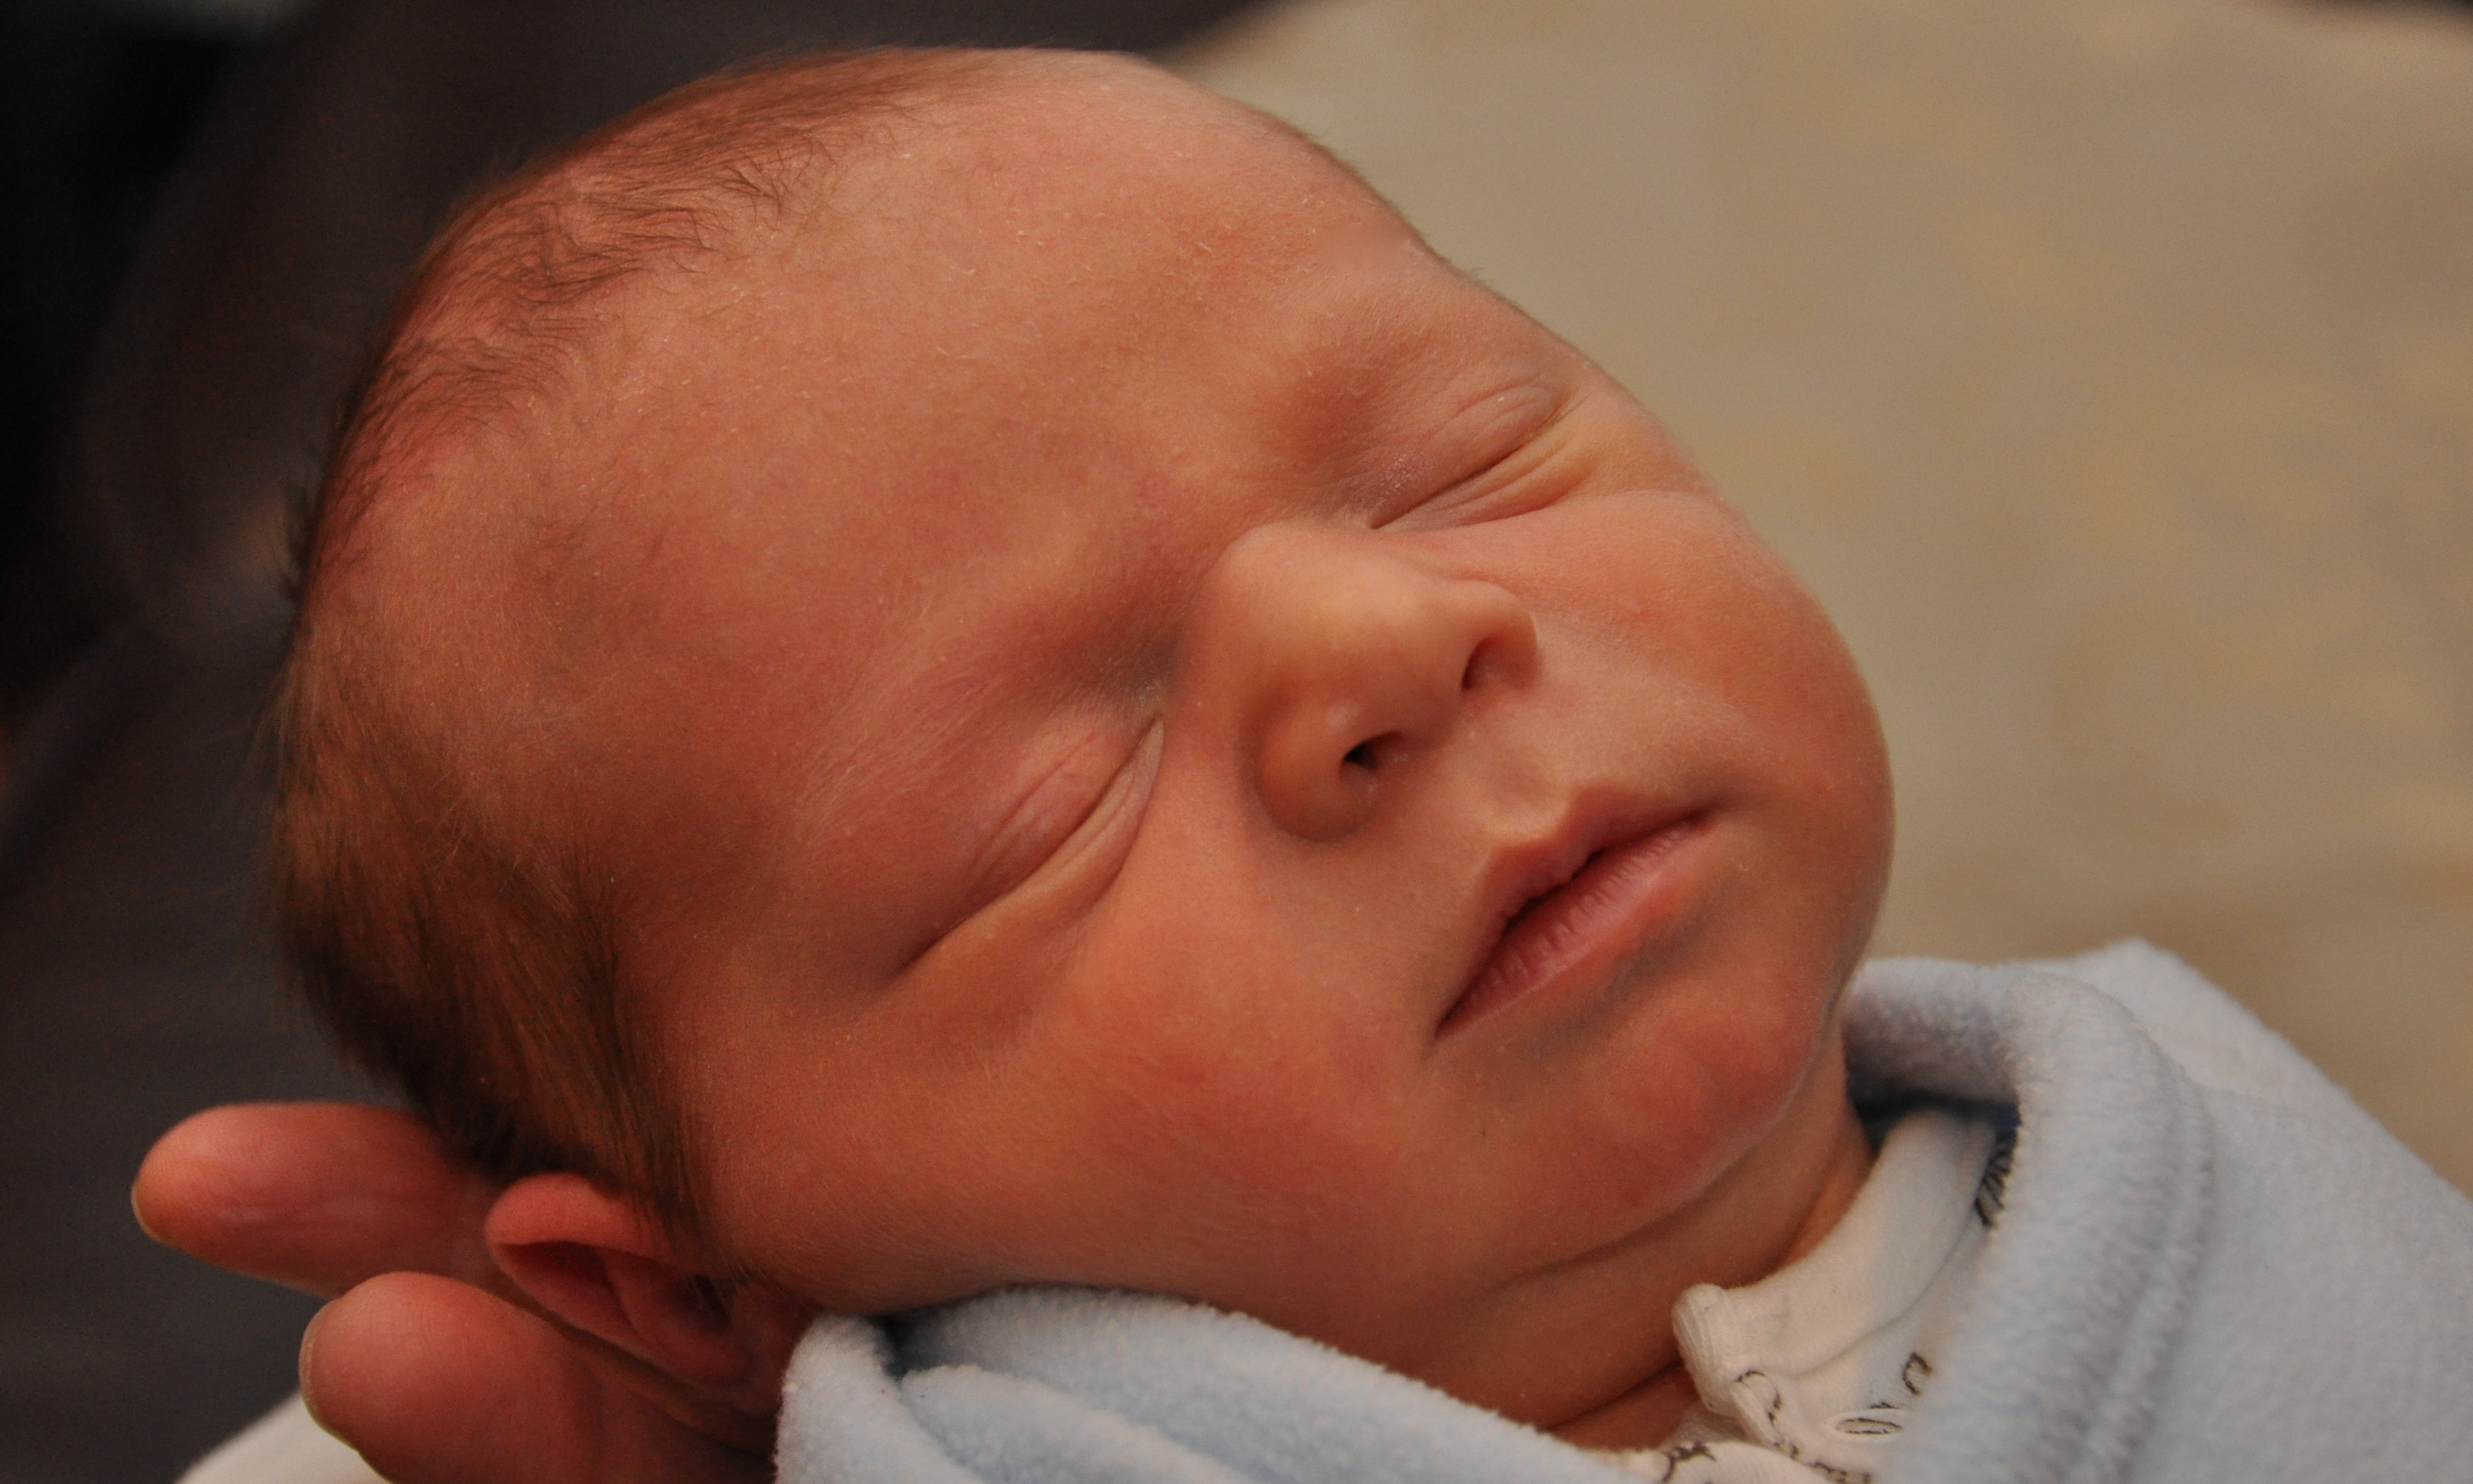
I’ve been a little quiet on the blogging front lately and just wanted to share why.  Baby N decided to grace us with his presence a week before his due date!  We’ve been happily adjusting to our new family of four over the past couple of weeks.  We don’t normally share photos of ourselves or our family on 2 Sisters 2 Cities, but like with Baby T, I wanted to share one snugly newborn photo.  This photo was taken the morning after he was born.

baby n

I think he looks pretty much just like his older brother did when he was born!  N is a chill little guy and his older brother has been really great with him (for the most part anyway.)

Hope you have a great Fourth of July weekend!  Just in case you were looking for any last minute recipes, here are ten 2S2C recipes perfect for your summer cookout:

  1. Herbed Potato Salad
  2. Homemade Hot Dog Buns
  3. Fresh Squeezed Lemonade
  4. Pistachio Ice Cream
  5. Salt Potatoes
  6. Greek Pasta Salad
  7. Baked Beans
  8. Buttermilk Biscuits (for Strawberry Shortcake)
  9. Fourth of July luncheon menu
  10. 2012 Fourth of July round up

sister m signature


Filed Under: M's post Tagged With: About 2 Sisters 2 Cities, baby, baby announcement, baby n, fourth of july

DIY Baby Closet Dividers

Posted by Keelin Hollenbeck on May 20, 2013

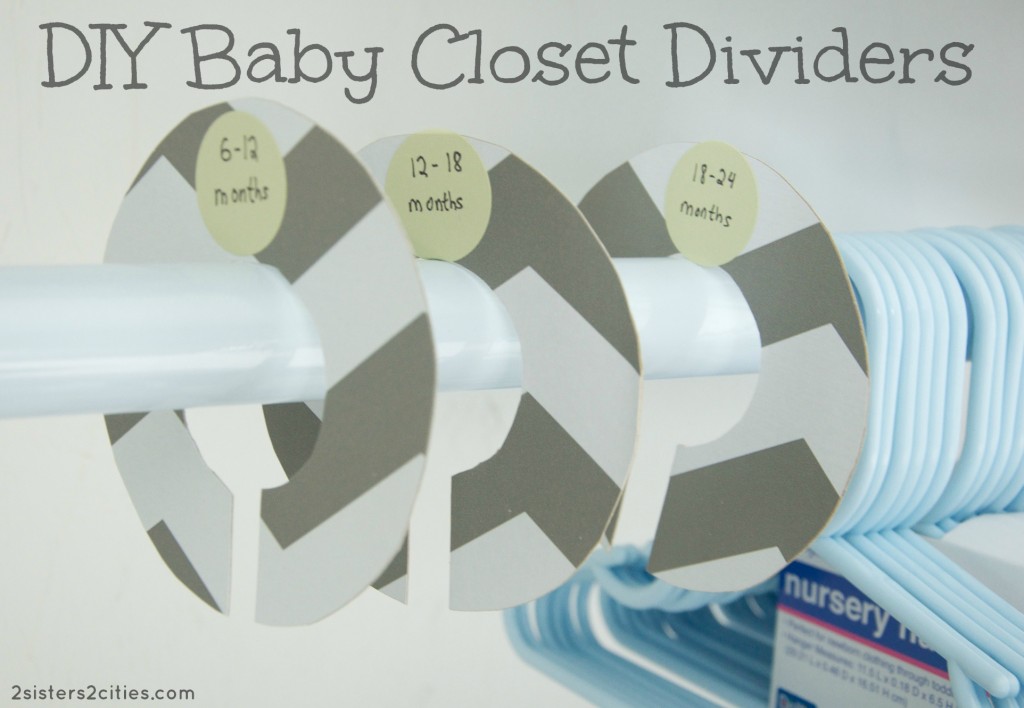
DIY Baby Closet Dividers {from 2 Sisters 2 Cities}

I’ve mentioned in a lot of my last posts that I have been busy nesting and getting ready for baby #2’s arrival.  This time around, I realize that the nursery does not need to be finished by the time the baby comes since he will be in a bassinet next to our bed most nights, but time will likely be a rare commodity with two little munchkins.  I’m trying to get as many things done ahead of time with just T around.

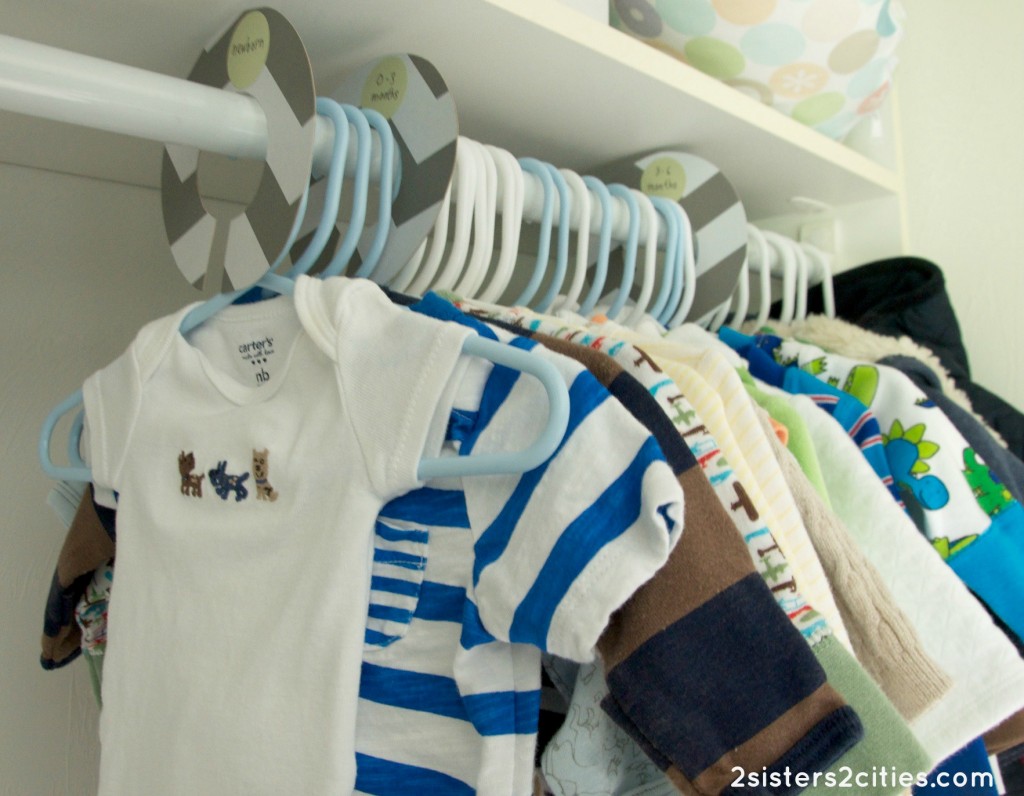
I wanted to share one of the latest baby projects that I just finished- DIY baby closet dividers.  These baby closet dividers are all the rage on etsy and I was originally going to just buy some.  I realized they would be fairly easy to make myself however so I decided to give it a try.  I had a few rolls of gray chevron contact paper that I picked up at Marshall’s a few months ago and I had put them aside for any projects that might come up.  I decided this paper would be perfect for making my own baby closet dividers.  {Side note: I’m not sure I’ve mentioned this in a past post, I decided to decorate this baby’s nursery in dark gray, bright green, and white.  Check out this post for a peek at baby T’s airplane-themed nursery that I did a few years ago.}

DIY Baby Closet Dividers

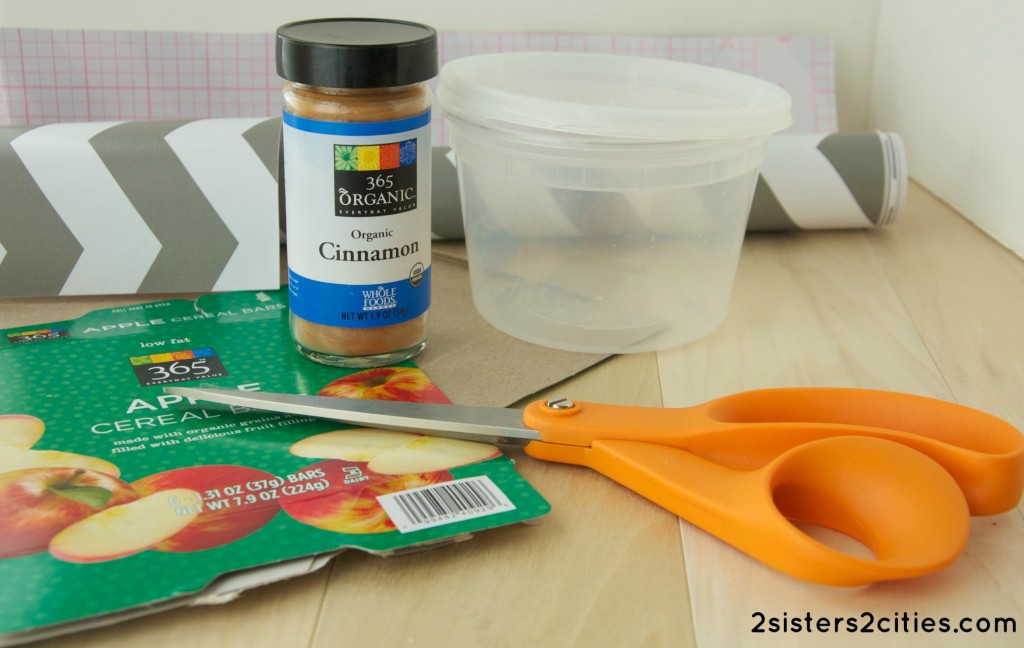
Materials

Materials for DIY Baby Closet Dividers

  • empty cereal, cracker, or snack cardboard boxes
  • large circle trace (I used a plastic take-out container)
  • small circle trace (I used a spice jar)
  • pencil
  • scissors
  • decorative contact paper
  • stickers or labels

Instructions

DIY Baby Closet Dividers {from 2 Sisters 2 Cities}

  1. Use the scissors to cut two large squares out of the decorative contact paper (make sure the squares are larger than the large circle trace you plan on using.)
  2. Remove the backing from the contact paper and place on both sides of a flat piece of cardboard.  The squares should match up so that when you cut a circle out of the cardboard, the contact paper will fully cover the circle on both sides.
  3. Using a pencil and large circle trace, trace a circle on one side of the square contact paper.  Then, using the small circle trace, trace a small circle in the middle of the large circle that you just traced.
  4. With your scissors, follow the large circle trace and cut the large circle from the piece of cardboard.  Then, cut two small even slits to cut out the small circle trace from the center.  Neaten any edges so that both circles appear even and smooth.
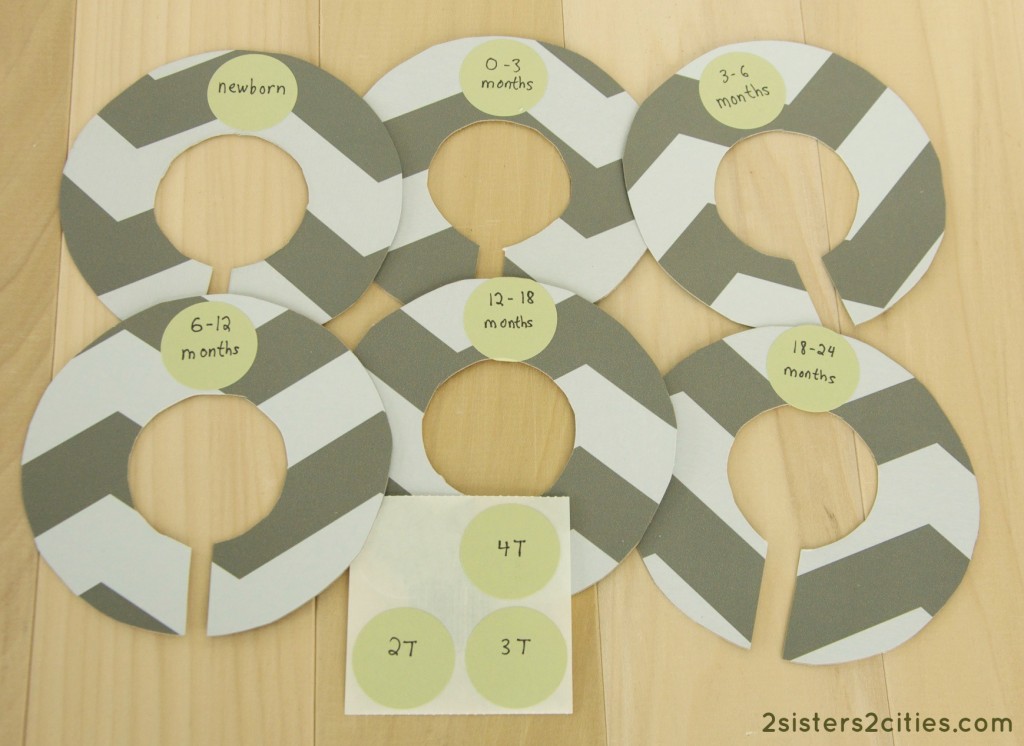
  5. Repeat this process 5-8 times depending on how many baby closet dividers you want to make.  (I made six of them since I will likely be storing away the baby clothes once the baby grows out of them.  I will then change the sticker out on the divider for a larger clothes size.)
  6. Label 6-9 stickers with common baby clothes sizes: newborn, 0-3 months, 3-6 months, 6-12 months, 12-18 months, 18-24 months, 2T, 3T, and 4T.  Apply sticker or label to top of clothes dividers.
  7. Hang in closet and organize baby’s clothes by size!

Baby Closet Dividers {from 2 Sisters 2 Cities}

I love how this project turned out!  Plus, I love being able to look at that first newborn onesie every time I open the closet door- I can never get over how little and cute newborn clothes are.  It barely even fits on the mini hanger!

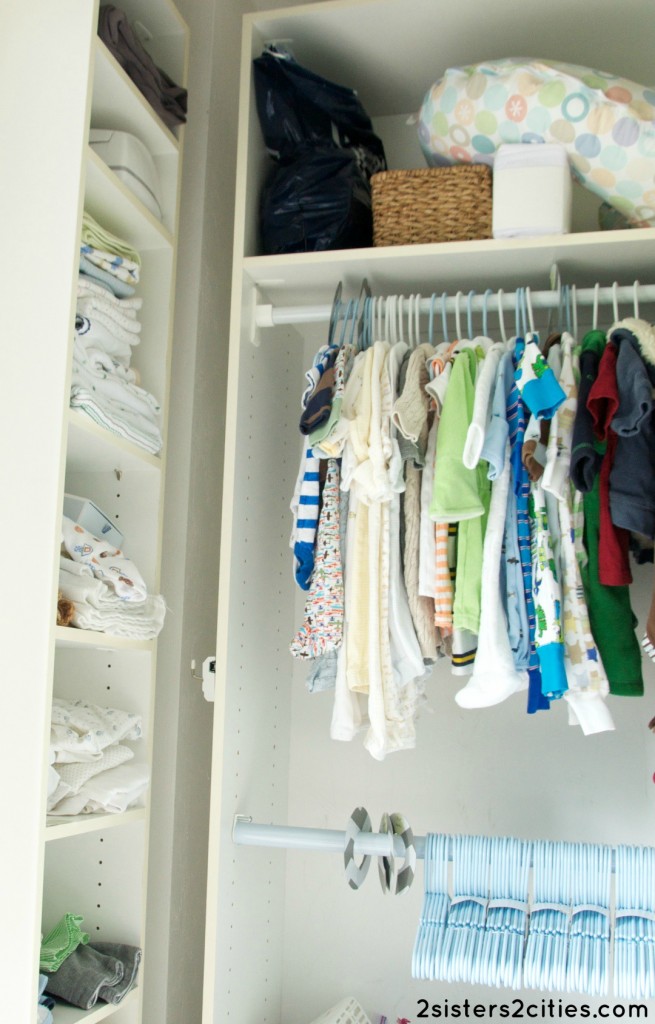
T never had a closet in our city condo since the closet in his nursery served as my husband’s main closet.  I used a lot of baskets to divide his clothes by size and type and stored them on a bookshelf.  While that system worked well, I really like having everything organized and hanging in a closet this time around.  It’s much easier to visualize what I have by size with everything in sight.  I still need to do a little more organizing once I move the dresser and changing table into this room, but it’s come a long way from the catch-all closet it used to be.

Baby Nursery Closet

Have you ever seen an idea on Etsy or a retail store that you decided to make yourself?

sister m signature


Filed Under: Crafting & DIY, M's post Tagged With: baby, baby #2, baby closet dividers, baby clothes, baby's nursery, closet organization, DIY projects, etsy, getting organized, getting ready for baby, nesting, nursery, nursery storage, preparing for baby

Oh baby…

Posted by 2 Sisters 2 Cities on January 17, 2013

oh baby giveaway

So, I have a little announcement to make on 2 Sisters 2 Cities today…I’m having another baby!  And to celebrate, we are hosting a $25 Amazon Gift Card giveaway over the course of the next week!  Just enter through the Wafflecopter widget below and leave a comment with your guess as to whether I’m having a boy or girl.  There is also a chance to earn bonus entries by following 2S2C on Facebook, Twitter, Pinterest, Google+, RSS, and/or e-mail.  A winner will be picked at random so you don’t have to guess correctly, but it will be fun to see which way the votes sway!  We’ll be finding out the baby’s gender next Thursday and I’ll  be doing a special baking-related gender reveal at that point.

Some data points to assist with your baby gender guess:

  • My two-year old son, Baby T, is a boy.
  • I’m one of four girls.  My husband is an only child.
  • The Chinese gender calendar predicts girl.
  • My main pregnancy craving has been ice cream (thank goodness for the new ice cream maker K got my for Christmas!)  My last pregnancy, I craved salty snacks.
  • My intuition says it’s going to be a boy.

My due date is in late June which puts me in pretty much the same pregnancy timeline as Kate Middleton, Jessica Simpson, and now Kim Kardashian.  I think it would be really fun for my baby to share the same birthdate as the royal baby (and not so much with the latter two!)

I can’t wait to see what everyone guesses!

a Rafflecopter giveaway

The Rules:   No entries will be accepted after January 24th, 2013 at 12:00 am, EST.  Entries that do not follow the entry requirements will not be considered.  One winner will be chosen at random and will be announced on January 24th, 2013.  (The winner does not have to guess the gender correctly to win.)  The chosen winner will then have 30 days to respond by e-mail to claim their prize.  Please note that this giveaway is fully sponsored by 2 Sisters 2 Cites.  Void where prohibited.

sister m signature


Filed Under: About 2 Sisters 2 Cities, M's post Tagged With: 2 Sisters 2 Cities giveaway, amazon, amazon gift card, announcement, baby, baby announcement, gender guess, gender reveal, getting ready for baby, giveaway, having a baby, team blue, team pink

Our New (Mini) Kitchen Table

Posted by 2 Sisters 2 Cities on February 18, 2012

Yesterday I took my very first trip to Ikea.  I had a lot of fun checking it out, but it was definitely overwhelming.  I had scoped out their website beforehand and had pretty much decided what I wanted already, but I wanted to see it in person first to make sure the quality was acceptable.  The main purpose of the trip was to pick up a few things for Baby T, but I’m already planning a return trip back to pick up some more things for the house.

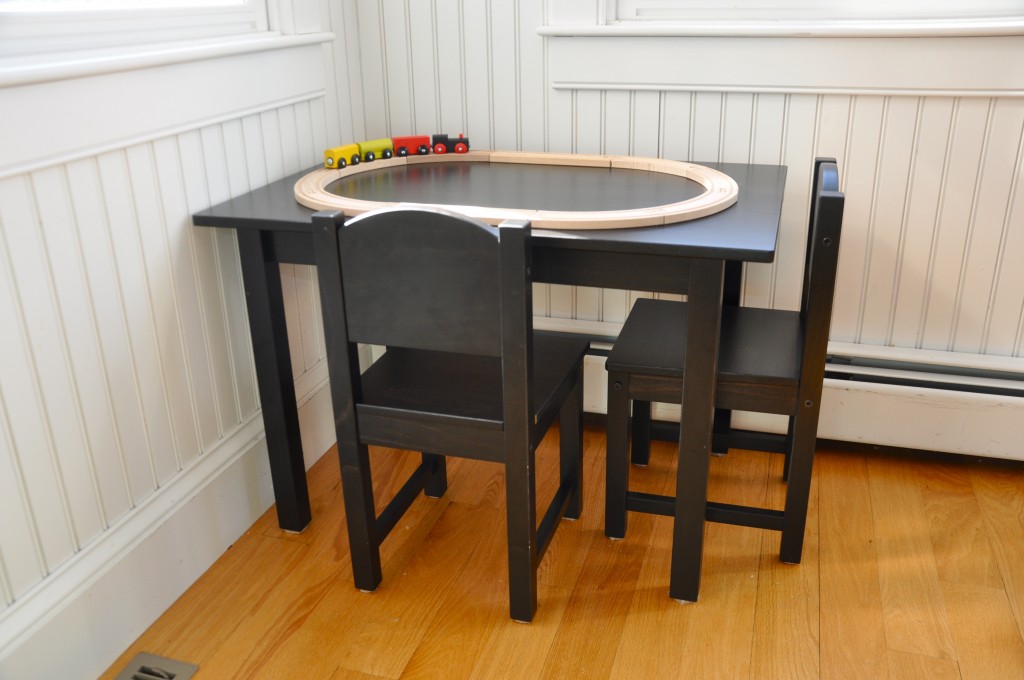
Baby T has a new found love of climbing.  His favorite thing to climb however is our kitchen table.  He pulls himself onto a chair and then the table (and he can do this very quickly.)  I decided to get him a children’s size table where he could eats snacks and play with toys.  I didn’t want to spend too much on the table since he’ll outgrow it pretty quickly and Ikea had just the thing…the Sundvik table and matching chairs:

How cute is that little train set as well?  I was really impressed with the quality and price of their toys!  The Lillabo train set was only $9.99 and has 20 pieces (the picture does not include the bridge and 4 additional curvy pieces.)  I also got him some of the Duktig kitchen accessories to go with his play kitchen he got for Christmas.  In addition, I also picked up a few small wooden toys, the drawing paper roll, and the Busa play tunnel.  I probably went a bit overboard, but I could not get over the prices!

Here’s what the children’s table looks like next to our full-sized black kitchen table:

Hopefully the mini table is the antidote we need to solve our kitchen table climbing problem!
-m


Filed Under: Design & Decorating, M's post Tagged With: baby, baby t, baby's nursery, children's table, getting ready for baby, Ikea, kitchen, Sundvik children's table

Can I put Master Toy Assembler On My Resume?

Posted by 2 Sisters 2 Cities on January 27, 2012

Now that Baby T is walking and that we have more room in our new house, our collection of toys has dramatically increased over the past few months.  In the fall, we hit up garage sales to pick up tools for suburban living.  We did not even own a rake- the only use for a rake in the city would be to save a parking spot when it snowed.  While we did not always find tools, we almost always found toys.  Looking back, we probably should have picked up more because assembling new toys is a major pain!

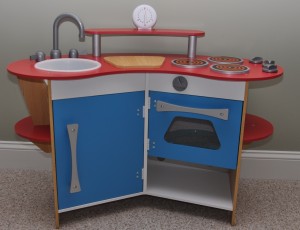
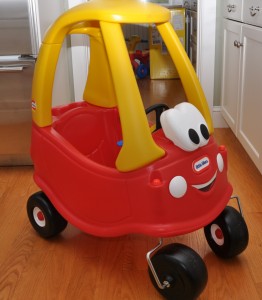
Two toys in particular that we have bought have practically required a PhD in engineering: the Melissa & Doug Cook’s Corner Wooden Kitchen and the Little Tikes Cozy Coupe.  I knew from reading a few reviews that they would be a little tricky to put together, but I did not anticipate how many hours I would have to spend on each one to assemble them!

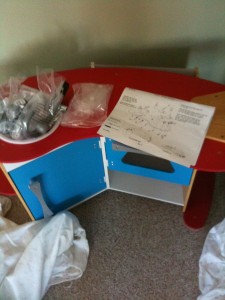
First, let’s discuss the kitchen set.  I really wish I had taken a picture of all the hardware and pieces that came in that cardboard box.  There were so many little bags of screws, bolts, hinges, and plastic pieces.  Here’s a picture I took on my phone about halfway through- check out all the pieces that still remain in the sink:

Overall, the instructions were fairly easy to follow, but the sheer number of things that had to be assembled just took a long time.  Some kitchen renovations probably take less time to put together.  I think it took three of Baby T’s nap time session to get this kitchen to look like this:

Now onto the Cozy Coupe…let’s just say this: at one point I actually googled “Cozy Coupe Hell” to see what would come up.  The assembly to put this bad boy together was a nightmare.  The directions are just pictures, you have to physically slam pieces together to make them fit, and it requires a drill to put together.  As you can see from this blogger, I am not the only one who had trouble with Step 12, which is simply a diagram noting to put the stickers on the dashboard.  I spent a good 30 minutes looking for plastic parts that the diagram appears to be showing!  Baby T is loving his new car, but I am just waiting for the moment when the whole thing comes crashing apart:

On the side of the box, it states that in 1999, the Cozy Coupe was the top selling car in America outselling the Honda Accord and Ford Taurus.  By 2003, over 10 million Cozy Coupes had been sold.  First off, that means over 10 million people have had to assemble this car.  Secondly, it also means there are probably 9,990,000 Cozy Coupes that people are going to sell in their next garage sale…

Readers, what is the most difficult toy you have ever had to assemble?

-m


Filed Under: M's post Tagged With: baby, baby t, mom blogging, toy assembly

I think I forgot Sophie…

Posted by 2 Sisters 2 Cities on March 5, 2011

We had some friends in town today and my husband ended up taking them to the Playwright in Southie for drinks and dinner.  I took baby T there for awhile to visit, but eventually had to take him home for his bedtime.  Husband M walked me halfway home and as I kept walking, I shouted back to him:

Me: I think I forgot Sophie there!  (Sophie being the French toy giraffe pictured above)
Husband M: Don’t worry- I’ll find her if she’s there.

Meanwhile, a guy was walking between us and likely overheard our conversation.  I’m laughing out loud thinking  about who he could have thought Sophie was…our crazy toddler we forgot at the bar, my invisible friend, our dog we take out wherever we go, etc.  Or maybe he just knew who Sophie was since every baby we know seems to have one.  Rest assured, I found Sophie safely chilling in the diaper bag upon our arrival home.

-m


Filed Under: M's post Tagged With: baby, playwright, sophie, sophie the giraffe, southie

Announcing the arrival of Baby T!

Posted by Meaghan Barry on December 15, 2010

Well, it’s now officially been well over a month since Baby T has been born so I figured it was about time I get to blogging about it!  He is such a great baby (well, maybe not so great in the evenings, but we still love him very much!)  I knew having a newborn would be hard work, but I never realized how much of a time encompassing life change it would be.  Time just flies by.  I can’t tell you how many times I have looked at the clock and am completely flabbergasted by what time it is (such as now…I’m still drinking my morning coffee at noon!)

My labor went relatively smoothly.  I was in labor at home for over 24 hours starting on my due date before we headed to the hospital.  Husband M took the day off work to go on walks around Castle Island and Thomas Park with me (it was a blustery cold day).  I was still in labor that night, but the contractions were still 10-20 minutes apart so we held off on going to the hospital.  Finally, around 5 or 6 a.m., I decided to get into the shower to start getting ready to head out.  By the time we left at 7 am, the contractions were coming hard every 2-3 minutes.  Once we got to the hospital, I was pretty much ready to push.  I was still able to get an epidural at that point thankfully (sorry Husband M for dragging you to 2 weekends of Natural Childbirth classes…although I did get to that point naturally!)  They gave me a 30 minute break to relax and then it was pushing time!  Baby T came out in less than 15 minutes. It was such an amazing experience to finally meet the little being that was living inside of you for the past 9 months.

Now that we are somewhat getting into a routine (as much of a routine as you can get into with an infant), I am going to try to get back to blogging more often.  On the agenda…very easy to cook dinners (my bon appetit and Julia Child cookbooks are getting pushed to the back of the bookshelf), baby stuff,  holiday ideas, reviewing last year’s resolutions, and new resolutions for 2011.  Thanks for sticking with us readers!

-m


Filed Under: M's post Tagged With: baby, baby announcement, baby t, having a baby, labor

Ready for Arrival: Airplane-Themed Nursery

Posted by Meaghan Barry on November 2, 2010

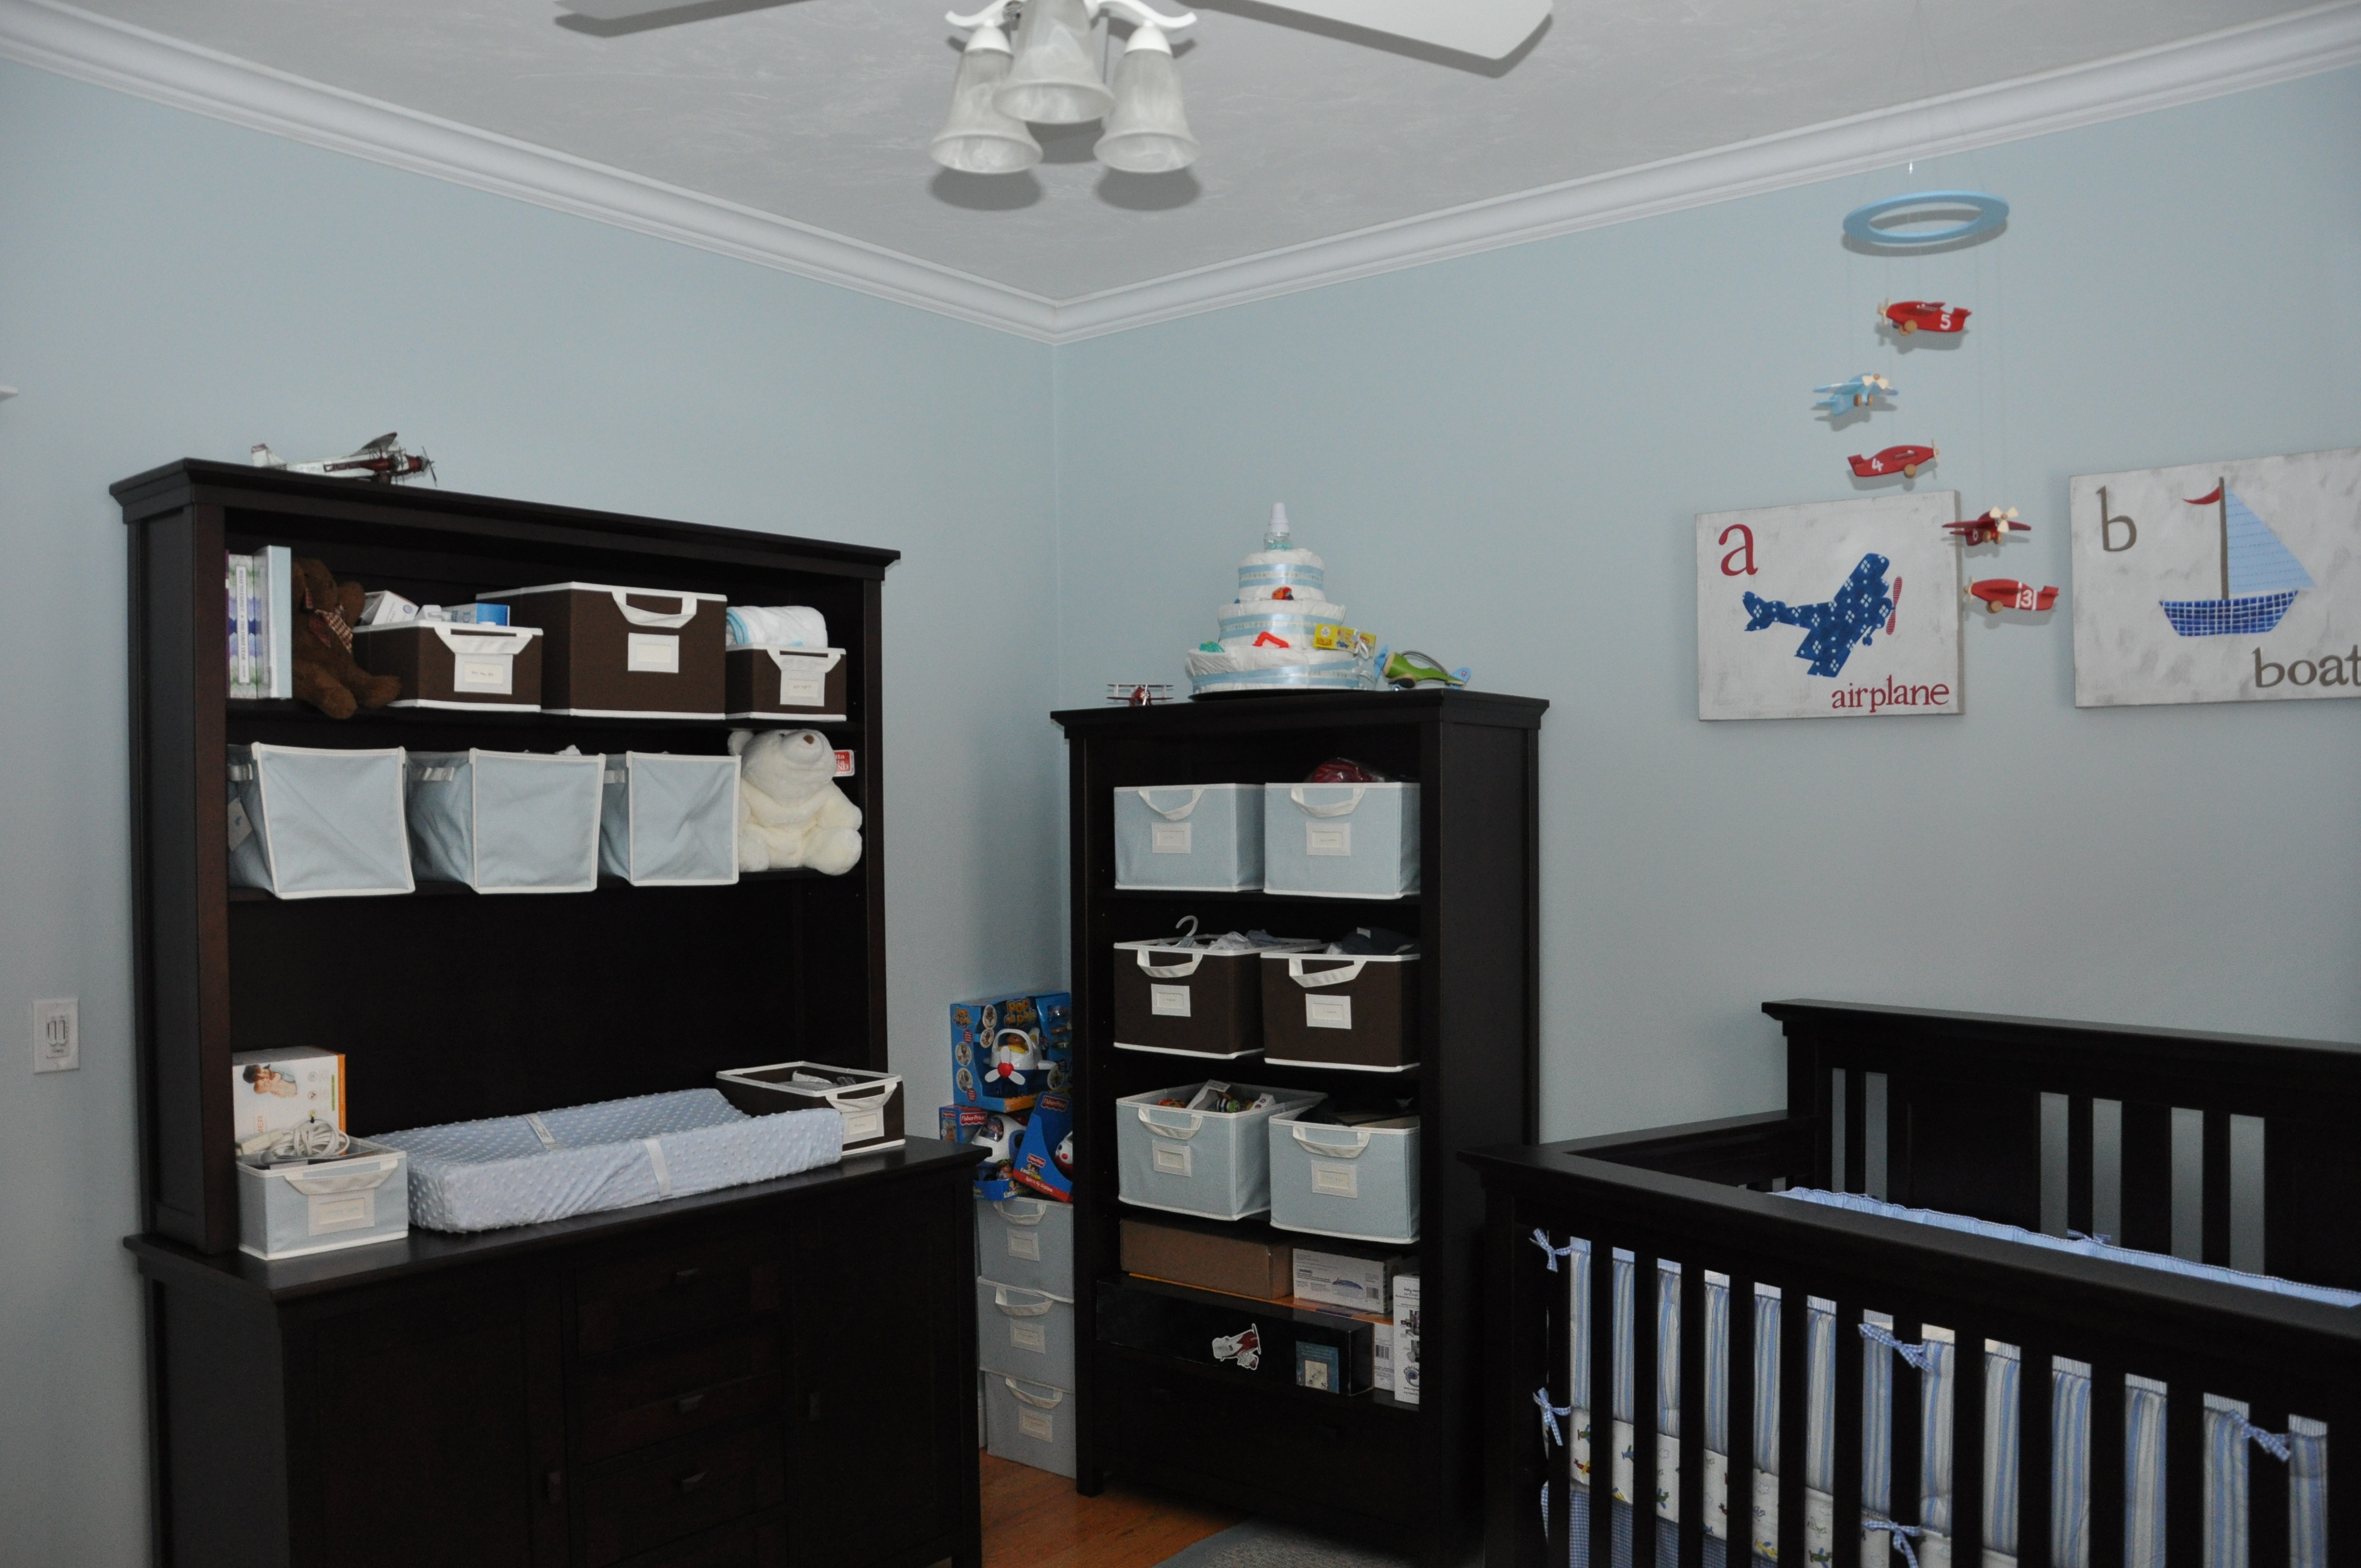
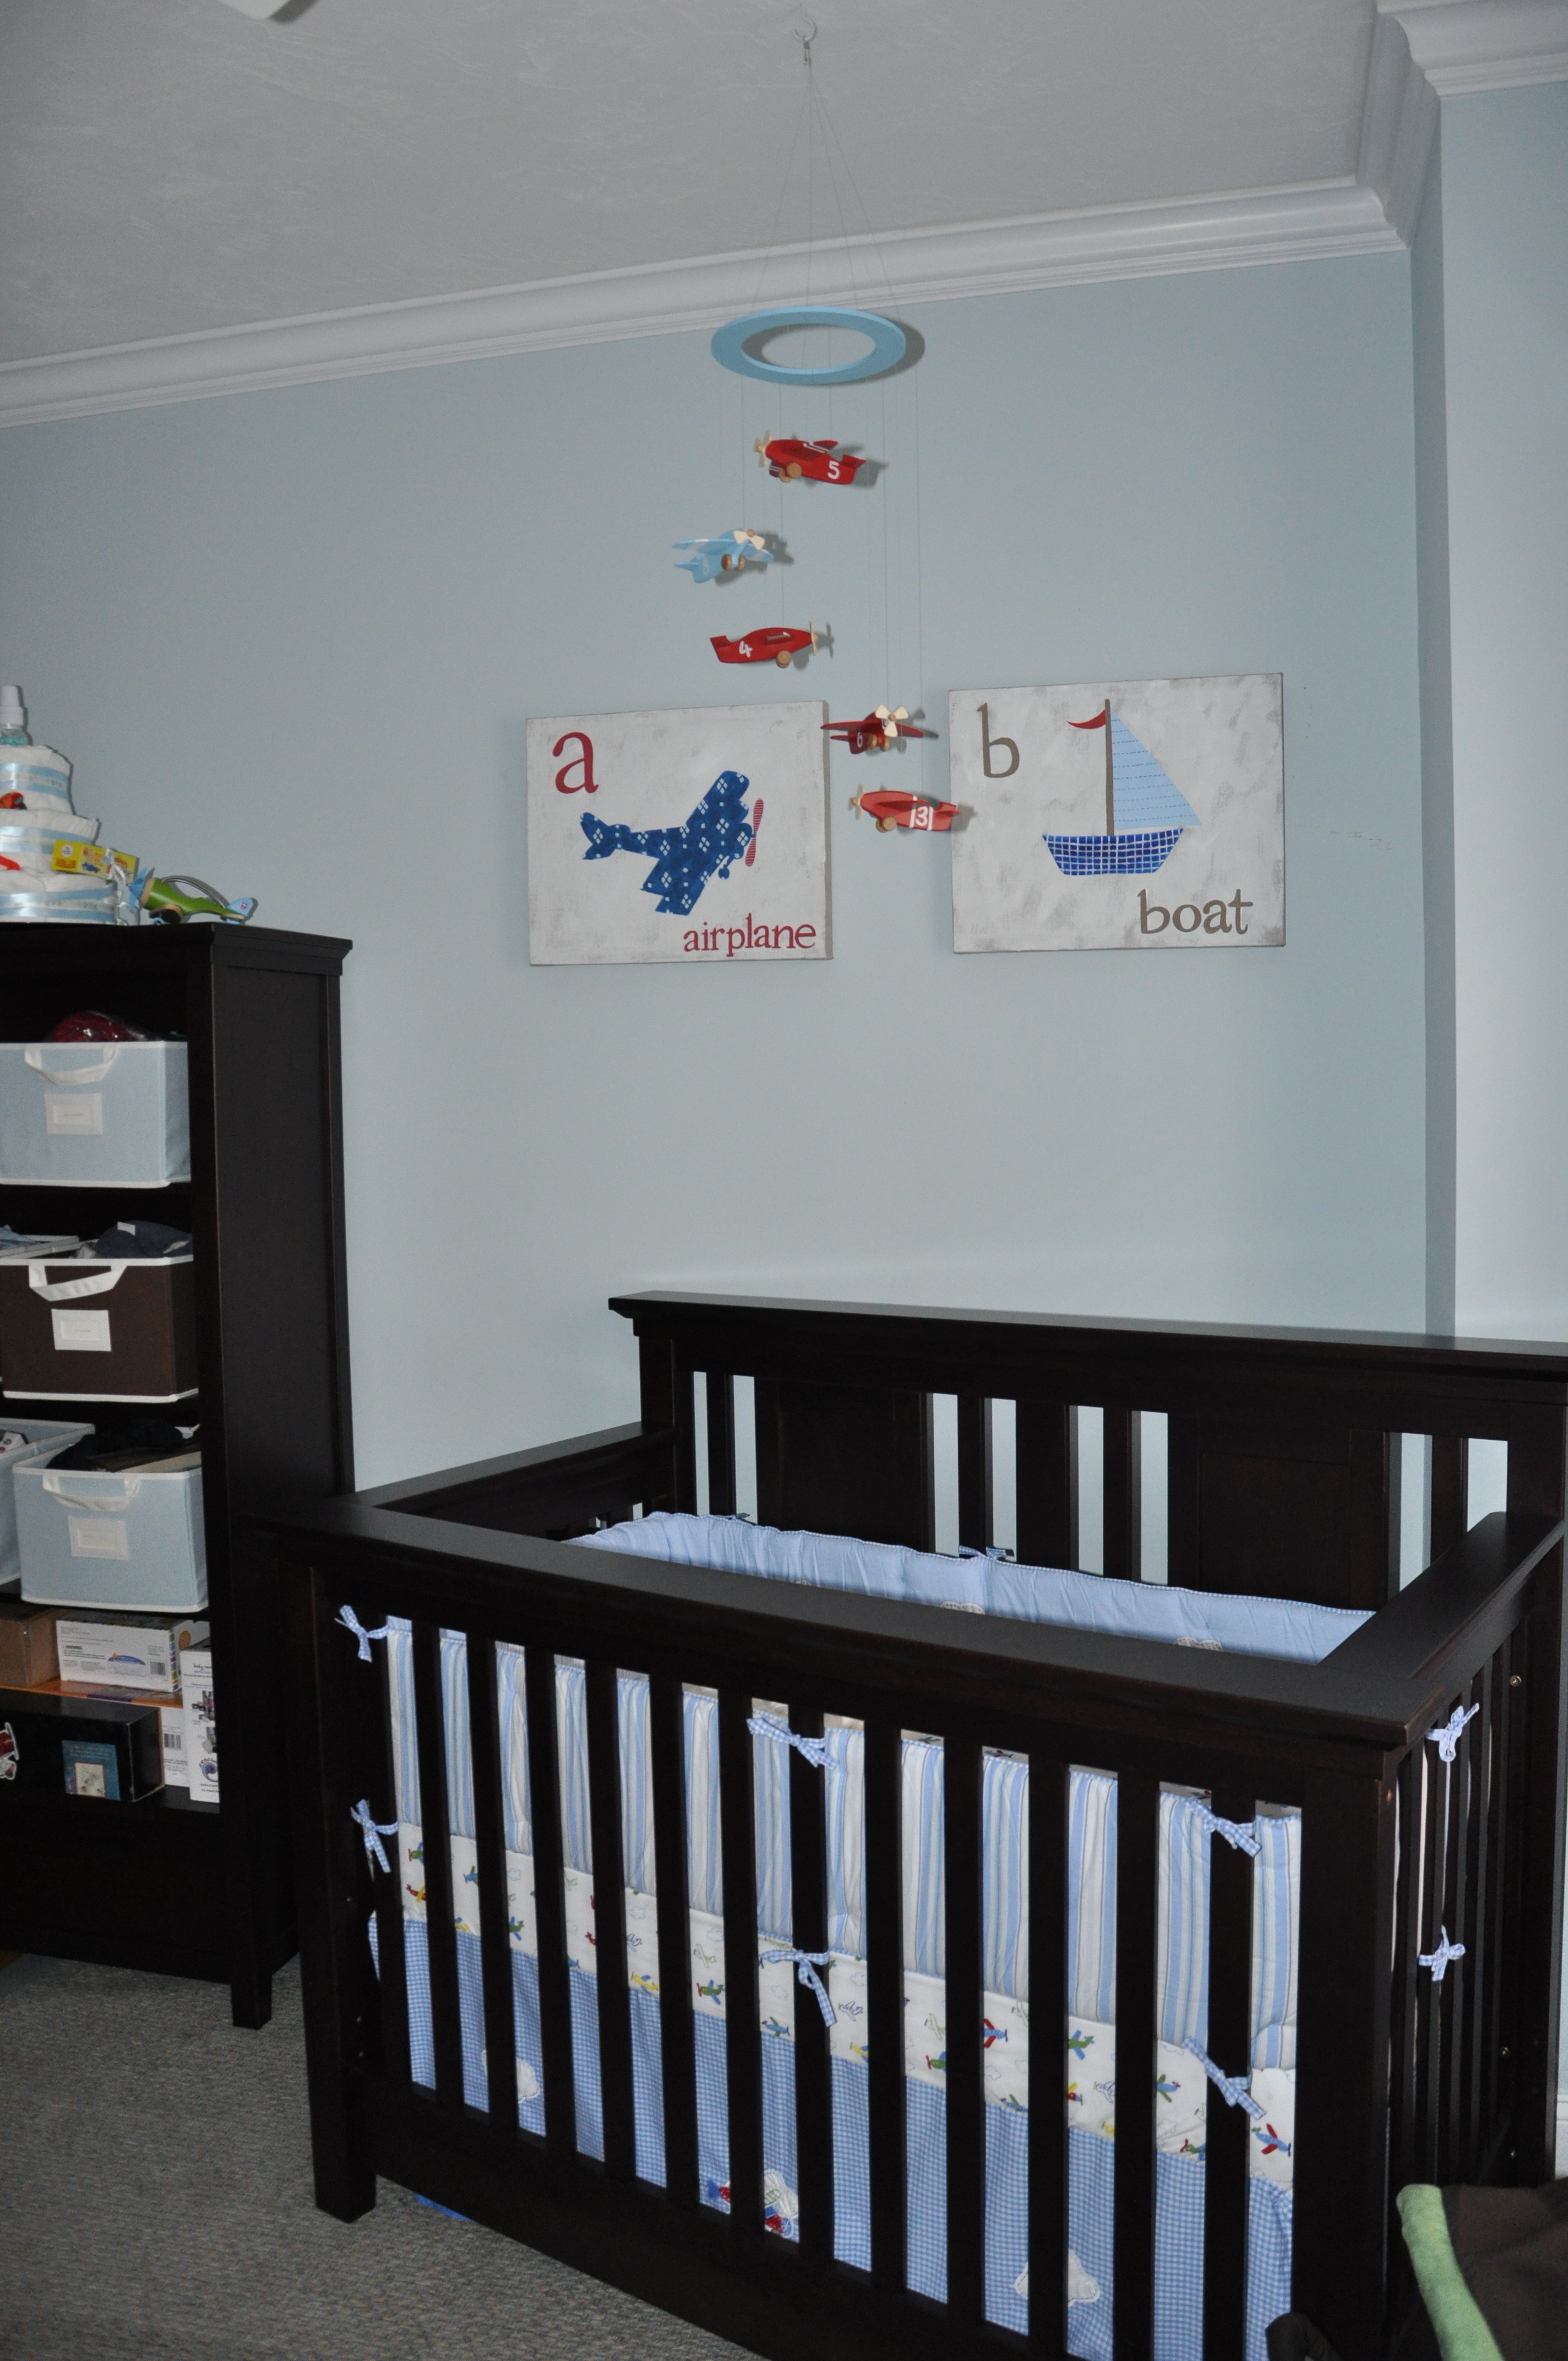
I’ve been on maternity leave for a little over a week now and I finally finished a few last minute touches to the baby’s nursery this morning.  I wanted to share some photos of the airplane-themed nursery that we put together.  Husband M and I decided (well, perhaps I decided) to go with an airplane theme as Husband M has loved planes since he was a little kid.  Growing up in London, his dad would take him to Heathrow every weekend to watch the planes take off.  When we were initially deciding on buying a place, I think one of the main selling points for South Boston  was its view of the runway approach to Logan Airport.  He spends half his summer up on the roof deck watching planes take off and land.  Hopefully our baby shares the same love of planes!

The final reveal:

airplane themed nursery

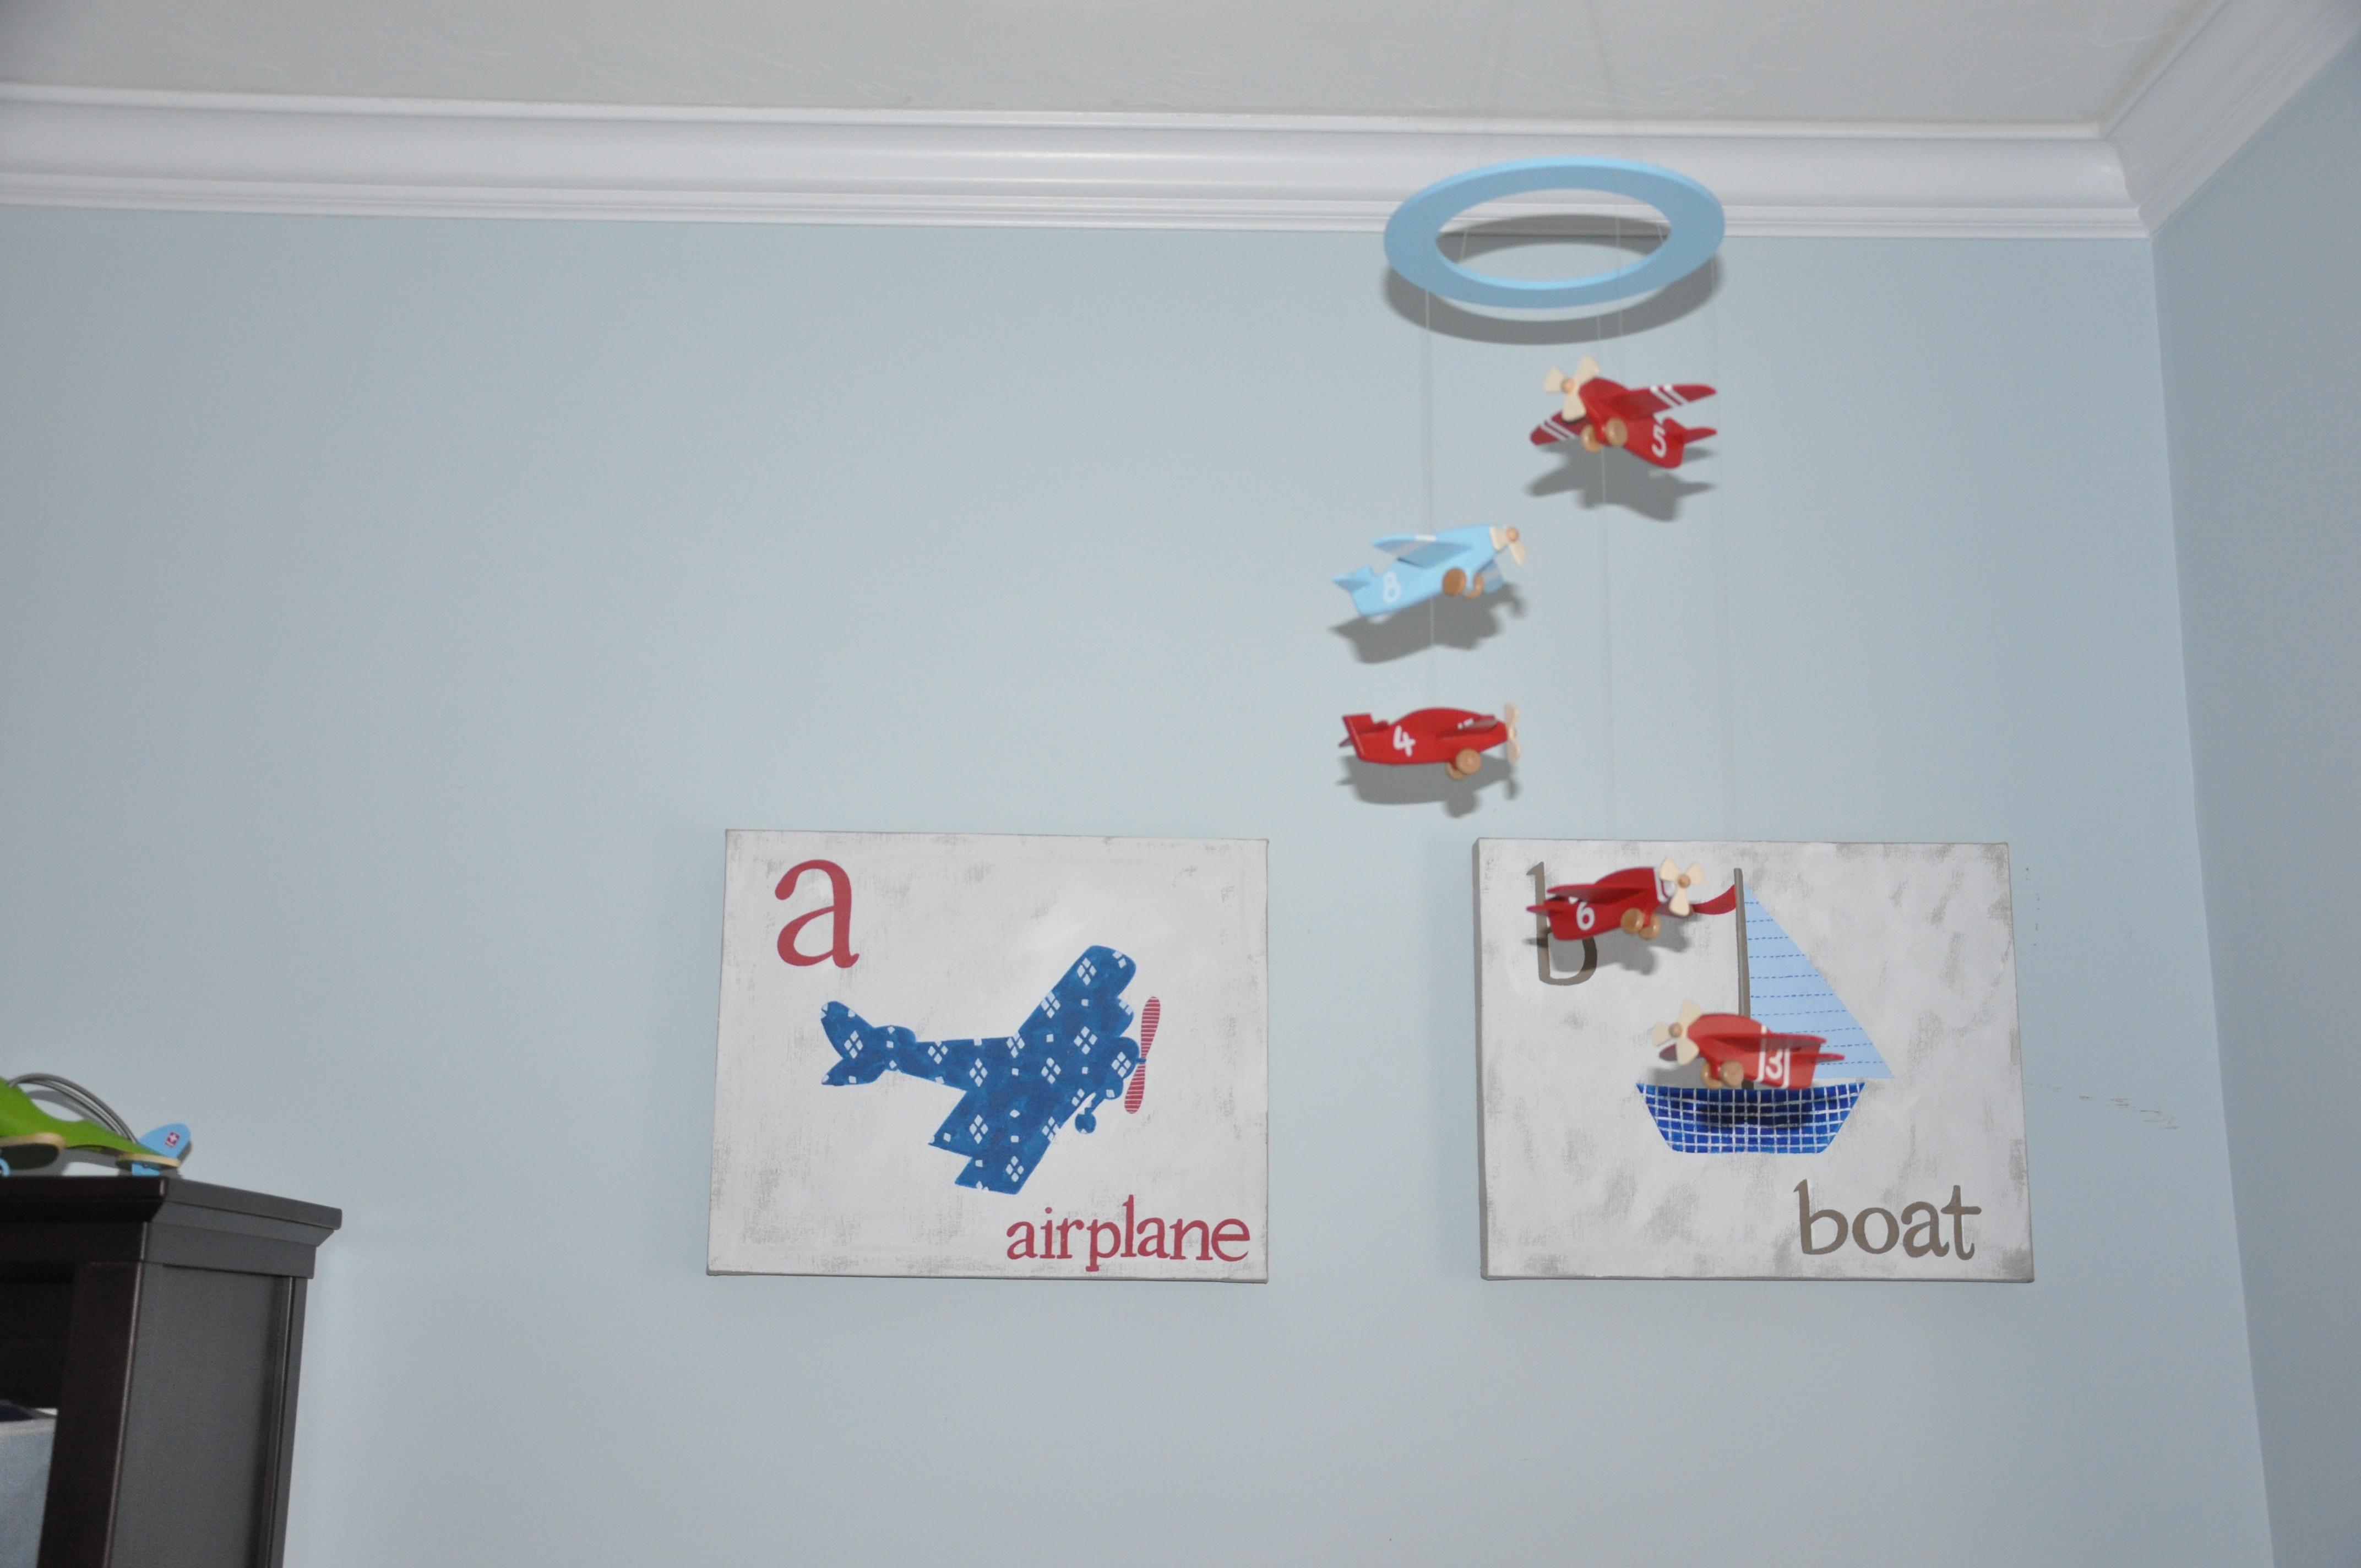
airplane mobile

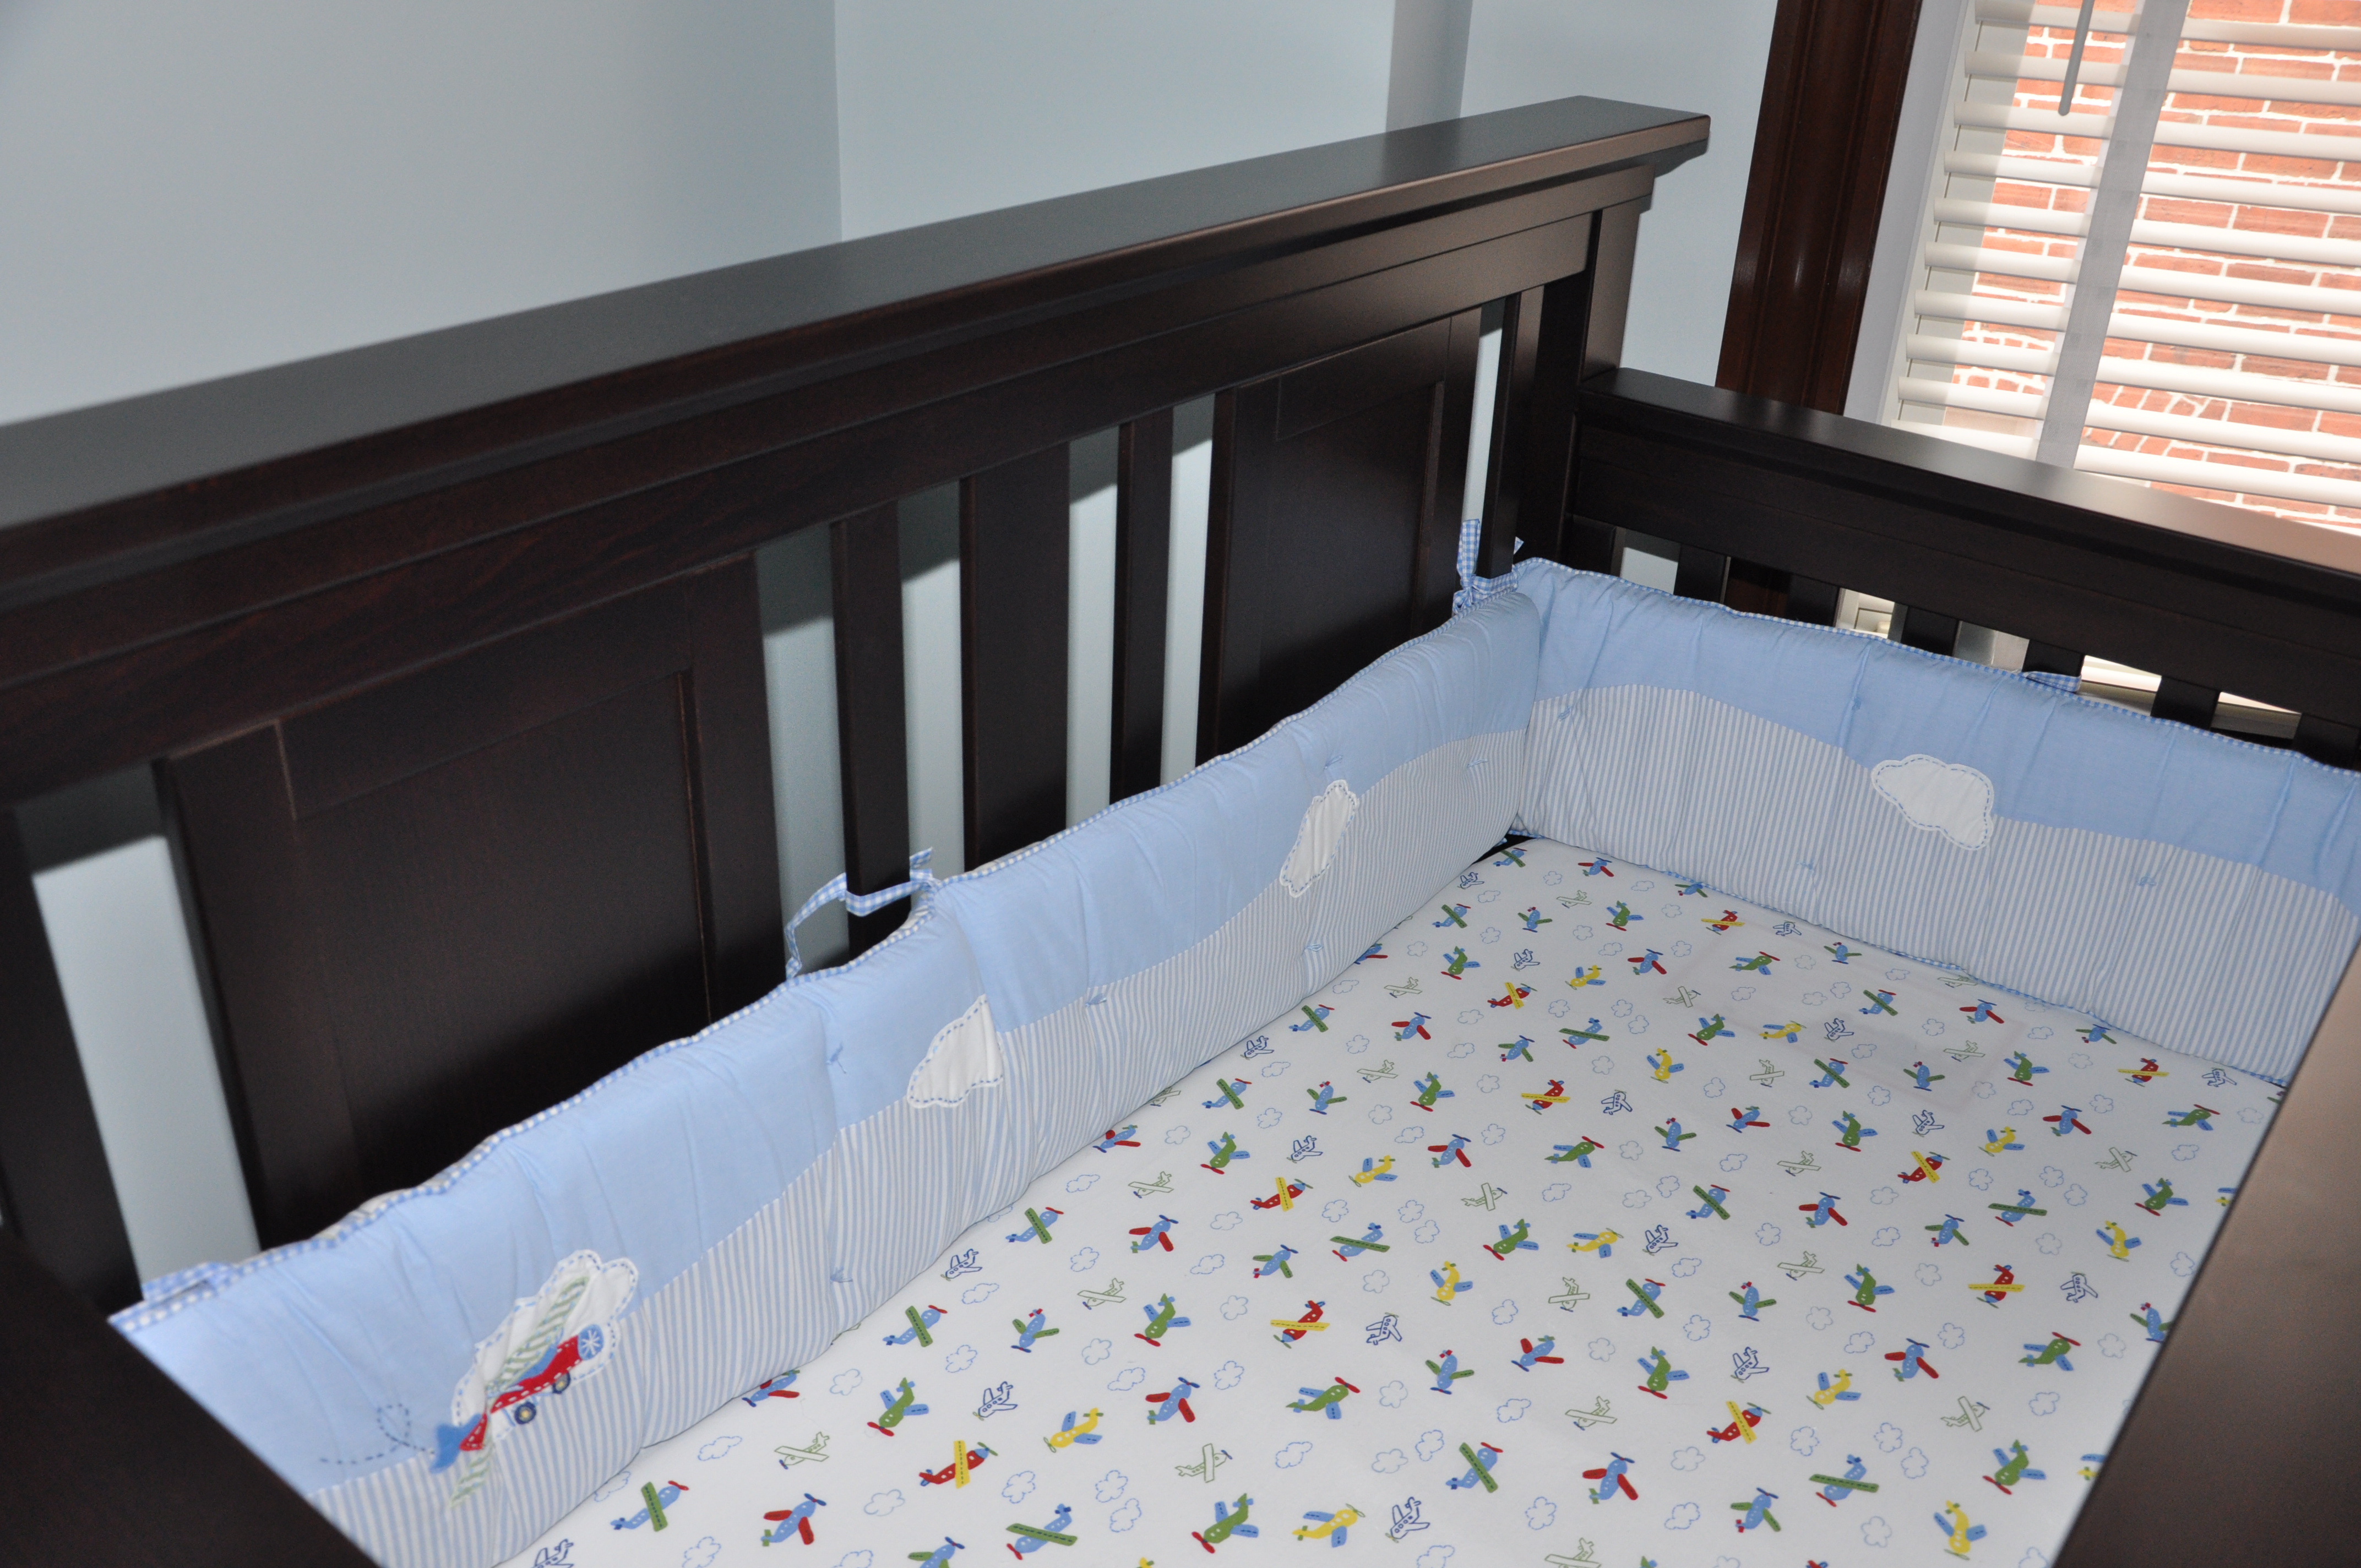
airplane crib

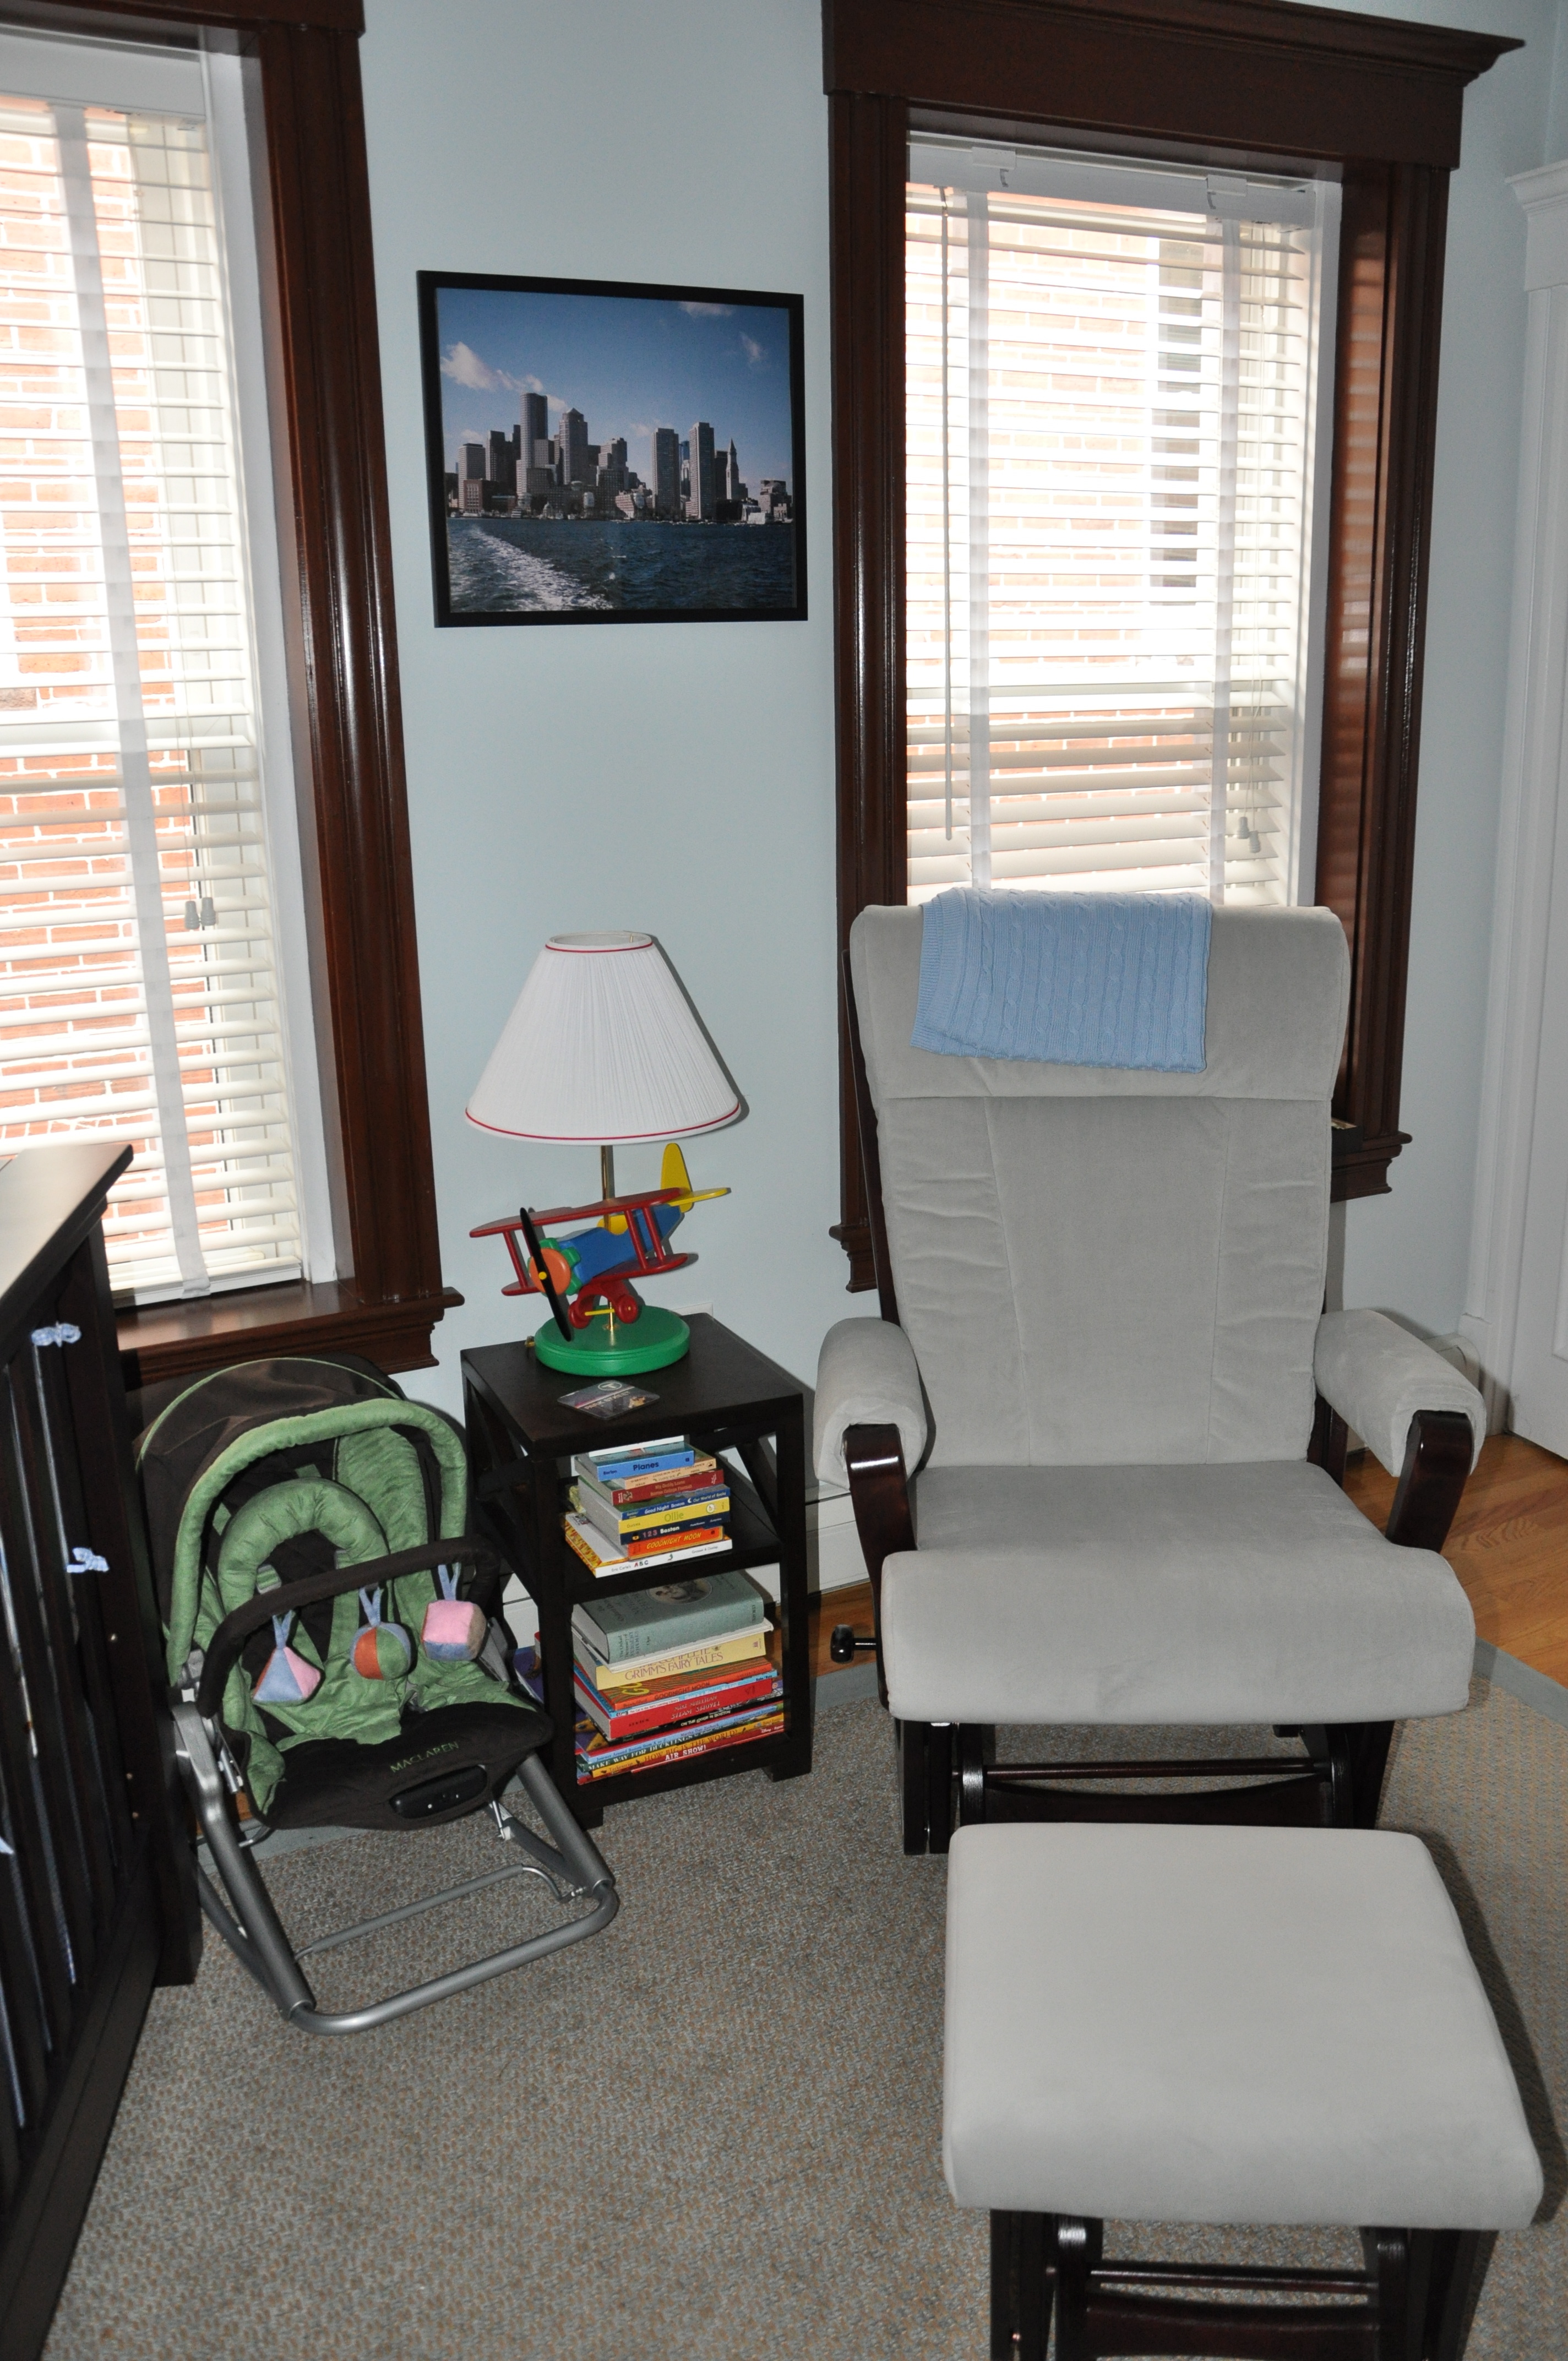
We purchased all the furniture from Baby Furniture Warehouse in Braintree.  The crib, bookshelf, and baby station are from the Romina Karisma collection and the glider is from Dutalier.  The bedding, mobile, airplane & boat pictures, and storage containers are all from Pottery Barn Kids.  The airplane lamp was a gift from our good friends at Crescent Harbor Lighting.

As I reach the end of my to do list, all that is left is to wait for baby’s arrival.  Hopefully he is not following the trend of the airline industry and decides to come right on time!

-m


Filed Under: Design & Decorating, M's post Tagged With: airplane nursery, airplane-themed nursery, baby, baby's nursery, getting ready for baby, nursery, nursery design idea, plane nursery, preparing for baby

How to Make a Diaper Cake for a Baby Shower

Posted by Keelin Hollenbeck on October 20, 2010

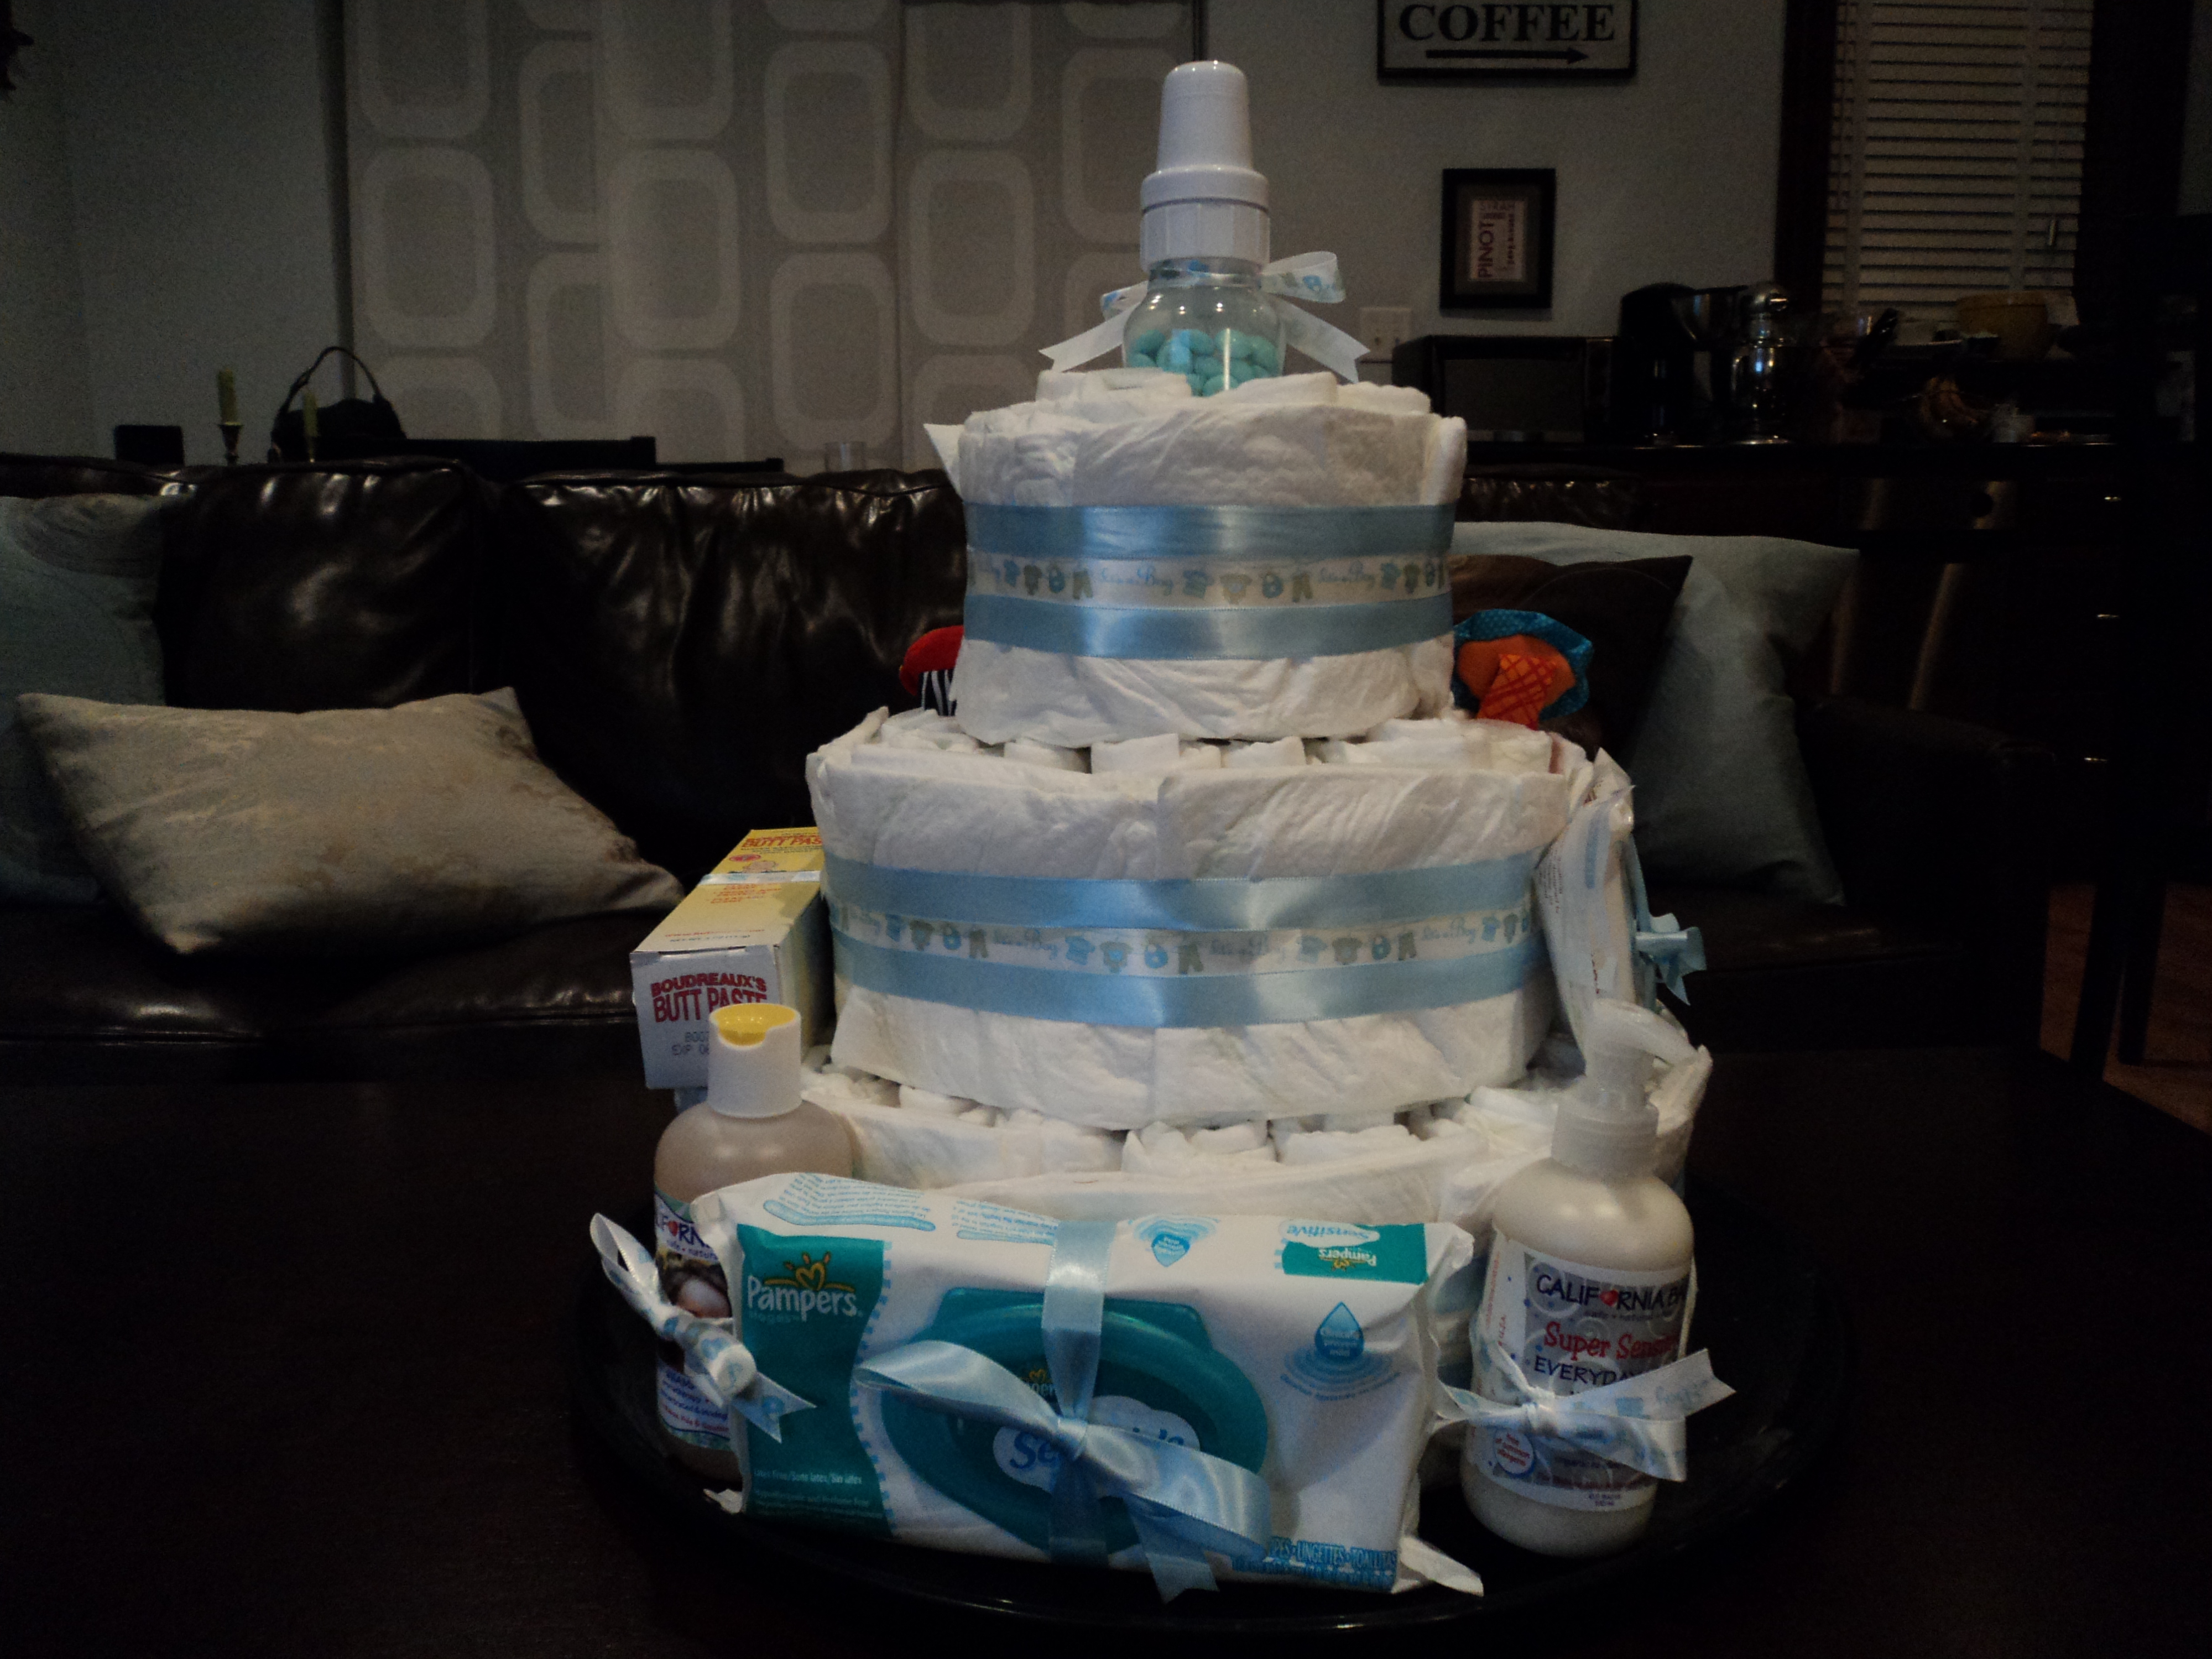
My little sister and I made a cake out of diapers for M’s baby shower.   My mom had the idea after seeing it at another baby shower.   She bought us all the supplies and we made it the night before M’s shower after looking at pictures of diaper cakes on-line.
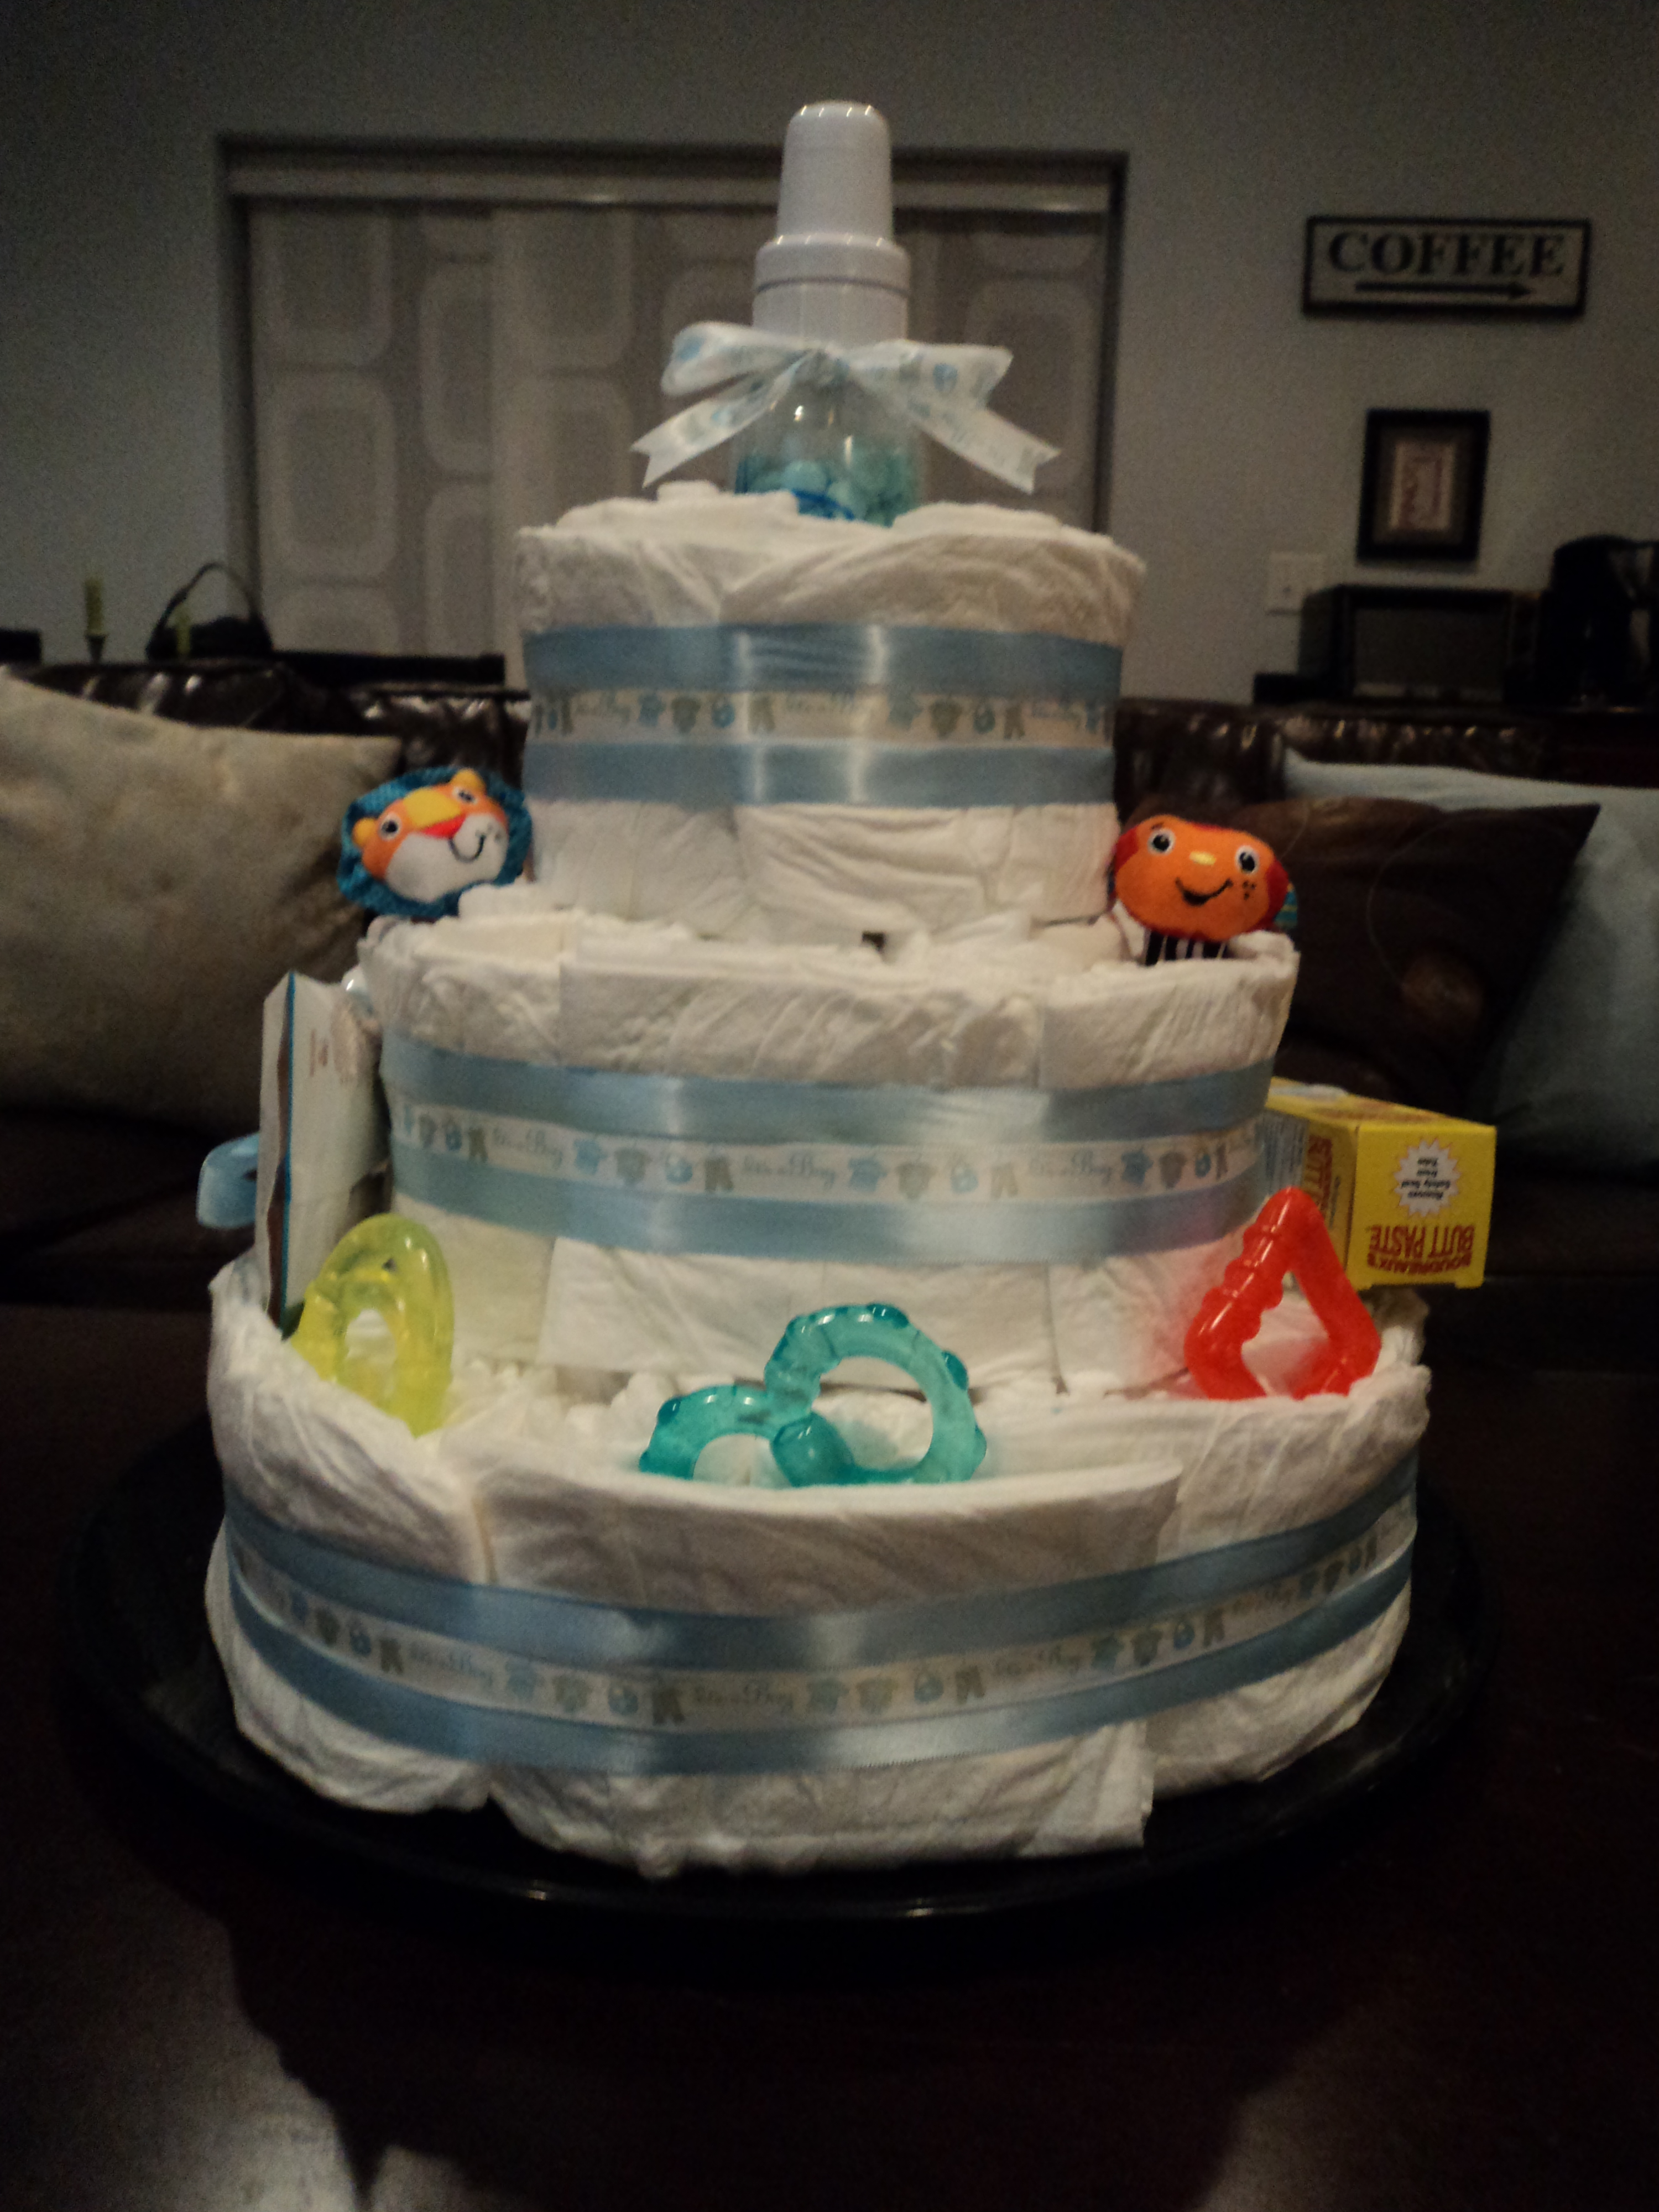
Supplies (aka cake ingredients):

– about 100 diapers (we used the brands and size M asked for her on registry so she can actually use the diapers when baby is born)
– wooden skewer
– curling ribbon, string or rubber bands
– pretty ribbon (like thick pink or blue ribbon)
– large tray or cake plate (we used a large catering plastic plate)
– tape
– scissors
– small baby gifts/supplies- like a bottle, pacifiers, teething toys, rattles, and whatever you would like to anchor on your cake

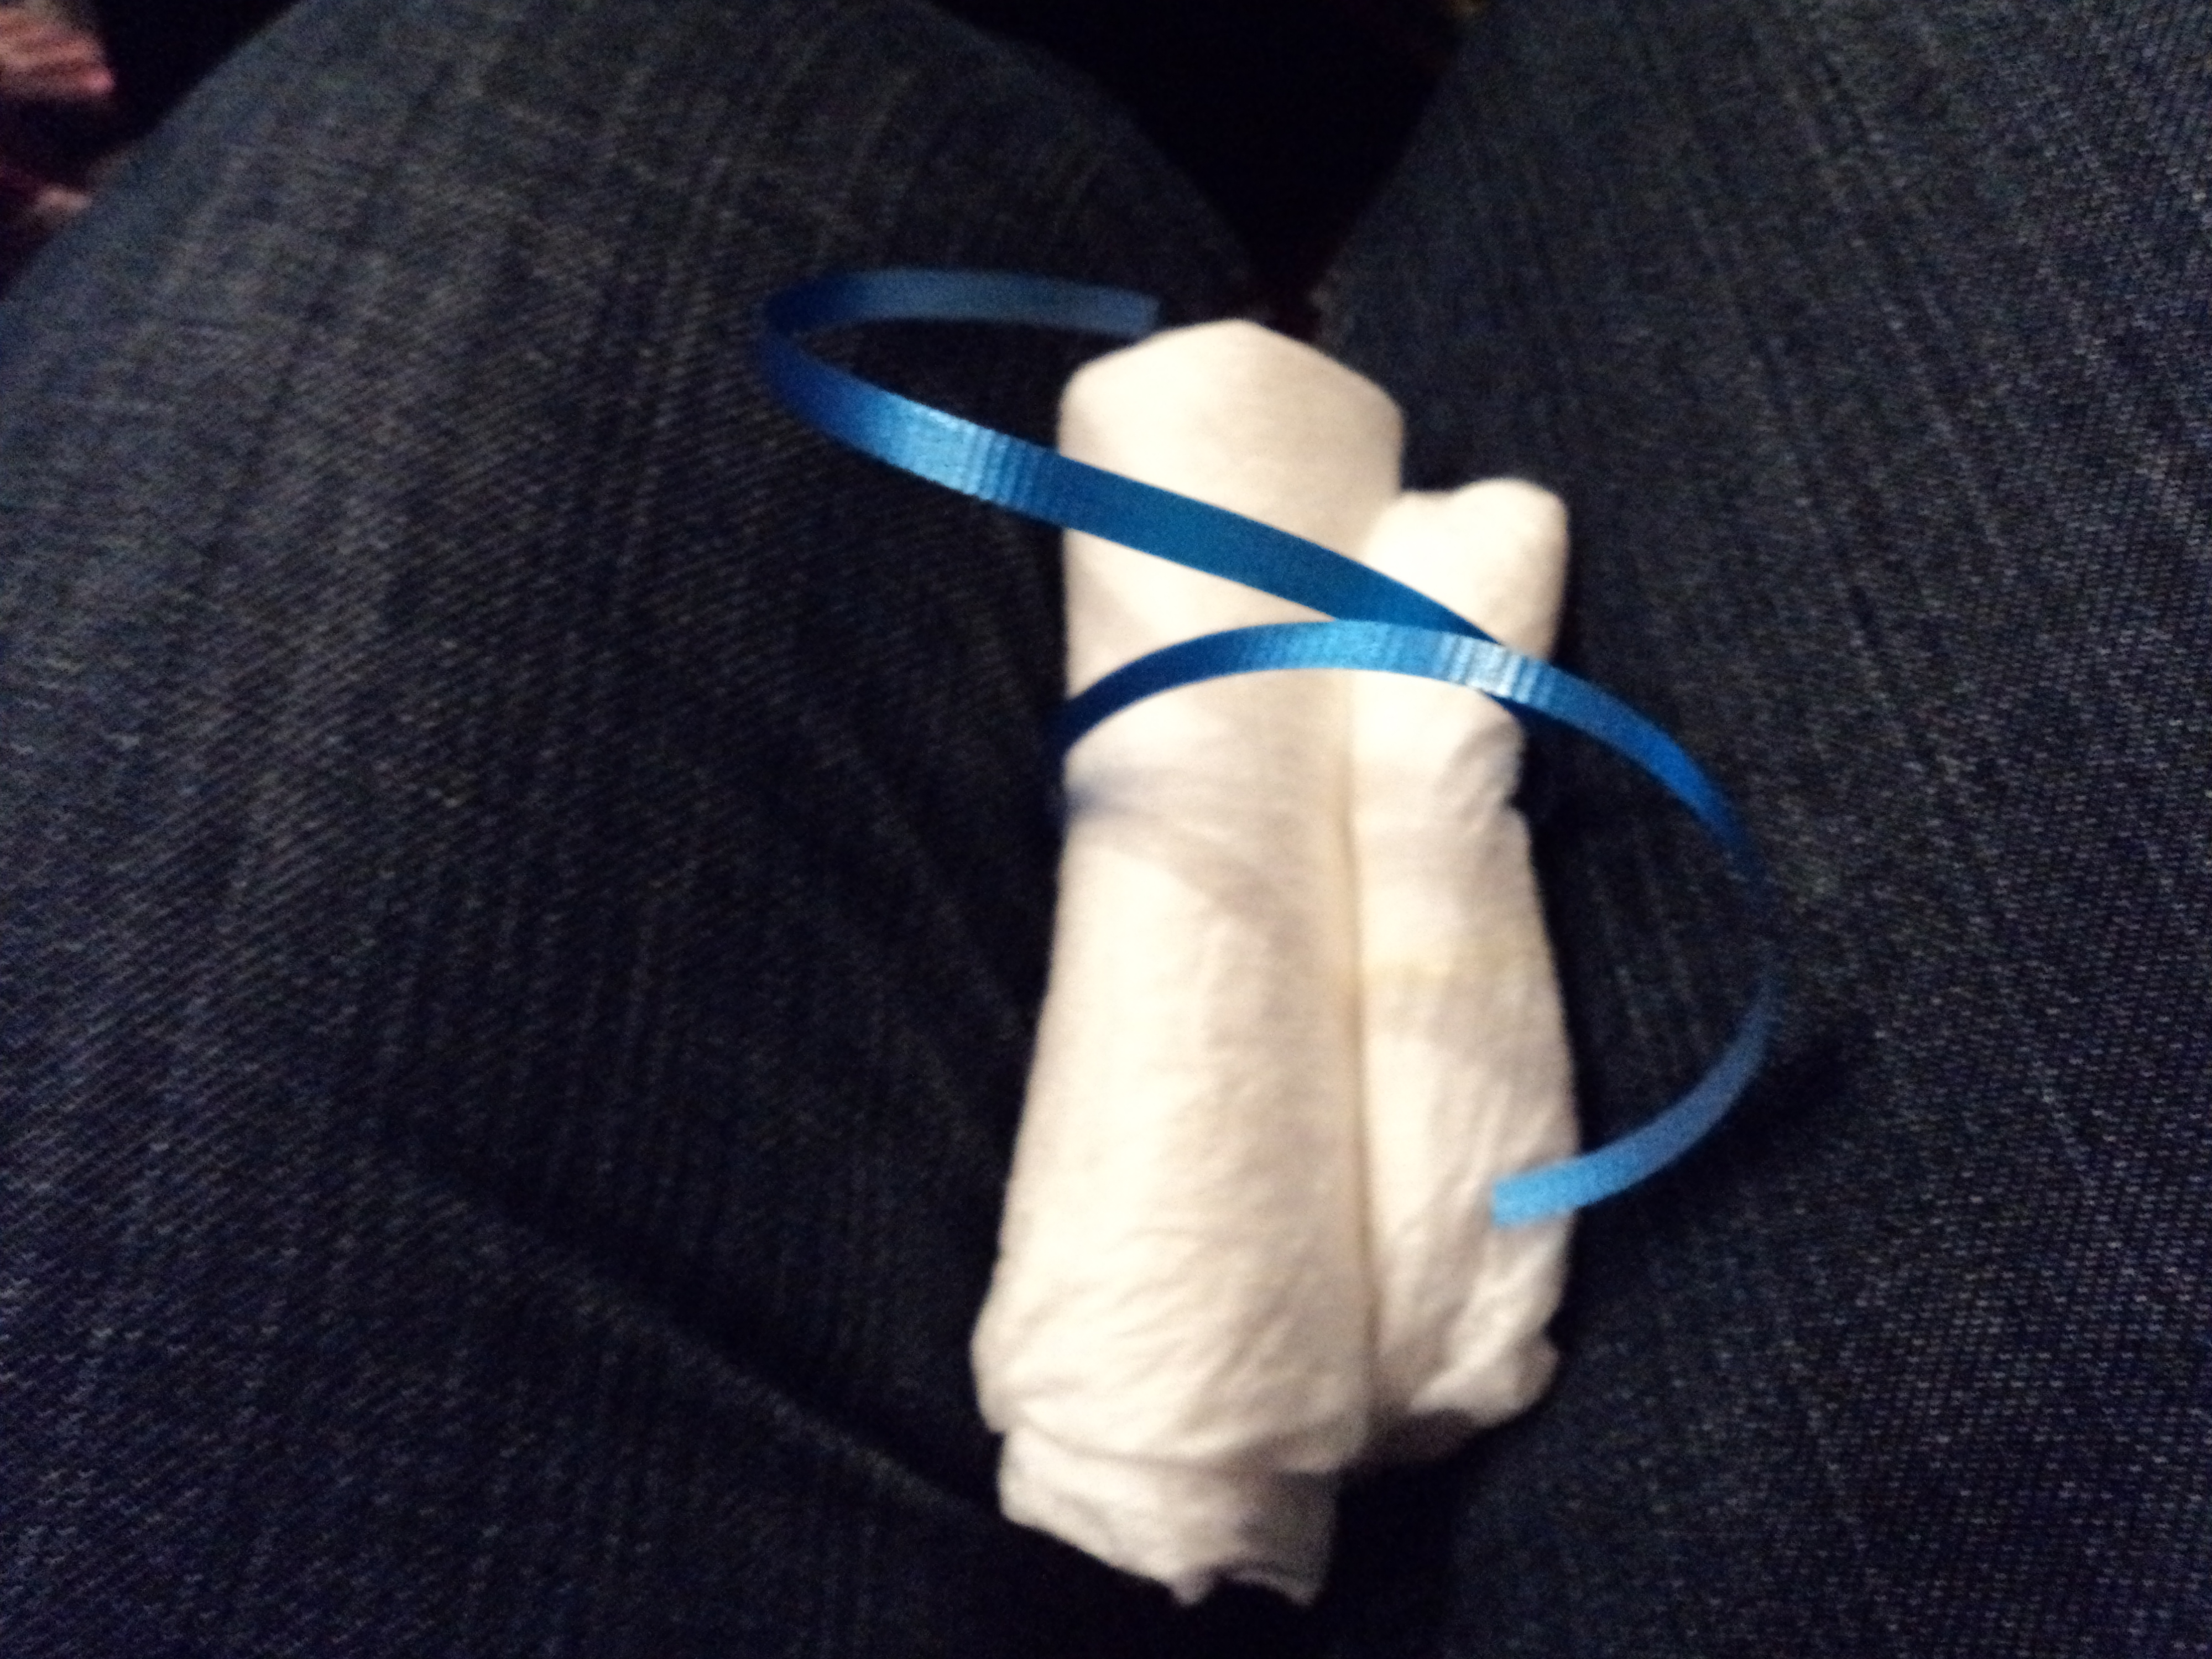
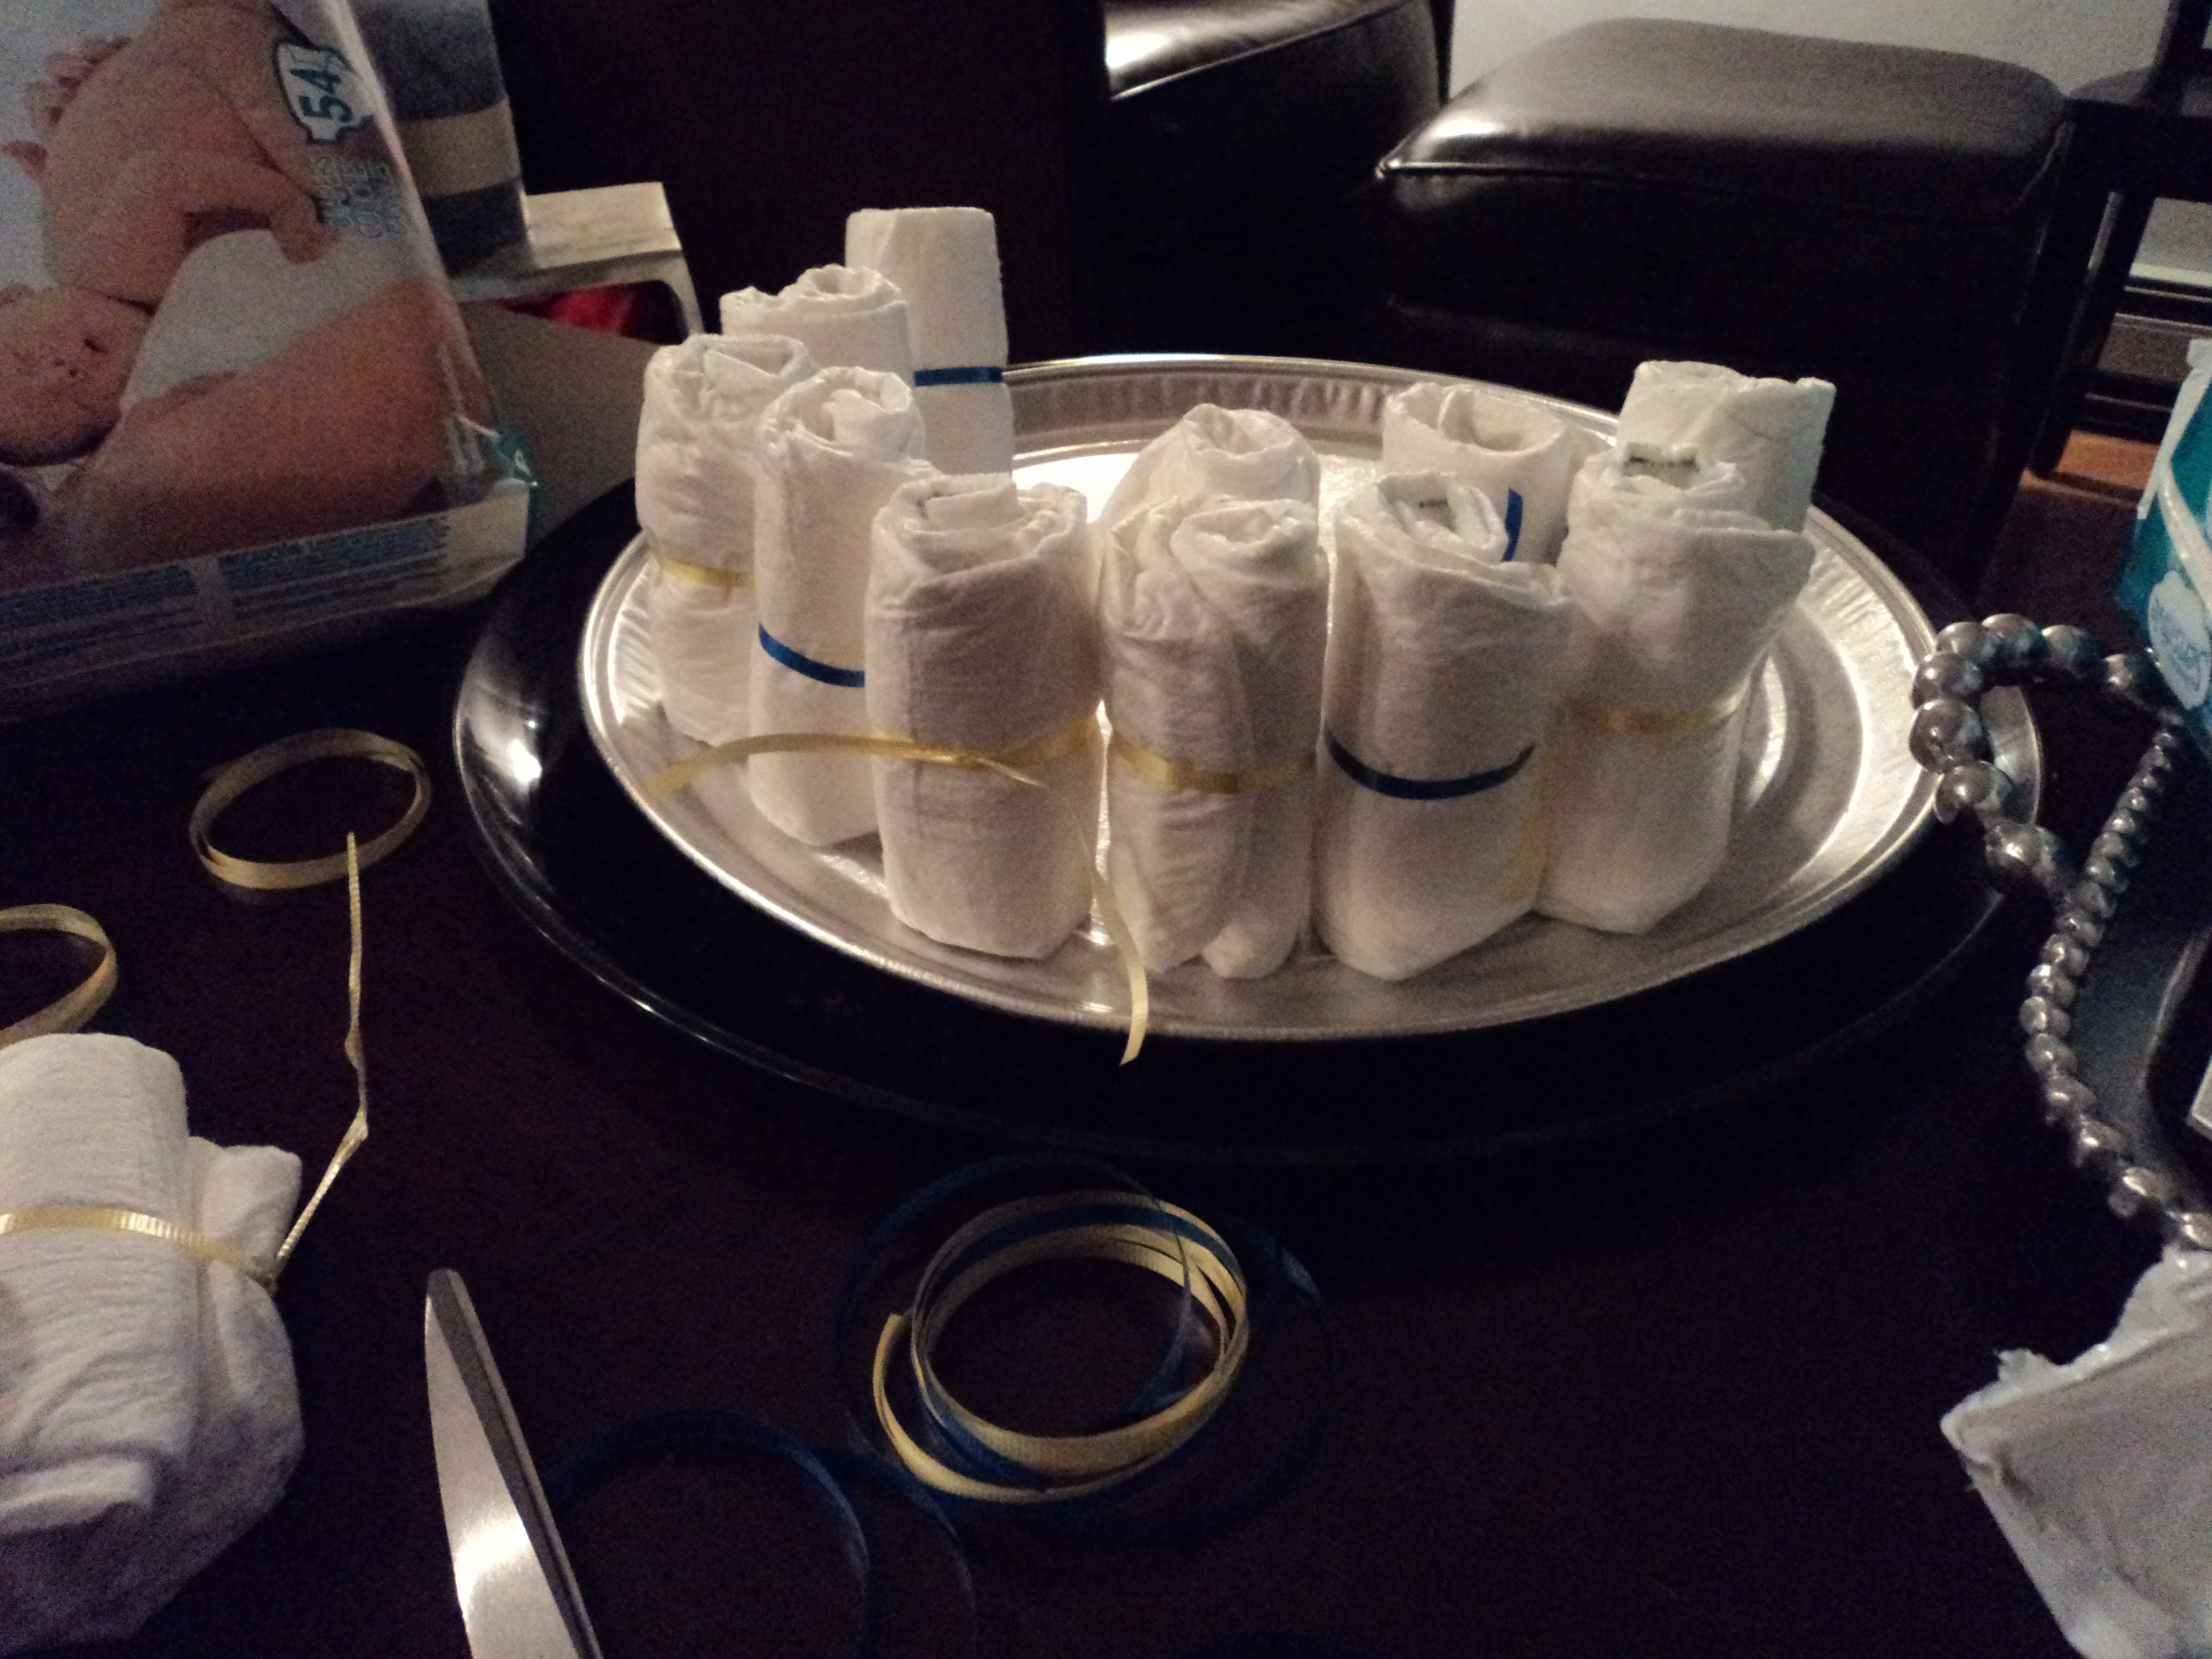
Start by rolling the diapers up, with the print to the inside (so you only see white)  and tie with the curling ribbon.   We found it easy to cut a bunch of curling ribbon to the right size in the beginning and then start rolling and tying the diapers up.

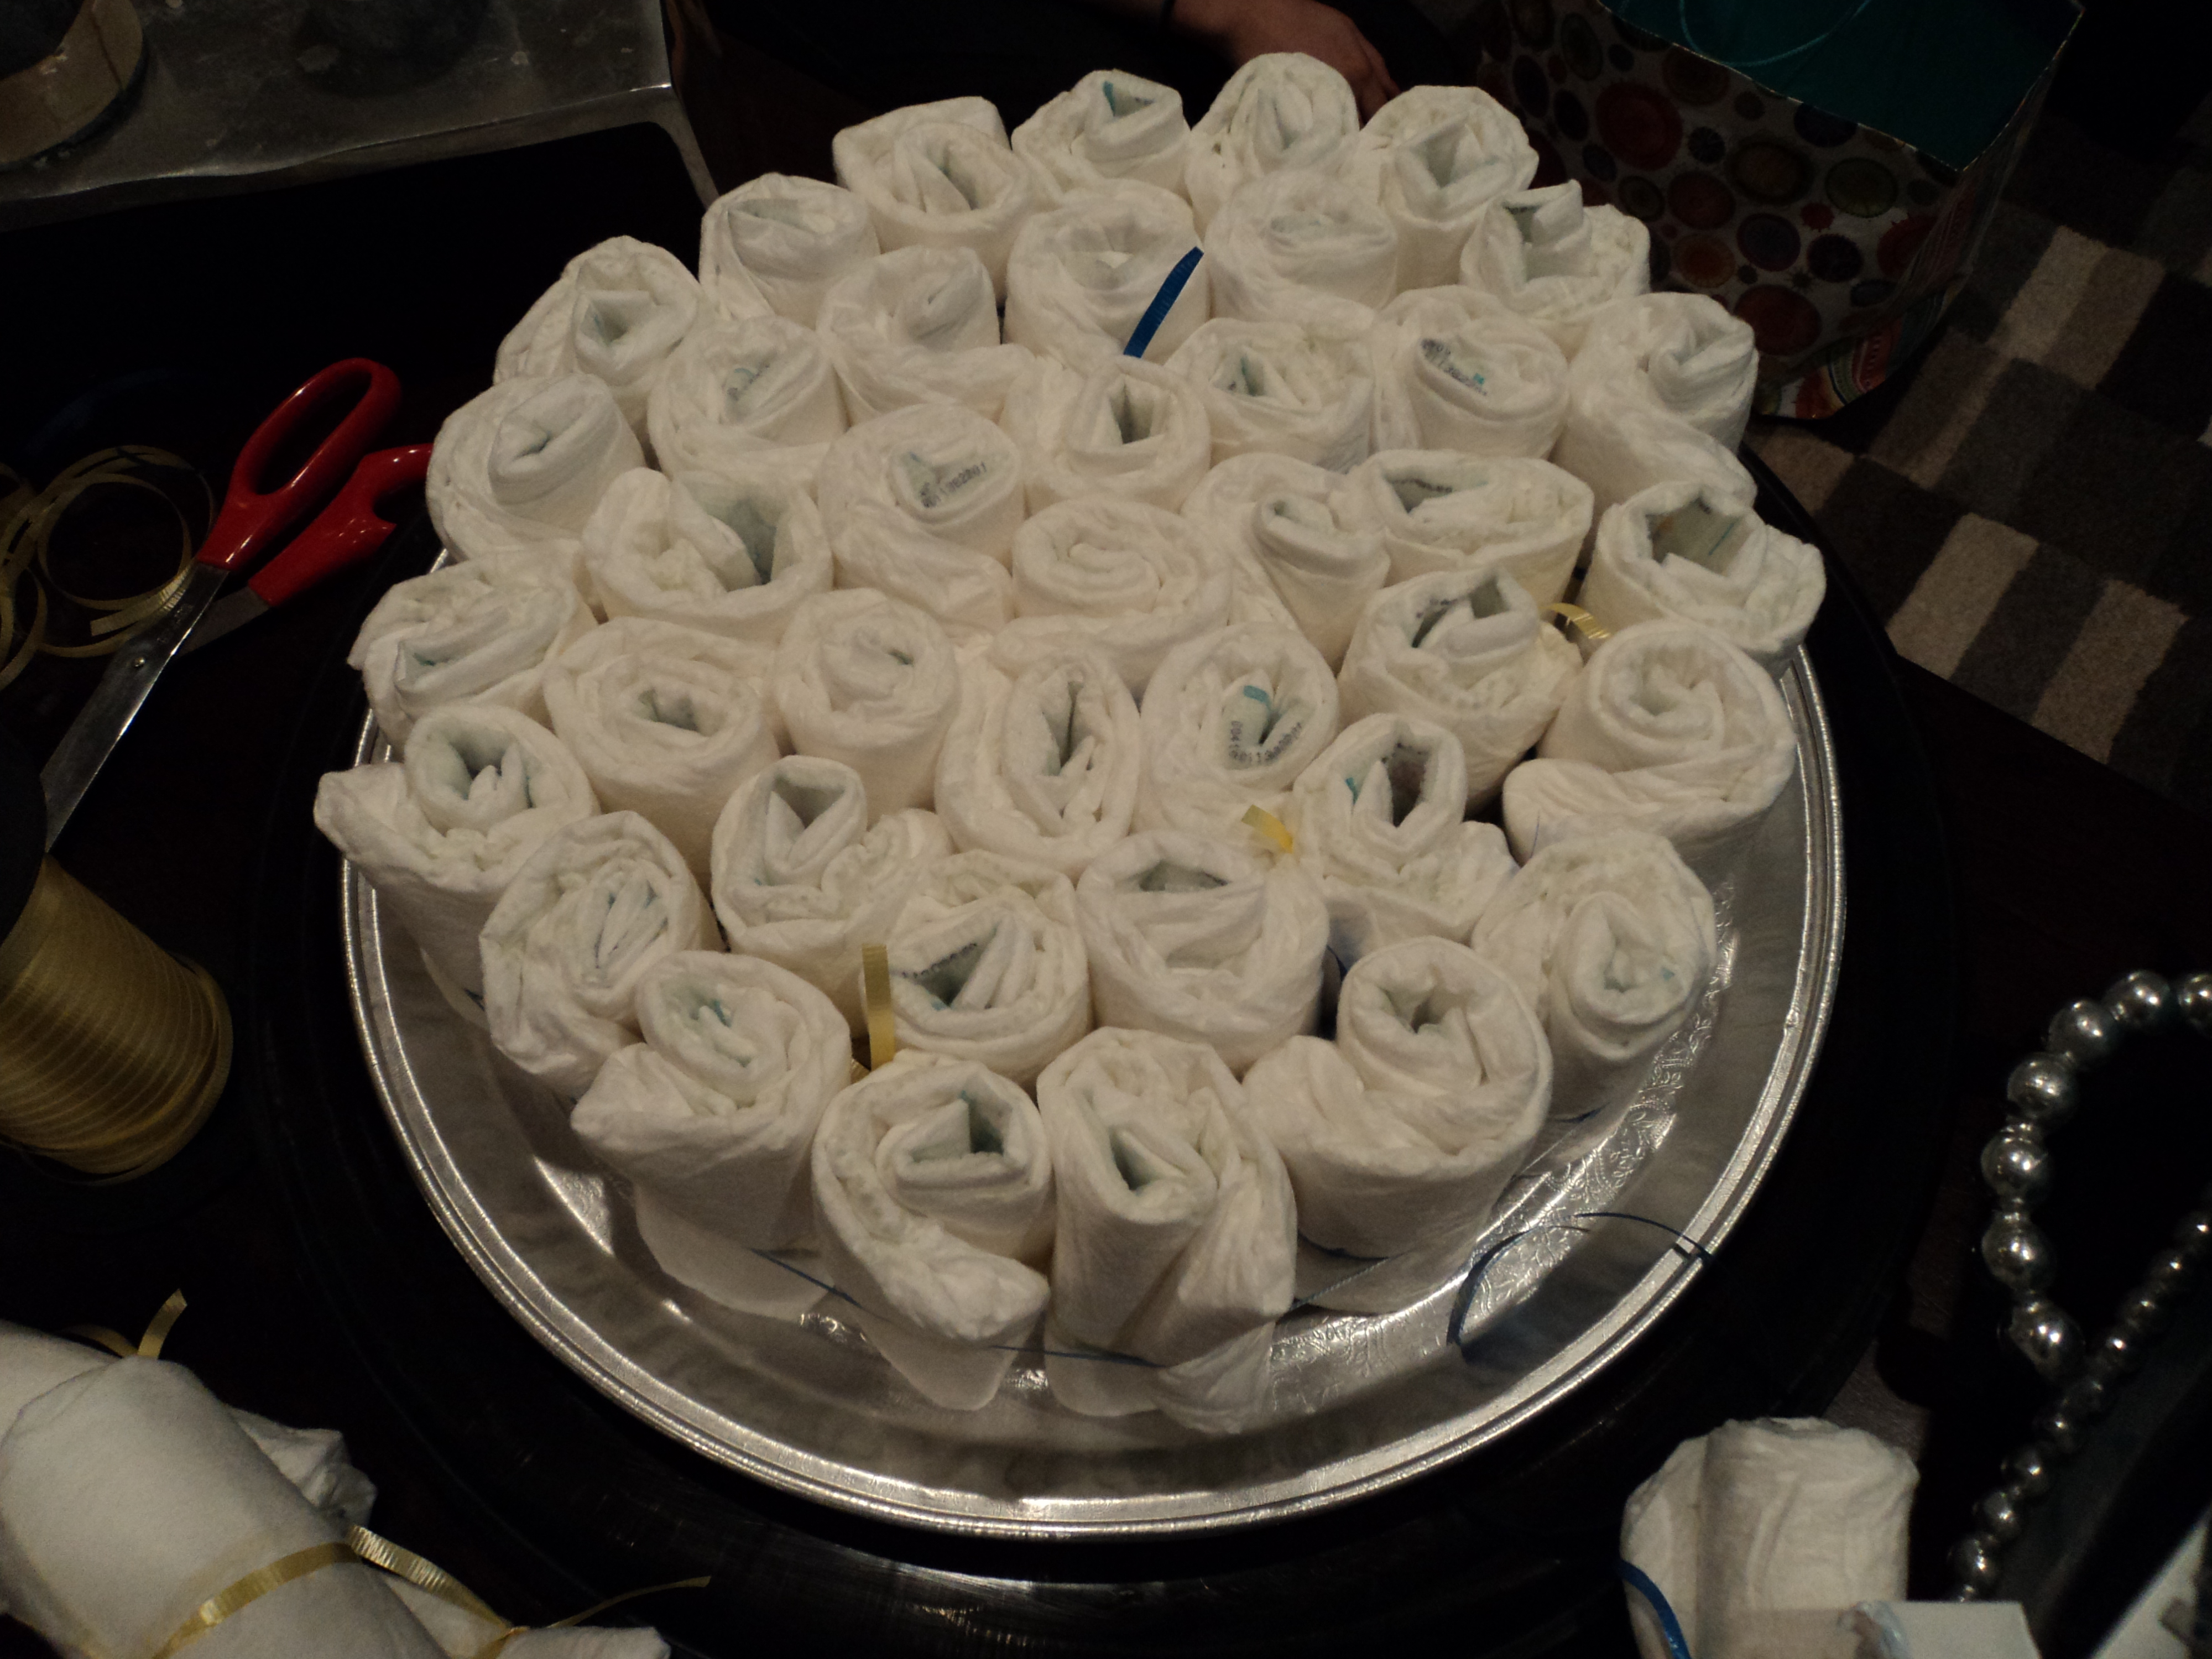
Keep tying the diapers until you can form about 12-15 together and to start the base. Tie curling ribbon around the 12-15 to hold them all together.  Next, start building around the bundle you have made until you have a base that fits your plate (or to whatever size you prefer).  Then, tie a larger curling ribbon around the outside to keep the whole base together.

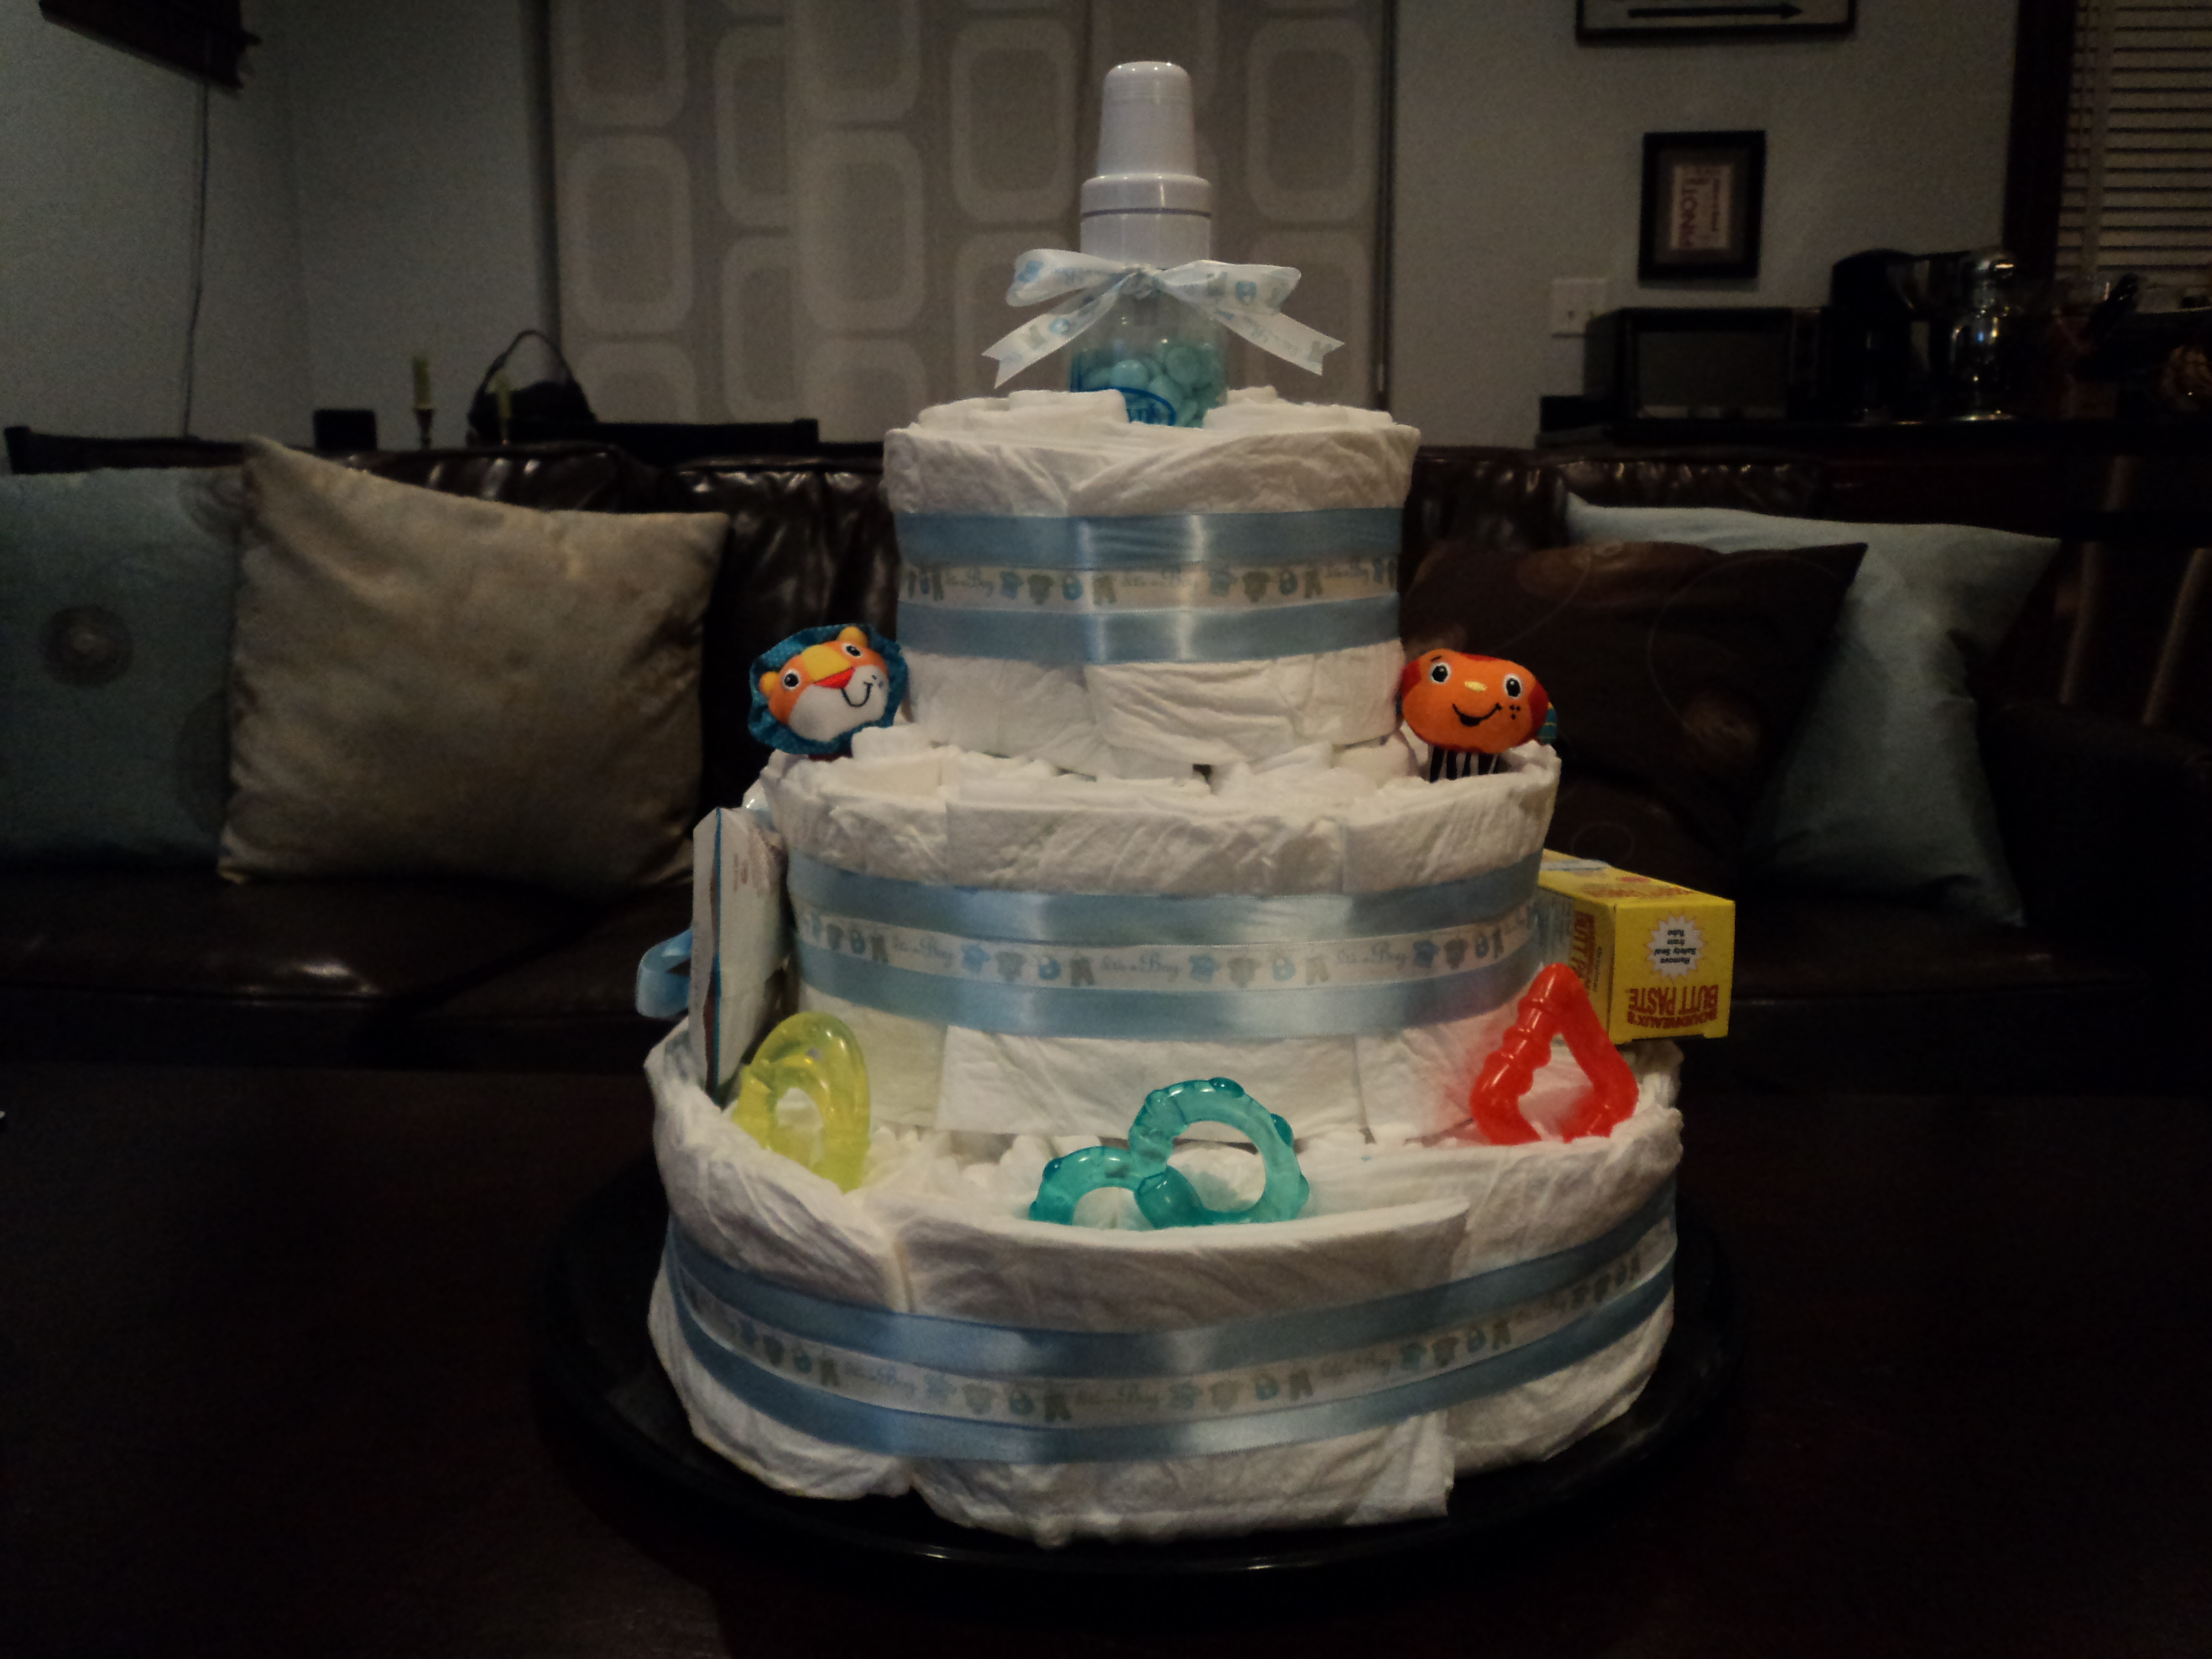
Next, we started on the middle layer just like we did the first layer, except making it about a row smaller to create a layered look to your cake.   When placing the second layer on the cake, we used a couple pieces of tape and then stuck a wooden skewer through the middle to hold it (we made sure not to pierce the diapers because we didn’t want to ruin them!)

Then, we made the top of the cake the same way,  just smaller then the middle layer and we placed a bottle in the center filled with light blue M&Ms. You can use your own creativity here!  We decided we wanted  a smoother frosting look to our cake so we tied another layer of flat unrolled diapers around the outside and tied them there with the curling ribbon. Next, we put light blue and baby ribbon around the curling ribbon to cover it up and make it look like stripes on frosting. Finally, we tucked and tied the toys and other gifts around the cake.  Feel free to look at my pictures to get ideas!

Enjoy!

-K

Related Posts Plugin for WordPress, Blogger...


Filed Under: Crafting & DIY, K's post, Party Ideas Tagged With: baby, baby shower, baby shower cake, baby shower diaper cake, diaper cake, getting ready for baby, how to make a diaper cake

  • 1
  • 2
  • Next Page »

Recent Posts

  • Easy Holiday Office Party Tips
  • 5 Steps to an Easy Football Party
  • Gingerbread Biscotti
  • Holiday Coffee Bar and Thanksgiving Recipes
  • Soft Sugar Pumpkin Cookies
  • Cinnamon Sugar Apple Cake
  • Hello Pumpkin Season!
  • Make Your Own Milkshake Party!
  • Mama’s Pickles
  • S’more Cookies

Categories

  • About 2 Sisters 2 Cities (7)
  • Books (8)
  • Crafting & DIY (22)
  • Design & Decorating (15)
  • Gardening (5)
  • Giveaway (14)
  • Guest Bloggers (8)
  • K's post (46)
  • K's Recipes (191)
    • K's Desserts (75)
    • K's Entrees (23)
    • K's Sides (24)
  • M's post (72)
  • M's recipes (167)
    • M's Entrees (21)
    • M's Sides (14)
    • M's Desserts (30)
  • Organizing (7)
  • Party Ideas (49)
  • Uncategorized (1)
  • Vacation (12)
Stitch Fix

Archives

Blogroll

  • Annie's Eats
  • Bake at 350
  • Baked Bree
  • Boston Harbor Beacon
  • Confections of a Foodie Bride
  • Cook Like a Champion
  • Erin’s Food Files
  • Forever and a Recipe
  • Framed Cooks
  • Oh Happy Day
  • On Common Ground
  • Pennies on a Platter
  • Pink Parsley
  • Recipe Girl
  • Sally's Baking Addiction
  • Simply Scratch
  • The Curvy Carrot
  • The Pioneer Woman
  • Tidy Mom
  • Two Peas & Their Pod
  • What’s Gaby Cooking
  • Young House Love
Increase your website traffic with Attracta.com

grab a 2 sisters button!


Copyright © 2014 ~ 2 Sisters 2 Cities | Blog Design by Minx Design