In addition to our Totally Awesome Christmas Giveaway, we’ve partnered with some blogger friends to bring you the chance to win one of the biggest prizes of the year. This time, we’re giving away an iPad Air!
ABOUT THE IPAD AIR
The new iPad Air is unbelievably thin and light. And yet it’s so much more powerful and capable. With the A7 chip, advanced wireless, and great apps for productivity and creativity — all beautifully integrated with iOS 7 — iPad Air lets you do more than you ever imagined. In more places than you ever imagined.
GIVEAWAY
Prize: iPad Air 16GB Wi-Fi ($499 ARV)
Sponsors: 2 Sisters 2 Cities, Bay Area Mommy, Clare’s Weight Loss Journey with Plexus Slim, Couponing For 4, Dallas Single Mom, Dream a Little Bigger, Food Folks and Fun, Fun Fierce Fab Beauty Over 50!, Happy Deal – Happy Day!, Joyful Scribblings, Mamamusing, Oh My Gosh Beck!, Patchwork Posse, This Mama Loves, You Justincredible
Rules: Use the Rafflecopter form to enter daily – all entries are optional. Giveaway ends 12/31 and is open worldwide.
Good Luck!
m&k


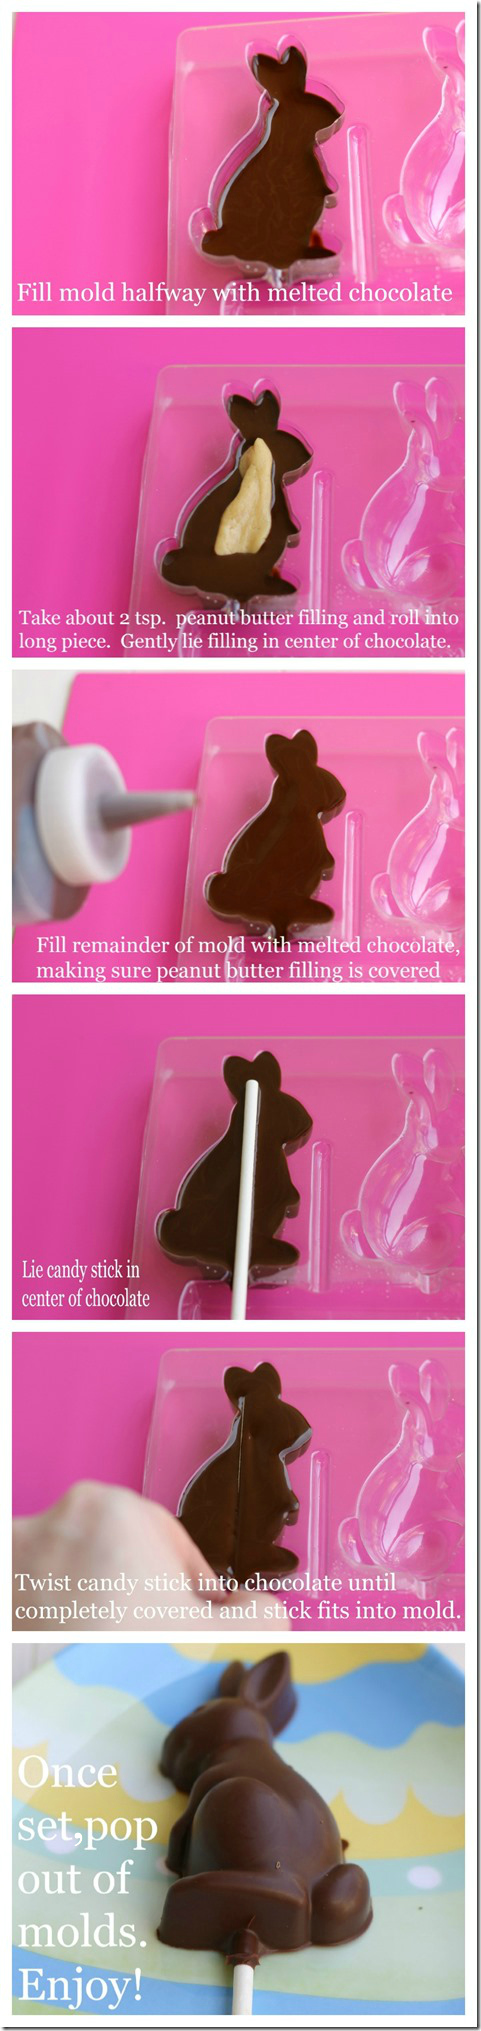
")


 and
and