2 Sisters 2 Cities

Image Map
  • About 2 Sisters 2 Cities
  • Recipe Index
  • Project Index
  • Contact Us
  • Like us on Facebook
  • Follow m on twitter
  • Follow k on twitter
  • Follow 2S2C on Pinterest
  • Follow 2S2C on G+
  • rss
  • e-mail 2S2C

Valentine’s Day Gift Packaging

Posted by Keelin Hollenbeck on February 11, 2014

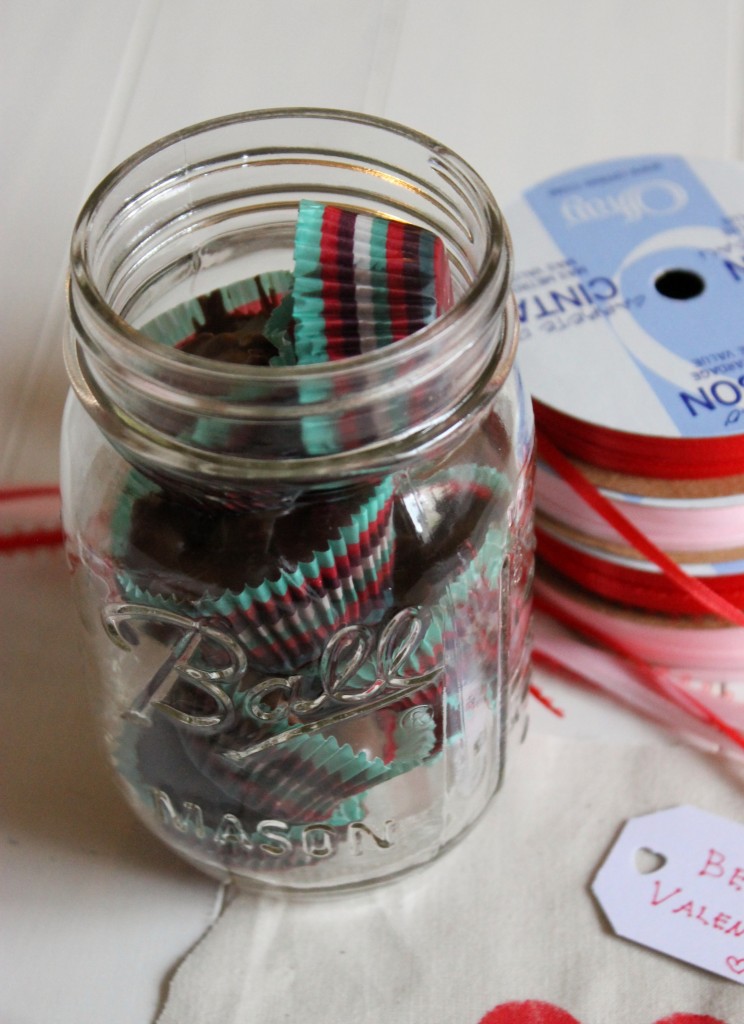
Valentine's Day Gift Jars

Valentine’s Day is almost here and if your haven’t started thinking about gifts for your loved ones, I have just the idea for you!  For my Christmas gift to my co-workers and friends this year, I made mason jars filled with homemade candy.  I then covered the jar with muslin fabric (stenciled with the holiday greeting “cheers!”) and tied it on with red and green ribbon.  Like most things around here, I finished it late the day before I was handing them out with no day light left.  Therefore, I never came up with a good picture to share with you all.
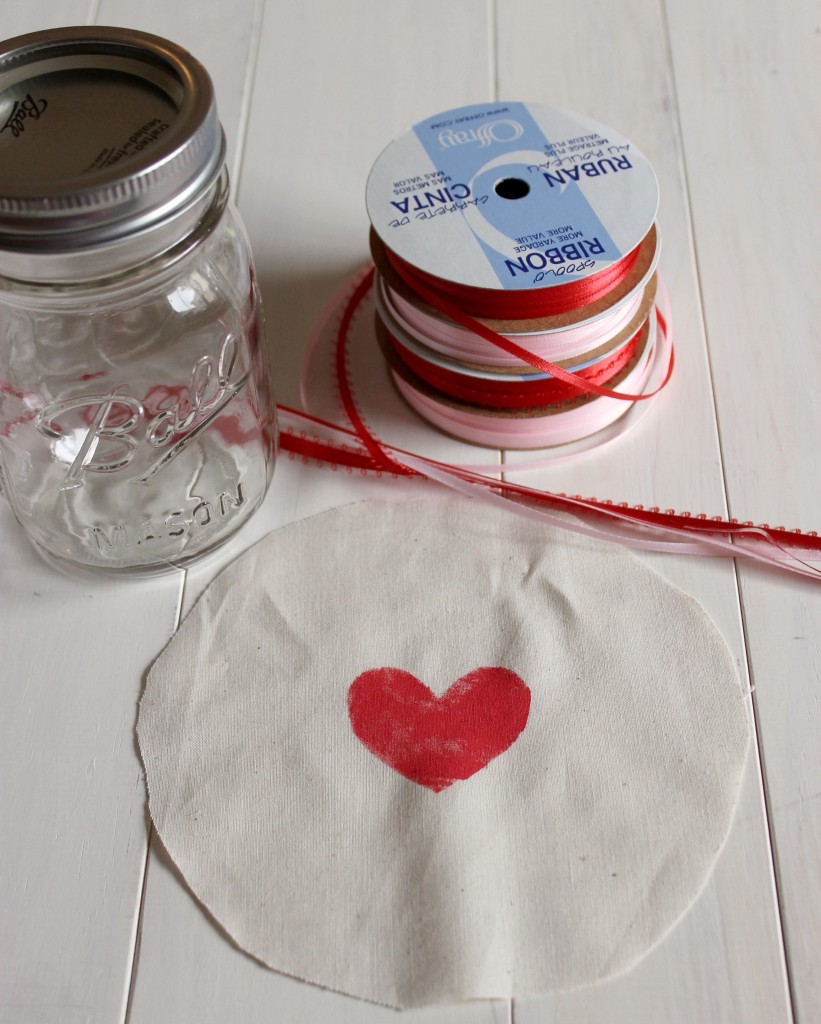
Getting Heart Jars Ready

After thinking about what I could make and write about on the blog for Valentine’s Day, I thought of re-creating the gift jars, except for a Valentine’s day gift.   Mason jars are such a cute way to gift and are usually less than a dollar.  The jars can be filled with whatever store-bought candy or homemade candy you would like to fill them with.  For Christmas I filled them with crock pot candies and peanut brittle.   The crock pot candy was so popular that I decided to fill my jars with them again because it was so simple to make.  I had originally planned to make homemade peanut butter cups for my jars, but had run out of time and calories!

Muslin fabric is one of the cheapest kinds of fabric you can buy.  I bought four yards at Christmas time and used a 50% off coupon so it ended up costing about four dollars!  I will have enough fabric to make gift jars for every holiday for the rest of my life!  As for ribbon, I always stock up on the 50 cent Offray ribbon at the craft stores in all the colors and different sizes.   For 50 cents, you just can’t go wrong!  I love combining different colors and sizes for a texture effect.  Mason jars can be bought at the grocery store, Target or even Amazon for less than a dollar each.

If this project is last minute for you, think about using store-bought Valentine’s Day candies such as conversation hearts, M&M’s, Reese’s, Mini Snickers, and or Hershey’s Kisses.  I also came up with a list of homemade candies that you could gift in these jars if you have more time (lucky!)

From our Blog:

  • Crock Pot Candies
  • Light Caramel Corn
  • Chocolate Oreo Truffles
  • Golden Oreo Truffles
  • Puppy Chow
  • White Trash Party Mix

From Other Blogs:

  • Homemade Peanut Butter Cups from Brown Eyed Baker
  • Valentine’s Day Homemade Gumdrops from Mom on Timeout
  • Peanut Butter Pretzel Truffles from Annie’s Eats
  • Chocolate Chip Cookie Dough Truffles from Inside BruCrew Life
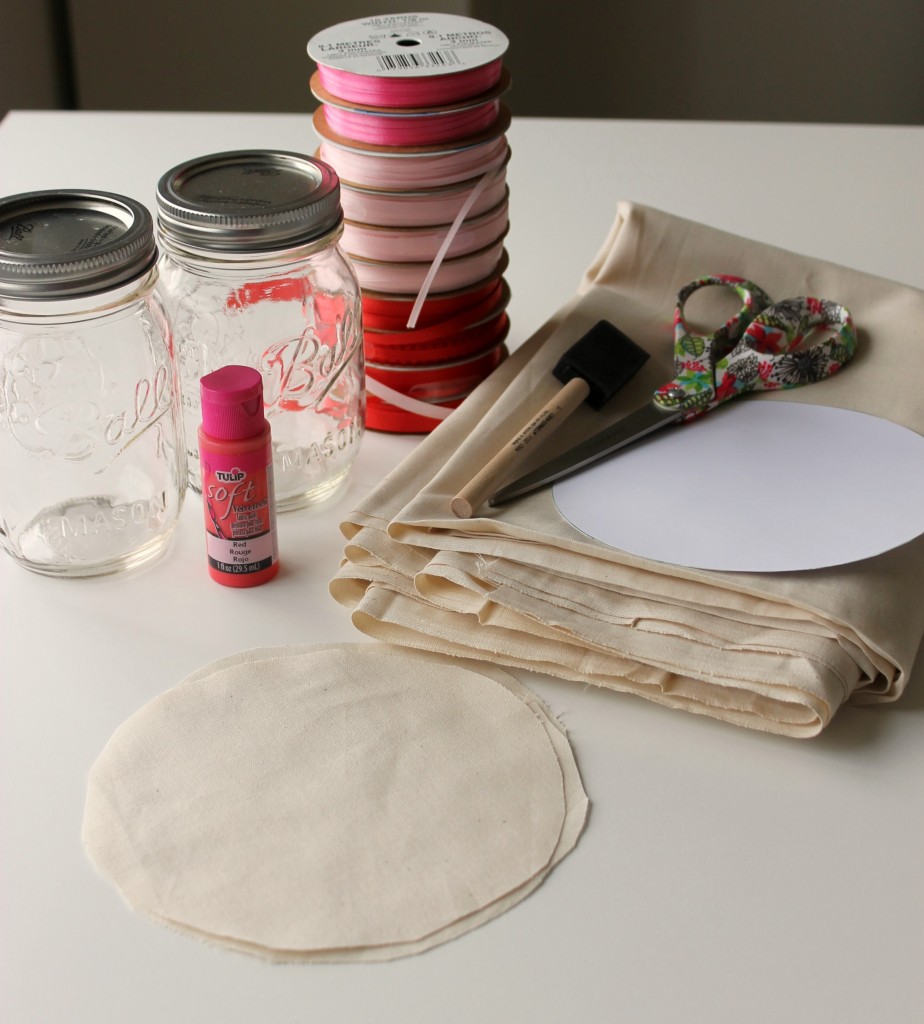
Gift Jar Supplies

Materials:

  • Muslin Fabric
  • Fabric Scissors
  • Fabric Paint
  • Foam Brush
  • Heart Stencil (or card stock paper with a heart cut out of it)
  • Rubber Band
  • Colored Ribbons
  • Mason Jars, cleaned and dried
  • Tags

Stenciling Heart

Cut muslin fabric in a 6-inch circle. Stencil the middle of fabric with heart by dabbing fabric paint with a foam brush.  Make sure to put scrap paper underneath because some paint might bleed through.
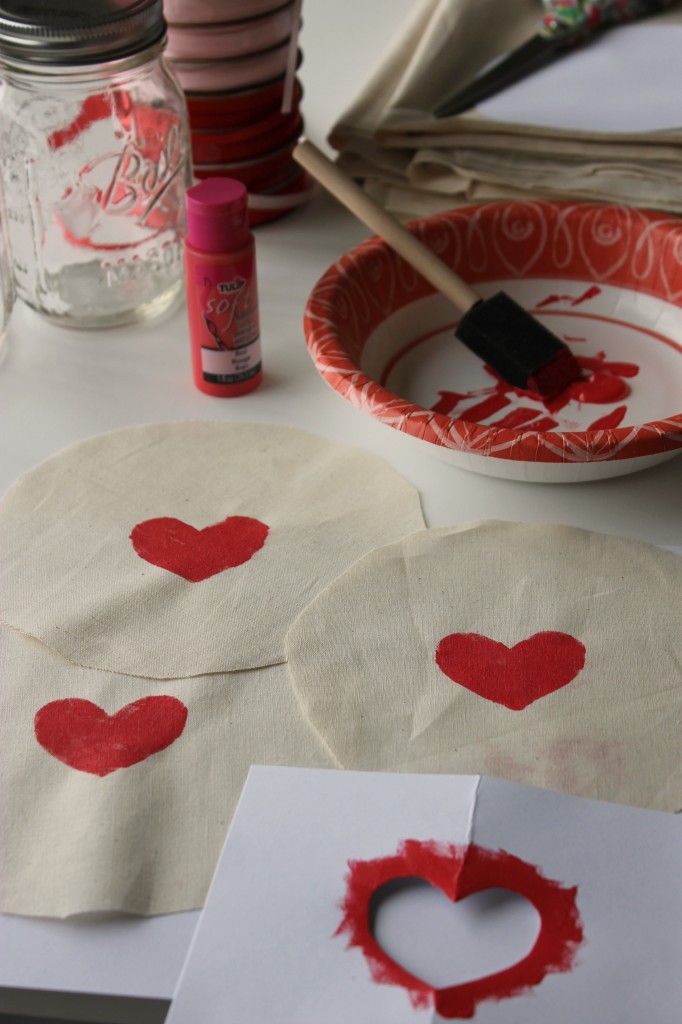
Stenciled Fabric

Let the fabric dry.

Fill Jar with Candy

Fill your jars with candy and close with lids.
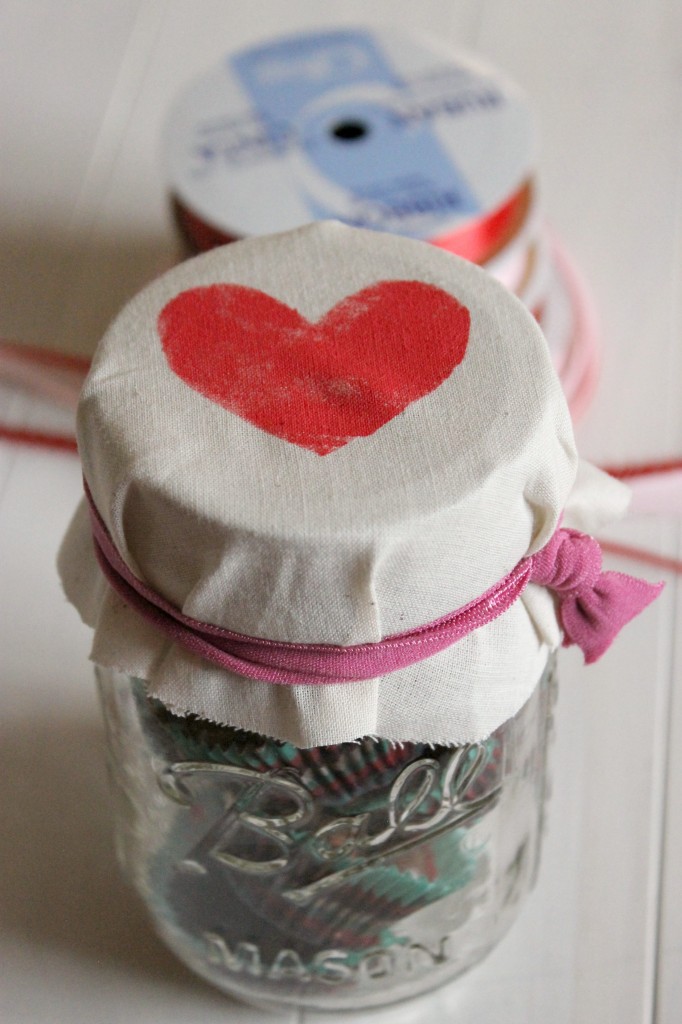
Rubberband around Jar

  Take the fabric circle on the top of the lid and place rubber band to hold it in place around the lid.
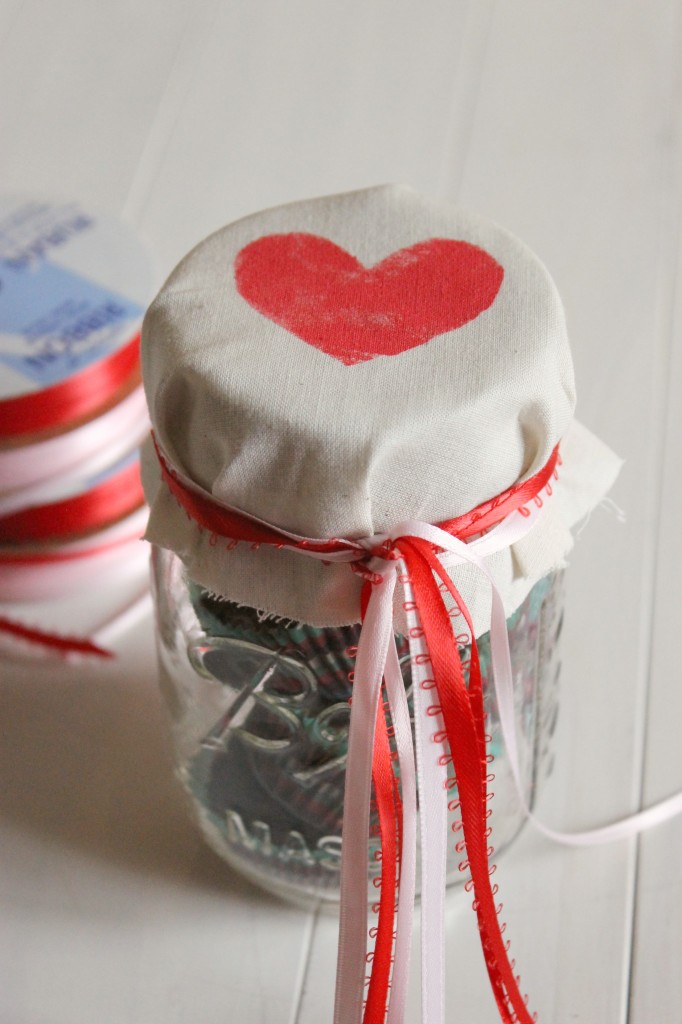
Tie Ribbon on Jar

 Cut about 2 feet of each ribbon color you intend to use.   Double knot the ribbon on top of the rubber band and then carefully pull the rubber band out from below so that ribbon remains holding the fabric over lid.

Finished Gift Jars for Valentine's Day

String tag onto of the ribbons and then tie bow on top. Ta da!  Happy Valentine’s Day!

sisterk (2)


Filed Under: Crafting & DIY, K's post, Party Ideas Tagged With: crockpot candies, gift jars, gift packaging, valentine's day, valentine's day gift idea

Our Top 10 Favorite Posts of 2013

Posted by 2 Sisters 2 Cities on January 2, 2014

I had originally planned to post this on New Year’s Eve, but I was a bit under the weather that day and did not get a chance to finish writing this.  K and I wish all our readers a very happy new year!  -m

Keeping with tradition, we are pulling together a list of our top 10 favorite posts from 2013.  It was a great year for both of us, but we are also looking forwards to the fresh start that the New Year always brings.  Here are each of our top 5 posts:

M’s Favorite Posts of 2013:

1.  Baby’s N’s arrival

 baby n

2. Gender Reveal Cupcakes

gender reveal cupcakes

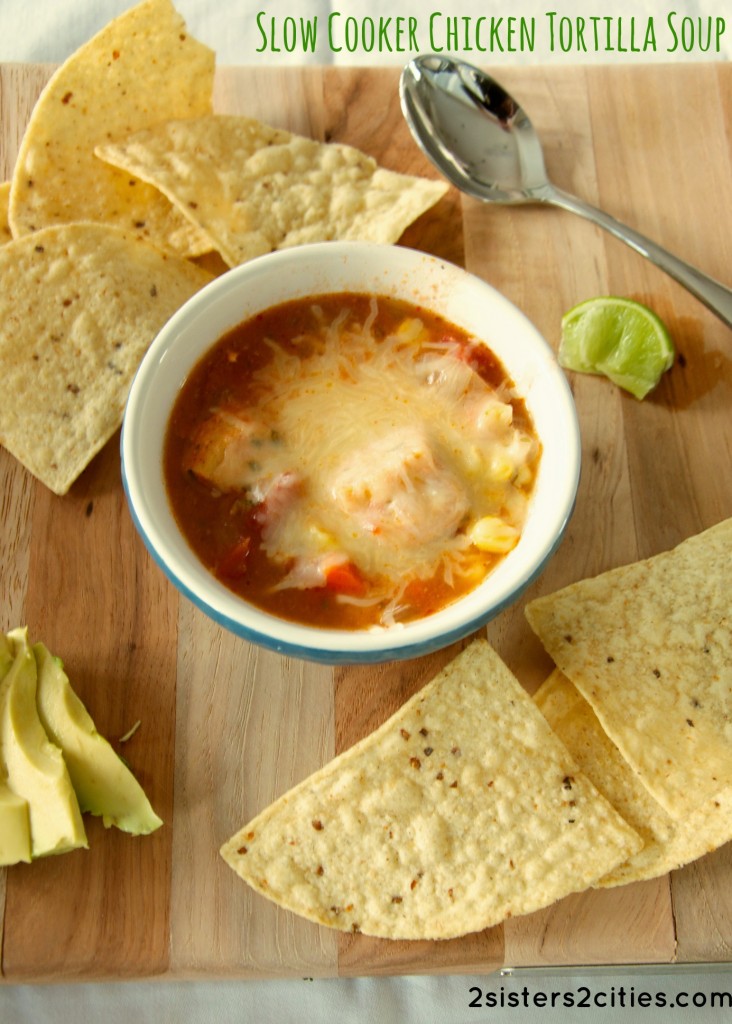
3. Slow-Cooker Chicken Tortilla Soup

slow cooker chicken tortilla soup

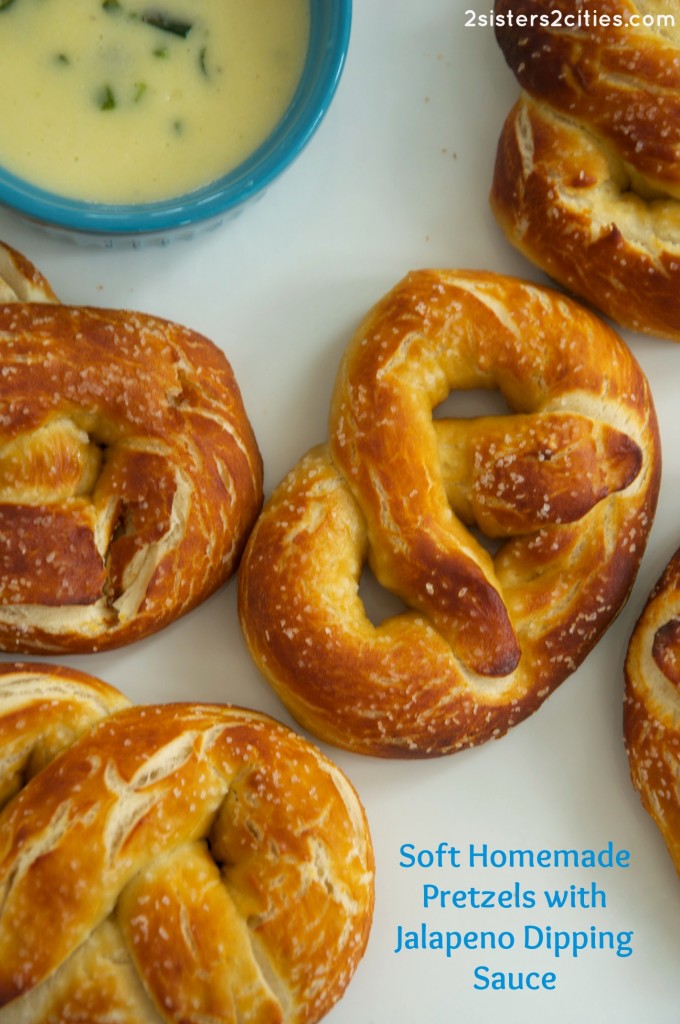
4. Soft Homemade Pretzels with Jalapeño Dipping Sauce

soft homemade pretzels with jalapeno dipping sauce

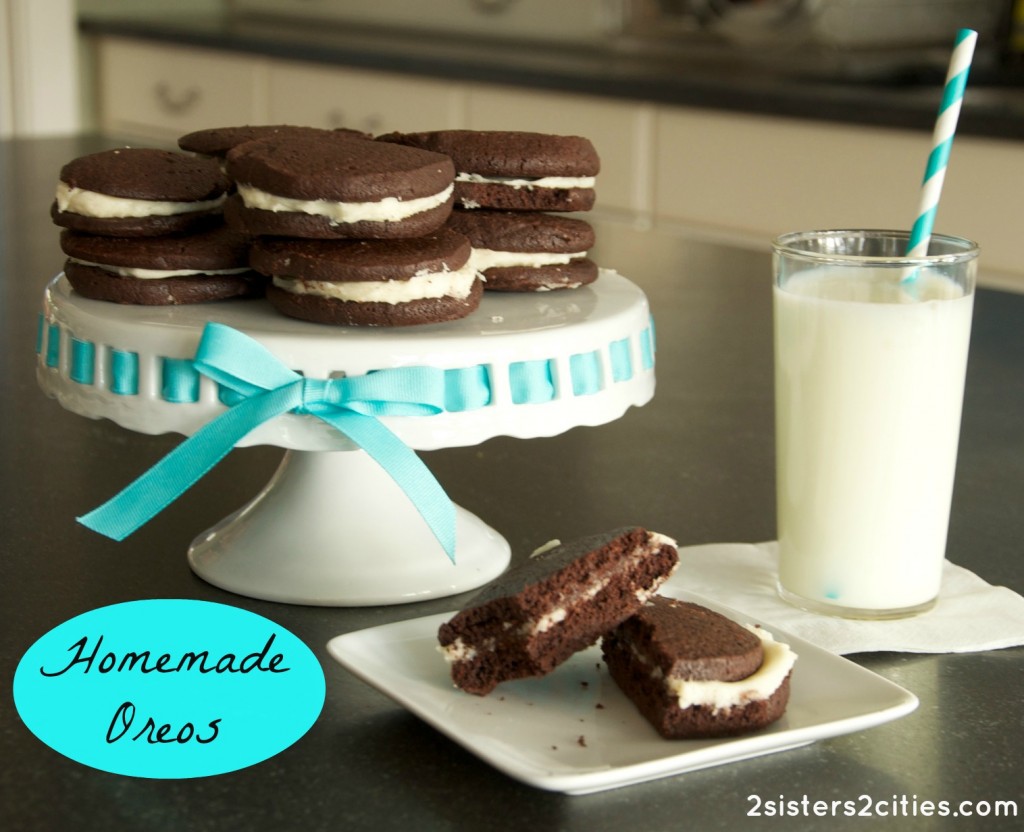
5. Homemade Oreos

Homemade Oreos from 2 Sisters 2 Cities

K’s Favorite Posts of 2013:

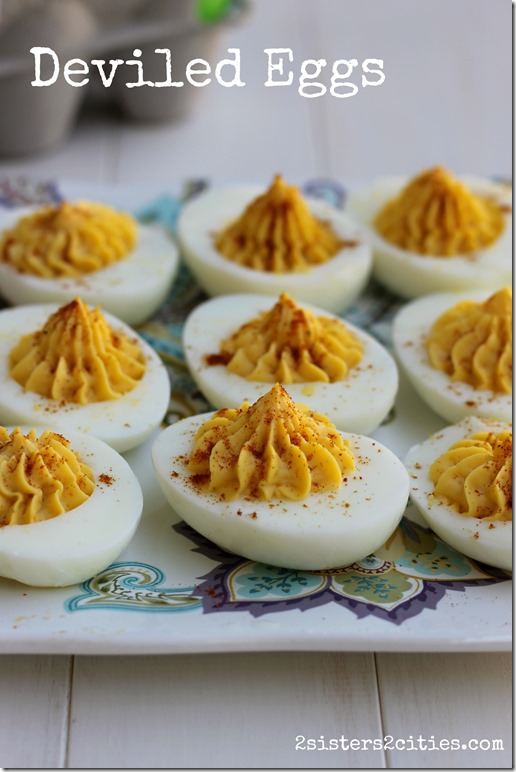
1. Deviled Eggs

Deviled-Eggs_thumb.jpg

2. Cutout Sugar Cookies with Buttercream Frosting

Cutout-Sugar-Cookies-with-Buttercream-Frosting_thumb.jpg

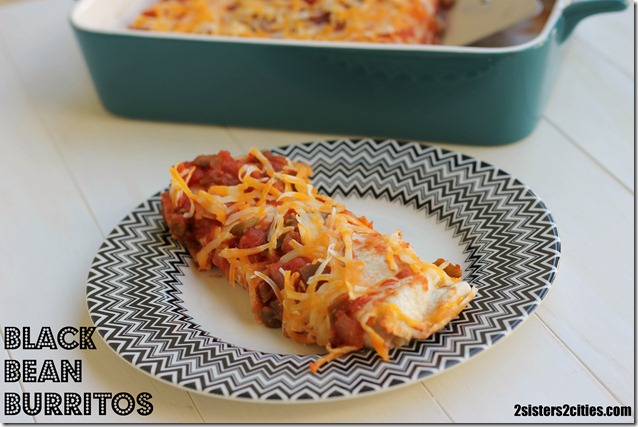
3. Black Bean Burrito Bake

Black-Bean-Burritos_thumb.jpg

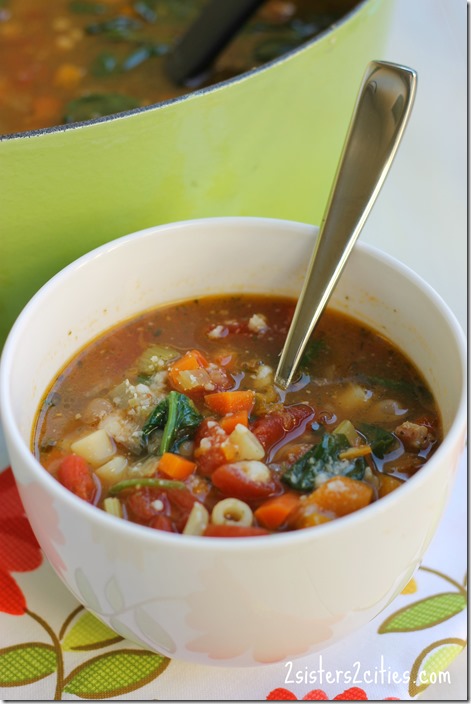
4. Minestrone Soup

Minestrone-Soup_thumb.jpg

5. Caramel Corn (lightened-up)

Lighter-Version-of-Caramel-Corn_thumb.jpg

Thanks to all the 2S2C readers for helping us have such a great year!  Stay tuned for some exciting changes around here in 2014, as well as many more of our favorite recipes and projects.  Happy New Year!

K&M


Filed Under: K's post, M's post Tagged With: 2013, favorite posts, New Year's Eve, round-up, Top 10

Grandma’s Sweet Refrigerator Rolls

Posted by Keelin Hollenbeck on November 25, 2013

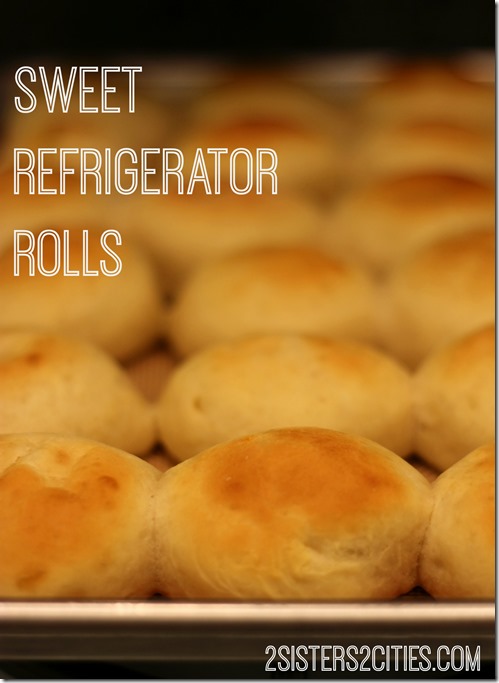
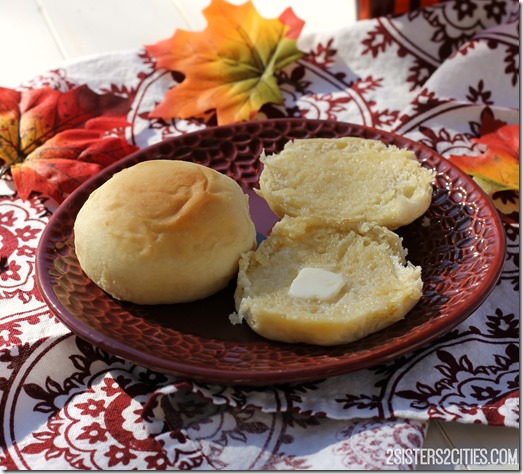
Sweet Refrigerator Rolls

What is Thanksgiving without homemade rolls?  This recipe is from our family cookbook that my aunt put together for everyone many, many years ago.  We are actually on our second edition and I use both cookbooks in my kitchen all of the time.  It’s great to have all my favorite family recipes in one place.  This recipe for sweet rolls is really special to me and M, it is our Grandma’s recipe for rolls that she made for Thanksgiving each year. We lost our grandma a few years ago, but we still have her recipes and family tradition that lives on.

These rolls not only have a place in our heart, but they are really tasty!  Their sweet taste goes perfectly with a small amount of butter and of course a thanksgiving dinner.   Make these rolls for your holiday meal this year!

These rolls can be frozen or the dough can be made the day before and then rolled and baked an hour before dinner (if you have extra oven space.)  I made these rolls over the weekend and froze them for my work Thanksgiving lunch Friday.  We are all about making things ahead here around here!  In the past when I was only cooking for four people, I cut the recipe in half and it turned out great.

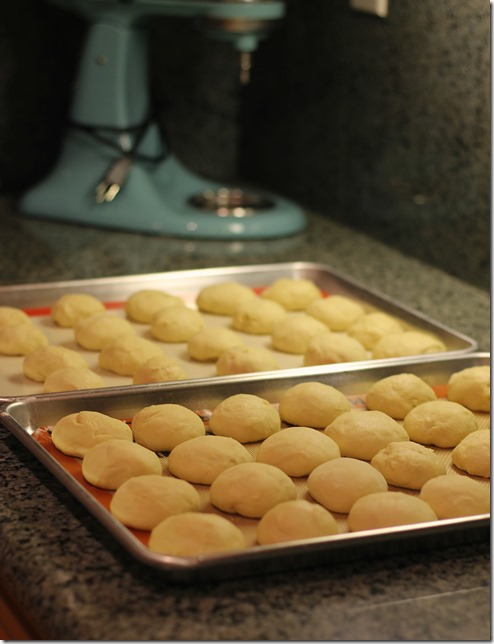
Homemade Rolls Rising

The rolls rising for 30 minutes before baking (plus my mixer in the background, isn’t she so pretty?)

Sweet Rolls

Mmmm rolls…..

Print
Grandma's Sweet Refrigerator Rolls
Author: 2 Sisters 2 Cities
Serves: 30-36 rolls
 
Ingredients
  • ¾ cup butter
  • 1 cup boiling water
  • ⅓ cup sugar
  • 4½ tsp. active dry yeast
  • 1 cup luke warm water
  • 2 eggs
  • ⅓ cup sugar
  • 6 cups flour
  • 2 tsp. salt
Instructions
  1. Combine butter and 1 cup of boiling water. Stir until butter is melted.
  2. In the bowl of your mixer with paddle attachment add ⅓ cup of sugar, yeast, and 1 cup luke warm water. Combine on low.
  3. Once the butter reaches room temperature, add into yeast mixture and mix until combined.
  4. Add in eggs and another ⅓ cup of sugar, mix well.
  5. Next add in flour and salt. Combine completely.
  6. Cover bowl with plastic wrap and place in the refrigerator for at least 4 hours or overnight. If leaving overnight, punch the dough down before you go to bed so it doesn’t overflow in your fridge.
  7. One hour before dinner, turn dough out on a floured surface. The dough will be sticky so make sure your hands and surface are well floured.
  8. Preheat the oven to 400 degrees F. Form dough 30-36 rolls evenly sized. Place rolls 1-inch apart on a silicone mat lined baking sheet, you may need 2 baking sheets.
  9. Allow to rise for 30 minutes, then bake for 10-12 minutes. For best results cook each baking sheets one at a time.
  10. Serve immediately or store in an airtight container once cooled. Rolls can be frozen for up to 2 months.
3.2.2124

Source-  Adapted from Grandma H’s original recipe
sisterk (2)


Filed Under: K's Sides, K's post Tagged With: Bread, family recipe, grandma's sweet rolls, rolls, Sweet Refrigerator rolls, Sweet rolls, Thanksgiving, thanksgiving sides

Gilroy Garlic Festival

Posted by Keelin Hollenbeck on August 4, 2013

Gilroy Garlic Festival Logo

Last weekend my boyfriend and I met up with some friends at the Gilroy Garlic Festival.  It was a beautiful sunny day, as it usually is around here, and the perfect day to go to a festival.  The Gilroy Garlic Festival is an annual festival that celebrates garlic and raises money for local fundraisers.  The city of Gilroy is known as the “Garlic Capital of the World,” although it’s not the world largest producer of garlic.  However, I am pretty sure all the garlic that is available in grocery store around here is from Gilroy.

What does a garlic festival consist of?  Well enough garlicky food to make you smell like garlic for the remainder of the night and most likely smell like garlic at work the next day!  Gilroy is only a 45 minute drive south from where we live so I have been wanting to go to this festival since we moved here last October. It was a fun experience and I am so glad we were able to go.

Drive To Gilroy

Fog rolling over the hills on the drive south to Gilroy.

Gilroy Sign

I love the Gilroy City sign with the garlic in the “G”

Gilroy Garlic Festival Flaming Garlic Bulb

A huge flaming garlic bulb meets you as you enter the festival.

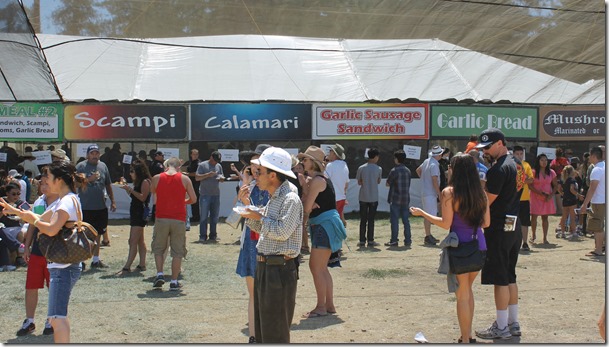
Rows of Food

One of the food rows, the garlic bread was tasty! Three dollars for a bag with 3-4 pieces…sorry no picture of the bread because we ate it so quickly.

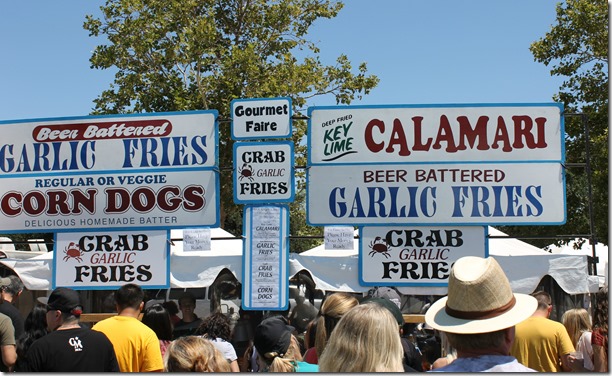
More Garlic Food

More food… love, love, love some garlic fries.

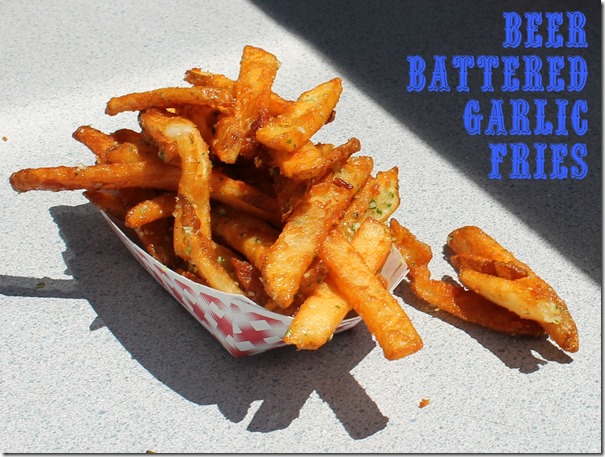
Beer Battered Garlic Fries

What’s better than garlic fries?  Beer Battered Garlic Fries.  ummm yumm

Icey Mimosa

An icey mimosa from the wine tent to cool down

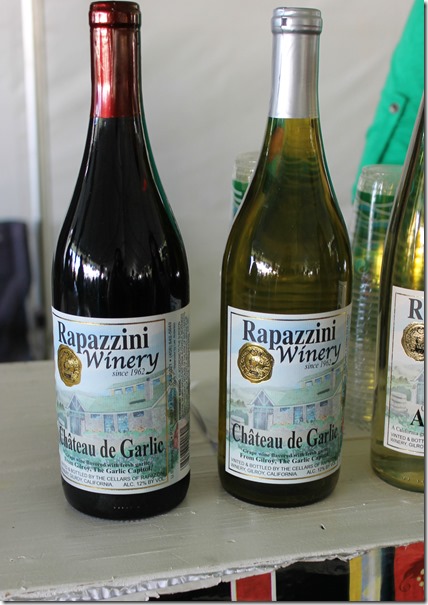
Garlic Wines

Speaking of wine tents, they had garlic wine from a local vineyard that I sampled.  They had a red and a white wine.  It smelled like garlic and then tasted like wine with a garlic after taste.  It was very interesting to try, but I don’t think I could sit down with a whole bottle.

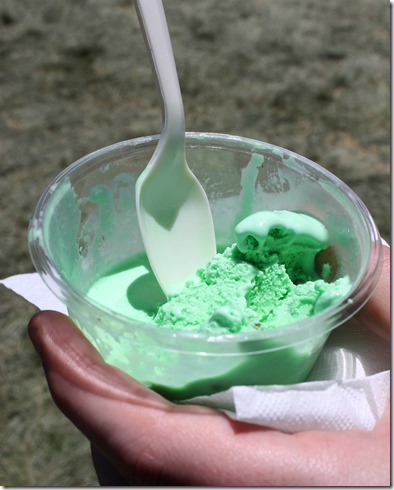
Garlic Ice Cream

Garlic Ice Cream is one of the attractions to the Garlic Festival.  One of the stands give small cones for free, but this stand had different flavors so we decided to try the Garlic Pistachio.

Garlic Pistachio Ice Cream

I am not sure if garlic pistachio ice cream is an award-winning combo, but it certainly was interesting!

Garlic Man

I am not sure what this guys name is but lets call him Garlic Man.   Until next year, Garlic Man!

Sister City

This is the street that part of the festival was on.  I sent a picture to M because I thought the name sounded a little familiar.

2 Sisters 2 Cities Circle

Much better!

sisterk (2)


Filed Under: K's post, Vacation Tagged With: California, festival, garlic, gilroy garlic festival, road trip, Vacation

Fresh Squeezed Lemonade

Posted by Keelin Hollenbeck on July 2, 2013

Fresh Squeezed Lemonade

Although I love a chilled glass of rosé in the summer and the occasional icy cocktail, sometimes I love a glass of freshly squeezed lemonade.  My favorite summer drink is to mix lemonade with iced tea and make what I call a half ‘n half, but it is also known as an Arnold Palmer.

When I was in high school, I worked at the New York State Fair for the two weeks it ran every year in Syracuse.  It was a great way to make extra cash to buy my back‐to‐school clothes.  I worked for a fried dough place that also owned lemonade stands.  The lemonade stands were in the shape of a lemon sliced in half and then propped open.   I would always work in the lemon which was fun because I got to people‐watch and drink lemonades.   The occasional fried dough also helped.  Whenever I drink fresh lemonades, it reminds me of when I worked in the lemon.

The recipe for lemonade is pretty basic; lemon juice, sugar, water and ice.  In this recipe I use super fine sugar because it dissolves easier than regular granulated sugar.  This sugar is found in most grocery stores.  If you can’t find it you can use regular sugar…you may just have to stir it a little longer.   I give a range for the amount of sugar because it is based on personal preference.  My lemons were very tart so I used the full 3/4 cups of sugar.    I used my hand lemon squeezer which works very well for juicing.   This recipe can be halved or double based on your crowd size.

Serve a pitcher this week at your Fourth of July party with a pitcher of ice tea!  You could also use this recipe to make Arnold Palmer popsicles or basil lemonade.

Glass of Fresh Lemonade

Print
Fresh Squeezed Lemonade
Author: 2 Sisters 2 Cities
 
Ingredients
  • 1 cup of lemon juice, from 4-5 lemons
  • ½-3/4 cup of super fine sugar
  • 4 cups cold water
  • 1 cup ice
  • lemon slices, for garnish
Instructions
  1. In a large pitcher add all ingredients and stir vigorously until all the sugar is dissolved. Serve with additional ice if needed.
3.2.1753

Source- Adapted from Ina Garten’s The Barefoot Contessa Cookbook

Lemonade

sisterk (2)


Filed Under: K's post, K's Recipes, Party Ideas Tagged With: arnold palmer, fourth of july menu ideas, fourth of july party, fourth of july recipes, fresh lemonade, fresh squeezed lemonade, lemonade, lemons, non-alcoholic drinks, summer drinks, summer recipes

Samoa Truffles

Posted by Keelin Hollenbeck on May 31, 2013

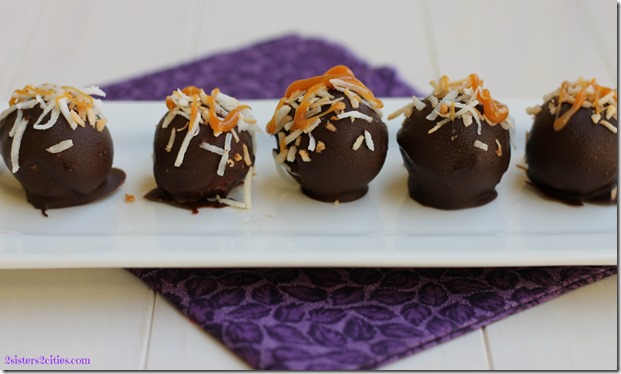
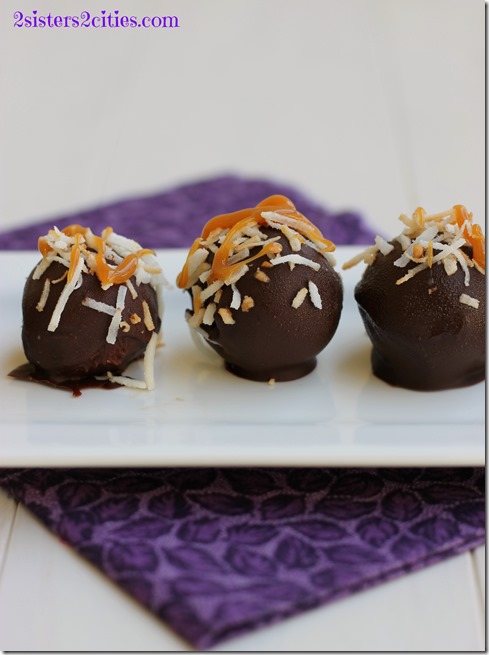
Samoa Truffles with Toasted Coconut and Caramel

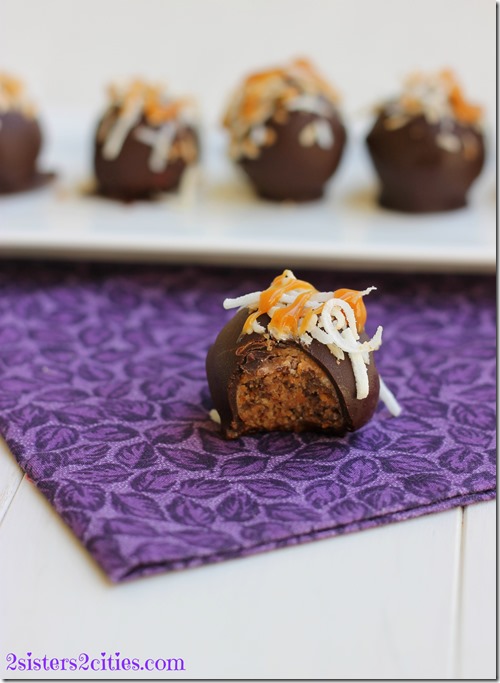
Did you know that you can make truffles with just about any type of cookie or brownie?  It blew my mind when I discovered all the different type of truffles out there.  My boyfriend was as shocked as me and then immediately made me make Samoa truffles.

Samoa Truffles

These cookies would be perfect if you froze your Girl Scout Samoas for a rainy day. I don’t really know many people that can do that- we certainly can’t save Samoas around here.  They are way too delicious and we love cookies far more than the “average Joe.”  So instead, we bought Keebler’s Coconut Dreams which are practically the same thing.  I am pretty sure they are the same thing- they just don’t have the nostalgia of Girl Scout Cookies.  Anyways for the purpose of this recipe, they are perfect because we are going to pulverize them into dust (okay, more like crumbs but I was going for the dramatic statement here.)  The crumbs are then mixed with cream cheese, rolled into balls,  partially froze and then dipped in melted chocolate.  You could end it there but then I topped them with toasted coconut and drizzled them with caramel.  Oh yeah, that’s how we do it around here.  Go big or go home!

Also as a side note, I keep truffles in the freezer and then bring them out before serving.  That’s why my truffles have a little condensation on them!

Bite of Samoa Truffle

Print
Samoa Truffles
Author: 2 Sisters 2 Cities
Serves: 24
 
Ingredients
  • 1 box of Samoas or Keebler’s Coconut Dream
  • 2 oz. cream cheese , at room temperature
  • 8 oz. bittersweet or semisweet chocolate, melted
  • ¼ cup sweetened coconut,
  • 2-3 caramel pieces
  • half and half or milk (caramel sauce)
Instructions
  1. In the bowl of a food processor, grind the cookies into a crumb consistency. In a medium bowl mix together the crumbs and the cream cheese at room temperature. Stir them until they are combined into a dough like consistency.
  2. Roll the dough into balls. Mine was a little smaller than a ping pong ball. Place on a wax paper covered baking sheet and freeze for 30 minutes.
  3. While the balls are freezing, place shredded coconut in a non-stick frying pan over medium heat. Stir until lightly browned and toasted. Watch the coconut carefully because it will burn easily.
  4. Melt the chocolate in a medium-sized heat proof bowl in the microwave in 30 second intervals. Stirring in between until completely melted.
  5. Once the dough balls are in the freezer for 30 minutes dip them in the melted chocolate. Place on a waxed paper covered baking sheet and sprinkle with toasted coconut. Repeat for remaining dough balls.
  6. Place tray back in the freezer for chocolate to harden.
  7. Take a few pieces of caramel candy chews in a small bowl with a few drops of half and half or milk. Microwave in 5-10 second intervals to melt, stirring in-between. Watch the caramel carefully because it will start to burn very easy (I burned my first batch.) With a spoon drizzle the caramel in zig-zags on top of the toasted coconut that is stuck on the chocolate coating. Let cool an enjoy!
3.2.1753

Source- Adapted from Cookies and Cups

Samoa Cookie Truffles

sisterk (2)


Filed Under: K's Desserts, K's post Tagged With: easy dessert, Girl scout cookies, samoa cookies, samoa truffles, truffles

The Classic Margarita

Posted by Keelin Hollenbeck on April 30, 2013

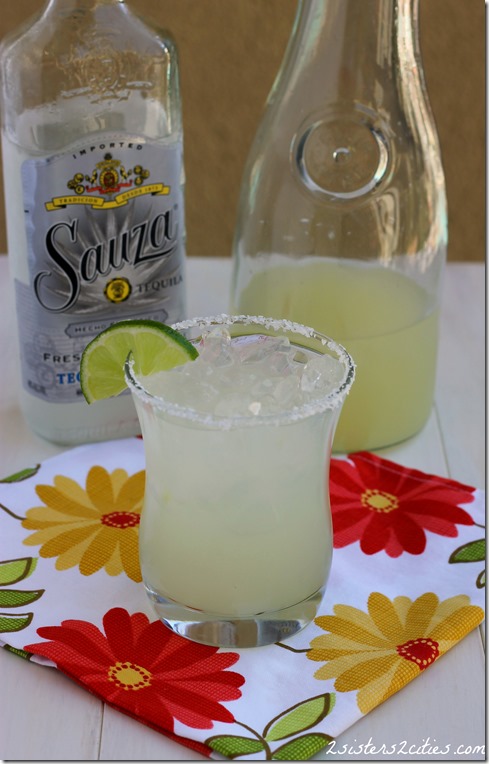
Classic Margaritas

You all know how much I love themed-blogging!  I made all sorts of Mexican food this weekend to share with you this week to help plan your Cinco De Mayo celebrations for this upcoming weekend.  Or, if you are like me and love all Mexican foods all the time, there will be plenty of new recipes for you to try anytime.

I am going to start this fiesta off right with my favorite margarita recipe.  I made this for a group of friends at a bachelorette party I was at last year and for my family last Memorial Day weekend.  It was a hit both times.

Pitchers of Margs

As I have mentioned before, I am not a huge liquor drinker  Until last year I didn’t have to much experience with drinking margaritas.  In search of the perfect after-work happy hour place with two of my co-workers in NY,  we found a restaurant close by that served amazing margarita for five dollars during happy hour.  You are probably thinking that’s a rip-off, but in NYC that is a steal for a drink that is served in a glass cup.  Sad, but true! Anyways, I fell in love with margaritas and especially love them served with freshly made tortilla chips salsa and guac.  Needless to say, we frequented this place a lot and always had a good time.

Making your margaritas at home is always the best because you can control the amount of liquor you want in it and you can put extra salt on the rim!   This recipe makes four drinks so feel free to double or halve it as needed.   Serve with a salt-rimmed glass and ice!

Lime Margaritas

Print
The Classic Margarita
Author: 2 Sisters 2 Cities
Serves: 4
 
Ingredients
  • ½ cup sugar
  • 1 cup water
  • 1 cup fresh squeezed lime juice (about 8-12 limes)
  • ¾ cup (6 oz) silver tequila
  • ½ cup (4 oz) orange liqueur
  • lime wedges/slices for garnish (optional)
  • kosher salt for rim of glass (optional)
Instructions
  1. In a sauce pan, heat up water and sugar until sugar is completely dissolved. Place simple syrup in a jar or pitcher and let cool.
  2. Using a juicer or citrus press squeeze 8-12 limes until you have 1 cup of lime juice. For easier juicing bring the limes to room temperature and roll the lime back and forth with the palm of your hand against a hard flat surface (like counter-top) and apply pressure to the lime as you roll.
  3. Add lime juice to cooled sugar water. Stir in tequila and orange liquor.
  4. To prepare the glass rub a lime wedge on the edge of glass to add a small amount of moisture. Place some kosher salt on a plate and turn glasses rim in the salt until covered, add in ice and pour in the margarita! Enjoy!
3.2.1753

Source- adapted from Confections of a Foodie Bride

Margaritas

sisterk (2)


Filed Under: K's post, K's Recipes, Party Ideas, Vacation Tagged With: cinco de mayo, classic margarita, drinks, fresh limes, fun cocktails, limes, margaritas, mexican, mexican food, party drinks, summer cocktail recipe, tequila

Chicago-Style Deep-Dish Pizza

Posted by Keelin Hollenbeck on April 28, 2013

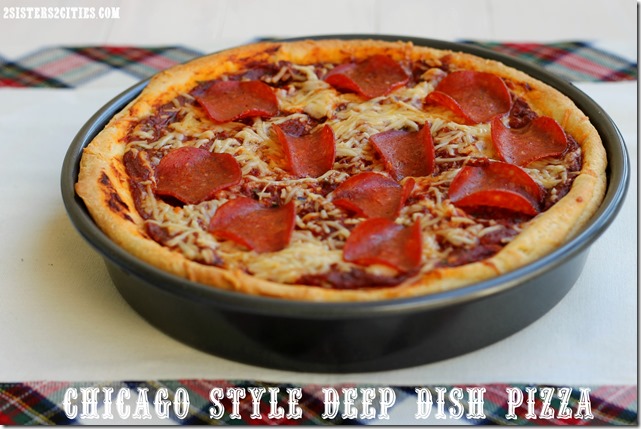
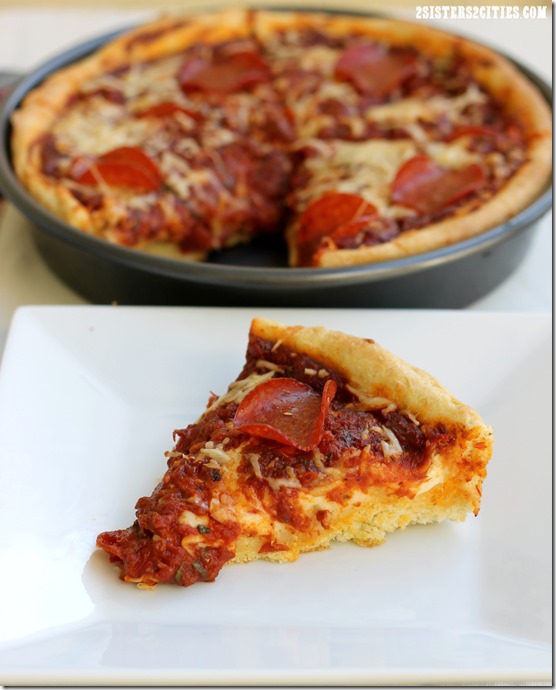
Chicago Style Deep Dish Pizza

Last weekend, my family and I went to Chicago for our cousin’s wedding.   It was a great trip for several reasons.  First, I got to see my family for the first time since Christmas and my extended family since Fourth of July weekend.   Secondly, both my boyfriend and I had never been to Chicago before so it was all new to us.

My boyfriend and I had a better time of getting to Chicago than the rest of our family.  The majority of my family’s flights out of Syracuse got canceled because of flooding in Chicago (which oddly enough didn’t affect me coming from California.)  My two sisters (Our very own M and little M), my brother-in-law, and my nephew (plus soon-to-be nephew) were locked down in Boston because of the search for the Marathon Bomber suspect #2.  One second, I was so excited to see my family and the next my mom called to tell me no one except me, my boyfriend, and my sister C were going to make it to the wedding.  Of course this was right before take-off so for the whole four and a half hour flight, my boyfriend had to console a very sad and disappointed K.   Upon landing, the texts started to come in that everyone scrambled to get new flights and would be coming staggered throughout the weekend, but would all be there for the wedding.

Excited and hungry we got off our non-dramatic SFO-to-Chicago flight and cabbed it into the city.  We quickly checked into the hotel, dropped off our stuff and were on our way to find some Chicago-style grub.   It was windy and cold mixed with a little snow/hail as we walked to find Al’s Deli,  which in my mind is how I imagined Chicago all my life.   Our hotel was in the middle of everything so it was only about a 10-15 minute walk.

Our cousin had listed some places to visit for food in Chicago on her wedding site and Al’s Beef for a “hot dog dragged through the garden”  was one.  As we were ordering, we ordered an Italian Beef Sandwich with hot peppers and I then asked for a “hot dog dragged thru the garden.”  The girl looked at me strange and said “I don’t know what you are talking about,  dragged thru the garden?”  I then explained that I didn’t know what it meant, but my cousin said I had to get it.   The check-out girl went to go ask her manager and he responded with “yeah, that means everything.”  Rest assured, I got my hot dog “dragged thru the garden”  or as I will now just call it “everything.”  We split both and liked them,  but were especially impressed with the hot dog.

Right across the way from Al’s Deli is Portillos.  This place wasn’t on our list, but it looked pretty hopping.  After checking it out on our iPhones, we realized it was also pretty famous for their hot dogs and Italian beef as well.   We decided we had enough room to split another hot dog so we proceeded to do so.  Also very delicious,  and we both sort of liked it more then our first!  Sorry Al!

As we headed back to hotel, we saw all the places for Chicago-style pizza like the original Pizzeria Uno’s.   I promised Matt that we would try some the next day because there was no way I was going to eat more before the rehearsal dinner that night.   The next day, my sister C, my mom, and I got our hair done at this awesome Blow Dry Bar called Blow-By Blow, highly recommended if you are ever in the area.   I also think I found my new love for Blow Out Bars,  mimosas and getting my hair shampooed and styled…ummm, yes please!    My boyfriend and dad went out to get more hot dogs and to possibly try to get a pizza to bring back to the hotel.   The pizza places all had a 45 minute wait for pizzas because that is how long they take to make.   They ended up not having enough time to wait so they brought back more hot dogs for all.   We never did have time for the Chicago-Style Deep-Dish pizza.

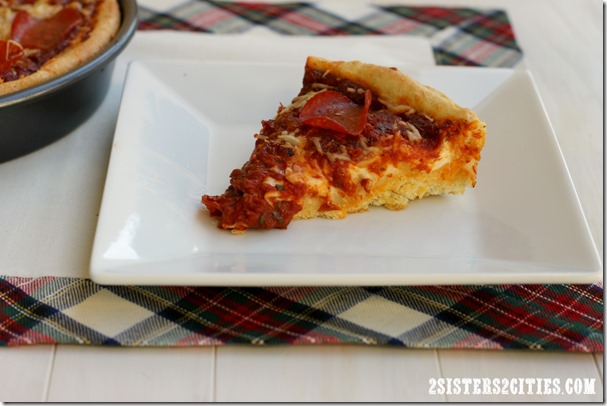
The week we got back, I decided to surprise my boyfriend by making a deep dish pizza since we never did get any.    It was surprisingly easy to make and so tasty!   I had one piece and I was so full!   I put turkey pepperoni on ours because that is what we had in the fridge- that’s why its sort of curling up, but you can top with whatever you like.

Slice of Deep Dish Pizza

Print
Chicago-Style Deep-Dish Pizza
Author: 2 Sisters 2 Cities
 
Ingredients
Dough:
  • 1 ½ cup plus 2 tbsp. all-purpose flour (in-between 8.1-8.2 oz. on scale)
  • ¼ cup yellow cornmeal (Not corn starch M!)
  • ¾ tsp. salt
  • 1 tsp. sugar
  • 1⅛ tsp. instant yeast
  • ½ cups plus 2 tbsp. water, at room temperature (5 oz.)
  • 1½ tbsp. unsalted butter, melted
  • 1 tsp. olive oil
  • 2 tbsp. unsalted butter, softened
Sauce:
  • 1 tbsp. unsalted butter
  • 2 tbsp. grated onion,
  • ⅛ tsp. dried oregano
  • ½ tsp. salt
  • 3 cloves garlic, minced
  • 1 14.5 oz. can crushed tomatoes
  • ⅛ tsp. sugar
  • 2 tbsp. fresh basil, coarsely chopped
  • 1½ tsp. extra-virgin olive oil
  • Additional Salt and fresh ground pepper, to taste
Assembly:
  • 2 tbsp. olive oil
  • 2 cups shredded mozzarella cheese
  • 3 tbsp. shredded Parmesan cheese
  • Sliced pepperoni (optional)
Instructions
Dough:
  1. Combine flour, cornmeal, salt, and yeast into the bowl of your mixer. With dough hook attachment mix on low speed for about 1 minutes until all ingredients are combined.
  2. Slowly add in water and melted butter and continue to mix on low speed for about 1-2 minutes. Make sure to scrape down the sides to get all ingredients incorporated.
  3. Increase the speed of the mixer to medium and knead the dough for about 4-5 minutes. The dough should become smooth and glossy.
  4. Take a large bowl and add in 1 tsp. olive oil. Using your hands coat the oil on the bowl and add the dough ball to the bowl. Cover the bowl tightly with plastic wrap and place at room temperature in an area without drafts, for about 1 hour.
  5. To laminate the dough, turn the dough out onto a dry work surface. Form dough into an 8- by 6-inch rectangle. Using a spatula or butter knife spread the 2 tbsp. of softened butter evenly on the dough leaving about a ½ inch of un-buttered dough around the edges. Stating at the 6-inch side, roll the dough tightly into a cylinder shape, pinching the ends together. Place the seam side down and flatten the dough into 9- by 2-inch rectangular. Fold dough into thirds, folding up the bottom side and then folding the top side over. Pinch the seams to form a ball. Place the dough ball back in the oiled bowl, cover with plastic wrap and place in the refrigerator. Let set for 40-50 minutes, or until doubled in size.
Sauce:
  1. This can be done while the dough is rising. Melt 1 tbsp. of butter to a medium-sized sauce pan over medium heat. Add in onions, oregano, and salt. Stirring occasionally, cook onions until golden brown, about 4-5 minutes. Add in garlic and cook for about 30 seconds. You should be able to smell garlic. Stir in the tomatoes and sugar and increase the the heat to about medium high. Bring the sauce to a simmer, lower heat to medium-low and keep at simmer for about 25 minutes. The sauce should thicken and reduce to about 1¼ cup. Take the sauce off heat and stir in basil and 1½ tsp. olive oil. Set aside.
Assembly:
  1. Preheat oven to 425 degrees.
  2. Coat a 9-inch cake pan with 2 tbsp. of olive oil. Take dough out on to a dry clean work surface and roll into a 13- inch wide circle. Place the dough in the cake pan and lightly press into the corners and up the sides so that it just reaches the top edge of the pan.
  3. Add the mozzarella cheese to the surface of the dough. Top with the tomato sauce and spread with a rubber spatula so it covers all of the cheese. Sprinkle with Parmesan cheese and then add desired toppings.
  4. Bake for 20-30 minutes until crust in golden brown. Let rest for at least 10 before cutting and serving. Enjoy!
3.2.1753

Source- adapted from Annie’s Eats, originally from Cook’s Illustrated

Deep Dish Pizza

sisterk (2)


Filed Under: K's Entrees, K's post, Vacation Tagged With: chicago, chicago-style deep dish pizza, chicago-style pizza, deep-dish pizza, family reunion, homemade pizza, pepperoni pizza, pizza dough, pizza recipe, travel, Vacation, weddings

New Culinary Collection from Lean Cuisine

Posted by 2 Sisters 2 Cities on February 6, 2013

One thing that I have never been able to get in the habit of is packing my lunch for work the night before.  I have tried and tried to get ahead of things by getting the coffee pot ready and packing my lunch, but as far as I get is occasionally setting up the coffee pot.  And that’s not even with a timer because setting that darn clock would be too much work.

This isn’t anything new-  I have been fighting this battle since I started making my lunches in middle school.  But now, time is at a premium more than ever because I have to catch my train pretty early each day.  When I pack my lunch in the morning, I usually allocate myself about four minutes.  If I don’t have leftovers from the previous night’s dinner, my go-to lunch is a Lean Cuisine.   I pack them with a snack bag of veggies (carrots,  bell pepper slices, snow peas, or cucumber slices), a few pieces of fruit for snacking throughout the day, a granola bar, and a cheese stick.  I have healthy snacks every couple of hours so I am not ravished when it’s time for lunch or dinner.   Lean Cuisine is constantly coming out with new delicious meals to satisfy whatever you are craving.  Need more convincing? How about the money you will save from not going out for lunch everyday!


Lean Cuisine has paired up with some really great chefs to create the Culinary Collection.  This collection of entrees includes Spinach Artichoke  Ravioli, Asparagus Ravioli, Ranchero Braised Beef, Chile Lime Chicken, Mushroom Mezzaluna Ravioli, Chicken Makhani, Chicken & Vegetables, Chicken in Peanut Sauce, Chicken Carbonara, Glazed Chicken, Steak Tips Portobello, Chicken with Basil Cream Sauce, Chicken Pecan, Thai-Style Chicken, Chicken Marsala, Lemon Chicken, and Orange Chicken.

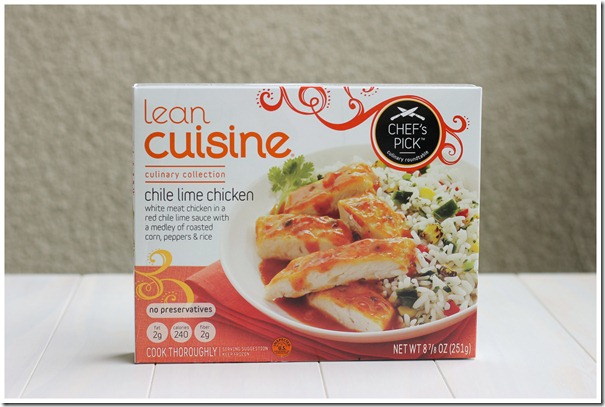
Chile Lime Chicken- Lean Cuisine Box

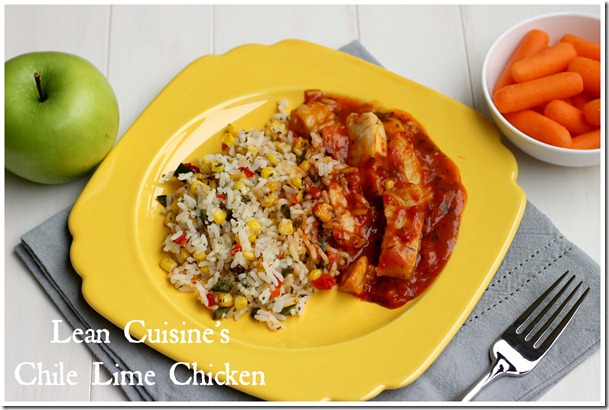
I picked out two from this selection-  it was so hard to get down to two!  I made the Chili Lime Chicken Lean Cuisine.  It was juicy tender white chicken breast in a chili lime sauce with a side of rice, corn, and roasted peppers on the side.

  Lean Cuisine's Chile Lime Chicken

I mixed each bite of chicken with some sauce and the rice mixture.  It was very enjoyable.

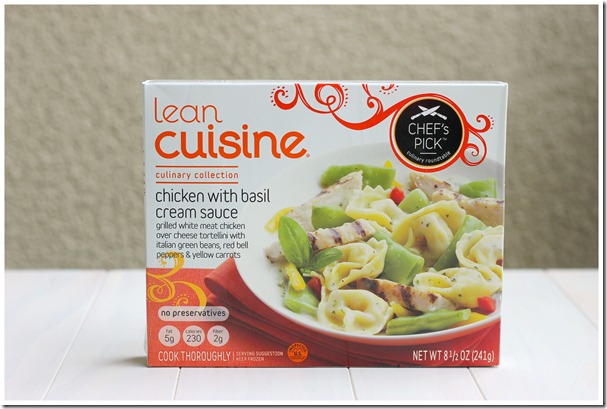
Chicken with Basil Cream Sauce- Lean Cuisine Box

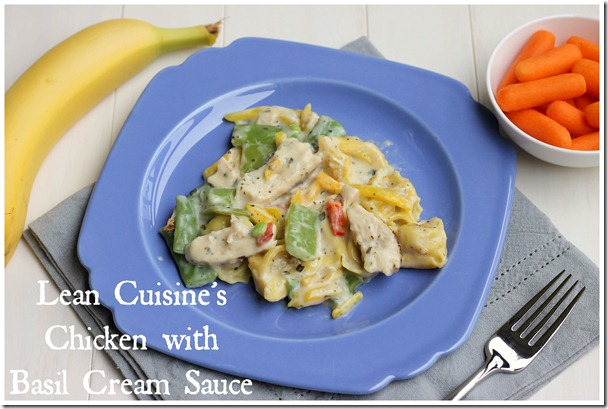
Then my boyfriend had the Chicken with Creamy Basil Sauce, which was also awesome. This entrée consisted of cheese tortellini with tender white chicken breast, bright-colored vegetables, and a delicious creamy sauce.

Lean-Cuisines-Chicken-wtih-Basil-Cream-Sauce_thumb.jpg

We paired these meals with a piece of fruit and some veggies.  The best part of our meal was that it was only 6 PointsPlus for those of you who are Weight Watchers followers.  Lean Cuisine posts the point value on the side of most of their product which makes shopping and point-counting that much easier.  Also, another great thing about Lean Cuisine is that they post all their nutrition facts on their website if you want to find out if any particular meals fit into whatever type of diet you are on.

Do you pack a lunch for work or school?  What are your usual go-to options?

sisterk (2)

I have partnered with Lean Cuisine through DailyBuzz Food to help promote their new line of Chef’s Pick products. I have been compensated for my time commitment to work with this product. However, my opinions are entirely my own and I have not been paid to publish positive comments. Thank you Lean Cuisine!


Filed Under: K's post Tagged With: chef's pick, chicken with basil cream sauce, chili lime chicken, culinary collection, lean cuisine, sponsored post

Craft Closet Organization Project

Posted by 2 Sisters 2 Cities on January 28, 2013

My boyfriend and I live in a 2-bedroom apartment and those of you who live in small apartments know that storage is at a premium.  We are lucky enough to have an extra bedroom to help out with storage.   The only problem with having a second bedroom is that it does become basically that- another storage room.

We were having trouble with putting the room together after the move and up until the other week, it had been filled with boxes of things we hadn’t unpacked yet and random furniture we hadn’t been able to find a place for.   We finally came up with a plan for the room and it  started to come together.  Once again, our second bedroom became the guest bedroom –slash- office-slash- craft room.   The only problem is that because the room fills all of those functions, I need a different type of storage for my crafts so that I can I take out what I need when I need it.

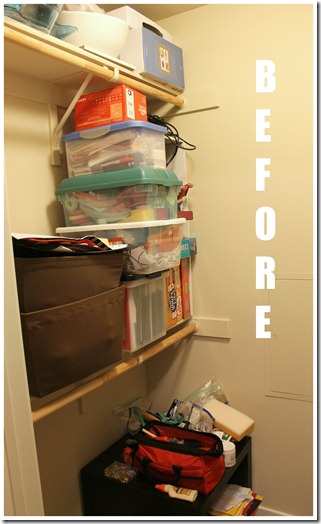
This is what the craft closet looked like before:

Extra Closet Before Project

Total chaos.  It was so hard to fine anything, which is not really conducive to creativity.

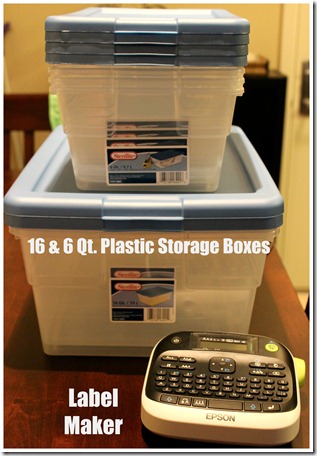
Storage Project

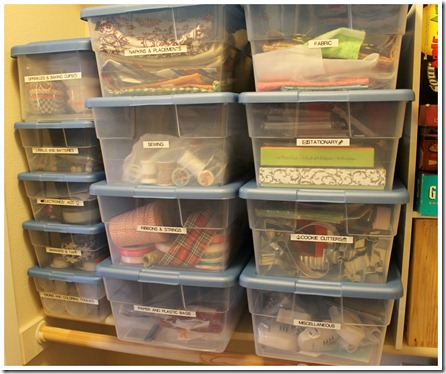
So what do you need?   I bought a bunch of 16 and 6-quart Sterlite storage boxes from Target (they were the cheapest here: only $2.60 and $1.00 respectively) and a label maker from Amazon.   You don’t really need a label maker to do this project- you can easily print out labels from your computer, cut them out, and put them on the box with clear mailing tape.   Then, organize everything into all its own boxes and create labels.

New Closet Organization

You can box together whatever makes sense for you, but I had a box for: stationary, cookie cutters, fabric,  ribbons and strings, sewing,  paper cutters, paper, sprinkles and baking cups, and labels and markers.

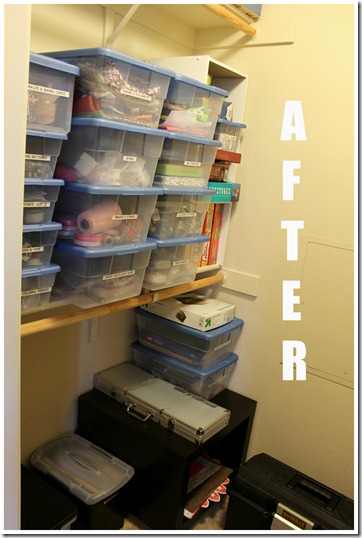
Closet and Craft Organization After

Ta Da!  I love the results- It is so much easier to find everything.  Also, we finally got a tool box to fit both of our tools we have collected over the years.  There are two file boxes on the floor for both of our files.  I left them out in the open like that so we can put away important paperwork more easily and stay ahead of the piles of paper that build up so easily.

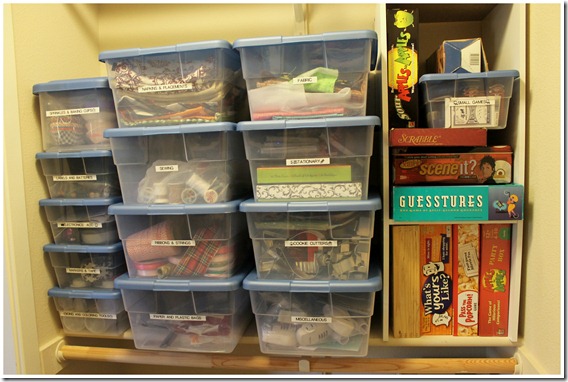
Closet Organization for Crafts

The games pretty much stayed the same, but I put the small games in a box together and it made them look neater.

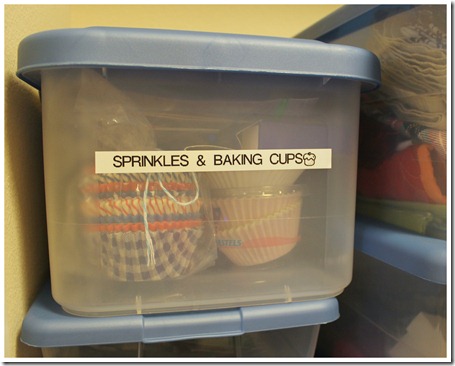
My Favorite Label

This is my favorite storage label because I figured out how to use the icon on my label maker!  A cupcake icon for the baking cups and sprinkles.  Mmmm …makes me both happy and hungry for a cupcake!  Yay for organization!!!

What projects have you been working on in the New Year?

sisterk (2)

Related Posts Plugin for WordPress, Blogger...


Filed Under: K's post, Organizing Tagged With: closet organization, craft closet, craft closet organization, craft room, DIY projects, getting organized, label maker, new year's resolutions, organizing, second bedroom storage, target

  • 1
  • 2
  • 3
  • …
  • 5
  • Next Page »

Recent Posts

  • Easy Holiday Office Party Tips
  • 5 Steps to an Easy Football Party
  • Gingerbread Biscotti
  • Holiday Coffee Bar and Thanksgiving Recipes
  • Soft Sugar Pumpkin Cookies
  • Cinnamon Sugar Apple Cake
  • Hello Pumpkin Season!
  • Make Your Own Milkshake Party!
  • Mama’s Pickles
  • S’more Cookies

Categories

  • About 2 Sisters 2 Cities (7)
  • Books (8)
  • Crafting & DIY (22)
  • Design & Decorating (15)
  • Gardening (5)
  • Giveaway (14)
  • Guest Bloggers (8)
  • K's post (46)
  • K's Recipes (191)
    • K's Desserts (75)
    • K's Entrees (23)
    • K's Sides (24)
  • M's post (72)
  • M's recipes (167)
    • M's Entrees (21)
    • M's Sides (14)
    • M's Desserts (30)
  • Organizing (7)
  • Party Ideas (49)
  • Uncategorized (1)
  • Vacation (12)
Stitch Fix

Archives

Blogroll

  • Annie's Eats
  • Bake at 350
  • Baked Bree
  • Boston Harbor Beacon
  • Confections of a Foodie Bride
  • Cook Like a Champion
  • Erin’s Food Files
  • Forever and a Recipe
  • Framed Cooks
  • Oh Happy Day
  • On Common Ground
  • Pennies on a Platter
  • Pink Parsley
  • Recipe Girl
  • Sally's Baking Addiction
  • Simply Scratch
  • The Curvy Carrot
  • The Pioneer Woman
  • Tidy Mom
  • Two Peas & Their Pod
  • What’s Gaby Cooking
  • Young House Love
Increase your website traffic with Attracta.com

grab a 2 sisters button!


Copyright © 2014 ~ 2 Sisters 2 Cities | Blog Design by Minx Design