2 Sisters 2 Cities

Image Map
  • About 2 Sisters 2 Cities
  • Recipe Index
  • Project Index
  • Contact Us
  • Like us on Facebook
  • Follow m on twitter
  • Follow k on twitter
  • Follow 2S2C on Pinterest
  • Follow 2S2C on G+
  • rss
  • e-mail 2S2C

Soft Heart Sugar Cookies with Buttercream Frosting

Posted by Keelin Hollenbeck on February 14, 2014

Valentine's Day Soft Sugar Cookies

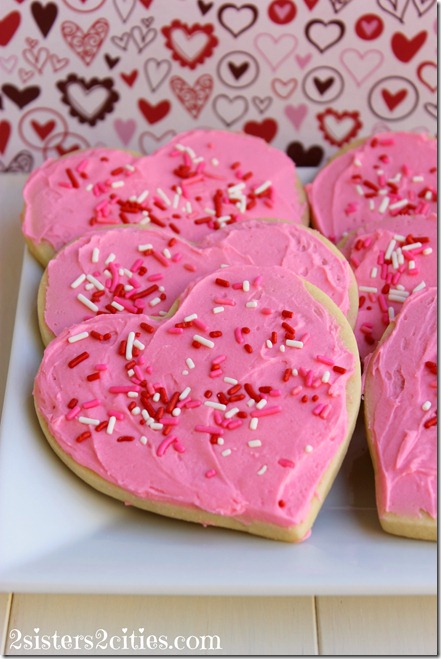
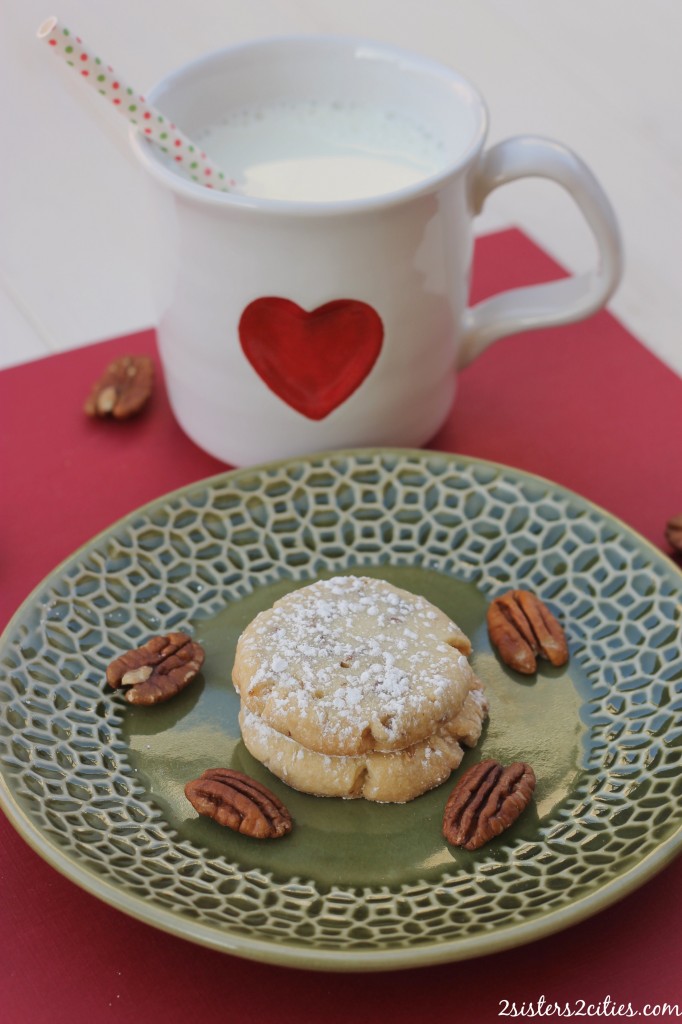
The most popular type of dessert in this house is by far cookies. It seems we have tried every type of chocolate chip cookie and frosted sugar cookie there is. I am always saving the latest and greatest recipes I find. While I was thinking about what I was going to make for Valentine’s Day, I knew that a soft fluffy cut-out sugar cookie with buttercream frosting was in order. Last years cutout sugar cookies with buttercream frosting were such a hit that I thought soft heart cookies would be worth a try. I made soft sugar cookies with buttercream frosting a couple years ago for a bake sale and they were heavenly. My mom made them for Christmas this year and between my boyfriend and I we ate at least half the batch! These heart shaped soft sugars are right up there with the my other two favorite recipes!

Cut Out Soft Sugar Cookies with Buttercream Frosting
I divided the original recipe in half because it made 6 dozen cookies. Since there is only the two of us in my house and we are both on Weight Watchers, we really did not need 6 dozen cookies!

Soft Cut Out Sugar Cookies

After decorating these cookies with pink frosting and Valentine’s Day sprinkles, I realized how similar these looked to last year’s cookies! I should have tried to make red or purple frosting, but oh well! They were delicious anyways.

Heart Cut Out Cookies
Happy Valentine’s Day!

Print
Soft Heart Sugar Cookies with Buttercream Frosting
 
Ingredients
For Cookies:
  • 3 cups of All Purpose Flour
  • ½ tsp. baking soda
  • ½ tsp. baking powder
  • ¼ tsp. salt
  • ½ cup unsalted butter (1 stick), at room temperature
  • 1 cup granulated sugar
  • 2 small eggs or 1 and ½ large eggs
  • 1 tsp. vanilla extract
  • ¾ cup sour cream or light sour cream
For Frosting:
  • ½ cup unsalted butter (1 stick), at room temperature
  • ½ tsp. vanilla extract
  • 2 cups confectioners' sugar
  • Smidgen of salt
  • 3 tbsp. heavy cream
  • food coloring, optional
  • sprinkles, optional
Instructions
For Cookies:
  1. In the bowl of your stand mixer, mix the butter and sugar together until light and fluffy. Add in egg and mix until combined. Add in vanilla extract and sour cream and stir until everything is incorporated.
  2. In a separate medium-sized bowl, whisk together the flour, baking soda, baking powder, and salt.
  3. Slowly mix dry ingredients into the butter mixture, with your mixer on low and making sure to scrape down the sides. Once all combined, divide dough into two. The dough will be sticky so you may want to lightly oil or flour your hands to prevent sticking. Place each dough half on a piece of plastic wrap and flatten to about 1 ½ inches thickness. Wrap completely, repeat for second half, and chill both halves for at least 2 hours.
  4. Preheat oven to 425 degrees. Line two baking sheets with parchment paper or silicone baking mats.
  5. Flour countertops and roll out the first dough slab to about a ¼th inch thickness. You may need to flour the top of a dough a little too if it gets too sticky. Lightly flour your cookie cutter and cut out your shapes, place each cookie on prepared baking sheet and leave about 2 inches between each cookie. Repeat until you use up all the dough. This recipe should make about 3 dozen but that all depends on the size of your cookie cutter (mine was about a 3 inch heart.)
  6. Bake for 7-8 minutes until cookies start to turn golden on the edges. Using a spatula, gently move your cookies over to a cooling rack.
For Frosting:
  1. Cream together butter and vanilla extract in the bowl of you stand mixer set at a low speed. Slowly add confectioners’ sugar and a smidgen of salt (half a pinch) until smooth. Add in heavy cream a tablespoon at a time and continue to beat on medium for 1-2 minutes until the frosting has a light and fluffy consistency. Add your desired food coloring and mix in.
For Assembly:
  1. Once the cookies are cool, frost them with 1-2 tsp. of frosting with a offset spatula or a butter knife. If desired, add sprinkles to frosting right after before it begins to set. Enjoy!
3.2.2265

Source- Adapted from Two Peas and Their Pod
sisterk (2)

Follow my blog with Bloglovin


Filed Under: K's Desserts, K's Recipes Tagged With: cookie recipe, cookies, cutout sugar cookies, soft sugar cookies, sugar cookies, sugar cookies with buttercream frosting, valentine's day

Valentine’s Day Round-Up

Posted by Meaghan Barry on February 7, 2014

It’s officially one week until Valentine’s Day and I have got some serious planning to do!  I have yet to make a single treat or card and our V’day menu remains a blank sheet of paper.  I figured a Valentine’s Day round-up was in order to spark some serious inspiration!

Cutout Sugar Cookies with Buttercream Frosting

These heart-shaped Cutout Sugar Cookies with Buttercream Frosting have recently been our most popular post and for good reason!  They are amazingly delicious cutout cookies without all the fuss that royal icing requires.

Valentine's Day M&M Cookies {from 2 Sisters 2 Cities}

I also love these these M&M cookies.  While I made them for the first time last year for Valentine’s Day, I made them throughout the year with various colored M&Ms.

Golden-Oreo-Truffles

These Golden Oreo Truffles are only 5 ingredients and are perfectly easy to make for your sweetheart!

chocolate_covered_strawberries

It’s also a great time of year to make Chocolate-Covered Strawberries (or pretzels or bananas!)

3 Layer Brownies- chocolate chip cookies, Oreos, and brownies together in one bar!

Or you could package up these amazing Three Layer Brownies to give out as gifts for Valentine’s Day!  The three layers include chocolate chip cookies, Oreos and brownies…wow!

Red-Velvet-Cupcakes-for-Valentines-Day_thumb.jpg

Our Red Velvet Cupcakes were recently selected as part of the Blog Better Boston {hub}LINKS newsletter as part of their “Let’s Talk Love” round-up.  Here were the other blog posts that were selected as part of this week’s theme:

hublinks-featured-blogger-LOVE

  • Looking to buy your sweetie a V-day gift? Mandy’s Money has a guide that covers gifts of various price points.
  • Who doesn’t love wedding photos? Lindsay’s Look takes us back to her wedding, 3 years ago.
  • DIY to your heart’s content with these Valentine’s Day DIYs (that aren’t cheesy) from Design Fixation.
  • Three words: Red. Velvet. Cupcakes. Two Sisters Two Cities has the recipe…and it involves cinnamon cream cheese icing.
  • This Valentine’s Day themed shoot from Stephanie Rita Photography is just too cute!
  • Want kissable lips? Cobbs Hill has the recipe for this two step process.
  • Inspired by grammar school valentines, Glitter Trim cooked up these adorable envelope cookies.
  • Wearing your heart on your sleeve is so last year! Style Tab recommends wearing it on your sunglasses instead.

Happy Valentine’s Day planning!

sister m signature


Filed Under: M's post Tagged With: brownies, cookies, cupcakes, heart, pink, red, round-up, strawberries, valentine's day

1 Roly-Poly Santa Cookies

Posted by Keelin Hollenbeck on December 24, 2013

Roly-Poly Santas

Here we are, our last cookie of the 2013 2 Sisters 2 Cities’ Cookie Countdown!   The last cookie is always the hardest to pick.  Since we photograph the number of cookies that correlate with the day of the countdown (if you haven’t noticed yet), having one cookie in a photo can be boring!   I knew that the last cookie had to be something special so when I saw these Roly-Poly Santa Cookies on Better Homes and Gardens’ website I was sold.  The funny thing is that  M and I both had these cookies on our 2013 cookie brainstorming list.

Roly-Poly Santa

Although these cookies are so cute, they are a little bit more labor-intensive than your average cookie.  I think this would be a great recipe to gift to kids.  I wanted to save one for my nephew T, but I knew they would never last in my luggage on the way home.

Roly-Poly Santas are made up with 11 red and white dough balls, then embellished with mini chocolate chips, red hots, and frosting.   I was worried that my red dye wouldn’t make a true red color.  I always get a bright pink when I try to make red frosting, but I’ve heard this happens to a lot of people.  From my research, I discovered that Americolor’s Super Red soft gel paste does the trick.  I was happy with the red color that my Santa cookies came out in and I did not taste any dye in them.

Print
Roly-Poly Santas
Author: 2 Sisters 2 Cities
Recipe type: cookies
 
Ingredients
For Cookies
  • 1 cup of butter, softened
  • ½ cup of sugar
  • 1 tablespoon of milk
  • 1 teaspoon of vanilla
  • 2¼ cups of all-purpose flour
  • Red paste food coloring
  • Miniature semisweet chocolate pieces
  • 1 recipe of Snow Frosting
  • Red cinnamon candies
White Frosting
  • ¼ cup of shortening
  • ¼ tsp. of vanilla
  • 1 cup plus 2 tbsp. of confectioners' sugar
  • 1½ tsp. of milk
Instructions
For Cookies:
  1. Preheat oven to 325 degrees F.
  2. In the bowl of your mixer, beat butter on medium speed for about 30 seconds. Add sugar to butter and continue to beat until combined.
  3. Beat in milk and vanilla, scraping down sides until all is combined.
  4. Next mix in as much of the flour as you can with the mixer. Stir in any remaining flour by hand. Remove 1 cup of the dough and place in a separate bowl . With the remaining dough, tint red with food coloring gel in mixer.
  5. For each Santa (this should make 10-12 cookies), shape red dough into twelve- 1-inch ball and sixty -1/2-inch balls(one 1-inch red dough ball, and five ½-inch red dough balls per Santa cookie.)
  6. Shape plain dough into twelve- ¾-inch ball and forty-eight- ¼-inch balls (one ¾-inch plain dough ball, and four-1/4 inch plain dough balls)
  7. Line 2 baking sheets with baking mat or parchment paper.
  8. Place the red 1-inch ball on a baking sheet, flattening the dough ball until about ½ inch thick. Attach the plain ¾-inch ball for head, flattening until ½ inch thick.
  9. Next, attach four of the red ½-inch balls for arms and legs and then attach the plain ¼-inch balls for hands and feet. Pinch the remaining ½-inch red ball into a Santa hat and attach to head.
  10. Repeat steps to create the rest of the Santas. Add the mini-chocolate chips as eyes and buttons.
  11. Bake Santa cookies for 12 to 15 minutes until edges are lightly browned.
  12. Let the cookies cool on baking sheet. Be careful because the are extremely fragile. Once cooled, gently move to a wire cooling rack.
  13. To create beard, put frosting in a piping bag with a small star tip (recipe below). Attach the red hot for the nose. Let sit until frosting sets.
For Frosting-
  1. In the bowl of you mixer, beat together shortening and vanilla for around 30 seconds. Gradually mix in around ½ cups of the confectioners' sugar until smooth. Next beat in 1½ tsp. milk. Continue to mix in remaining confectioners' sugar until the consistency for piping.
3.2.2199

Source- Slightly Adapted from BHG.com

sisterk (2)


Filed Under: K's Desserts, K's Recipes Tagged With: 12 cookies of Christmas, Christmas Cookies, cookie recipe, cookies, holiday baking, santa

2 Pecan Sandies

Posted by Keelin Hollenbeck on December 22, 2013

I know M and I have been saying this the whole time, but I cannot believe we are only three days away from Christmas.  All the cookies are made and we are so excited to share the the last two with you.  Today’s cookies are the Pecan Sandies, a delicious butter cookie with a hint of sweetness and a whole lot of pecans!  I actually picked out this recipe last February when I got the Bouchon Bakery cookbook.  When you know you have to make 12 new types of cookies in December, you definitely  need to plan ahead!

Pecan Sandies

This recipe closely resembles my family’s recipes for Mexican Wedding Cakes, the only difference is that these are made with pecans instead of walnuts, and the cookies are pressed down instead of just cooked in ball shape. I wouldn’t refuse either with a cup of tea or coffee…mmmmmmm.

2 Pecan Sandies

Print
2 Pecan Sandies
Author: 2 Sisters 2 Cities
Serves: 24-30
 
Ingredients
  • 1¾ cups plus 2 tsp. all purpose flour
  • ¾ cup coarsely chopped pecans
  • ¾ cup unsalted butter (1½ sticks)
  • ¾ cup plus 2 tbsp. confectioners' sugar, additional for sprinkling finished cookies
Instructions
  1. Preheat oven to 350 degrees F.
  2. In the bowl of your mixer, beat butter for 1-2 minutes until smooth. Add confectioners' sugar and mix together until light and fluffy.
  3. In a separate bowl combine pecans and flour.
  4. Mix dry ingredients into butter until combined, scraping down the side of the bowl to make sure all ingredients are incorporated.
  5. Roll dough into 1 to 1½ inch balls. Place dough balls at least 2 inches away from on a baking sheet lined with a silicone baking mat or parchment paper. Lightly flour the backside of a measuring cup, press dough ball into ½ inch thick disk.I
  6. Bake for 15-20 minutes until cookies are lightly golden on edges, rotating the baking sheet halfway through baking. Let cool on a wire rack and lightly sprinkle with additional confectioners' sugar.
3.2.2199

Source- Slightly adapted from Bouchon Bakery cookbook

sisterk (2)


Filed Under: K's Desserts, K's Recipes Tagged With: 12 days of christmas cookies, Christmas Cookies, cookies, holiday baking, holiday cookies, pecan sandies

4 Oatmeal Chocolate Mint Cookies

Posted by Keelin Hollenbeck on December 18, 2013

Oatmeal Chocolate Mint Cookies

Was that a misprint?  An oatmeal cookie with mint?  No mistake here, these two flavors are a hidden treasure.  San Francisco is know for an ice cream sandwich from IT’s-IT Ice Cream which is vanilla, mint, chocolate, or cappuccino ice cream in between two old-fashioned oatmeal cookies and then dipped in dark chocolate.  We found them at the grocery store recently and have tried both the vanilla and mint sandwiches.  I have to say my favorite is the mint.  The classic oatmeal cookie with the cool refreshing taste of mint ice cream all pulled together with the bitter dark chocolate is something truly to write home about.

IT'S-IT Inspired Cookies

I was inspired to try to make a cookie version of this ice cream sandwich after eating some of Hershey’s Holiday Mint Truffle Kisses.  I searched through my cookbooks for a basic oatmeal cookie recipe and decided to tuck the kiss inside the cookie versus placing on top.  When the cookies came out of the oven, the flavor was almost perfect but missing something.  I had leftover melted chocolate from the chocolate-dipped shortbread cookie recipe so I drizzled some chocolate on top.  With the addition of the chocolate, the cookie instantly tasted just like the ice cream sandwich.

My boyfriend told me that they were best of all the holiday cookies I created, which is a huge feat after our favorite shortbread recipe.  I was a little worried about bringing them into work because of the weird combo, but my co-workers went nuts over them and they were gone quickly.   Take a chance this holiday season and make these cookies before those truffle kisses run out!

4 Oatmeal Chocolate Mint Cookies

Print
4 Oatmeal Chocolate Mint Cookies
Author: 2 Sisters 2 Cities
 
Ingredients
  • 1 cup of unsalted butter (2 sticks), at room temperature
  • 1 cup packed light brown sugar
  • 1 egg
  • 1 tsp. vanilla extract
  • 1 ¾ cup all purpose flour
  • 1 tsp. Cinnamon
  • ½ tsp. salt
  • 2 ½ cups old fashioned oats
  • 30-36 Hershey’s Mint Truffle Kisses, unwrapped
  • ¼ cup Bittersweet chocolate chips
Instructions
  1. In the bowl of you mixer, beat together butter and brown sugar until its fluffy and light yellow in color. Scrape down the sides of the bowl and add in egg and vanilla extract, mix for about 1 minute.
  2. In a separate bowl mix together flour, cinnamon, and salt. Add in oats.
  3. With mixer on low speed add dry ingredients to butter mixture. Mix for about 30 seconds and then finish the rest with a rubber spatula.
  4. Cover bowl with plastic wrap and place in the refrigerator for at least 1 hour or up to 12 hours.
  5. After at least an hour of chilling, preheat oven to 350 degrees
  6. Taking about 2 teaspoon of dough in your hand, flatten into a disk and place a mint kiss in the middle. Fold sides up around the kiss and top with an additional teaspoon of dough so that the kiss is completely sealed in the dough ball. Place on a baking sheet lined with a silicone baking mat or parchment paper, leaving at least 2 inches between each cookie.
  7. Bake for 14-16 minutes or until set. Let cool on baking sheet a couple of minutes before moving to a wire cooling rack.
  8. Once cookies have cooled top with chocolate drizzle.
  9. For Drizzle- In a small heat proof bowl, add chocolate chips. Microwave in 20 second intervals, stirring in between until melted. To drizzle, take a spoon of melted chocolate, tip the spoon to get a small stream of chocolate going and move back and forth over the cookies so you get zig zags over the cookies.
3.2.2199

Have you been following our entire 2013 Cookie Countdown?  Catch up below if you have missed any!

5 Sprinkle Cookies
6 Chocolate-Dipped Shortbread Cutouts
7 Chocolate Hazelnut Coins
8 Italian Lemon Drops
9 Chocolate Toffee Crackers
10 Cranberry Pistachio Shortbread Cookies
11 Christmas Snickerdoodles
12 Chocolate Raspberry Thumbprints

sisterk (2)


Filed Under: K's Desserts, K's Recipes Tagged With: 12 days of christmas cookies, baby shower brunch, chocolate, cookie recipe, cookies, holiday baking, it's it, mint, oatmeal, san francisco

6 Chocolate-Dipped Shortbread Cutouts

Posted by Keelin Hollenbeck on December 14, 2013

Chocolate Dipped Shortbread Cutouts

On the sixth day of Christmas cookies my true love gave to me… 6 chocolate-dipped shortbread cutouts!   Aww, thanks!  I love love this recipe for shortbread.  It is one of my favorite cookies.  I feel like I say that a lot, but what can I say, I love me some cookies.  My boyfriend and I make them year-round in different shapes based on the season.  He will make the dough and put it in the refrigerator, and do the dishes, and then I will roll it out, cut them out, bake them and dip them in chocolate.   When I am feeling festive, I add sprinkles!  I love the longer “jimmie” sprinkles rather than the nonpareil sprinkles.

Chocolate Dipped Shortbread Cutouts

I happened to only have the later when I was making these cookies so I ran out the grocery store to get some  more.  I later discovered that I also had no confectioners’ sugar left to make my next cookie!  Don’t you hate when that happens!  I had every type of sugar – granulated, light brown, dark brown, and even superfine!  I had to change my next cookie recipe up because I was not about to go back to the store.  Sprinkles and chocolate are optional and if this recipe looks familiar to you, it’s just a variation of the recipe I use for linzer cookies.

Chocolate Dipped Shortbread Cookies

These cookies are great to come home to after a long day of last-minute shopping.  Not to toot my own horn, but I don’t have any last minute shopping to do because I bought everything on-line last week…Toot TOOT!  I do have some serious baking to do this weekend though!
Chocolate Dipped Shortbread Cutouts
Print
6 Chocolate Dipped Shortbread Cutouts
 
Ingredients
  • 1½ cups of Butter (3 sticks), at room temperature
  • 1 cup granulated sugar
  • 1 teaspoon vanilla extract
  • 3½ cups AP flour
  • ¼ teaspoon salt
  • 2 cups bittersweet or semi-sweet chocolate chips
  • 1 cup sprinkles (optional)
Instructions
  1. In the bowl of a mixer, add in butter and sugar and mix until combined (using the paddle attachment.) Mix in vanilla extract.
  2. In a separate bowl whisk together flour and salt.
  3. With mixer on low, add the dry ingredients into the butter and mix until combined.
  4. Take dough out on to a floured surface and form into a disk. Wrap in plastic wrap and place in the refrigerator for 30 minutes.
  5. Preheat oven to 350 degrees F.
  6. On a floured surface, roll out dough with a rolling pin to ¼-1/2 inch thickness.
  7. Using a 3 inch cookie cutter, cut out shapes and place them on a silicone baking mat or parchment paper lined baking sheet. Space cookies at least 2 inches away from one another.
  8. Bake for 15-20 minutes until cookies start to brown on edges.
  9. To melt chocolate-- In a microwave safe bowl place chocolate chips. On a 50% power setting on the microwave heat the chocolate for 1-1½ minutes. Stir chocolate then continue to heat until melted in 20 seconds intervals until completely smooth or melted.
  10. Dip cookies in melted chocolate, using a off-set spatula to scrape the chocolate off the bottom of the cookie. Lie on parchment paper. Add sprinkles immediately before chocolate starts to dried. Repeat for all cookies. Let dry before repacking cookies. Eat within three days or freeze.
  11. *I would recommend higher quality chocolate chips for this process because although I am a huge fan of Nestle chips and Costco chips in cookies, they have added more wax in their chips in the last few years and they do not melt as smoothly. I used Ghiradelli Bittersweet Chocolate chips and they melted perfectly. For smoother chocolate you can even used baking bars of chocolate which have even less wax in them resulting in smoother chocolate.
3.2.2199
sisterk (2)


Filed Under: K's Desserts, K's Recipes Tagged With: 12 days of christmas cookies, chocolate, chocolate dipped cookies, christmas cookie, cookie recipe, cookies, holiday baking, shortbread, sprinkles

8 Italian Lemon Drops

Posted by Keelin Hollenbeck on December 11, 2013

Italian Lemon Drops

As I have told you all before, I have a crazy food memory in which I can practically remember everything I have eaten at most events in my life.   Can I remember a phone number or where my keys are…uhhh nope!  It’s funny how selective memories can be, but I guess it shows my love for all things food.

Where were we?  Oh right, when I think of Christmas as a child, all the cookies my mom made around the holiday time come to mind.  I can remember the peanut brittle, the chocolate crinkles, the peanut butter cup blossoms, the Mexican wedding cakes, the cut-out cookies, the buckeyes and endless more.  As I grew up and learned how to bake, I started taking on more baking around the holidays and emulated the same tradition my mom had in my own place.  The whole Christmas cookie process of planning, sharing, giving and of course, eating has become quiet an obsession of mine and really how our 12 Days of Christmas Cookies started here at 2s2c.

Italian Lemon Drops

I have shared most of the above recipes that I remember growing up with, but there was one cookie missing that I couldn’t put my finger on.  I kept remembering a round puffy lemon cookie with lemon glaze.   It was driving me crazy that I couldn’t find the recipe in any of my family cookbooks.  When I asked my mom, she remembered where it was from: a school fundraiser cookbook she had bought over 30 years ago.  Alas, here is how we came to cookie number eight on this year’s countdown- the Italian Lemon Drop cookie (i.e. the Lemon Anginetti.)  I have updated some of the ingredients to more modern ones since the original recipe included melted Crisco and 3 tablespoons of lemon extract!

Print
Italian Lemon Drops
Author: 2 Sisters 2 Cities
 
Ingredients
Cookie-
  • ½ cup unsalted butter, melted
  • Zest from one lemon
  • ¾ cup sugar
  • 2 eggs
  • pinch of salt
  • 3½ cups all-purpose flour
  • 7 tsp baking powder
  • ⅔ cup whole milk
  • 2 tsp. lemon extract
  • ½ tsp. vanilla extract
Glaze-
  • 1 lemon, juiced
  • 1-1 ½ cups confectioners’ sugar
Instructions
  1. Preheat oven to 350 degrees F.
  2. In the bowl of your mixer add sugar and lemon zest. Mix for 1-2 minutes to infuse the sugar with the lemon flavor.
  3. Add melted butter to lemon sugar and combine. Mix in eggs and salt.
  4. In a separate bowl sift together flour and baking powder.
  5. In measuring cup mix together milk, lemon extract and vanilla extract.
  6. Mix in ⅓ of flour mixture to butter followed by ⅓ of milk mixture. Repeat process ending with milk and stirring until all ingredients are combined.
  7. Line baking sheets with non-stick baking mats or parchment paper. Roll dough in balls the size of walnuts. The dough may be sticky so make sure your hands are well floured. Leave about 2 inches between each cookie.
  8. Bake for 10-12 minutes until cookies are firm to touch. Let cool on wire rack.
  9. To make glaze- whisk together 1 cup of confectioners’ sugar and 1-2 tablespoons of lemon juice. Continue to whisk until smooth, adding more lemon juice as needed. If glaze gets too thin add additional confectioners’ sugar. Dip each cookie top in glaze and let excess drip back into bowl. Place on parchment paper and let dry completely before putting away. Can be store in air tight container for up to three days or frozen up to 3 months.
3.2.2199

sisterk (2)


Filed Under: K's Desserts, K's Recipes Tagged With: 12 days of christmas cookies, cookie recipe, cookies, holiday baking, lemon, lemon cookies

9 Chocolate Toffee Crackers

Posted by Meaghan Barry on December 10, 2013

Chocolate Toffee Crackers (from 2 Sisters 2 Cities)

I have seen this recipe for Chocolate Toffee Crackers so many times on Pinterest and I have been wanting to make it for such a long time.  It goes by a lot of different names- Christmas Crack, Chocolate Saltine Toffee, Sweet & Saltines, Saltine Toffee Candy, etc.  I knew I could not refer to this recipe as Christmas Crack as my son picks up on everything we say lately.  I really do not want a note from his nursery school asking why T made “crack” with his mother over the weekend.

{Side story: we made a joke about having raccoon and coyote steak this past summer while we were having a regular (cow) steak dinner.  T still requests raccoon and coyote steak to this day…it makes me snicker out loud when I think about him telling his teachers that his favorite meal consists of raccoon and coyote meat.}

Anywhoo…it’s a super easy recipe to make.  I once again attempted a cookie recipe while T & N were both awake.  I even made this one during the “witching hour”…basically anytime between 4:30-7:30pm in our house.  I let T add the nonpareil sprinkles to the top of the chocolate toffee crackers as they were cooling.  He was grabbing them by the fistful and throwing them on top.  We had a fun time making this recipe, but I tell you, my kitchen may never be the same after I brought out those nonpareil sprinkles.  I’m trying very hard this holiday season to let go of my need for everything to be clean all the time and to just have fun making memories with the kids!

Chocolate Toffee Crackers (from 2 Sisters 2 Cities)

Print
9 Chocolate Toffee Crackers
Prep time:  10 mins
Cook time:  4 mins
Total time:  14 mins
 
Ingredients
  • cooking spray
  • 40 saltine crackers
  • 1 cup unsalted butter
  • 1 cup light brown sugar
  • ½ teaspoon vanilla
  • 2 cups chocolate chips
  • nonpareil sprinkles or any other type of decorative candy (optional)
Instructions
  1. Preheat oven to 400 degrees Fahrenheit. Line a jelly roll pan with foil and spray it with cooking spray. Lay down a single layer of 40 saltines on the foil surface.
  2. Meanwhile, melt together the butter and brown sugar in a medium-sized sauce pan. Allow it to reach a boil, then lower the temperature and allow it to simmer for about 5 minutes. Stir the butter & sugar mixture occasionally and remove from the heat once it has thickened.
  3. Stir in the vanilla to the saucepan and pour the mixture over the crackers on the jelly pan. Use a spatula to spread the mixture over any crackers that are dry. Put in the oven and bake for 3-4 minutes, or until it gets bubbly. Remove pan from oven.
  4. Sprinkle chocolate chips over crackers evenly. Allow the chocolate chips to melt for a few minutes and use a spatula to smooth it out over the crackers. Then, sprinkle on nonpareil sprinkles or any other decorative candy (this step is optional). Place the pan in the fridge for 30-45 minutes or until chocolate is hard. Break up into pieces and serve. Store at room temperature in an airtight container.
3.2.2124

Source: Adapted from Trisha Yearwood and Averie Cooks

sister m signature


Filed Under: M's Desserts, M's recipes Tagged With: 12 days of christmas cookies, chocolate, chocolate chips, Christmas Cookies, cookie recipes, cookies, crackers, holiday baking, saltines, toffee

10 Cranberry Pistachio Shortbread Cookies

Posted by Keelin Hollenbeck on December 9, 2013

Cranberry Pistachio Shortbread

Today’s cookie is number ten on our cookie countdown: Cranberry Pistachio Shortbread cookies.  I was inspired to make these cookies by looking through my pantry to see what I had available to make for Christmas cookies this year. As you know, I love to bake so I already had many options before having to go out to buy ingredients. I had a bag of pistachios and dried cranberries sitting next to each other and the thought came to me of trying to find a recipe that contained both ingredients since they are natural Christmas colors. I then found a shortbread recipe that incorporated both ingredients and the results were just what I wanted.

These shortbread cookies were perfect, a light buttery cookies with punches of sweet cranberries and salty pistachios.  I brought the leftover cookies to work so I wouldn’t eat them all, and they were gone within an hour of putting them out.   Enjoy!

10 Cranberry Pistachio Shortbread

Print
10 Cranberry Pistachio Shortbread Cookies
 
Ingredients
  • 2⅓ cups all-purpose flour
  • ½ tsp. kosher salt
  • 1 cup unsalted butter (2 sticks), at room temperature
  • ⅔ cup granulated sugar
  • 1 tsp. vanilla extract
  • 1 cup unsalted pistachios, coarsely chopped
  • 1 cup dried cranberries, coarsely chopped
Instructions
  1. In the bowl of your mixer, beat the butter until smooth, about 1-2 minutes. Add sugar and continues to mix until smooth, about 3 minutes. Next beat in the vanilla extract.
  2. In a separate bowl whisk together flour and salt. Add flour mixture to butter until just incorporated. With a spatula, fold in the chopped pistachios and dried cranberries until evenly combined.
  3. Divide the dough in half and roll each dough half into 14 inch logs, so that the width is the same throughout . Wrap in parchment paper and twist the ends. Place in the refrigerator and chill for at least 2 hours but up to three days.
  4. Preheat oven to 325 degrees F. Line 2 baking sheets with parchment paper or silicone baking sheets.
  5. Using a sharp knife slice the logs into ¼ thick slices. Place cookies on baking sheet space at least 1½ inches away. Bake for 15-20 minutes until cookies just start to brown on edges. Let cool on wire rack. Store in an airtight container up to three days. Freeze cookies to keep them longer (up to 3 months.)
3.2.2124

Source- Adapted from The Grand Central Baking Book via JoyofBaking.com

sisterk (2)


Filed Under: K's Desserts, K's Recipes Tagged With: 12 days of christmas cookies, Christmas Cookies, cookies, cranberries, holiday baking, pistachios, shortbread

11 Christmas Snickerdoodles

Posted by Meaghan Barry on December 6, 2013

Christmas Snickerdoodles (from 2 Sisters 2 Cities)

For my first Christmas cookie recipe of the season, I decided to turn a traditional year-round cookie into a Christmas version of itself.  I used red and green sugar crystals in the recipe to turn these Snickerdoodles into Christmas Snickerdoodles!

This recipe was super simple and it was the perfect cookie recipe to make with a 3-year old and 5-month old.  After I formed a ball of cookie dough, I handed it to T and he would roll it in either the red or green sugar & cinnamon mixture, then place it on the pan.  We got a good laugh as Baby N sat in his Bumbo chair and kept trying to grab for the red cookies…you can have cookies soon baby!  I hope you have as much fun as I did making these Christmas Snickerdoodles this holiday season. (Just keep in mind that the dough needs to be refrigerated for one hour before baking- the perfect amount of time to grab a quick afternoon nap or watch a Christmas movie by the fire!)

Christmas Snickerdoodles (from 2 Sisters 2 Cities)

Print
11 Christmas Snickerdoodles
Prep time:  1 hour 30 mins
Cook time:  10 mins
Total time:  1 hour 40 mins
 
Turn this classic cookie recipe into a Christmas one by using green and red-colored sugars.
Ingredients
  • 1 cup butter, softened
  • 1 and ½ cups sugar
  • 1 teaspoon baking soda
  • 1 teaspoon cream of tartar
  • ¼ teaspoon salt
  • 2 eggs
  • 1 teaspoon vanilla
  • 3 cups all-purpose flour
  • 2 tablespoons red sanding sugar or sugar crystals
  • 2 tablespoons green sanding sugar or sugar crystals
  • 2 teaspoons ground cinnamon
Instructions
  1. Add the softened butter to a mixing bowl and use an electric mixer to beat butter on high for 30 seconds. Add the 1 and ½ cups sugar, baking soda, cream of tartar, and salt and mix until combined. Use a spatula to scrape the side of the mixing bowl if necessary. Turn off mixer and add in eggs and vanilla- mix for 30 more seconds until combined. Turn off mixer and add 1 cup of flour at a time, beating after each addition until flour is incorporated. Cover bowl with plastic wrap and chill for 1 hour or more.
  2. Preheat oven to 375 degrees F and prepare cookie sheets with parchment paper. Add the red sugar into a small bowl and the green sugar into a second small bowl. Add 1 teaspoon cinnamon into each bowl and mix. Shape dough into ~1 balls (you can make the balls smaller or larger based on how what size cookie you prefer. I ended up making 36 cookies from this batch of dough.)
  3. Roll balls in either the red or green sugar mixture until dough is coated. Place 2 inches apart on the parchment paper.
  4. Bake for 12-13 minutes or until bottoms are light brown. Transfer to wire racks and allow to cool.
3.2.2124

Source: BHG.com

sister m signature

Related Posts Plugin for WordPress, Blogger...


Filed Under: M's Desserts, M's recipes Tagged With: 12 days of christmas cookies, baking, christmas, Christmas Cookies, cinnamon, cookie recipe, cookies, holiday baking, holiday cookies, snickerdoodles

  • 1
  • 2
  • 3
  • 4
  • Next Page »

Recent Posts

  • Easy Holiday Office Party Tips
  • 5 Steps to an Easy Football Party
  • Gingerbread Biscotti
  • Holiday Coffee Bar and Thanksgiving Recipes
  • Soft Sugar Pumpkin Cookies
  • Cinnamon Sugar Apple Cake
  • Hello Pumpkin Season!
  • Make Your Own Milkshake Party!
  • Mama’s Pickles
  • S’more Cookies

Categories

  • About 2 Sisters 2 Cities (7)
  • Books (8)
  • Crafting & DIY (22)
  • Design & Decorating (15)
  • Gardening (5)
  • Giveaway (14)
  • Guest Bloggers (8)
  • K's post (46)
  • K's Recipes (191)
    • K's Desserts (75)
    • K's Entrees (23)
    • K's Sides (24)
  • M's post (72)
  • M's recipes (167)
    • M's Entrees (21)
    • M's Sides (14)
    • M's Desserts (30)
  • Organizing (7)
  • Party Ideas (49)
  • Uncategorized (1)
  • Vacation (12)
Stitch Fix

Archives

Blogroll

  • Annie's Eats
  • Bake at 350
  • Baked Bree
  • Boston Harbor Beacon
  • Confections of a Foodie Bride
  • Cook Like a Champion
  • Erin’s Food Files
  • Forever and a Recipe
  • Framed Cooks
  • Oh Happy Day
  • On Common Ground
  • Pennies on a Platter
  • Pink Parsley
  • Recipe Girl
  • Sally's Baking Addiction
  • Simply Scratch
  • The Curvy Carrot
  • The Pioneer Woman
  • Tidy Mom
  • Two Peas & Their Pod
  • What’s Gaby Cooking
  • Young House Love
Increase your website traffic with Attracta.com

grab a 2 sisters button!


Copyright © 2014 ~ 2 Sisters 2 Cities | Blog Design by Minx Design