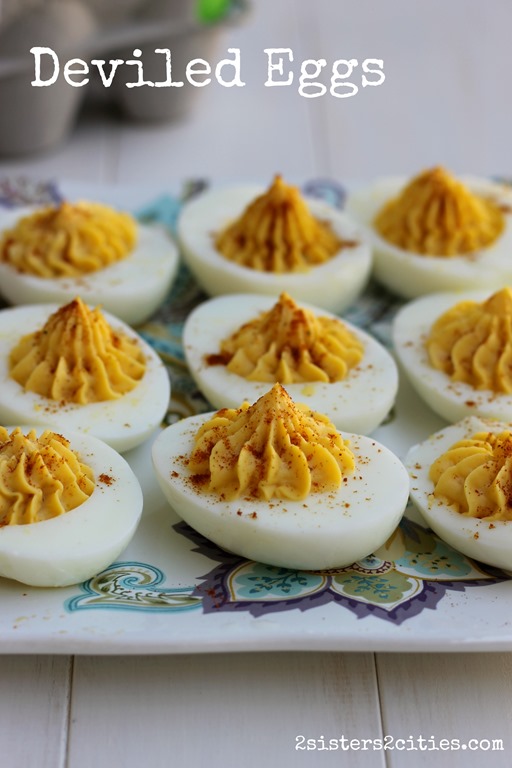
One of the most popular posts on our site has been the Classic Deviled Eggs post from Easter last year. M and I got a good laugh after Thanksgiving, Christmas, New Year’s Eve and Superbowl Sunday because we would get so much traffic from Pinterest for the Deviled Eggs post. I think we have only thought about having deviled eggs around Easter time, but we are so glad for to learn there are hardcore deviled egg fans year-round! I have been thinking of how I could expand on the original post to show more versions of deviled eggs.
I personally love classic deviled eggs and had never ventured outside of my favorite recipe. When I received this month’s Cooking Light, I was excited to see they had 12 different types of deviled egg recipes. I knew I had to try some new recipe variations!
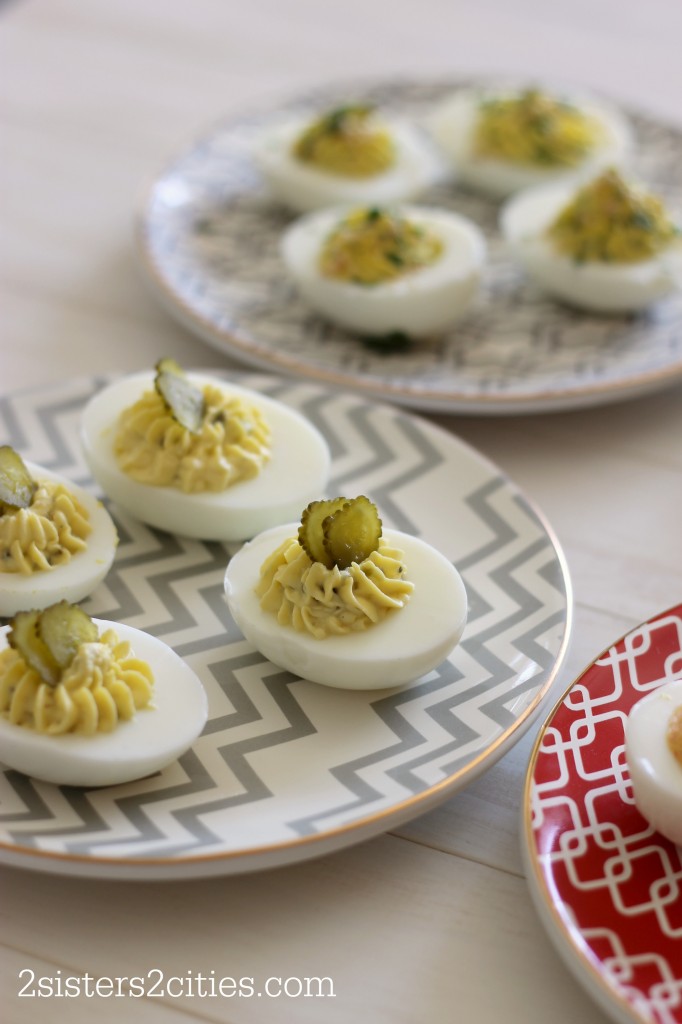
In one day, I made four of the 12 types, adapting them slightly based on ingredients I had on hand. (I was quite impressed that I could make four types without buying any more items!):
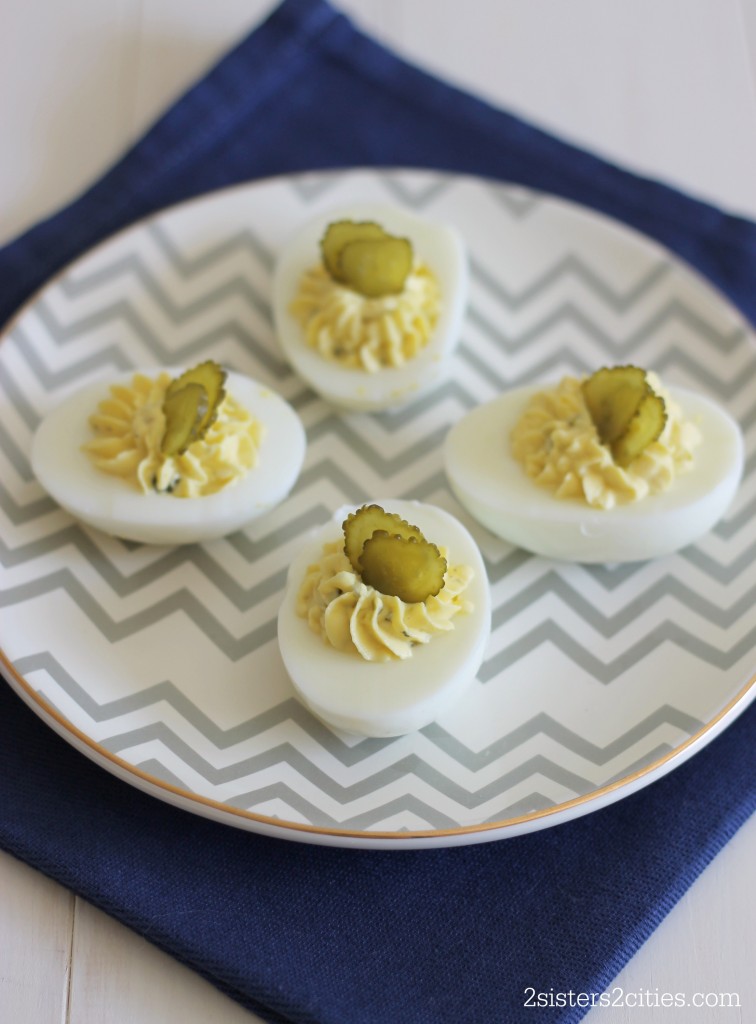
- Pickle Jalapeño
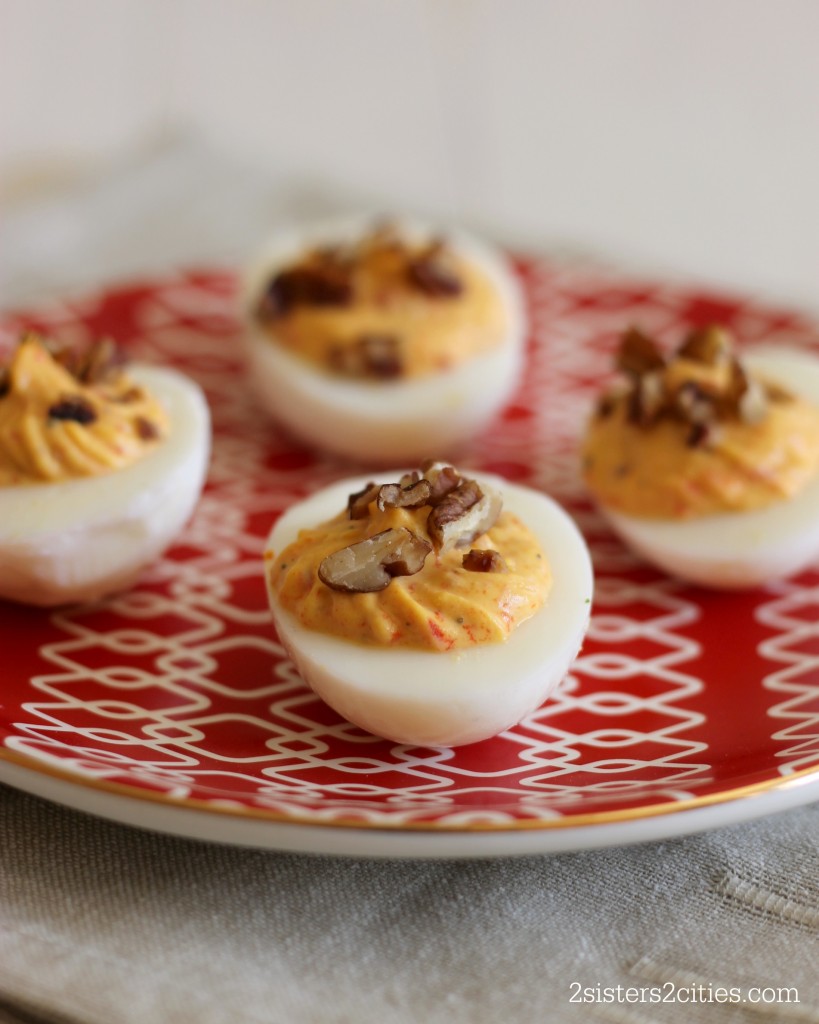
- Pimiento Cheese
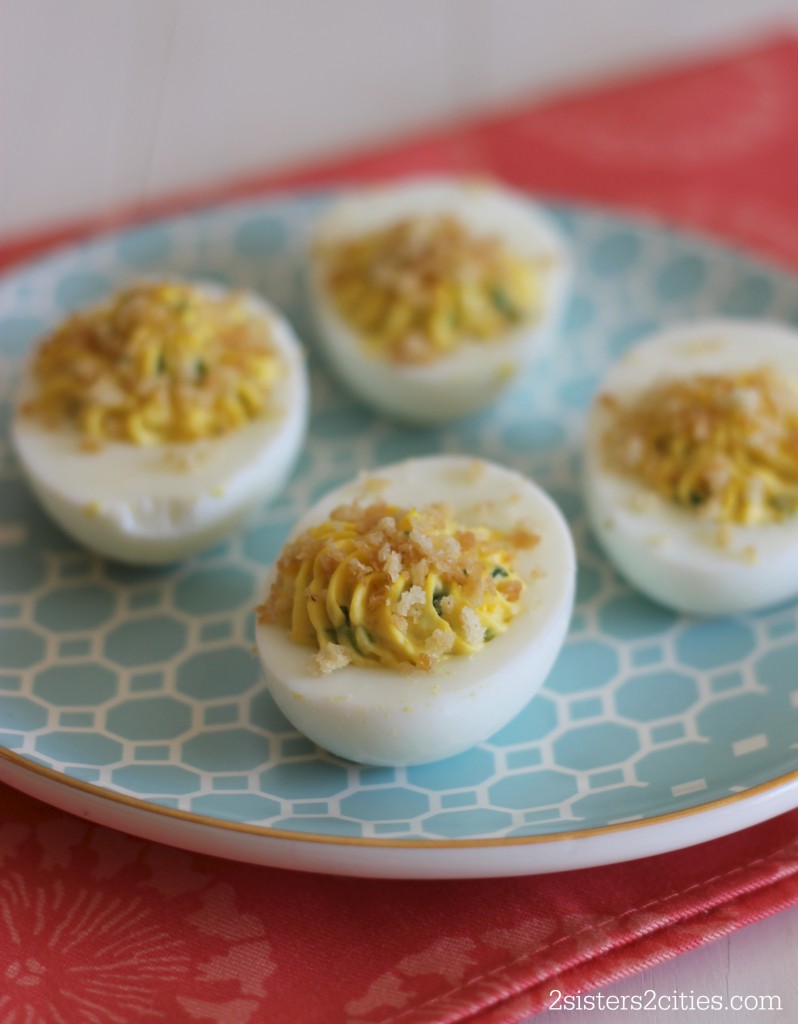
- Herb and Crumb
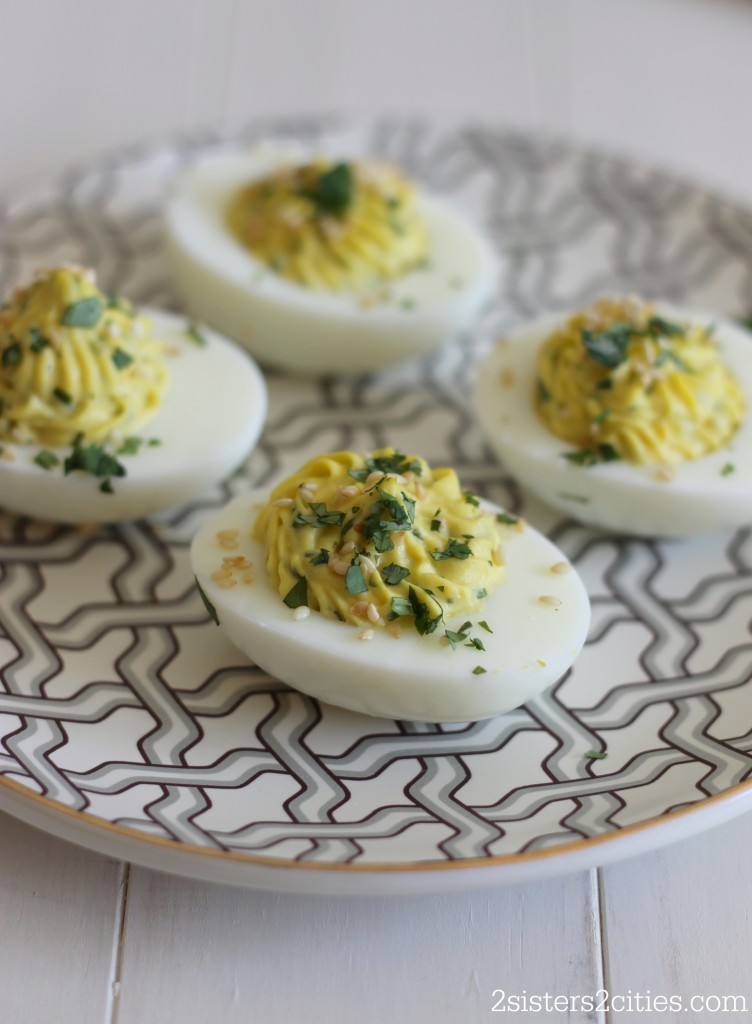
- Wasabi Ginger
The results (well, besides Matt and I being stuffed with eggs) were delicious. My favorite of the four was the Herb and Crumb, while Matt’s was Pimiento Cheese. I predicted that would be his favorite since we are always making up this Pimiento Cheese Dip I shared with you last month.
Easter is the best time to make deviled eggs because of all the extra hard-boiled eggs from decorating eggs. When my sisters and I were younger, we loved decorating eggs. Since there was four of us, my mom had to make a lot of eggs so we could get our fill of coloring. What did we do with all that extra eggs? Deviled eggs and egg salad sandwiches of course! We hope everyone has a great Easter Weekend!
- 12 eggs
- Gently place the eggs in a large saucepan and cover with cold water (water level should be 1-inch above the eggs.)
- Place saucepan on stove-top, set to high and bring to a boil. Once boiling, remove saucepan from heat, cover, and let stand for 10 minutes.
- Fill a large-sized bowl with ice cold water while the eggs are sitting.
- After the 10 minutes, take eggs out of hot water with a slotted spoon and place in the ice water gently; let sit for 5 minutes.
- Store in refrigerator or use immediately
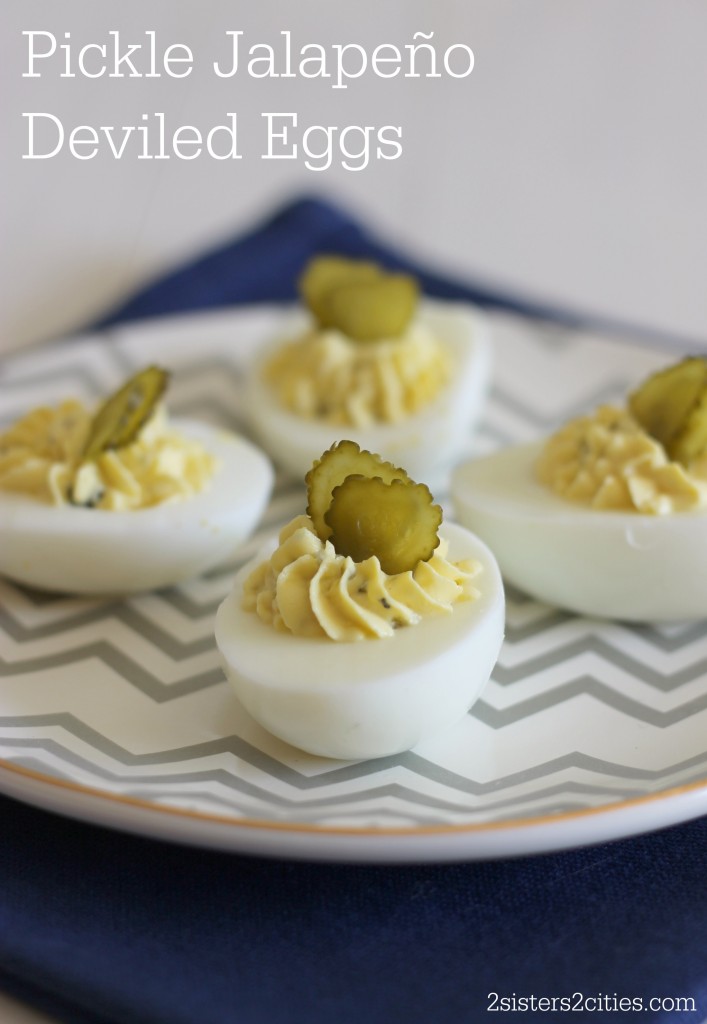
- 12 hard-boiled eggs
- 3 tbsp. mayonnaise
- 3 tbsp. 2% Greek yogurt
- 1½ minced sweet gherkins
- 1 tbsp. minced pickled jalapeño
- 1 tablespoon cider vinegar
- ¼ tsp. kosher salt
- ¼ tsp. fresh cracked pepper
- Thinly sliced gherkins, for garnish
- Peel eggs and then slice length wise. Take out the yolks of the eggs and place them in a medium sized bowl. With a fork, mash the egg yolks until all the large chunks are gone.
- Add in remainder of ingredients except for garnish and stir with a rubber spatula. Mash mixture on the side of the bowl to smooth out any lumps.
- Prepare a pastry bag with a large star tip (I used Wilton’s 6B). Take egg yolk mixture and add it to the pastry bag, then twist the top portion closed to push the eggs into the bag further.
- Pipe the yolks into the egg whites by applying pressure to pastry bag and lifting up slowly and releasing the pressure as the egg white fills with yolk. Top each egg with sliced gherkins.
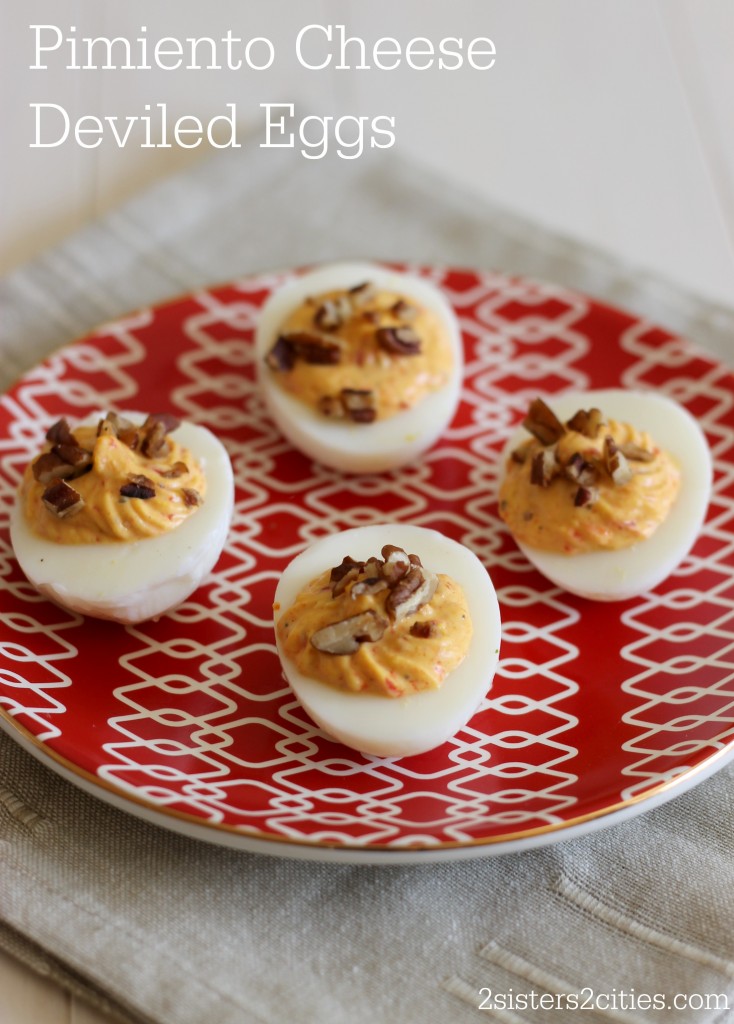
- 12 hard-boiled eggs
- ¼ cup chopped pimientos, drained
- ¼ cup light mayonnaise
- ½ tsp. hot sauce
- ½ tsp. Worcestershire sauce
- ¼ tsp. kosher salt
- ¼ tsp. fresh cracked pepper
- ¾ ounce reduced fat shredded cheese
- 2 tbsp. pecans, toasted and chopped, for garnish
- Peel eggs and then slice length wise. Take out the yolks of the eggs and place them in a medium sized bowl. With a fork, mash the egg yolks until all the large chunks are gone.
- Add in remainder of ingredients except for garnish and stir with a rubber spatula. Mash mixture on the side of the bowl to smooth out any lumps.
- Prepare a pastry bag with a large star tip (I used Wilton’s 6B). Take egg yolk mixture and add it to the pastry bag, then twist the top portion closed to push the eggs into the bag further.
- Pipe the yolks into the egg whites by applying pressure to pastry bag and lifting up slowly and releasing the pressure as the egg white fills with yolk. Top each egg chopped toasted pecans.
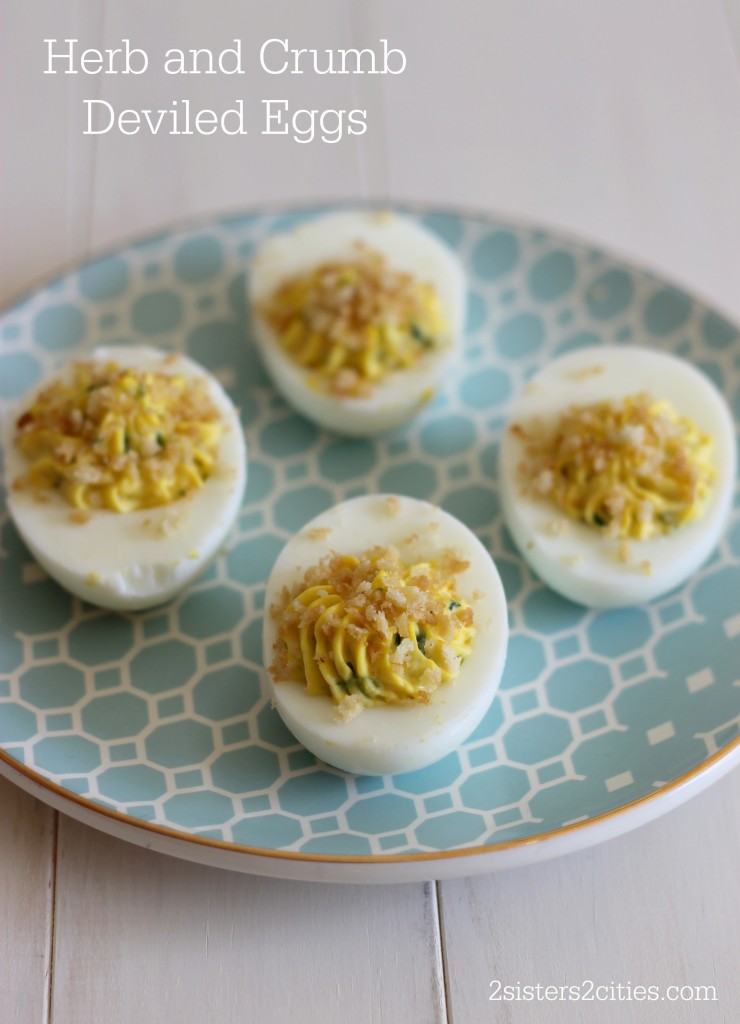
- 12 hard-boiled eggs
- 2 tbsp. panko bread crumbs
- 1 tsp. butter
- ¼ cup light mayonnaise
- 3 tbsp. light sour cream
- 3 tbsp. chopped green onion
- 1 tbsp. chopped fresh parsley
- 1 tsp. Dijon mustard
- 1 tsp. lemon juice
- ¼ tsp. kosher salt
- ¼ tsp. fresh cracked pepper
- In a small fry pan, melt the butter and add the panko bread crumbs. Stir until toasted.
- Peel eggs and then slice length wise. Take out the yolks of the eggs and place them in a medium sized bowl. With a fork, mash the egg yolks until all the large chunks are gone.
- Add in remainder of ingredients except for toasted panko breadcrumbs and stir with a rubber spatula. Mash mixture on the side of the bowl to smooth out any lumps.
- Prepare a pastry bag with a large star tip (I used Wilton’s 6B). Take egg yolk mixture and add it to the pastry bag, then twist the top portion closed to push the eggs into the bag further.
- Pipe the yolks into the egg whites by applying pressure to pastry bag and lifting up slowly and releasing the pressure as the egg white fills with yolk. Top each egg with the toasted panko breadcrumbs.
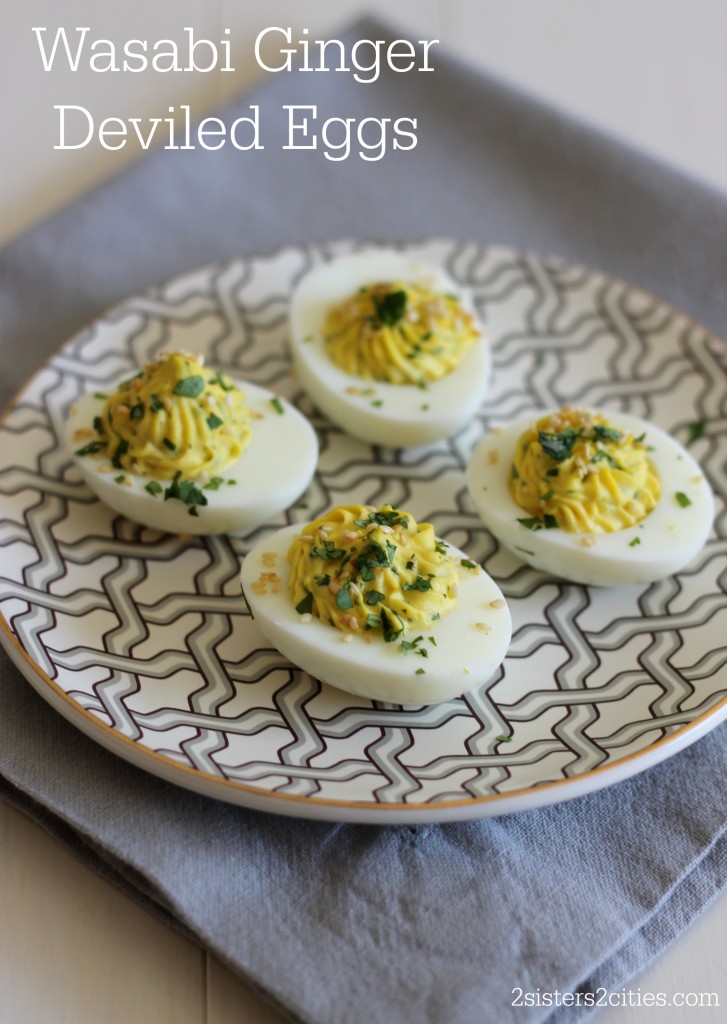
- 12 hard-boiled eggs
- ¼ cup light mayonnaise
- 2 tbsp. chopped fresh cilantro, plus 2 tsp. for garnish
- 4 tsp. grated ginger
- 4 tsp. wasabi paste
- 4 tsp. lime juice
- 2 tsp. toasted sesame seeds, for garnish
- Peel eggs and then slice length wise. Take out the yolks of the eggs and place them in a medium sized bowl. With a fork, mash the egg yolks until all the large chunks are gone.
- Add in remainder of ingredients except for garnishes and stir with a rubber spatula. Mash mixture on the side of the bowl to smooth out any lumps.
- Prepare a pastry bag with a large star tip (I used Wilton’s 6B). Take egg yolk mixture and add it to the pastry bag, then twist the top portion closed to push the eggs into the bag further.
- Pipe the yolks into the egg whites by applying pressure to pastry bag and lifting up slowly and releasing the pressure as the egg white fills with yolk. Top each egg with toasted sesame seeds and chopped cilantro.
Source- Adapted slightly from Cooking Light, April 2014
And here’s a bonus version- the classic recipe for Deviled Eggs for all those leftover Easter Eggs!