2 Sisters 2 Cities

Image Map
  • About 2 Sisters 2 Cities
  • Recipe Index
  • Project Index
  • Contact Us
  • Like us on Facebook
  • Follow m on twitter
  • Follow k on twitter
  • Follow 2S2C on Pinterest
  • Follow 2S2C on G+
  • rss
  • e-mail 2S2C

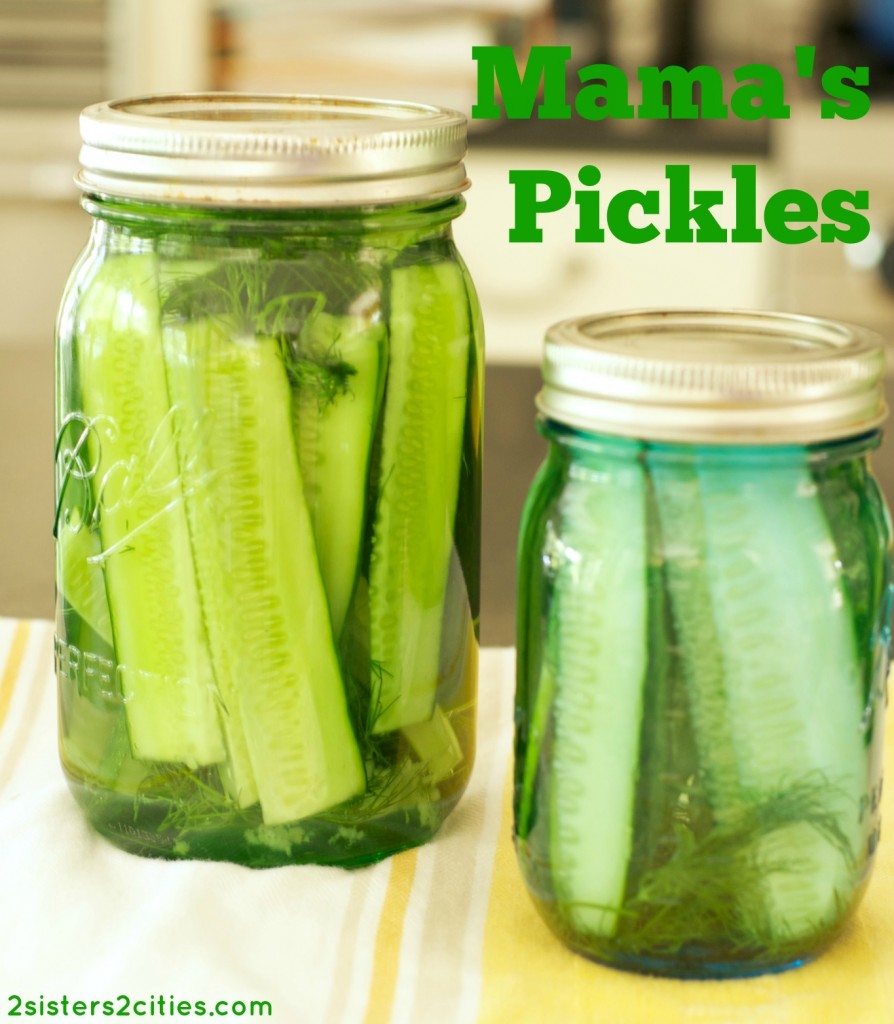
Mama’s Pickles

Posted by Meaghan Barry on July 24, 2014

Mama's Pickles

T is the kind of 3-year old who loves pickles.  He’s the kid who requests them for breakfast, lunch, snack, or dinner.  He’s the kid at the summer cookout who will be holding a pickle in one hand and a chocolate chip cookie in the other.  When I made my own pickles for the first time last summer, T was elated and started to refer to them as “Mama’s Pickles.”  The name stuck in our house and homemade dill pickles henceforth were known simply as Mama’s Pickles.
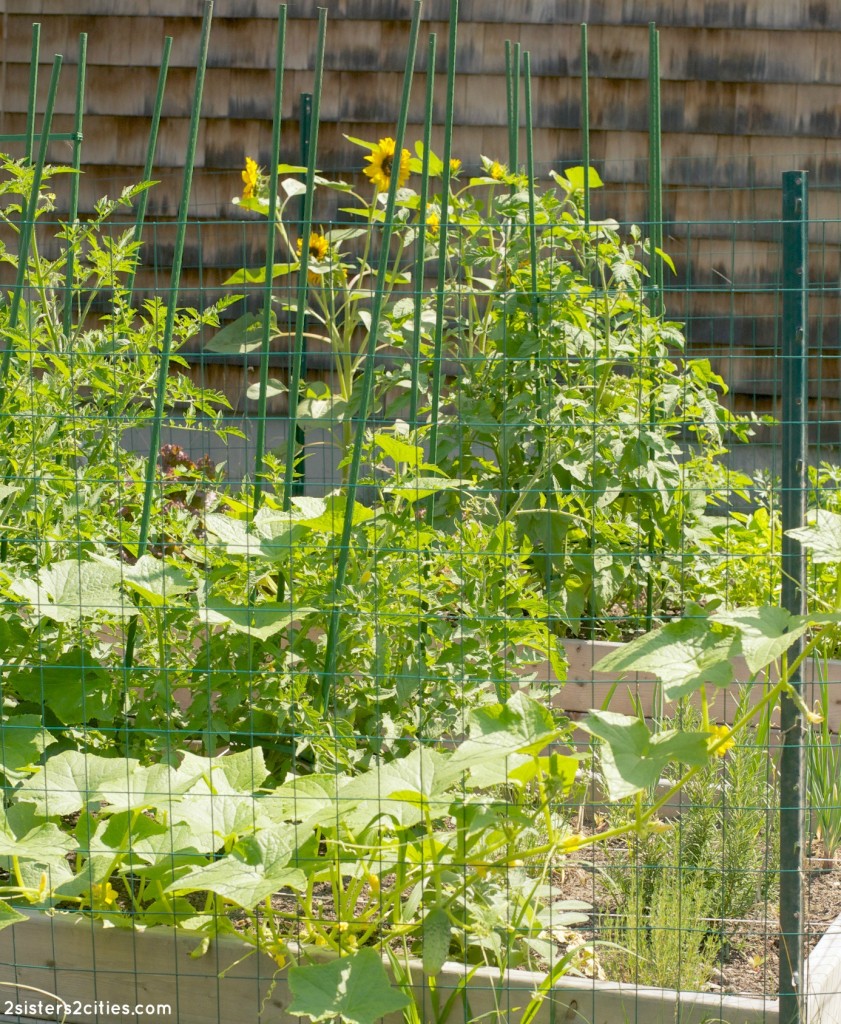
garden

One of the vegetables that I have planted in my garden this summer are pickling cucumbers (in addition to Marketmore cucumbers.)  The cucumbers have really taken off and are climbing all over my garden fence and the other plants.  I’ve already harvested quite a few of them so I knew it was time to make my first batch of Mama’s Pickles for the season, this time with my own homegrown pickling cucumbers!
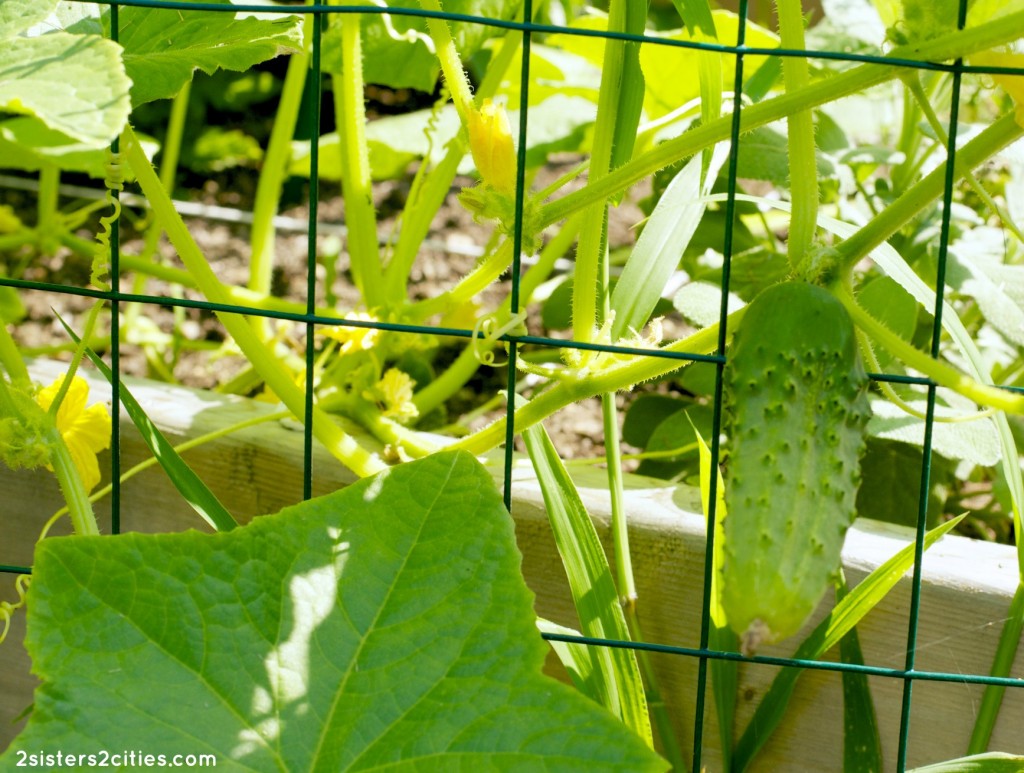
Cucumber_plant

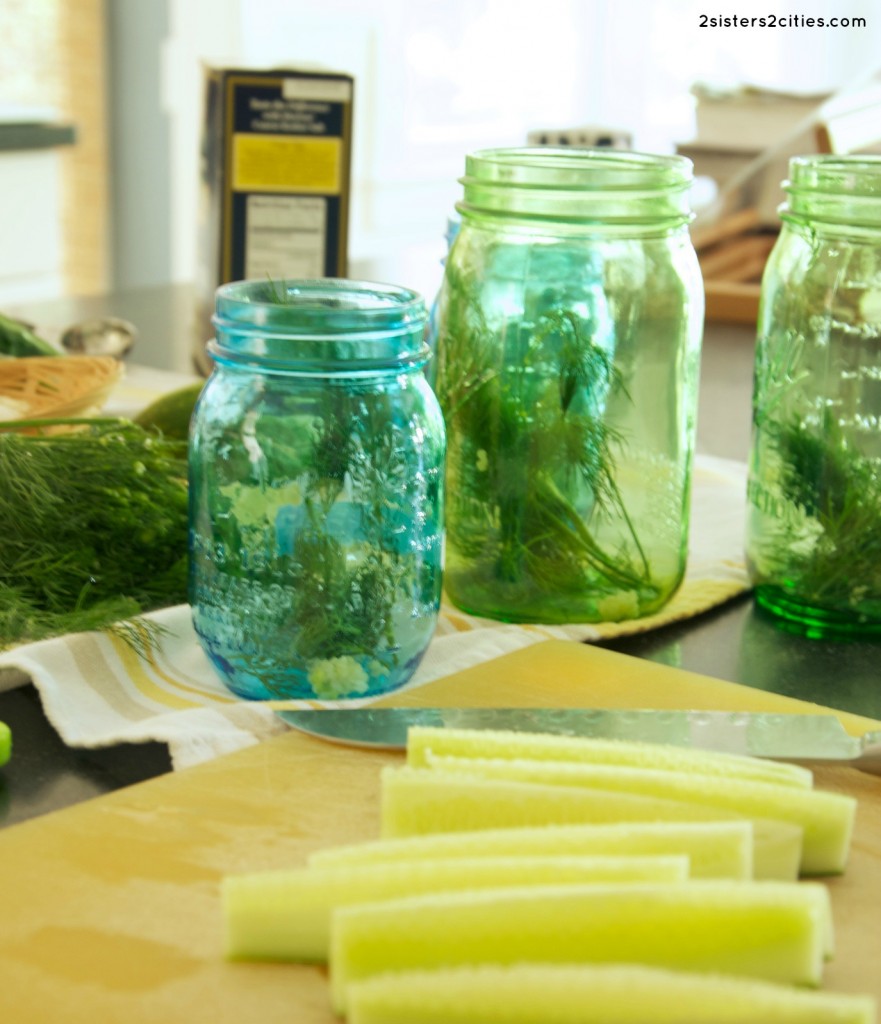
This recipe is very flexible and you can cut the cucumbers whichever way you see fit (spears, slices, whole, etc.)  T prefers “stick pickles”…his terms for pickle spears, so that is how I cut them for this first batch.  Feel free to halve this recipe or double as you see fit.
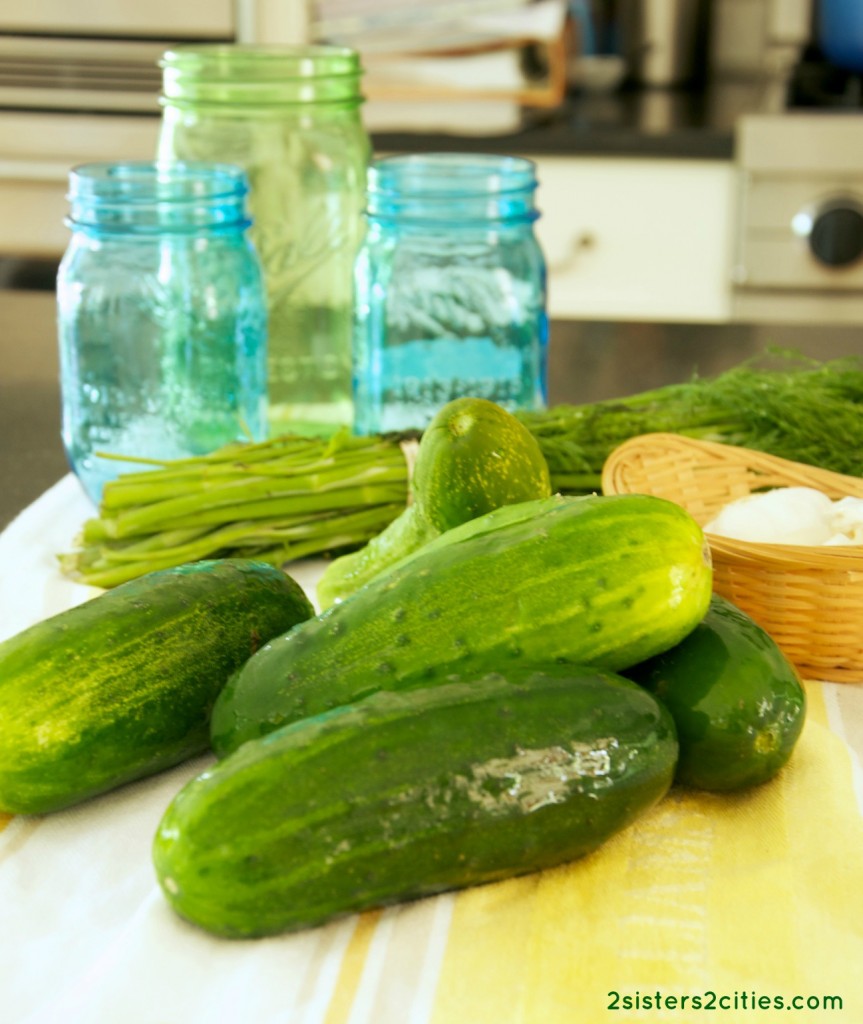
pickle ingredients

prepping pickles

Print
Mama's Pickles
Author: 2 Sisters 2 Cities
Prep time:  48 hours 10 mins
Total time:  48 hours 10 mins
 
Ingredients
  • 1 bunch fresh dill
  • 6 cloves garlic, peeled and pressed
  • 6-8 pickling cucumbers, washed and ends cuts off
  • 6 cups water
  • ¾ cup distilled white vinegar
  • 6 tablespoons kosher salt
Instructions
  1. Gather three to four clean mason jars and put a couple sprigs of the dill and some of the pressed garlic on the bottom of each jar. Next, slice the cucumbers up into spears, slices, or keep them whole depending upon your pickling preference. Place the cucumbers into the mason jars.
  2. In a large bowl with a spout or measuring cup, mix together the water, vinegar, and salt. Stir until the salt is fully dissolved. Pour the vinegar mixture into each mason jar until it fully covers the cucumbers. Place a few more sprigs of dill and more of the pressed garlic on top (if desired.) Screw on mason jar covers.
  3. Refrigerate for at least 2 days. Then, enjoy for breakfast, lunch, or dinner if you have the same love of pickles as my little guy!
3.2.2499

Source: Slightly adapted from Annie’s Eats

sister m signature


Filed Under: M's Sides, M's recipes Tagged With: cookout, cookout recipes, cucumbers, gardening, homemade, pickles, pickling cucumbers, summer, summer recipe, vegetable garden

Banana Daiquiris

Posted by 2 Sisters 2 Cities on August 12, 2012

Banana Daiquiris

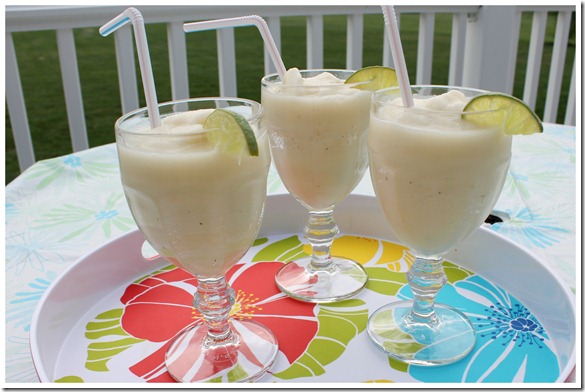
I made these Banana Daiquiris during Memorial Day weekend when I was testing out a few frozen drink recipes (the other recipe I tried was one for Strawberry Daiquiris.)   These were creamy, refreshing and a little boozy,  all good things in my book.  I found the recipe on a whim while I was at the grocery store getting the ingredients with my little sister M and my boyfriend.   The boyfriend was pushing for Banana Daiquiris because they are one of his favorites.  When claiming his receipts for all his work trips to Costa Rica over the summer, his accounting office asked him why he had all these “girly drinks” on his restaurant bills.  He proudly responded to them that they were his drinks and he enjoys a fruity frozen beverage.  Feel free to test this recipe out for yourself and let us know if you are on the banana daiquiri boat!

Print
Banana Daiquiris
Author: K
 
Ingredients
  • 2-3 ripe bananas
  • 1 cup coconut milk
  • 2 tablespoons of lime juice
  • ½ cup of sugar
  • 6 cups of ice
  • 4-8 ounces of rum (depending on how strong you want them)
Instructions
  1. Place half of each of the ingredients into the blender and blend until smooth. Pour into glasses and serve. Repeat with remaining ingredients for second batch.
  2. *Can easily be made without alcohol by omitting the rum. My mom enjoyed them this way.
2.2.8

Source– adapted from Food Network Recipes by Sandra Lee
Three Banana Daiquiris


Filed Under: K's Recipes, Party Ideas Tagged With: banana daiquiris, banana recipe, drink recipe, frozen drink recipe, fun cocktails, summer cocktail recipe, summer recipe

Hot Fudge Sauce

Posted by 2 Sisters 2 Cities on August 8, 2012

Hot fudge sauce
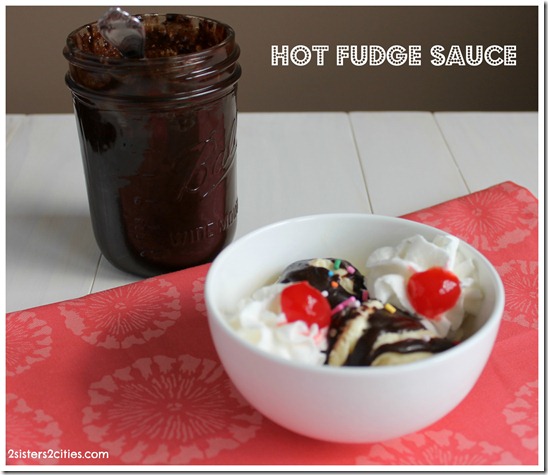
I happened to be reading a book on the couch one Sunday afternoon when the book mentioned a couple sharing a hot fudge sundae.  For the life of me, I could not stop thinking about hot fudge sundaes and I decided to look up what I needed to make hot fudge sauce.   I happened to have all of the ingredients and my boyfriend ran out to get whipped cream and light vanilla ice cream.   The hot sauce came together so quickly and I was soon back to my book eating a hot fudge sundae like the characters in my book.

I don’t always make what I am thinking about because if I did I would be eating bad foods all the time.   I just happened to be going home later that week and needed a dessert that did not have gluten in it for my little sister.  The hot fudge sauce fit perfectly into a medium sized mason jar and after we had some on our ice cream, I put it away in the refrigerator to store for later. Then later that week when we were traveling to Syracuse, I just put the chilled fudge sauce in our cooler and took it with us.   The sauce heats up in the microwave very easily in 30 second intervals.

Print
Hot Fudge Sauce
Author: K
 
Ingredients
  • 4 oz. unsweetened chocolate, chopped
  • 3 tablespoons unsalted butter
  • ⅔ cup water
  • ⅓ cup of sugar
  • ¼ cup plus 2 tablespoons of corn syrup
  • Pinch of salt
  • 1 tsp. vanilla extract
Instructions
  1. In a double-boiler or a heatproof bowl set over simmering water in a sauce pan, add in chocolate and butter. Stir until melted and smooth.
  2. In another sauce pan heat boil the ⅔ cup of water. Stir in the melted chocolate/butter mixture into the boiling water.
  3. Mix in sugar, corn syrup and salt until smooth.
  4. Increase the heat until the chocolate sauce comes to a boil. Boil for 9 minutes, stirring occasionally.
  5. Take off heat and let cool for 15 minutes. Stir in vanilla extract. Serve warm on top of ice cream. Store in an airtight container in the refrigerator. To heat up, microwave in 30 second intervals, stirring in between intervals until heated.
2.2.8

Source- Adapted from Annie’s Eats from Smitten Kitchen, originally from Silver Palate Cookbook

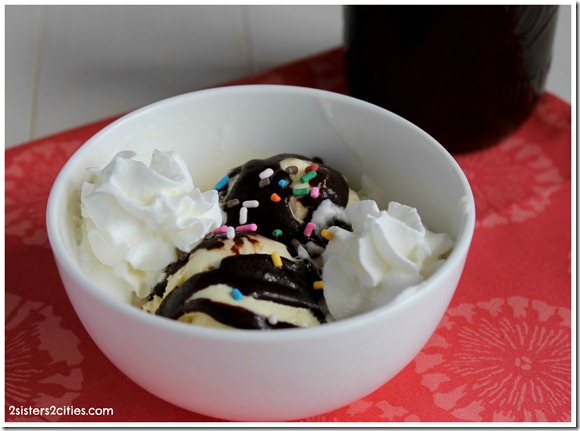
Hot Fudge Sundae


Filed Under: K's Desserts, K's Recipes Tagged With: chocolate recipe, frozen treat, hot fudge sauce, hot fudge sauce recipe, hot fudge sundae, ice cream, ice cream topping, summer dessert, summer recipe

Mini Peach Pies

Posted by 2 Sisters 2 Cities on July 29, 2012

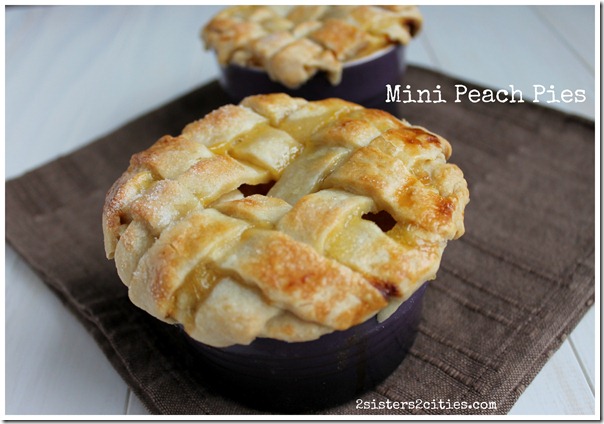
Mini Peach Pies

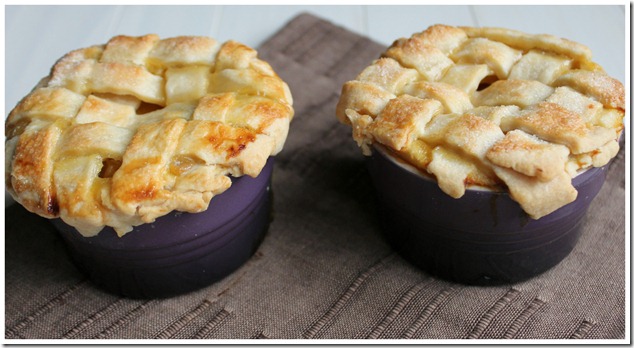
One of my favorite types of pie is the peach pie.  A peach pie is the ultimate summer time dessert for me because peaches are readily available and at their most deliciousness.  I love the combination of the sweetness and tartness of the peaches mixed with the buttery and salty pie crust.  Pies aren’t something I make too often because they are hard to carry into the city and my boyfriend and I don’t need a whole pie to ourselves.   We are both what we would call “fat kids at heart” and really have to watch what we eat.  When dessert is left around our house it will get eaten, which is probably why I don’t make pies. Most of the desserts I make I immediately share with co-workers or family.  So when I saw the concept of mini desserts and pies on a few blogs, I thought it would be perfect to make mini peach pies for us.

Earlier this year I bought 6 oz. ramekins at the Le Creuset Outlet store in cassis, which is their color purple.  I haven’t had the chance to use them so I though they would work perfectly for my mini peach pies. When making the pie crust, I made one batch of pie crust which is the equivalent of just the bottom pie crust on a pie.  This recipe for pie crust can be easily used to make a full sized pie by making two batches.   The recipe I used is for making in a food processor so if you don’t have a food processor you may want to use another recipe for pie crust.  You can also easily use ready made pie crust like Pillsbury is that is easier for you.Peach Pies in Ramekins

Print
Mini Peach Pies
Author: K
Serves: 6
 
Ingredients
  • For Filling: 1 batch of pie crust
  • 4-5 medium sized peaches, peeled and cut into small pieces
  • ¼ cup granulated sugar
  • 1 rounded teaspoon of flour
  • 1 rounded teaspoon of corn starch
  • 2-3 drops of almond extract
  • ½ lemon, juiced
  • For Topping: 1 egg white mixed with ½ of egg yolk
  • 1 tablespoon granulated sugar
Instructions
  1. In a medium sized bowl, combine peaches, ¼ cup sugar, flour, corn starch, almond extract and lemon juice.
  2. Cover with plastic wrap and let sit for 30 minutes
  3. Grease 3 ramekins with cooking spray or butter and preheat the oven to 375 degrees
  4. Roll out pie crust to about ⅛th inch thickness, thinner then you would making a full size pie
  5. Cut the crust to a circle that is about 1½ inches to 2 inches larger than the edges of the ramekin.
  6. Fit the dough circle into the greased ramekin and gently push down to fit the size. The dough should come to the top edge of the ramekin with a small amount of dough hanging over edge. Repeat for other 2 ramekins.
  7. Fill with peach filling to the top of the ramekins.
  8. To make lattice top: With a pastry cutter wheel (I don’t have a pastry cutter so I used crinkle cutter from Pampered Chef that I use to make crinkle cut fries) cut ¾ inch strips of dough.
  9. Lay down 3-4 strips going horizontally over the pie filling on top of the ramekin so they fit side to side with a small space in-between.
  10. Working with one vertical strip at a time, go over and under horizontal strips. It is best to start in the middle and fold over every other horizontal strip so you can just place the center vertical strip down and then unfold the horizontals over the verticals. Repeat with the other 2-3 strips depending on what fits, alternating from the vertical strip next to it (example if one vertical strip is over-under-over-under, the strip next it should be under-over-under-order.)
  11. Once the weaved pattern is done, pitch the sides of the pie so the bottom layer is attached to the top lattices. Break off any of the excess dough hanging from the strips.
  12. To made solid top: Cut out a circle of dough that is about ½ inch larger than the circumference of the ramekin. Place the circle on top of the ramekin and pinch the top dough and bottom dough together. Ripping off any excess dough. Cut a few slits in the top of the top dough to let the filling breathe.
  13. With a pastry brush, brush on egg white and a half egg yolk mixture to the top of the pies. Sprinkle with sugar.
  14. Place ramekins on a baking sheet and place into the oven for 30-35 minutes until pies are lightly brown.
  15. Let pies cool and serve with vanilla ice cream. Enjoy!
2.2.8

Source– Adapted from Marion’s Vintage Bakeshop


Filed Under: K's Desserts, K's Recipes Tagged With: mini peach pies, mini pies, pie, pie crust, summer dessert, summer recipe

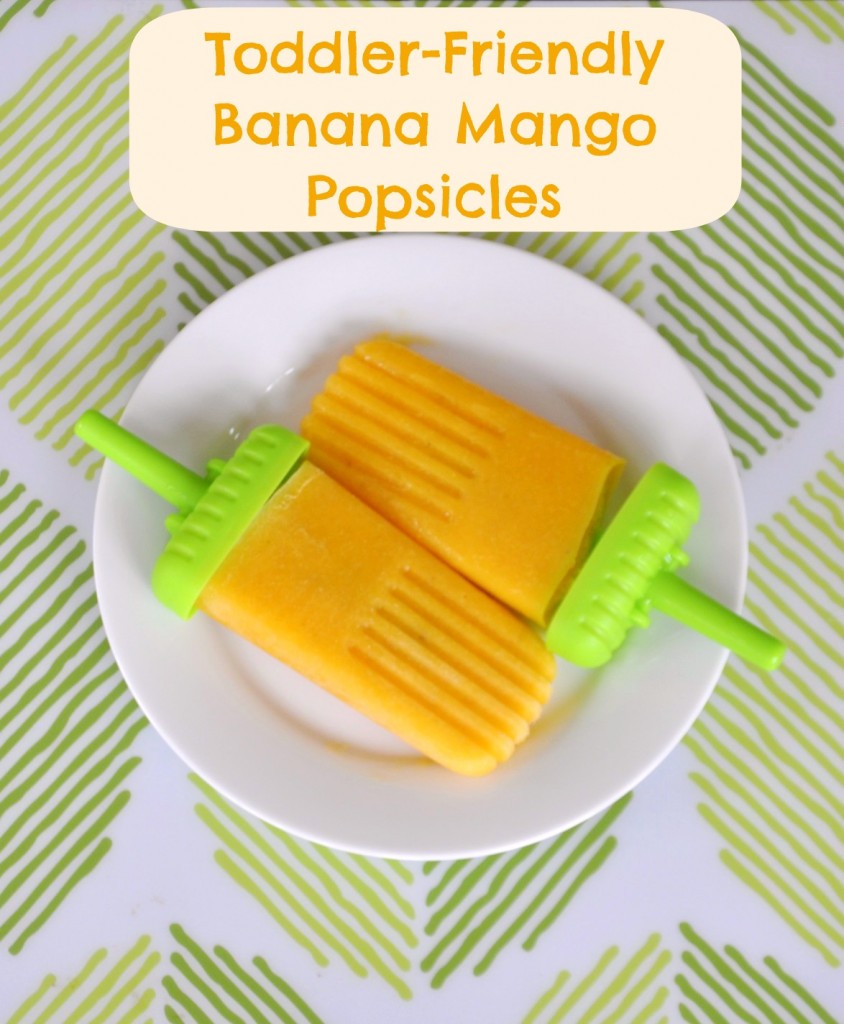
Toddler-Friendly Banana Mango Popsicles

Posted by 2 Sisters 2 Cities on July 23, 2012

My son loved the Blueberry Lemon Mint Popsicles I made last week, but this week I wanted to make a type that combined some of his favorite fruits (and that was a little less messy than pureed blueberries.)  I decided to combine two tropical fruits to make some banana mango popsicles.  The result: a perfect toddler treat that’s actually very healthy!

Print
Banana Mango Popsicles
Author: m
Recipe type: Frozen Treat
Prep time:  5 mins
Cook time:  4 hours
Total time:  4 hours 5 mins
Serves: 6
 
This ratio of bananas to mangos still has a very strong banana taste (which my son loves)- I recommend using half of a banana if you (or your child) do not like a lot of bananas.
Ingredients
  • -1 ripe banana, peeled
  • -1 ripe mango, peeled and roughly diced
  • -1 cup milk
  • -1 tablespoon agave nectar
Instructions
  1. Place all ingredients in a food processor or blender and blend until pureed. Pour mixture into popsicle molds (leave at least ¼ of an inch extra room at the top to to allow for expansion when freezing.) Freeze for at least 4 hours. Remove popsicles from mold and enjoy.
2.2.8

What are your plans for this week?  I hope it includes making popsicles!


Filed Under: M's recipes Tagged With: banana mango popsicles, banana popsicles, banana recipes, easy dessert, frozen treat, mango popsicles, mango recipes, popsicle recipe, popsicle series, summer recipe, summer recipes, tropical popsicles

Tex-Mex Pimiento Cheese Dip

Posted by 2 Sisters 2 Cities on July 15, 2012

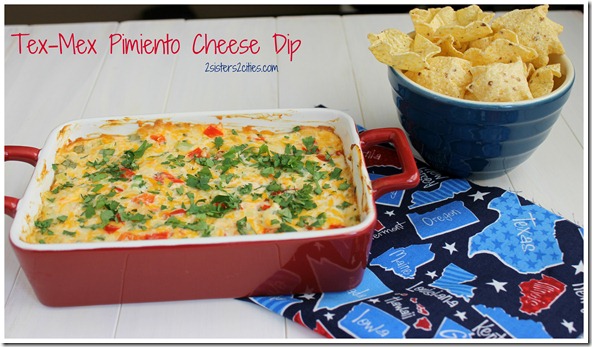
Tex-Mex Pimiento Cheese Dip
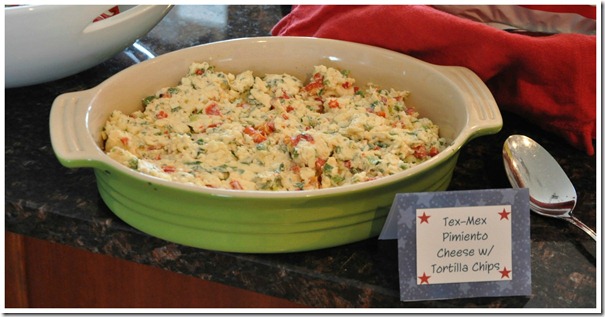
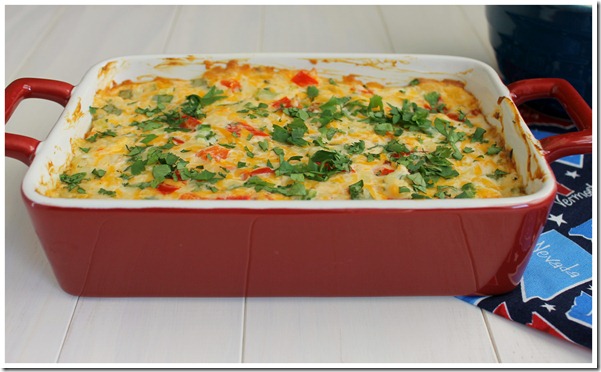
This Tex-Mex Pimiento Cheese Dip is seriously amazing, I mean make 3 times in the same week kind of amazing.  When we served this dip at our family lunch over Fourth of July, it was gone within minutes of coming out of the oven.  My mom made more of the pimiento cheese dip the next day because we had enjoyed it so much the day before.   Then, I made a half batch when I got home to take more photographs of the dip since I didn’t get one of the dip baked at the party.   The pimiento cheese dip is easy to pull together and can be made ahead of time.
Tex-Mex Pimiento Cheese Dip with Tortilla Chips

Print
Tex-Mex Pimiento Cheese Dip
 
Ingredients
  • ½ cup Greek Yogurt (0% Fat)
  • 6 oz. reduced fat cream cheese, softened
  • ¾ cup roasted red pepper, diced
  • 2 small or 1 large jalapeño peppers, ribbed, seeded and minced
  • 2-3 scallions, chopped
  • ¼ cup minced fresh cilantro, plus 1 tablespoon
  • 8 oz. of shredded pepper jack cheese
  • 8 oz. of shredded cheddar cheese
  • ¼ tsp. red pepper flakes
  • Salt and pepper, to your liking
Instructions
  1. Preheat oven to 350 degrees
  2. In a medium bowl combine Greek yogurt, cream cheese, roasted red peppers, scallions, ¼ cup cilantro, shredded cheddar, shredded pepper jack, red pepper flakes, salt and pepper.
  3. In a 2-quart oven-proof casserole dish spread the dip out evenly.
  4. Place in oven and bake for 20-25 minutes until cheese is bubbly and dip it hot.
  5. Top with remaining 1 tablespoon of chopped cilantro and serve with tortilla chips
  6. To make ahead of time-Do steps 2-3 and put plastic wrap over it and place in the fridge.
2.2.8

Source– Slightly adapted from Annie’s Eats

Tex-Mex Pimiento Cheese Dip Close-up


Filed Under: K's Recipes, Party Ideas Tagged With: appetizer, Appetizer Recipes, appetizer to bring to party, appetizers, party dish, party recipe, pimento cheese dip, pimiento cheese dip, summer appetizer recipe, summer recipe, tex mex pimiento cheese dip, tex-mex dish

Blueberry Lemon Popsicles

Posted by 2 Sisters 2 Cities on July 11, 2012

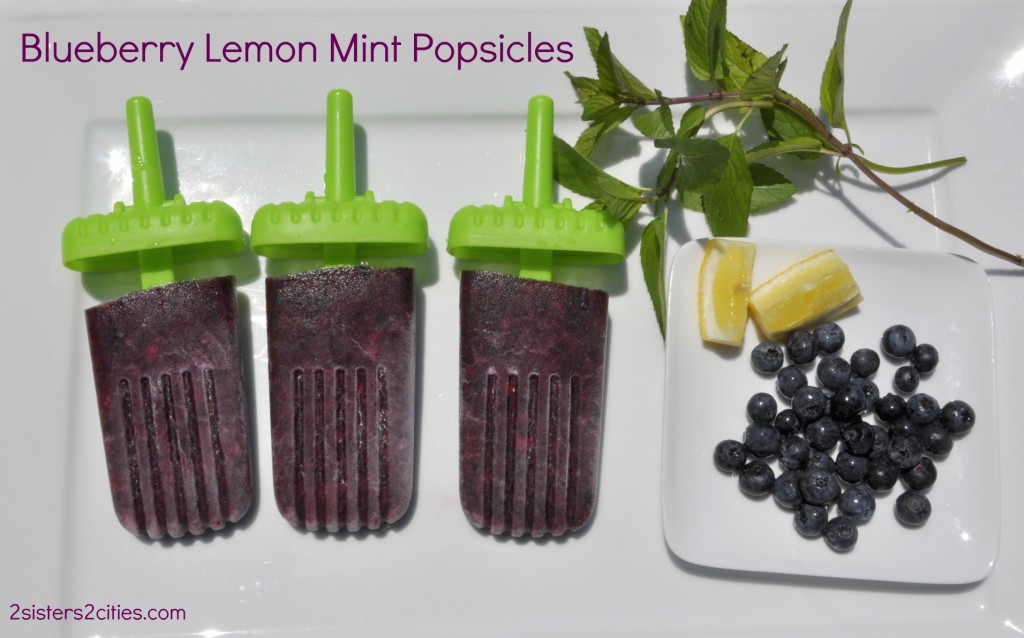
Blueberry Lemon Popsicles

I’m kicking off a new summer series today starting with this recipe for blueberry lemon popsicles.  Each week this summer, I will be posting a new popsicle recipe!  I just bought my first set of popsicle molds and I am excited to try out a lot of variations.

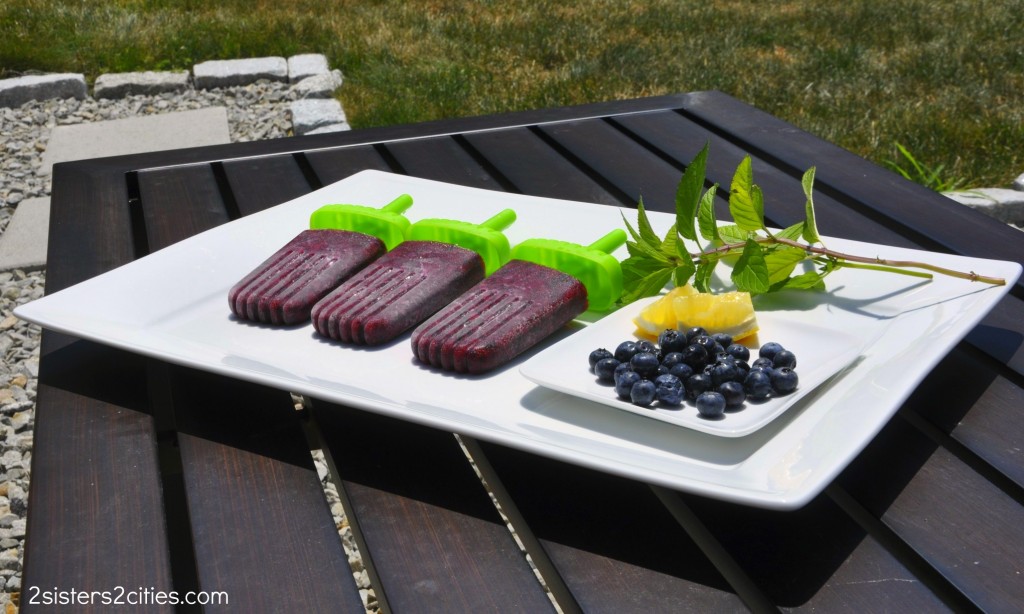
blueberry lemon mint popsicle

I created this week’s blueberry lemon popsicle with ingredients I already on hand in the house including the fresh mint from my CSA pick-up.  I’m excited for baby T to try it out this afternoon, but it will definitely have to be an outdoor event :)

Print
Blueberry Lemon Popsicles
Author: m
Recipe type: Frozen Treat
Prep time:  5 mins
Cook time:  4 hours
Total time:  4 hours 5 mins
Serves: 6
 
Ingredients
  • 5-6 mint leaves, cut chiffonade-style
  • 1 lemon, juiced and lightly zested
  • 2 tablespoons blue agave
  • 1 and ½ cups blueberries
  • 1 cup cold water
Instructions
  1. Place all the ingredients in a food processor or blender. Blend until smooth and pour into popsicle molds (leave a little extra room to allow for the ingredients to expand while freezing.) Place in a freezer for 4 hours or until frozen.
  2. Makes 6 full-size popsicles.
2.2.8

What’s your favorite recipe for popsicles? Let me know if you have one I have to try in the next couple of months!


Filed Under: M's recipes Tagged With: blueberry lemon mint popsicles, blueberry lemon popsicles, blueberry popsicles, blueberry recipes, easy dessert, frozen treat, popsicle recipe, popsicle series, summer recipe, summer recipes

Salt Potatoes

Posted by 2 Sisters 2 Cities on June 22, 2012

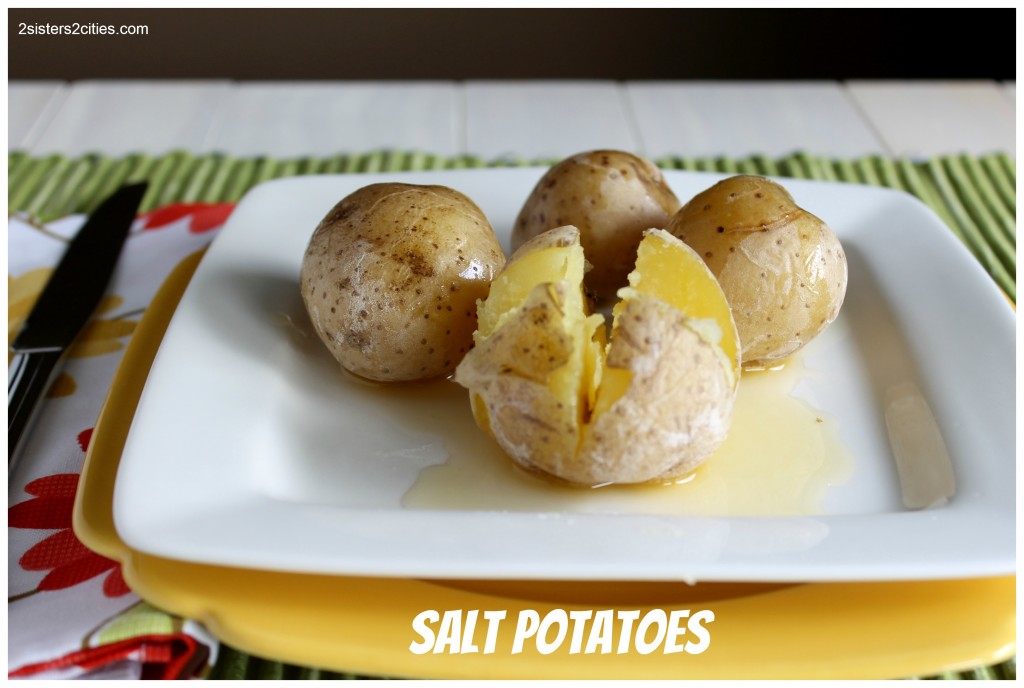
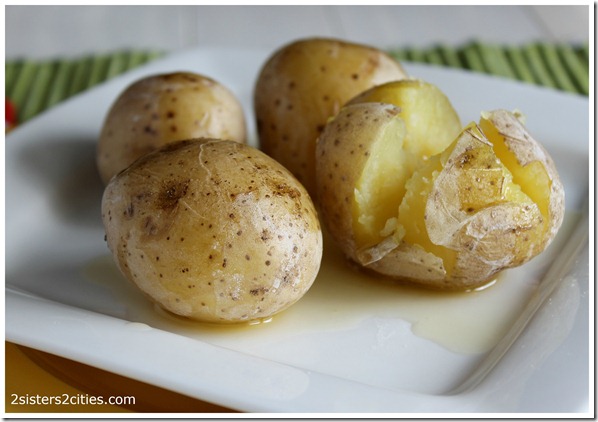
Growing up in Syracuse, salt potatoes use to be one of my favorite summer side dishes at a barbecue.  Salt potatoes are an iconic Syracuse dish originating from the late 1800s.  At that time, the Irish immigrants working in the salt springs around Onondaga Lake would bring in small bags of unpeeled potatoes and boil them in the salt brine for their lunches.  The dish later progressed to cooking young potatoes or small potatoes in a pot of highly salted water and serving with melted butter.

Salt potatoes have a delicious salted skin with a creamy potato inside that is perfectly matched with the melted butter it is served with.   The potatoes get their creaminess from the high temperature of the salt water that cooks the starches in the potatoes more than regular water.  When I young I didn’t know that salt potatoes were a regional dish.  I thought everyone ate salt potatoes at picnics like macaroni salad or coleslaw.  It makes me sad to think about what you were all missing!   So, please do make these to take this burden off of me! 

Print
Salt Potatoes
Author: K
Recipe type: Side
 
Ingredients
  • 4 pounds new white potatoes or small creamer potatoes (cleaned)
  • 12-16 oz Kosher salt (about 1½ to 2 cups)
  • ½ cup (1 stick) unsalted butter, melted
Instructions
  1. In a large pot add potatoes, salt, and 8 cups of water.
  2. Cover pot and bring to boil.
  3. Cook for 25-30 minutes until potatoes are tender.
  4. Drain potatoes in colander and let dry until salt is crystallized on skins
  5. Melt butter in a microwave safe bowl or measuring cup.
  6. Serve potatoes with melted butter poured on top.
2.2.7

IMG_1161


Filed Under: K's Sides, K's Recipes Tagged With: bbq sides, easy side dish, grilling, salt potato recipe, salt potatoes, side dish, summer meal, summer menu ideas, summer recipe

Greek Pasta Salad

Posted by 2 Sisters 2 Cities on June 21, 2012

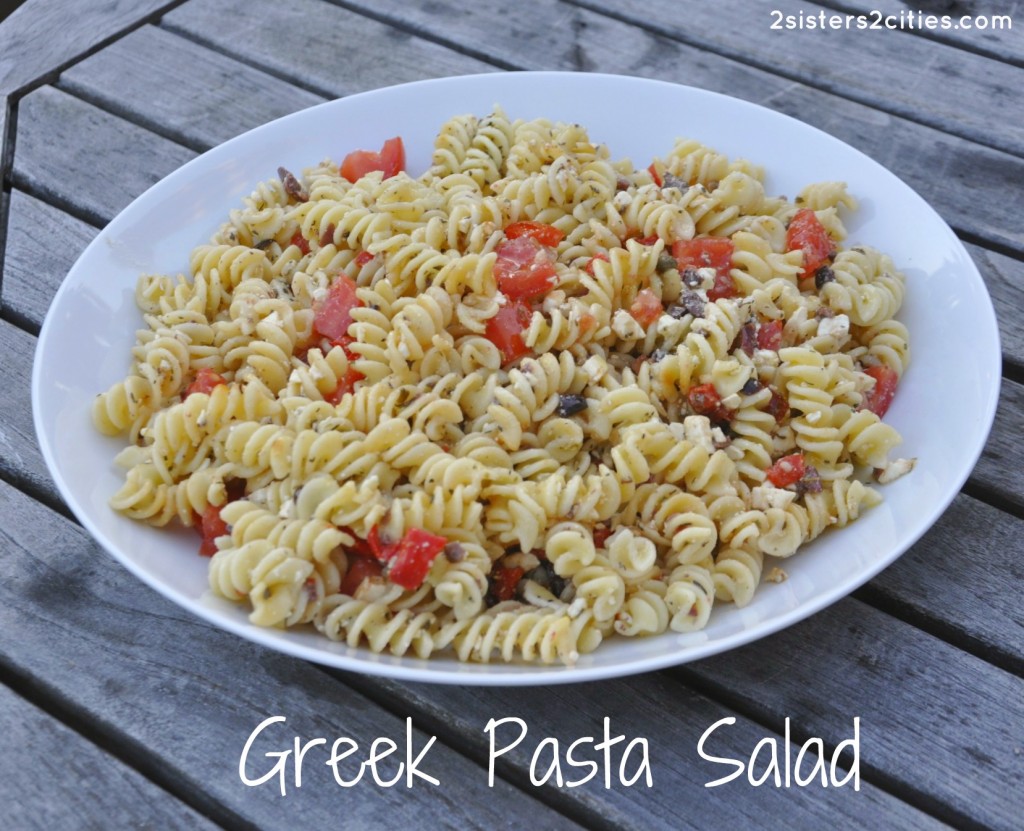
Greek Pasta Salad from 2 Sisters 2 Cities

It’s now officially summer! And it has come in with a bang in the Boston area- 98 degrees yesterday and it may hit 100 later today.  With such heat, we usually opt to grill outside as much as possible.  For Father’s Day on Sunday, I pulled together this simple Greek Pasta Salad with some ingredients I already had on hand.  I loved how it came together and it was the perfect accompaniment to our grilled steak tips, sausages, and zucchini.

I recommend making this Greek Pasta Salad early in the day while it’s cooler out and the flavors get a chance to meld together.  I also don’t add the tomatoes until I’m ready to serve the pasta salad as tomatoes lose a lot of their flavor if they are refrigerated.  If you don’t feel like dicing up olives or roasting a red pepper, be sure to check your supermarket antipasto bar- an olive tapenade or pre-made roasted red peppers will work in a pinch!

Print
Greek Pasta Salad
Author: m
Recipe type: Side dish
Prep time:  15 mins
Cook time:  15 mins
Total time:  30 mins
Serves: 12
 
The perfect pasta salad for a hot day
Ingredients
  • 16 oz box fusilli pasta
  • 1 red pepper, washed, trimmed, and cut in half
  • ½ cup olive oil (or more to taste)
  • ⅓ cup lemon juice
  • 2 tablespoons snipped fresh basil or 2 tsp. dried basil, crushed
  • 2 tablespoons snipped fresh oregano or 2 tsp. dried oregano, crushed
  • 1 tablespoon anchovy paste
  • 2 cloves garlic, crushed or minced
  • ¼ teaspoon salt
  • ¼ teaspoon ground black pepper
  • ½ cup kalamata olives, diced
  • ½ small red onion, diced
  • 1 cup feta cheese
  • 2 plum tomatoes, chopped
Instructions
  1. Cook pasta according to package directions. Drain in a colander and rinse with cold water until cool.
  2. Preheat oven to 400 degrees. Place red pepper halves on a baking sheet covered with foil. Bake for about 15 minutes until peel starts to blacken. Take baking sheet out of the oven and wrap pepper tightly with the aluminum foil it was baking on. Once it has cooled, remove peel and dice red pepper into small pieces.
  3. In a small bowl, whisk together the olive oil, lemon juice, basil, oregano, anchovy paste, garlic, salt, and pepper.
  4. In a large bowl toss together the cooked pasta, red pepper, olives, red onion, feta, and dressing. Cover and chill in refrigerator for as least 2 hours or up to 24 hours. To serve, add diced tomatoes; toss. Makes 12 to 16 side-dish servings.
2.2.7

What is your favorite dish to prepare when the temperatures are soaring?


Filed Under: M's Sides, M's recipes Tagged With: easy side dish, greek pasta salad, greek pasta salad recipe, grilling, pasta salad, side dish, summer meal, summer recipe

Basil Lemonade Recipe

Posted by 2 Sisters 2 Cities on May 25, 2012

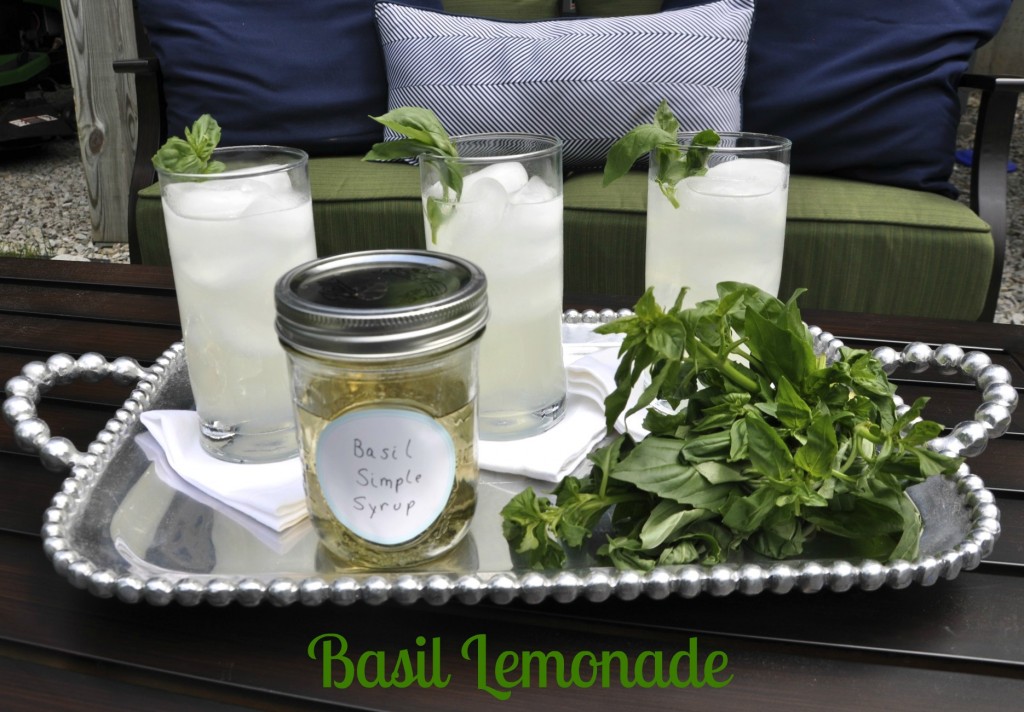
Before we head into the weekend, I wanted to give you one more summer recipe – basil lemonade.  If you are like many Pinterest users, you pin a lot of stuff that you plan to make one day and never do.  I am also guilty of pinning without abandon :) I have been going through a few of my pin boards to get some recipe ideas and I found this particular recipe for basil lemonade.  Two of my favorite things about summer are fresh basil and a glass of lemonade…this drink merges those flavors together.  It calls for 8 cups lemonade- I used store-bought, but you certainly could use homemade lemonade.  Regardless, it is the perfect beverage to sip outside on a hot summer day.

Print
Basil Lemonade
Author: m
Recipe type: Drink
Prep time:  5 mins
Cook time:  10 mins
Total time:  15 mins
Serves: 8
 
Ingredients
  • 1 cup sugar
  • 1 cup basil leaves, plus sprigs for garnish
  • 8 cups lemonade (store bought or homemade)
  • 1 and ½ cups cold water
  • ice
Instructions
  1. To make the simple syrup, heat a small saucepan over medium heat and add sugar and water. Bring to a summer and cook (without stirring) until the sugar dissolves and the mixture slightly thickens. This should take about 5 minutes.
  2. Remove simple syrup from heat and add 1 cup basil leaves. Allow the mixture to cool to room temperature. Strain out the basil and store the simple syrup in a container.
  3. Pour 2 to 3 teaspoons of the basil simple syrup into 8 glasses filled with ice, and add a cup of lemonade to each. Garnish with an additional sprig of basil.
Notes
Alternatively, you can store the basil simple syrup in the fridge for up to 2 weeks. The simple syrup would also be refreshing with ice tea, sparkling water, vodka or gin-based cocktails, or even over lemon sorbet. You could also swap out the basil for rosemary, lemon balm, or mint to make other herb-based simple syrups.
2.2.6

Source: Adapted from Real Simple

Be sure to check out our Memorial Day Weekend recipe post for more summer menu ideas.  Have a great holiday weekend!


This post was linked at:

Related Posts Plugin for WordPress, Blogger...


Filed Under: M's recipes Tagged With: basil lemonade, basil lemonade recipe, drink recipe, lemonade recipe, memorial day recipe, pinterest recipes, summer recipe

Recent Posts

  • Easy Holiday Office Party Tips
  • 5 Steps to an Easy Football Party
  • Gingerbread Biscotti
  • Holiday Coffee Bar and Thanksgiving Recipes
  • Soft Sugar Pumpkin Cookies
  • Cinnamon Sugar Apple Cake
  • Hello Pumpkin Season!
  • Make Your Own Milkshake Party!
  • Mama’s Pickles
  • S’more Cookies

Categories

  • About 2 Sisters 2 Cities (7)
  • Books (8)
  • Crafting & DIY (22)
  • Design & Decorating (15)
  • Gardening (5)
  • Giveaway (14)
  • Guest Bloggers (8)
  • K's post (46)
  • K's Recipes (191)
    • K's Desserts (75)
    • K's Entrees (23)
    • K's Sides (24)
  • M's post (72)
  • M's recipes (167)
    • M's Entrees (21)
    • M's Sides (14)
    • M's Desserts (30)
  • Organizing (7)
  • Party Ideas (49)
  • Uncategorized (1)
  • Vacation (12)
Stitch Fix

Archives

Blogroll

  • Annie's Eats
  • Bake at 350
  • Baked Bree
  • Boston Harbor Beacon
  • Confections of a Foodie Bride
  • Cook Like a Champion
  • Erin’s Food Files
  • Forever and a Recipe
  • Framed Cooks
  • Oh Happy Day
  • On Common Ground
  • Pennies on a Platter
  • Pink Parsley
  • Recipe Girl
  • Sally's Baking Addiction
  • Simply Scratch
  • The Curvy Carrot
  • The Pioneer Woman
  • Tidy Mom
  • Two Peas & Their Pod
  • What’s Gaby Cooking
  • Young House Love
Increase your website traffic with Attracta.com

grab a 2 sisters button!


Copyright © 2014 ~ 2 Sisters 2 Cities | Blog Design by Minx Design