2 Sisters 2 Cities

Image Map
  • About 2 Sisters 2 Cities
  • Recipe Index
  • Project Index
  • Contact Us
  • Like us on Facebook
  • Follow m on twitter
  • Follow k on twitter
  • Follow 2S2C on Pinterest
  • Follow 2S2C on G+
  • rss
  • e-mail 2S2C

Chocolate Dipped Coconut Macaroons

Posted by 2 Sisters 2 Cities on March 25, 2013

Chocolate Dipped Coconut Macaroons {from 2 Sisters 2 Cities}

Continuing on with our Easter recipe series today, I thought I would skip right to dessert!  These chocolate dipped coconut macaroons are a very simple cookie recipe to make and can be made up to five days ahead of time (just be sure to store them in an airtight container.)  Since coconut macaroons have no leavening agents or wheat in them, they are also perfect for Passover or for serving to family and friends who are gluten-free.

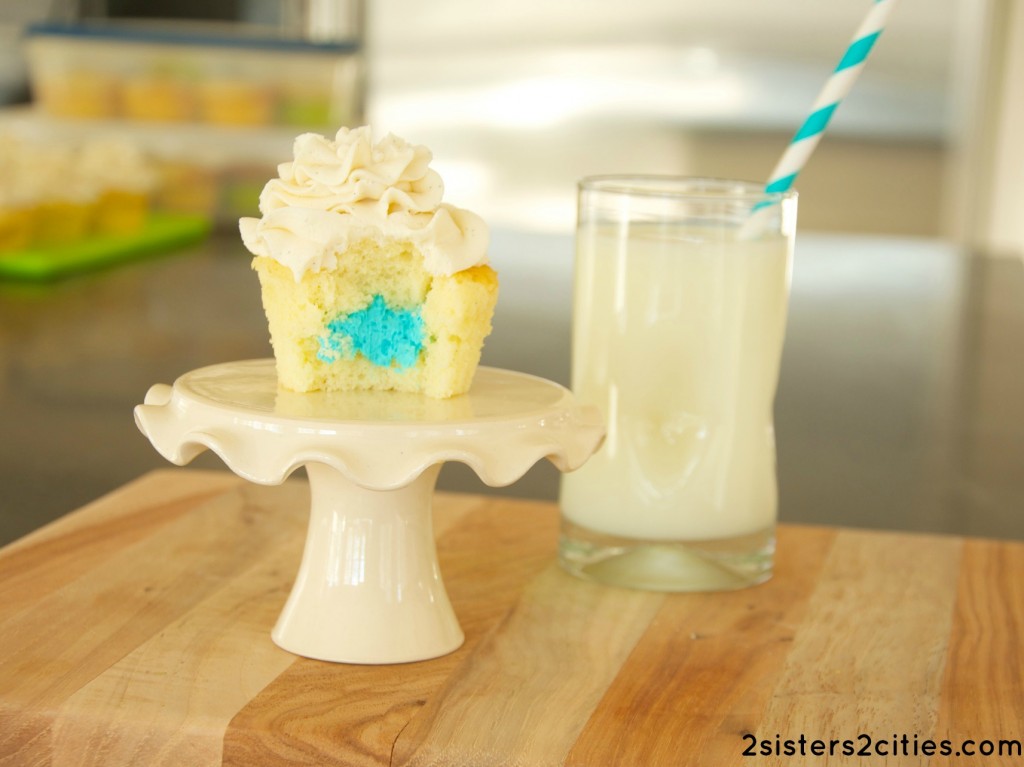
{As a side note, I apologize for my lack of posts last week.  Luckily, K has been on a holiday cooking spree lately!  We were on vacation in St. John the week before and I’ve been playing a bit of catch-up around the house since we got back.  I suddenly realized I have less than 14 weeks to go until my due date and went into full-blown nesting mode.  I’ve been working on baby #2’s nursery and finishing up a number of organizing projects around the house.  I’m feeling a bit more prepared now and I’m hoping to share a few more Easter-related recipes this week!} 

Chocolate Dipped Coconut Macaroons {from 2 Sisters 2 Cities}

Print
Chocolate Dipped Coconut Macaroons
Prep time:  15 mins
Cook time:  20 mins
Total time:  35 mins
 
Ingredients
  • 3 large egg whites
  • ½ cup sugar
  • ½ teaspoon vanilla extract
  • ¼ teaspoon kosher salt
  • 1 14-ounce package sweetened shredded coconut (~5 cups)
  • 4 oz. good-quality dark/semi-sweet chocolate
Instructions
  1. Heat oven to 325° F. Line 2 baking sheets with parchment paper.
  2. Whisk together the egg whites, sugar, vanilla, and salt in a medium bowl until the sugar is almost dissolved. Stir in the coconut with a spatula until all ingredients are thoroughly combined.
  3. Use a small ice cream scoop to drop the coconut mixture into mounds on the parchment sheets (about 2 tablespoons each.) Bake the macaroons for 20 to 25 minutes, keeping a close eye on them toward the end- these cookies are very easy to burn! Remove from oven once they start to turn golden brown. Allow to cool on the baking sheets for a few minutes and transfer them to cooling racks.
  4. Meanwhile, place the chocolate in a microwave-safe container (I use a large Pyrex glass) and cook in the microwave for 30 second increments. Stir between each increment and continue to cook until chocolate is fully melted and smooth.
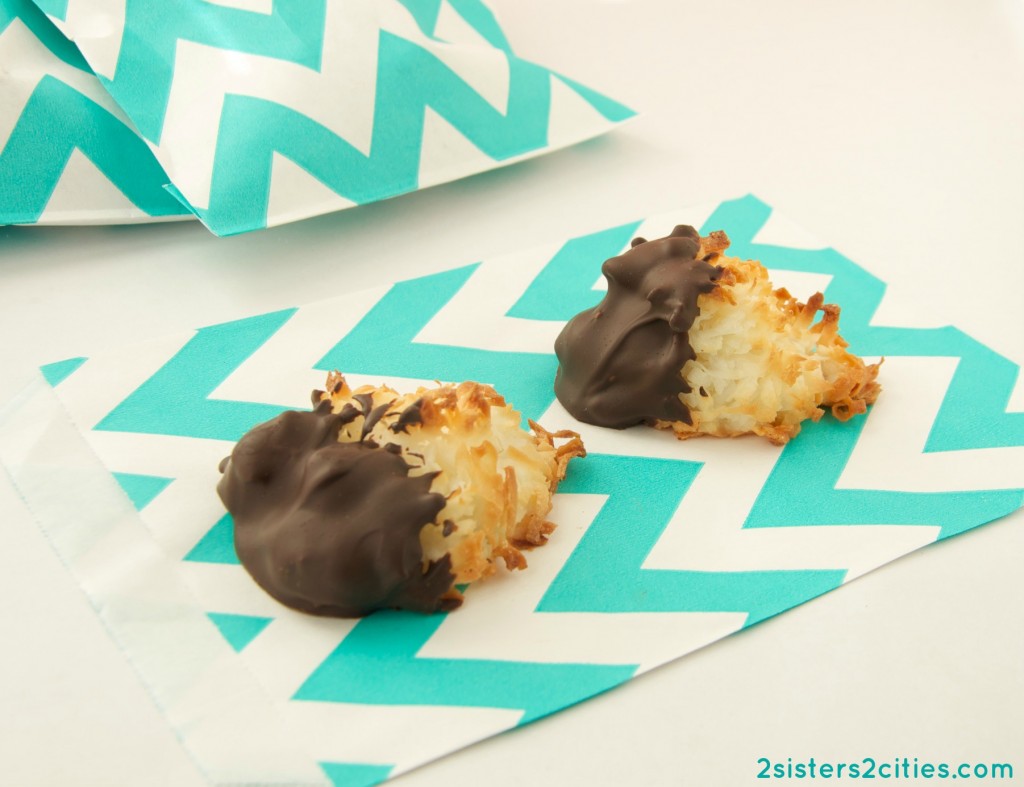
  5. Dip each cooled macaroon into the melted chocolate and place back onto the parchment paper. You can either dip side half the macaroon in the chocolate (as seen in my photos) or dip the bottom half into the chocolate. Alternatively, you could also drizzle chocolate on top of the macaroons if you want a lighter touch of chocolate. Once you fill up a baking sheet with the dipped macaroons, place the sheet in the refrigerator for 5 minutes or until chocolate is set.
  6. Store in an airtight container for up to five days.
3.2.1682

Source: Adapted from Real Simple, March 2013

sister m signature


Filed Under: M's Desserts, M's recipes Tagged With: chocolate, coconut, coconut macaroons, cookie recipes, cookies, easter, Easter cookies, easter desserts, easter recipes, gluten-free, gluten-free cookies, passover, passover cookies

M&M Cookies for Valentine’s Day

Posted by 2 Sisters 2 Cities on February 5, 2013

Valentine's Day M&M Cookies {from 2 Sisters 2 Cities}

I have been meaning to share this cookie recipe for the past two weeks, but these M&M cookies seem to disappear before I can even take a photo of them!  I was finally able to make a batch this past weekend and sneak in a photo session before we ate them all.  While this recipe does take a little bit of time because you need to chill the dough before baking them, I have been been breaking it into two baking sessions.  I make the M&M cookie dough on one night, and then I bake the cookies the next day.  I sometimes prefer baking this way because it makes the clean-up seem much more manageable when split over two days.

Valentine's Day M&M Cookies {from 2 Sisters 2 Cities}

I used Valentine’s Day pink, red, and white M&Ms to make these, but you could switch up the M&M colors for any holiday or theme party…think Easter, Fourth of July, Halloween, Christmas, etc.  You could even use the personalized M&Ms to bake up a special message for someone for this upcoming Valentine’s Day.   Way better than conversation hearts in my opinion!

My husband and I gave out customized M&Ms as a wedding favor since our first name both starts with the letter M.  We had our wedding date and our names printed on blue, green, and white M&Ms (our wedding colors).  I should have used the extras to bake up a batch of these M&M cookies!  Maybe I’ll have some reprinted for a fun anniversary gift in future years.

Valentine's Day M&M Cookies {from 2 Sisters 2 Cities}

Print
M&M Cookies for Valentine's Day
Author: 2 Sisters 2 Cities
Prep time:  40 mins
Cook time:  10 mins
Total time:  50 mins
Serves: 12
 
Ingredients
  • 2 cups plus 2 tablespoons all-purpose flour
  • ½ teaspoons baking soda
  • 1 and ½ sticks unsalted butter, softened at room temperature
  • 1 cup light brown sugar
  • ½ cup sugar
  • 1 egg, at room temperature
  • 1 egg yolk, at room temperature
  • 2 teaspoons vanilla extract
  • 1 cup M&Ms (regular or seasonal)
Instructions
  1. In a medium-sized bowl, mix the flour and baking soda with a whisk. Set flour mixture aside. Using the paddle attachment with an electric stand mix, mix the butter, brown sugar, and regular sugar together until combined and creamy. Next, add the egg, egg yolk, and vanilla and continue to mix. Add the flour mixture ½ cup at a time and mix until all flour/baking soda is incorporated. Scrape down the sides of the bowl with a spatula as needed.
  2. Remove the mixing bowl from the stand and fold in the M&Ms with the spatula. (Don't mix in the M&Ms with the electric mixer or they will get crushed!)
  3. Wrap dough in plastic wrap and chill in the refrigerator for at least 30 minutes. The cookie dough will keep up to five days in the fridge.
  4. When you are ready to bake the M&M Cookies, preheat oven to 325 degrees F. Line baking sheets with parchment paper.
  5. Use a mini ice cream scoop to create small balls of dough and place on parchment-lined baking sheet. Before baking, press a few more M&Ms onto the tops to add a little more color to the cookies. Bake for 10-12 minutes or until edges are slightly browned. The centers should still be slightly soft. Remove from oven and allow cookies to cool a few minutes on the baking sheet and transfer to cooling racks. Store in a airtight container for up to seven days.
3.2.1596

Source: Slightly adapted from Sally’s Baking Addiction (I highly recommend checking out this blog if you have time- so many great cookie recipes…)

sister m signature


Filed Under: M's Desserts, M's recipes Tagged With: chocolate recipe, cookie recipe, M&M cookies, M&Ms, seasonal M&Ms, valentine's day

Rustic Almond Pear Tart

Posted by 2 Sisters 2 Cities on January 31, 2013

Rustic Almond Pear Tart {from 2 Sisters 2 Cities}

One of Baby T’s* favorite fruits is pears so we always have a bunch of them in our fruit bowl in varying stages of ripeness.  When I came across this recipe for an almond pear tart, I knew I had to try it.  It made the perfect winter afternoon treat to go with a cup of tea.  The layers of buttery phyllo in the tart accentuate the warm notes of nutmeg and pear.  This tart would also make a pretty side dish to serve at a ladies’ get-together.

*When should I officially stop calling Baby T a baby now that he is well over two-years-old.  I think maybe his high school graduation?

almond pear tart {from 2 sisters 2 cities}

Print
Prep time:  10 mins
Cook time:  18 mins
Total time:  28 mins
 
Ingredients
  • ¾ cup raw almonds
  • ¼ cup sugar plus more for sprinkling
  • 1 tablespoon all-purpose flour
  • ¼ teaspoon salt
  • 1 large egg
  • ½ teaspoon pure vanilla extract
  • ⅛ teaspoon ground nutmeg
  • 6 sheets frozen phyllo dough, thawed
  • ½ stick butter, melted
  • 2 firm-ripe Bartlett pears, each pair sliced into ~15 slices
Instructions
  1. Preheat oven to 400 degrees F and prepare a baking sheet with parchment paper.. In an electric food processor, pulse almonds, sugar, flour, and salt until finely ground. Add egg, vanilla, and nutmeg to the almond mixture and continue to pulse until combined.
  2. Lay 1 sheet phyllo the parchment paper and lightly brush the phyllo with the melted butter. Sprinkle with about ½ teaspoon sugar. Repeat this process for the remaining 5 layers of phyllo (omit sugar on last layer). Carefully spread almond mixture evenly on stack, leaving a 1-inch border (if the phyllo rips slightly, don't worry- it's "rustic!") Arrange sliced pears on top. Fold over edges of phyllo to create a crust border.
  3. Bake the almond pear tart for 18 minutes (edges will be golden when done). Serve warm or at room temperature.
3.2.1596

Source: Slightly adapted from Martha Stewart Everyday Food, December 2012

sister m signature


Filed Under: M's Desserts, M's recipes Tagged With: afternoon treat, almond pear tart, almonds, pears, tart, tea treats

Gender Reveal Cupcakes

Posted by 2 Sisters 2 Cities on January 24, 2013

The big day has arrived and we finally found out what the gender of baby #2 was this morning!  Thank you so much to everyone who entered our  Oh Baby $25 Amazon Gift Card Giveaway and left their prediction.  I loved reading everyone’s comments and guesses as to whether the baby was going to be a boy or a girl.  Congrats to the winner of the gift card, Krystal M.!

I wanted to announce the baby’s gender in a special way- through a cupcake recipe!  I have seen so many cute ideas for gender reveals and wanted to fill a cupcake with either pink or blue frosting so you discover the baby’s gender with your first sweet bite of cupcake.  I think most people have the ultrasound technician write down the gender and put it in a sealed envelope, which then goes to the baker to make the appropriately-filled cupcakes.  I, however, needed to know the gender the very second it was possible for me to know.  I thought it would be really fun to try making these cupcakes myself and share the recipe/tutorial on 2S2C!

Before I share the final gender reveal, I did a little number crunching from the gender prediction comments in the giveaway.  51.4% of you predicted a girl, while 49.6% predicted a boy.

OK, who’s ready for the big reveal?  Is baby #2 going to be a boy or girl?  Team pink or team blue?

Are you sure you are ready?

Would you like to make one final guess?

3, 2, 1…

.

.

.

.

gender reveal cupcakes

 Yes, it’s going to be another crazy little boy in our household!  Baby T is going to love having a little brother (I hope!)  While part of me hoped the baby was going to be a girl, I pretty much knew it was going to another bouncing baby boy.  Many of you mentioned with your prediction that you have to give a lot of credit to mother’s intuition and I definitely have thought that this pregnancy feels very similar to the last.  With two boys, I have a feeling the next few years (or 18) will be very active ones- please feel free to send any unused Starbucks cards my way!  Hopefully the two of them will be best of friends.

I put together a picture tutorial of how I made these cupcakes.  I just happened to find a little tool that made a hole in the cupcakes when I was in Marshall’s the other day.  It was only $2 so I picked it up, but you certainly would be able to do the same thing with a small paring knife.  Here are the six steps you need to take to enjoy your gender reveal cupcakes:

Gender Reveal Cupcakes Tutorial {from 2 Sisters 2 Cities}

I opted for a vanilla bean cupcake and vanilla bean buttercream frosting so the blue would really shine through.  I also just bought a huge bag of vanilla beans on-line for ice cream making and I wanted to try it with baking.

gender reveal cupcakes

Print
Prep time:  1 hour
Cook time:  25 mins
Total time:  1 hour 25 mins
 
Ingredients
Vanilla Bean Cupcakes
  • 3 cups cake flour
  • 1 tablespoon baking powder
  • ½ teaspoon salt
  • 1 vanilla bean, split lengthwise and seeds scraped out
  • ½ cup of unsalted butter (2 sticks), at room temperature
  • 2 cups sugar
  • 5 eggs, at room temperature
  • 1 and ¼ cups buttermilk (I did not have buttermilk so I used mixed up a powder buttermilk with water)
  • 1 tablespoon vanilla extract
Whipped Vanilla Buttercream
  • 1 and ½ cups butter, plus 2 tablespoons (3 sticks, plus 3 tbsp.), at room temperature
  • 3 cups confectioners' sugar, sifted
  • pinch of salt
  • 1 vanilla bean, split lengthwise and seeds scraped out
  • 2 tablespoons heavy cream
  • 1 tablespoon vanilla extract
Instructions
Vanilla Bean Cupcakes
  1. Preheat the oven to 350 degrees Fahrenheit. Prepare two cupcakes pans by lining them with (gender neutral!) paper liners.
  2. In a medium-sized bowl, whisk together the flour, baking powder, and salt. Set flour mixture aside. Meanwhile, add the butter to the bowl of an electric mixer and scrape the vanilla bean seeds into the bow. Using the paddle attachment, beat the butter and vanilla mixture for 3 minutes on medium-high speed. Periodically scrape down the bowl.
  3. Add the sugar to the butter mixture, one cup at a time. Beat for 1 minute after each cup. Add the eggs and continue to mix one at a time. In a liquid measuring cup, combine the buttermilk and vanilla extract. Add a bit of liquid mixture and flour mixture to the butter mixture and allow to incorporate after each addition. Continue to add the liquid and flour mixture until it all has been added to the cupcake batter.
  4. Pour the batter into the prepared baking cup liners about ⅔rd of the way through (you may end up with extra batter.) Bake for about 20 minutes, or until a toothpick entered in the center of each cupcake comes out clean. Allow to cool in the pan for a few minutes and then transfer to a cooling rack. Let cupcakes cook completely before frosting.
Whipped Vanilla Buttercream
  1. Place the butter in the bowl of an electric mixer. With the whisk attachment, blend the butter on medium-high speed for about a minute. Add the scraped out vanilla bean seeds and salt to the butter mixture and continue to whisk for another minute. Add the heavy cream and vanilla, scrape down the sides of the bowl, and continue to whip the frosting for another 4 minutes on high speed.
  2. To make gender reveal cupcakes, remove about ¾ of the vanilla bean frosting and add it to an icing bag. With the remaining ¼ of the frosting, add either blue or pink food coloring for the cupcakes' inner filling. Once completely blended, add blue/pink frosting to a second icing bag.
  3. Using a cupcake corer tool or a small paring knife, cut a hole on the top center of each cupcake. Carefully remove cupcake core and fill with blue or pink frosting. Add cupcake core back to the top of the cupcake and pat it down. Frost the top of the cupcake with the white vanilla bean icing.
3.2.1337

Source: Vanilla Bean Cupcake and Whipped Vanilla Buttercream slightly adapted from Annie’s Eats

Was your prediction correct?!?

sister m signature


Filed Under: M's Desserts, M's recipes Tagged With: baby #2, baby announcement, baby shower, boy, gender reveal, gender reveal cupcake tutorial, gender reveal cupcakes, getting ready for baby, girl, having a baby, how to make gender reveal cupcakes, it's a boy!, it's a girl!, team blue, team pink, vanilla bean cupcakes, whipped vanilla buttercream

Two Mini Gingerbread Men with Cream Cheese Icing

Posted by 2 Sisters 2 Cities on December 21, 2012

Mini Gingerbread Men with Cream Cheese Icing

I spent my afternoon making Mini Gingerbread Men with Cream Cheese Icing and raced against the clock to get a photo of them with the dwindling natural afternoon light.  I should have read the original recipe more thoroughly and realized that the dough needed to chill for three hours.  Not a great thing to read on the shortest day of the year!  Fortunately, I was able to shave a little time of chilling the dough by freezing it for a bit instead.  Before the sun set for the day, the crazy rain and wind subsided and the sun came out!

mini gingerbread men

While I was deciding on what my last cookie contribution for our 12 Days of Christmas Cookies, I pulled out my cookie cutters for some inspiration.  I found a mini gingerbread cut-out that was just too cute to pass up.  Since the cookies themselves are pretty tiny, I decided to add a layer cream cheese icing between two cookies.  You can also use the icing to pipe details onto each gingerbread or just leave them plain.

Print
Two Mini Gingerbread Men with Cream Cheese Icing
Author: 2 Sisters 2 Cities
Recipe type: Cookies
Prep time:  3 hours 30 mins
Cook time:  5 mins
Total time:  3 hours 35 mins
Serves: 36
 
Ingredients
  • ½ cup shortening
  • ½ cup granulated sugar
  • 1 tsp baking powder
  • 1 tsp ground ginger
  • ½ tsp baking soda
  • ½ tsp ground cinnamon
  • ½ tsp ground cloves
  • ½ cup molasses
  • 1 egg
  • 1 tablespoon white vinegar
  • 2 and ½ cups flowers
  • 4 tablespoons butter
  • 4 oz. cream cheese
  • ½ tsp vanilla
  • 2 cups powdered sugar
Instructions
  1. To make the gingerbread men, mix shortening with an electric mixer for 30 seconds. Add granulated sugar, baking powder, ginger, baking soda, cinnamon, and cloves. Mix until combined. Then, beat in molasses, egg, and the vinegar until mixed well. Add the flour in batches. Divide dough in half. Wrap each half in plastic wrap and allow to chill in the fridge for 3 hours or the freezer for 45 minutes.
  2. Preheat oven to 375 F. Prepare baking sheets with parchment paper. Roll out one cookie dough half on a lightly floured surface until about ⅛" thick. Use a small gingerbread cookie cutter to cut-out cookies. Place on baking sheet.
  3. Bake for 5 to 6 minutes or until set. Cool on cookie sheet for a minute and transfer to a wire rack to allow cookies to cool.
  4. To make the cream cheese icing, mix the butter and cream cheese with an electric mixer. Add in the vanilla and combine. Add in the powdered sugar ½ cup at a time to desired consistency.
  5. Spread a layer of the cream cheese icing on the bottom of a gingerbread cookie and stick another cookie to it. Repeat until all cookies have been paired up. Put remaining icing in a piping bag and ice details on each gingerbread man cookie if desired.
3.2.1336

sister m signature


Filed Under: M's Desserts, M's recipes Tagged With: 12 cookies of Christmas, 12 days of christmas cookies, christmas, christmas in hawaii, cookie recipe, cookies, cream cheese frosting, cream cheese icing, gingerbread cookies, gingerbread men

Four Nutella and Sea Salt Stuffed Sugar Cookies

Posted by 2 Sisters 2 Cities on December 19, 2012

Nutella and Sea Salt Stuffed Sugar Cookies

Four Nutella and Sea Salt Stuffed Sugar Cookies vs Four Calling Birds?  I’ve got to go with Nutella cookies on this one!

While this is not the first Nutella cookie recipe that we have posted about this year, I knew I had to try this Nutella and Sea Salt Stuffed Sugar Cookies when I came across them on Pinterest.  As I have mentioned before, my husband is obsessed with Nutella so I knew he would be all over these.  I am trying to keep some hidden in the freezer so there will be left for Christmas, but I’m afraid they have been discovered and our supply is running quite low.

Nutella and Sea Salt Stuffed Sugar Cookies

This recipe only yields 24 cookies, but these cookies do come out on the fairly large size.  If you want to have a higher yield of smaller cookies, I recommend just freezing Nutella with a 1/2 tsp measure and using smaller pieces of cookie dough for each cookie.  Either way, I imagine these cookies will be gobbled up in your house quickly as well!

Print
Four Nutella and Sea Salt Stuffed Sugar Cookies
Author: 2 Sisters 2 Cities
Recipe type: cookies
Prep time:  30 mins
Cook time:  10 mins
Total time:  40 mins
Serves: 12
 
Ingredients
  • ½ cup Nutella (chocolate-hazelnut spread)
  • 2 and ½ cups all-purpose flour
  • ½ tsp baking powder
  • ½ tsp salt
  • 1 and ½ cups plus ¼ cup granulated sugar, divided
  • 1 and ¾ sticks unsalted butter, at room temperature
  • 2 large eggs, at room temperature
  • 2 tsp vanilla extract
  • 1 tbsp sea salt
Instructions
  1. Using a 1 teaspoon measure, scoop out Nutella and place in small heaps on a cookie sheet lined with parchment paper. Place in the freezer for 15 minutes. (I found using two small trays of plates work best because you can rotate them between the freezer and the kitchen counter as you are preparing each batch of cookies.)
  2. Preheat the oven to 350 degrees F. Line 2 large baking sheets with parchment paper.
  3. In a medium bowl, whisk together flour, baking powder, and salt. In a large bowl, beat butter and 1½ cups granulated sugar with an electric mixer set on medium speed until the mixture is creamy and fluffy. Beat in the eggs and the vanilla extract.
  4. Set the mixer to low speed and gradually add in the flour mixture until it is just combined.
  5. Place ¼ cup granulated sugar in a small bowl. Use 1 heaping tablespoon cookie dough for each cookie. Split the piece of dough in half and slightly flatten the each half with the palm of your hand. Sprinkle a pinch sea salt on one half of the flattened dough.
  6. Remove the frozen Nutella from the freezer and use a small metal spatula to lift the frozen Nutella from the parchment paper. Lay it on the bottom half of cookie dough, on top of the sea salt. If the Nutella starts to soften, place back in the freezer for a few minutes (or alternate with the other tray if you do two trays in the first step.)
  7. Cover the bottom half and frozen Nutella with the other piece of cookie dough. Gently seal the edges with your fingers. Roll the cookie in the sugar to lightly coat it and place it on the prepared baking sheet.
  8. Repeat with the remaining dough and frozen Nutella, spacing the cookies about 2 inches apart from each other on the baking sheets. I found it easiest to prep about 6 cookies at a time in an assembly line fashion.
  9. Bake the cookies, one sheet a time. They are done when the edges are set and beginning to brown, 10 to 13 minutes. The centers of the cookies should still be soft and puffy.
  10. Remove the cookies from the oven and allow to cool on the baking sheet for 10 minutes. Transfer cookies to cool on a rack. Enjoy warm or at room temperature!
3.1.09

Source: Slightly adapted from Cookin’ Canuck

sister m signature


Filed Under: M's Desserts, M's recipes Tagged With: 12 cookies of Christmas, 12 days of christmas cookies, Christmas Cookies, cookie recipe, cookies, holiday baking, nutella, nutella cookies, sea salt, sea salt cookies, sugar cookies

Six Chocolate Velvet Butter Balls

Posted by 2 Sisters 2 Cities on December 14, 2012

Chocolate Velvet Butter Balls

Looking for an easy, chocolate-y cookie recipe to bring to an upcoming Christmas cookie exchange?  This recipe for Chocolate Velvet Butter Balls fits the bill.  This chocolate cookie recipe whips up a high volume of cookies in no time flat and they are the perfect hit of chocolate.  The Chocolate Velvet Butter Balls also freeze very well in case you are stocking up on your Christmas cookie supply this weekend.

Chocolate Velvet Butter Balls

Can we talk about how Christmas is only a week and a half away!?!  I find that fact very shocking.  This is going to be a very busy weekend of sending Christmas cards, shopping for presents, wrapping gifts, and baking more cookies.  The only problem with starting to bake so early for our 12 Days of Christmas Cookie series is that we have a lot of cookie thieves in our home (myself included!)

Print
Six Chocolate Velvet Butter Balls
Author: 2 Sisters 2 Cities
Recipe type: cookie
Prep time:  10 mins
Cook time:  10 mins
Total time:  20 mins
Serves: 35
 
Ingredients
  • 2 and ½ cups flour
  • 6 tablespoons cocoa powder
  • 1 cup butter, at room temperature
  • ¾ cup granulated sugar
  • 2 tsp vanilla
  • dash of salt
  • 1 egg
  • confectionery sugar (for garnish)
Instructions
  1. Preheat oven to 350 degrees F.
  2. Sift together flour and cocoa powder; set aside. Use a mixer to blend together the butter and granulated sugar. Add vanilla, salt, and egg to mixing bowl and beat until blended. Pour the flour/cocoa mixture directly into the mixing bowl. Mix until dough is well combined.
  3. In the palm of your hand, roll into ball one inch in diameter. Bake 10 minutes on parchment paper-lined cookie sheet. Cool on racks and then sift confectionery sugar on top.
3.1.09

What are you plans for the weekend?  Do you have a planned itinerary of baking, sending cards, and wrapping gifts as well?

sister m signature


Filed Under: M's Desserts, M's recipes Tagged With: 12 cookies of Christmas, 12 days of christmas cookies, chocolate, chocolate cookies, chocolate velvet butter balls, Christmas Cookies, cookie exchange, cookie recipes, cookies

Eight Kolacky

Posted by 2 Sisters 2 Cities on December 10, 2012

Kolacky

K and I are once again on the same wavelength this week…my cookie for today as part of our 12 Days of Christmas Cookies is also a jam-filled one.  If you are looking for a jam cookie in addition to K’s raspberry linzer cookies, try this recipe for kolacky.  This has been a traditional Christmas cookie that we have had at our home growing up.  I believe it has Polish origins.

kolacky

These cookies can be customized to your taste by using any type of jam or fruit preserves that you want.  I usually prefer to make it with apricot jam, but you could do another type or even a variety of jam flavors.  I love how this cookie puffs up while baking to create light flaky layers- it’s perfect with a cup of tea.

Print
Eight Kolacky
Author: 2 Sisters 2 Cities
Recipe type: cookie
Cuisine: Polish
Prep time:  1 hour
Cook time:  10 mins
Total time:  1 hour 10 mins
Serves: 30
 
Ingredients
  • 1 cup unsalted butter, at room temperature
  • 8 ounces cream cheese, at room temperature
  • ½ teaspoon vanilla extract
  • 2 and ¼ cups all-purpose flour
  • ½ teaspoon salt
  • Thick jam, such as apricot
Instructions
  1. Preheat oven to 350 degrees F.
  2. Mix butter and cream cheese together in a medium bowl until fluffy. Beat in vanilla extract.
  3. In a separate bowl, combine flour and salt. Add to butter and cream cheese mixture in fourths, blending well after each addition. Chill dough until easy to handle.
  4. Once dough is chilled, roll dough to ⅜th inch thickness on floured surface. Cut out 2-inch circles (or other shapes). Place on ungreased baking sheets. Make a "thumbprint" about ¼ inch deep in each cookie (I just use my thumb, but the back of a spoon would also work.) Fill each cookie thumbprint with jam.
  5. Bake for 10 to 15 minutes until delicately browned on edges.
3.1.09

sister m signature


Filed Under: M's Desserts, M's recipes Tagged With: 12 cookies of Christmas, 12 days of christmas cookies, christmas, christmas cookie, Christmas cookie recipes, cookies, holiday, holiday cookies, jam, jam cookie, kolacky, polish cookie

Ten Crisp Toffee Chocolate Bars

Posted by 2 Sisters 2 Cities on December 5, 2012

crisp toffee chocolate bars

One foodie trend that I can not get enough of is the combination of chocolate and salt.  We’ve definitely posted a lot of recipes that include this combo (see Chewy Chocolate Cookies with Fleur de Sel, Sea Salt Caramel Brownies, and Salted Caramel Chocolate Shortbread Bars.)  When I came across this recipe for crisp toffee chocolate bars in one of my favorite cookbooks, Mad Hungry by Lucinda Scala Quinn, I knew I had to try it.

crisp toffee chocolate bars

This recipe is very easy to make and it doesn’t require any specialty ingredients.  In fact, I had the entire ingredient list on hand and did not need to make a trip to the grocery store (that’s definitely a huge bonus this time of year!)   This recipe for crisp toffee chocolate bars can be upgraded by using a higher quality dark, bittersweet, or semisweet chocolate.  I ended up using a combination of 70% cacao dark chocolate and semisweet chocolate chips.  These bars went so fast in our household that I already need to make another batch!

Print
Ten Crisp Toffee Chocolate Bars
Author: 2 Sisters 2 Cities
Prep time:  10 mins
Cook time:  20 mins
Total time:  30 mins
Serves: 20
 
Ingredients
  • cooking spray
  • 1 cup unsalted butter (2 sticks), softened
  • 1 cup light brown sugar
  • 1 teaspoon kosher salt
  • 1 teaspoon pure vanilla extract
  • 2¼ cups sifted all-purpose flour
  • ⅓ cup walnuts, chopped
  • 1 cup dark chocolate, or semisweet chocolate chips (or a combination of the two)
  • cooking spray
Instructions
  1. Preheat the oven to 350 degrees. Spray a 9 x 13-inch glass baking dish with cooking spray.
  2. In a large bowl, mix together the butter, sugar, salt, and vanilla. Add the sifted flour and stir to combine. Mix in the walnuts and chocolate chips.
  3. Add the dough to glass baking dish and press the dough into the prepared pan. Bake until golden and set, about 20 minutes. Cut into small squares while still warm.
3.1.09

Source: Slightly Adapted from  Mad Hungry by Lucinda Scala Quinn

sister m signature


Filed Under: M's Desserts, M's recipes Tagged With: 12 cookies of Christmas, 12 days of christmas cookies, chocolate, christmas, Christmas Cookies, cookie, cookie recipe, day 10, holiday baking, holiday cookies, salt, toffee

Twelve Oreo Truffles

Posted by 2 Sisters 2 Cities on December 2, 2012

Oreo Truffles

It’s here!  We are officially ready to kick off another year of the 2S2C Twelve Days of Christmas Cookies!  (If you missed the event from 2011, the recap with all 12 cookie recipes can be found here.)  K and I have found twelve new recipes for the holiday season and we hope you’ll join us for the celebration!  I’m kicking off the party with a recipe that is new to me- Oreo Truffles.

My mom brought these Oreo Truffles to my house for a post-Thanksgiving treat.  She said that she had read about this recipe on a lot of food blogs and had to try them out.  At first I was skeptical, especially after eating way too many Oreos for T’s Mickey Mouse-themed birthday party.  The fact that the original recipe for Oreo Truffles only has three ingredients didn’t help either.  However, once I tried one, I understood what all the fuss was about.  Who knew that such an easy cookie recipe could be so good!?

I figured this recipe would be a great way to kick things off with a nice and simple, but amazing recipe.  Try making some Oreo Truffles to kick off your Christmas cookie season (however, did I mention these are no-bake?)  Hopefully that will get you in the mood for more holiday baking.  We’ve got so many great cookie recipes planned….I can hardly wait!

Oreo Truffles

Print
Twelve Oreo Truffles
Author: 2 Sisters 2 Cities
Recipe type: Cookie
Prep time:  1 hour 20 mins
Total time:  1 hour 20 mins
Serves: 48
 
Ingredients
  • 36 Oreo cookies
  • 8 oz. cream cheese, room temperature
  • 16 oz. semi-sweet or dark chocolate
  • 3 tablespoons sprinkles (optional)
Instructions
  1. Place Oreo cookies in a food processor and pulse until finely ground. Reserve ¼ cup of the cookie crumbs in a small bowl. Mix the remaining cookie crumbs and cream cheese in a medium size bowl until blended. Shape mixture into 48 balls.
  2. Mix reserved cookie crumbs with the sprinkles. (This step is optional, but I wanted to get a little green, red, and white color on the truffles to make them more Christmas-y.)
  3. Meanwhile, melt chocolate in a microwave-safe bowl (a glass Pyrex measuring cup also works great). Microwave on high for 2-4 minutes depending on your microwave's strength, stirring about every 30 seconds.
  4. Cover a rimmed baking sheet with a piece of wax paper. Once the chocolate is melted, dip each oreo ball into the melted chocolate mixture. Use two forks to roll truffles in the chocolate until evenly coated. Let excess chocolate drip back into the bowl and place dipped truffle onto the baking sheet. Before the chocolate firms up, sprinkle a small amount of the cookie crumb and sprinkle mixture on top.
  5. Refrigerate 1 hour or until firm. Store truffles in an air-tight container in the fridge or freeze in a freezer bag until ready to serve.
3.1.09

Source: Slightly adapted from Kraft Recipes

sister m signature

Related Posts Plugin for WordPress, Blogger...


Filed Under: M's Desserts, M's recipes Tagged With: 12 cookies of Christmas, 12 days of christmas cookies, christmas, Christmas cookie recipes, Christmas Cookies, cookie recipe, cookies, oreo truffles, Oreos

  • « Previous Page
  • 1
  • 2
  • 3
  • Next Page »

Recent Posts

  • Easy Holiday Office Party Tips
  • 5 Steps to an Easy Football Party
  • Gingerbread Biscotti
  • Holiday Coffee Bar and Thanksgiving Recipes
  • Soft Sugar Pumpkin Cookies
  • Cinnamon Sugar Apple Cake
  • Hello Pumpkin Season!
  • Make Your Own Milkshake Party!
  • Mama’s Pickles
  • S’more Cookies

Categories

  • About 2 Sisters 2 Cities (7)
  • Books (8)
  • Crafting & DIY (22)
  • Design & Decorating (15)
  • Gardening (5)
  • Giveaway (14)
  • Guest Bloggers (8)
  • K's post (46)
  • K's Recipes (191)
    • K's Desserts (75)
    • K's Entrees (23)
    • K's Sides (24)
  • M's post (72)
  • M's recipes (167)
    • M's Entrees (21)
    • M's Sides (14)
    • M's Desserts (30)
  • Organizing (7)
  • Party Ideas (49)
  • Uncategorized (1)
  • Vacation (12)
Stitch Fix

Archives

Blogroll

  • Annie's Eats
  • Bake at 350
  • Baked Bree
  • Boston Harbor Beacon
  • Confections of a Foodie Bride
  • Cook Like a Champion
  • Erin’s Food Files
  • Forever and a Recipe
  • Framed Cooks
  • Oh Happy Day
  • On Common Ground
  • Pennies on a Platter
  • Pink Parsley
  • Recipe Girl
  • Sally's Baking Addiction
  • Simply Scratch
  • The Curvy Carrot
  • The Pioneer Woman
  • Tidy Mom
  • Two Peas & Their Pod
  • What’s Gaby Cooking
  • Young House Love
Increase your website traffic with Attracta.com

grab a 2 sisters button!


Copyright © 2014 ~ 2 Sisters 2 Cities | Blog Design by Minx Design