2 Sisters 2 Cities

Image Map
  • About 2 Sisters 2 Cities
  • Recipe Index
  • Project Index
  • Contact Us
  • Like us on Facebook
  • Follow m on twitter
  • Follow k on twitter
  • Follow 2S2C on Pinterest
  • Follow 2S2C on G+
  • rss
  • e-mail 2S2C

Deviled Eggs:  Four Ways

Posted by Keelin Hollenbeck on April 18, 2014

Deviled Eggs 4 Ways.jpg

One of the most popular posts on our site has been the Classic Deviled Eggs post from Easter last year.   M and I got a good laugh after Thanksgiving, Christmas, New Year’s Eve and Superbowl Sunday because we would get so much traffic from Pinterest for the Deviled Eggs post.  I think we have only thought about having deviled eggs around Easter time, but we are so glad for to learn  there are hardcore deviled egg fans year-round!   I have been thinking of how I could expand on the original post to show more versions of deviled eggs.

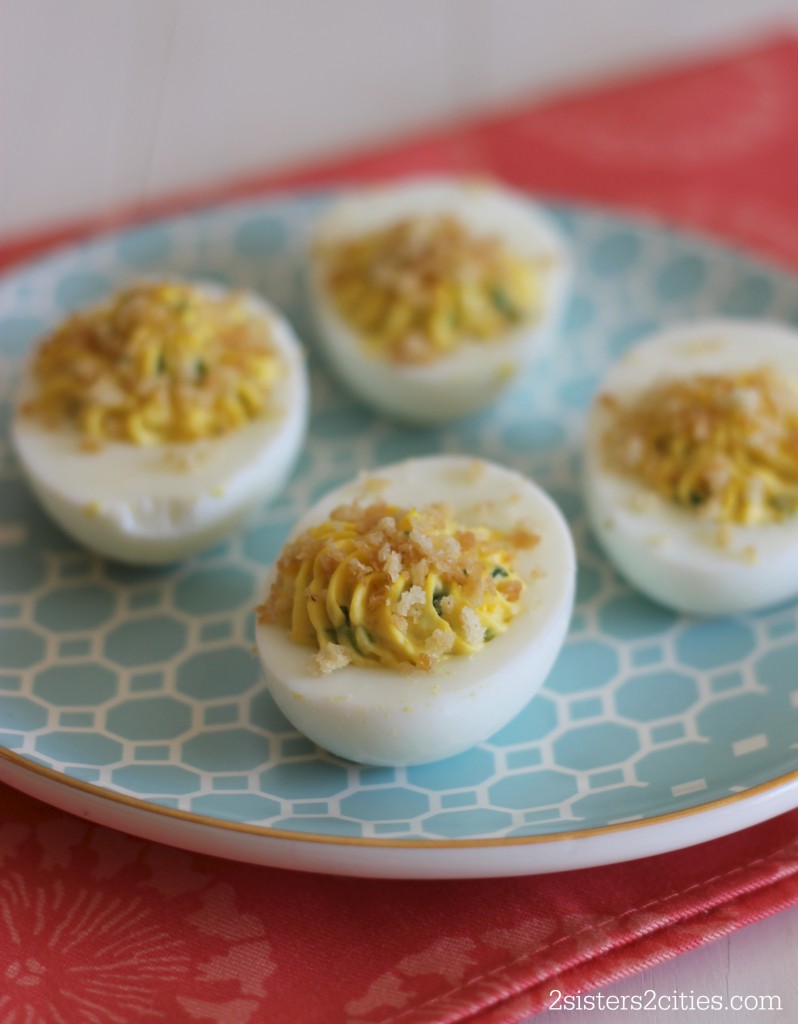
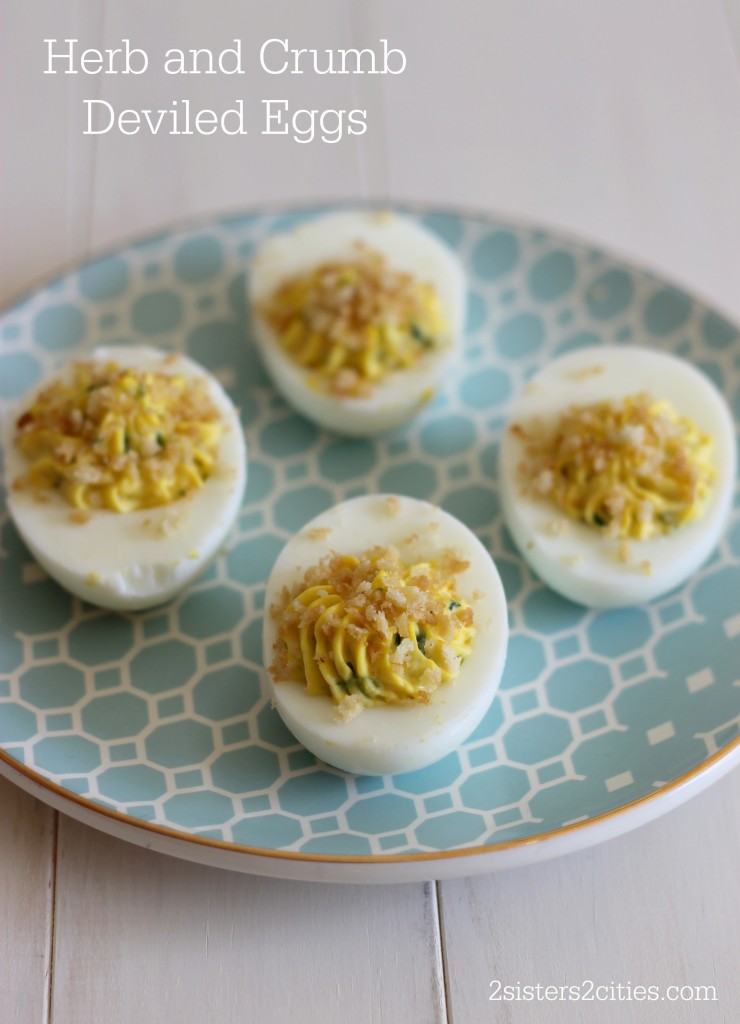
Herb and Crumb

I personally love classic deviled eggs and had never ventured outside of my favorite recipe.  When I received this month’s Cooking Light, I was excited to see they had 12 different types of deviled egg recipes.  I knew I had to try some new recipe variations!

In one day, I made four of the 12 types, adapting them slightly based on ingredients I had on hand.  (I was quite impressed that I could make four types without buying any more items!):

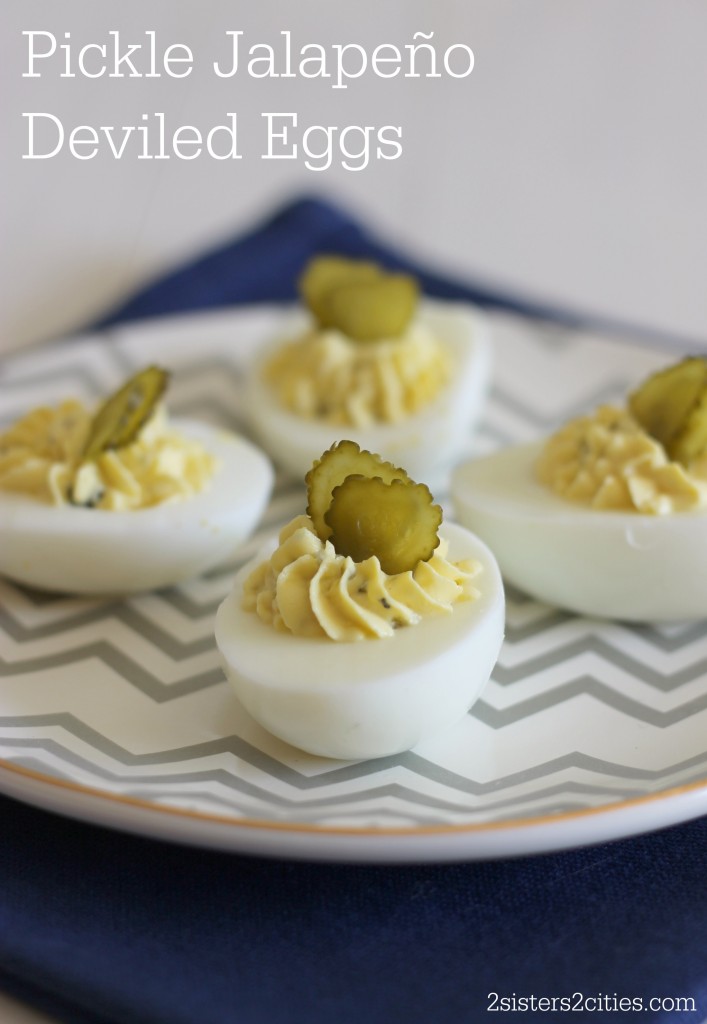
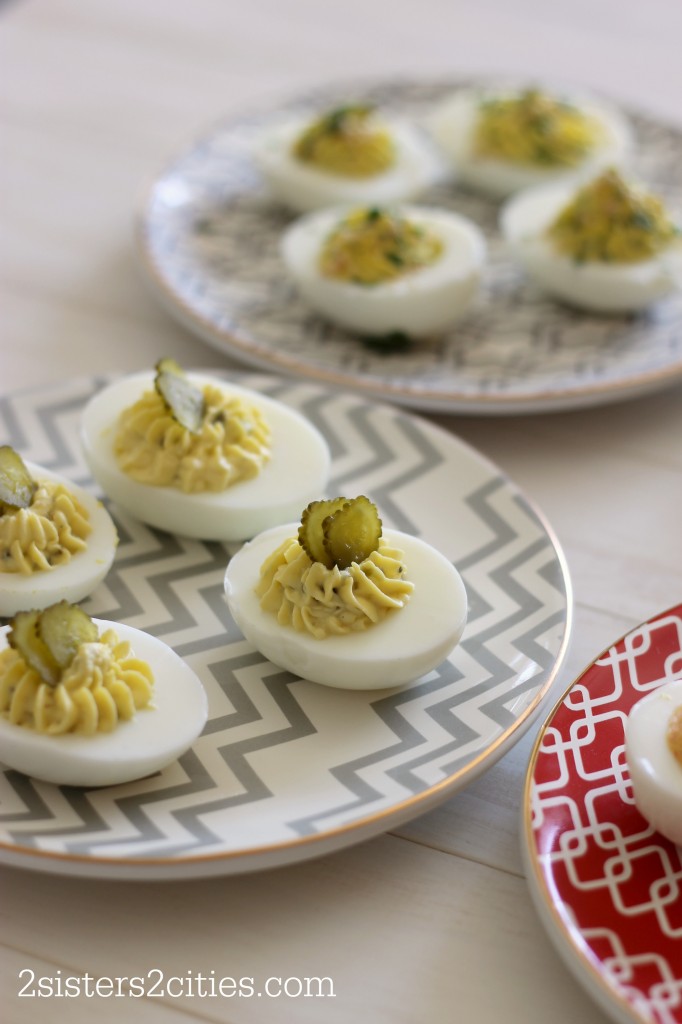
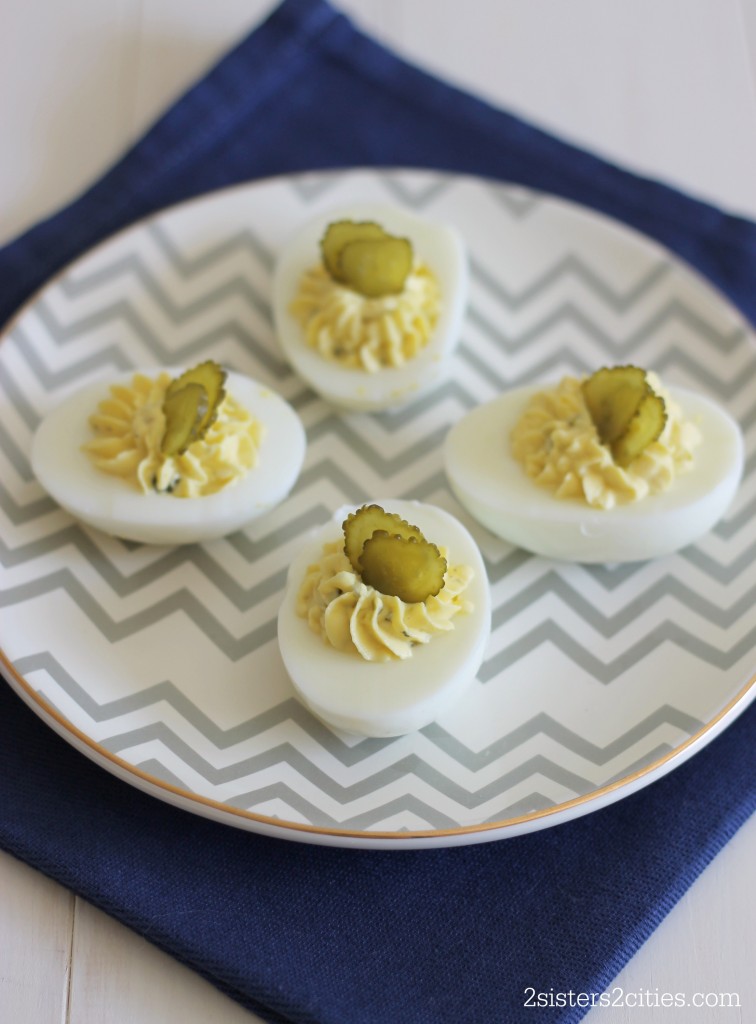
  • Pickle Jalapeño
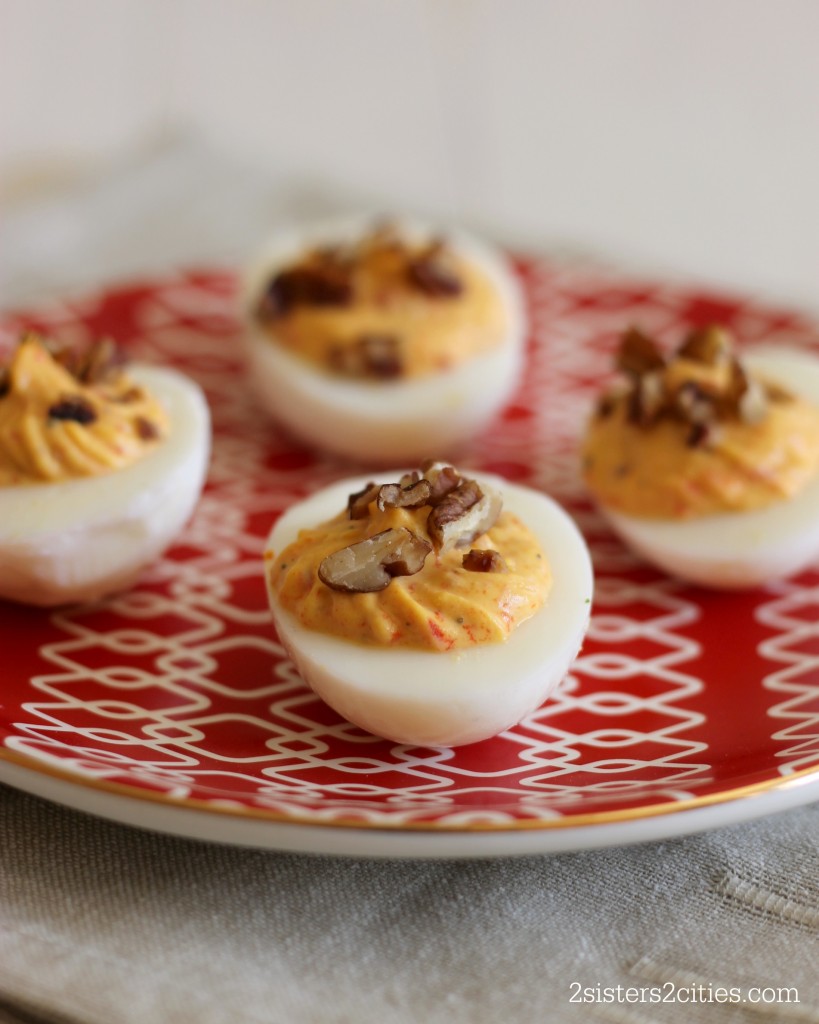
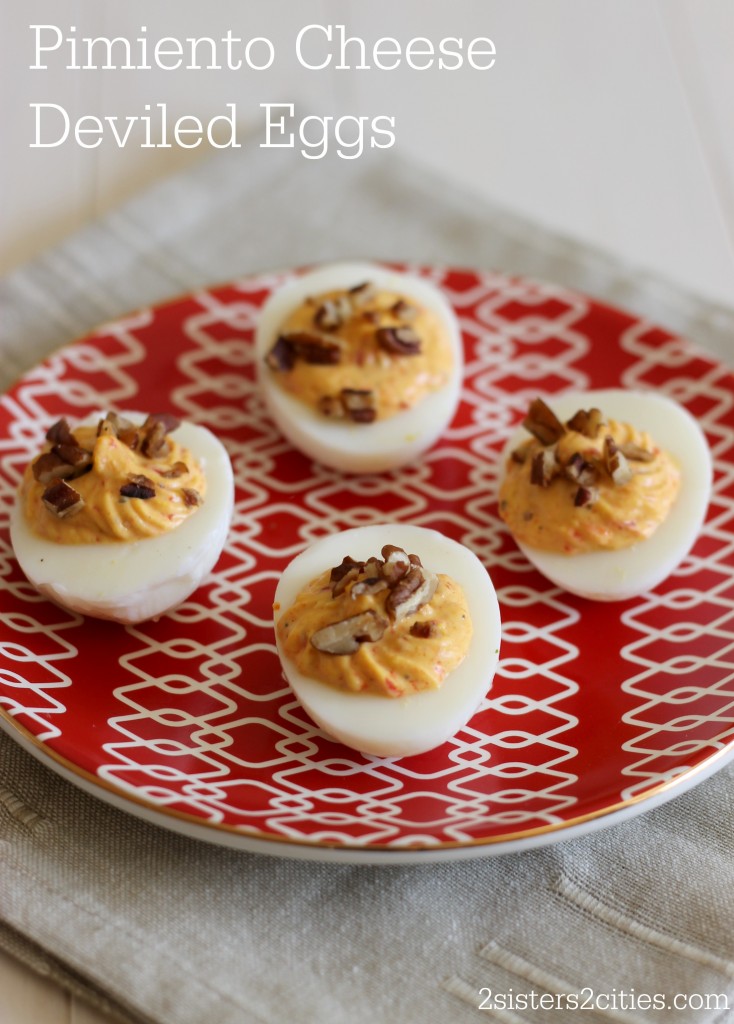
  • Pimiento Cheese
  • Herb and Crumb
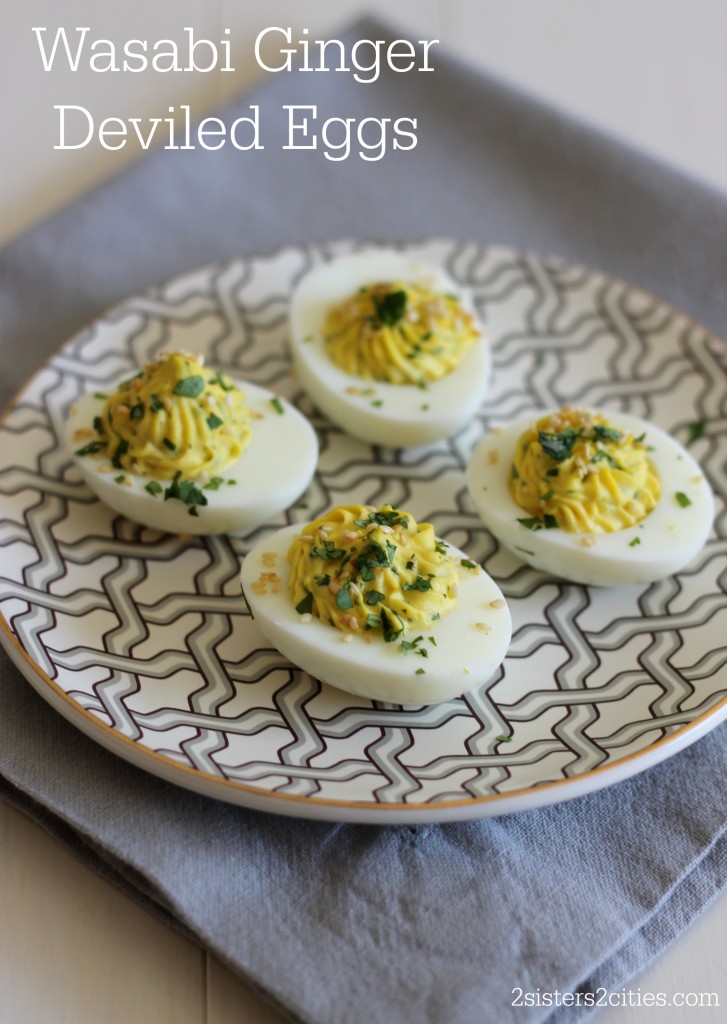
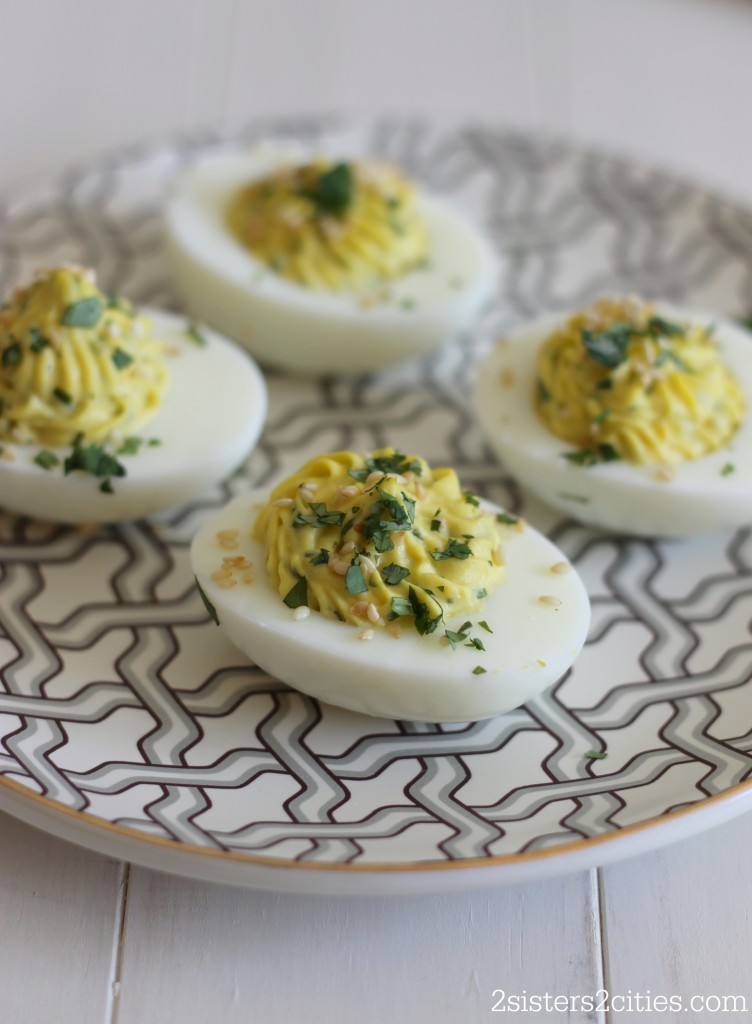
  • Wasabi Ginger

The results (well, besides Matt and I being stuffed with eggs) were delicious.  My favorite of the four was the Herb and Crumb,  while Matt’s was Pimiento Cheese.   I predicted that would be his favorite since we are always making up this Pimiento Cheese Dip I shared with you last month.

Easter is the best time to make deviled eggs because of all the extra hard-boiled eggs from decorating eggs.   When my sisters and I were younger, we loved decorating eggs.  Since there was four of us, my mom had to make a lot of eggs so we could get our fill of coloring.   What did we do with all that extra eggs?   Deviled eggs and egg salad sandwiches of course!  We hope everyone has  a great Easter Weekend!

Pimiento Cheese .jpg

Print
Hard-Boiled Eggs
 
Ingredients
  • 12 eggs
Instructions
  1. Gently place the eggs in a large saucepan and cover with cold water (water level should be 1-inch above the eggs.)
  2. Place saucepan on stove-top, set to high and bring to a boil. Once boiling, remove saucepan from heat, cover, and let stand for 10 minutes.
  3. Fill a large-sized bowl with ice cold water while the eggs are sitting.
  4. After the 10 minutes, take eggs out of hot water with a slotted spoon and place in the ice water gently; let sit for 5 minutes.
  5. Store in refrigerator or use immediately
3.2.2265

 Pickle Jalapeño Deviled Eggs

Print
Pickle Jalapeño Deviled Eggs
 
Ingredients
  • 12 hard-boiled eggs
  • 3 tbsp. mayonnaise
  • 3 tbsp. 2% Greek yogurt
  • 1½ minced sweet gherkins
  • 1 tbsp. minced pickled jalapeño
  • 1 tablespoon cider vinegar
  • ¼ tsp. kosher salt
  • ¼ tsp. fresh cracked pepper
  • Thinly sliced gherkins, for garnish
Instructions
  1. Peel eggs and then slice length wise. Take out the yolks of the eggs and place them in a medium sized bowl. With a fork, mash the egg yolks until all the large chunks are gone.
  2. Add in remainder of ingredients except for garnish and stir with a rubber spatula. Mash mixture on the side of the bowl to smooth out any lumps.
  3. Prepare a pastry bag with a large star tip (I used Wilton’s 6B). Take egg yolk mixture and add it to the pastry bag, then twist the top portion closed to push the eggs into the bag further.
  4. Pipe the yolks into the egg whites by applying pressure to pastry bag and lifting up slowly and releasing the pressure as the egg white fills with yolk. Top each egg with sliced gherkins.
3.2.2265

 Pimiento Cheese Deviled Eggs.jpg

Print
Pimiento Cheese Deviled Eggs
 
Ingredients
  • 12 hard-boiled eggs
  • ¼ cup chopped pimientos, drained
  • ¼ cup light mayonnaise
  • ½ tsp. hot sauce
  • ½ tsp. Worcestershire sauce
  • ¼ tsp. kosher salt
  • ¼ tsp. fresh cracked pepper
  • ¾ ounce reduced fat shredded cheese
  • 2 tbsp. pecans, toasted and chopped, for garnish
Instructions
  1. Peel eggs and then slice length wise. Take out the yolks of the eggs and place them in a medium sized bowl. With a fork, mash the egg yolks until all the large chunks are gone.
  2. Add in remainder of ingredients except for garnish and stir with a rubber spatula. Mash mixture on the side of the bowl to smooth out any lumps.
  3. Prepare a pastry bag with a large star tip (I used Wilton’s 6B). Take egg yolk mixture and add it to the pastry bag, then twist the top portion closed to push the eggs into the bag further.
  4. Pipe the yolks into the egg whites by applying pressure to pastry bag and lifting up slowly and releasing the pressure as the egg white fills with yolk. Top each egg chopped toasted pecans.
3.2.2265

 Herb and Crumb Deviled Eggs.jpg

Print
Herb and Crumb Deviled Eggs
 
Ingredients
  • 12 hard-boiled eggs
  • 2 tbsp. panko bread crumbs
  • 1 tsp. butter
  • ¼ cup light mayonnaise
  • 3 tbsp. light sour cream
  • 3 tbsp. chopped green onion
  • 1 tbsp. chopped fresh parsley
  • 1 tsp. Dijon mustard
  • 1 tsp. lemon juice
  • ¼ tsp. kosher salt
  • ¼ tsp. fresh cracked pepper
Instructions
  1. In a small fry pan, melt the butter and add the panko bread crumbs. Stir until toasted.
  2. Peel eggs and then slice length wise. Take out the yolks of the eggs and place them in a medium sized bowl. With a fork, mash the egg yolks until all the large chunks are gone.
  3. Add in remainder of ingredients except for toasted panko breadcrumbs and stir with a rubber spatula. Mash mixture on the side of the bowl to smooth out any lumps.
  4. Prepare a pastry bag with a large star tip (I used Wilton’s 6B). Take egg yolk mixture and add it to the pastry bag, then twist the top portion closed to push the eggs into the bag further.
  5. Pipe the yolks into the egg whites by applying pressure to pastry bag and lifting up slowly and releasing the pressure as the egg white fills with yolk. Top each egg with the toasted panko breadcrumbs.
3.2.2265

 Wasabi Ginger Deviled Eggs

Print
Wasabi Ginger Deviled Eggs
 
Ingredients
  • 12 hard-boiled eggs
  • ¼ cup light mayonnaise
  • 2 tbsp. chopped fresh cilantro, plus 2 tsp. for garnish
  • 4 tsp. grated ginger
  • 4 tsp. wasabi paste
  • 4 tsp. lime juice
  • 2 tsp. toasted sesame seeds, for garnish
Instructions
  1. Peel eggs and then slice length wise. Take out the yolks of the eggs and place them in a medium sized bowl. With a fork, mash the egg yolks until all the large chunks are gone.
  2. Add in remainder of ingredients except for garnishes and stir with a rubber spatula. Mash mixture on the side of the bowl to smooth out any lumps.
  3. Prepare a pastry bag with a large star tip (I used Wilton’s 6B). Take egg yolk mixture and add it to the pastry bag, then twist the top portion closed to push the eggs into the bag further.
  4. Pipe the yolks into the egg whites by applying pressure to pastry bag and lifting up slowly and releasing the pressure as the egg white fills with yolk. Top each egg with toasted sesame seeds and chopped cilantro.
3.2.2265


Pickle Jalapeno

Source- Adapted slightly from Cooking Light, April 2014
Wasabi Ginger.jpg

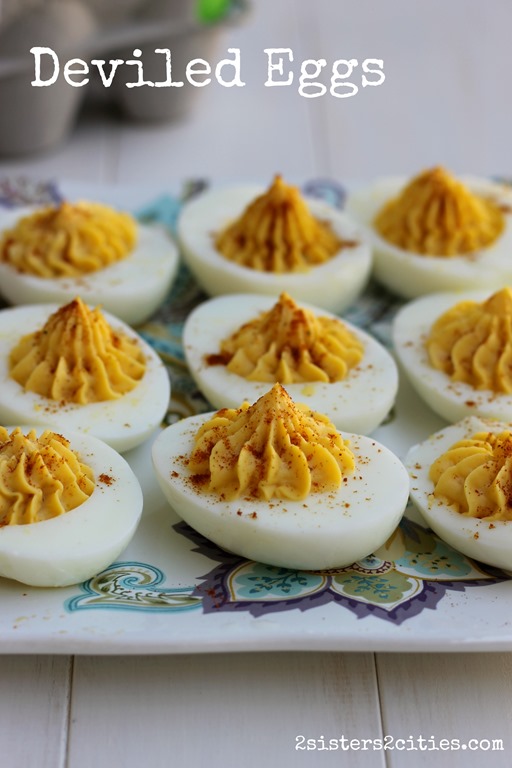
And here’s a bonus version- the classic recipe for Deviled Eggs for all those leftover Easter Eggs!

Deviled-Eggs.jpg

Click Here!

sisterk (2)


Filed Under: K's Sides, K's Recipes, Party Ideas Tagged With: appetizers, deviled eggs, easter, eggs, Herb and Crumb, Pickle Jalapeño, Pimiento Cheese, Wasabi Ginger

Hummus and Whole Wheat Pita Chips

Posted by Keelin Hollenbeck on January 30, 2014

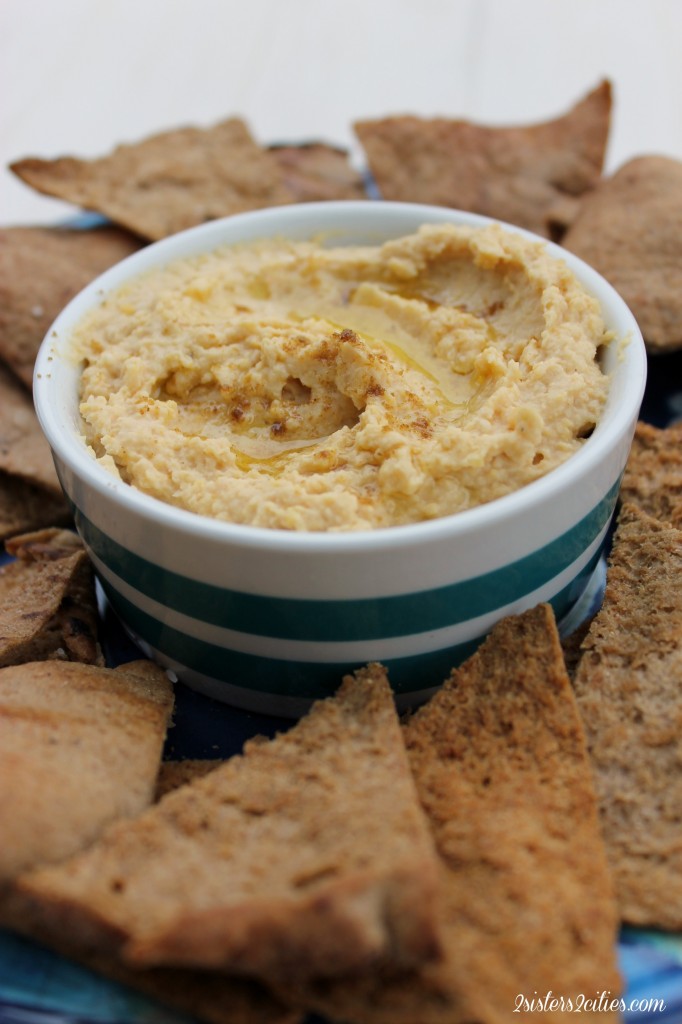
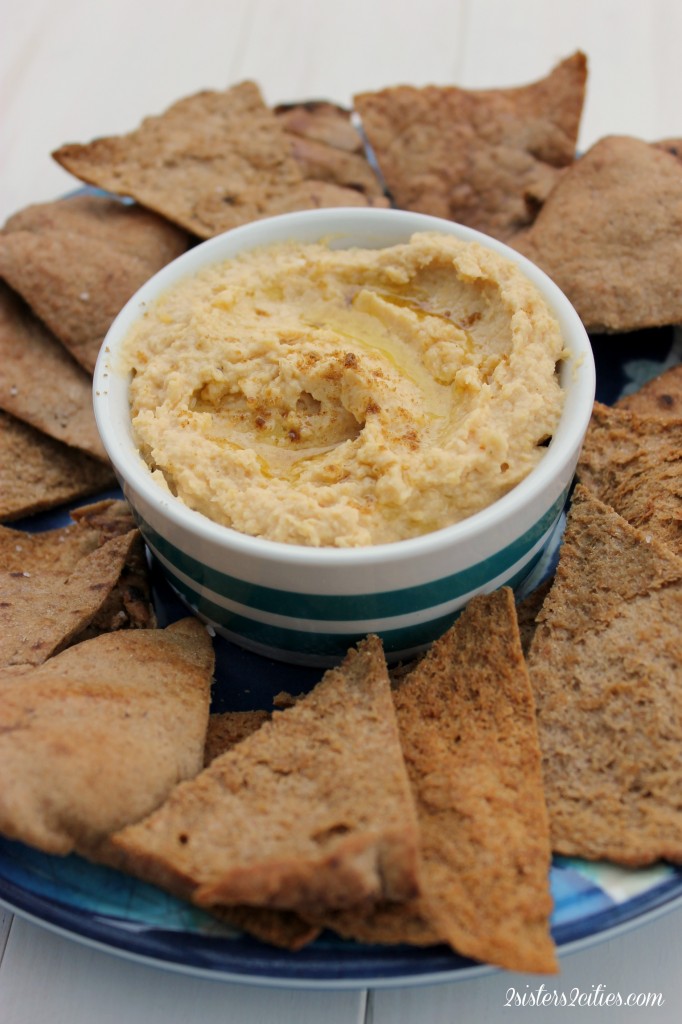
Hummus

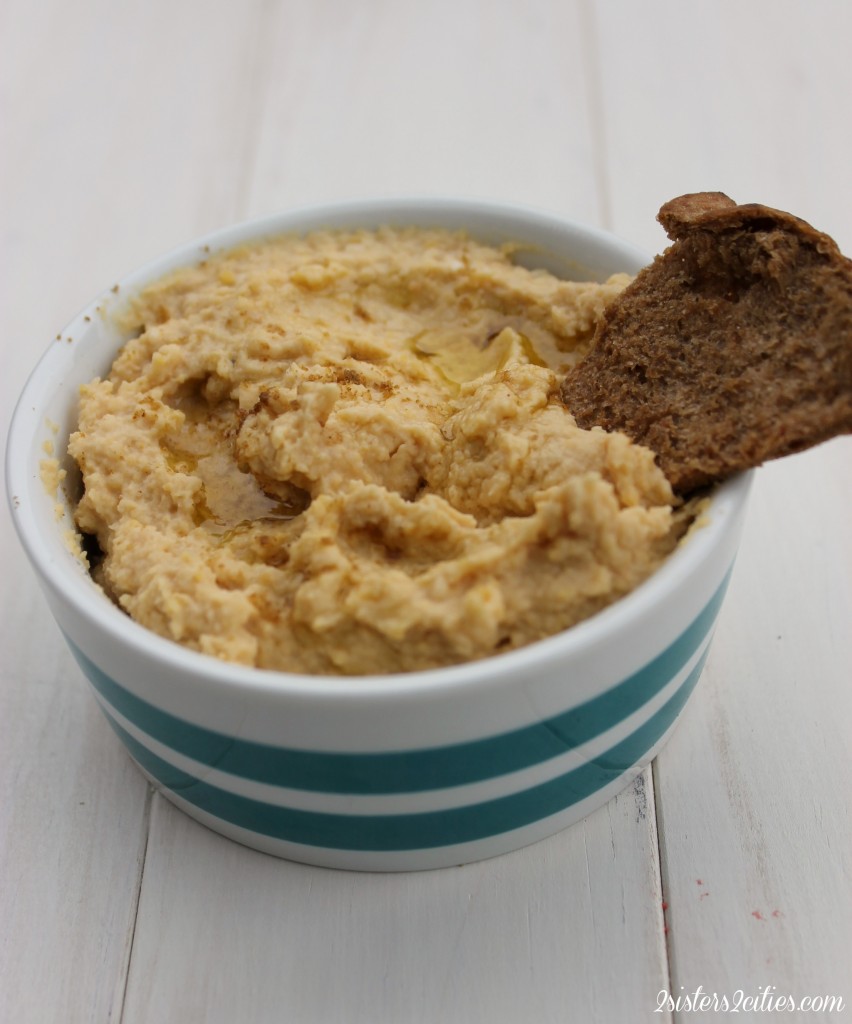
When I first started out working in New York City, I lived in Hoboken, NJ with one of my college roommates.  I had grown up on homemade hummus, but my food processor at the time was one of those mini-prep food processors handed down from my mom.  Making hummus in this mini-prep was impossible and messy!  We started to buy Sabra hummus and Stacy’s pita chips at the grocery store because of the ease and we soon became addicted!  We would eat an entire container for dinner some nights.

Pita Chip Dipped in Hummus

Before Christmas, my boyfriend Matt returned from a business trip in Israel, he too has discovered the love for hummus and pita chips.  When we went to visit my family, my mom had made homemade hummus and whole wheat pita chips.  With a mouthful of hummus and pita chips Matt asked, “why haven’t you ever made this for me?”  Truthfully, I forgotten about how delicious and easy to make homemade hummus was.  Now that I had a large-sized food processor there were no more excuses.

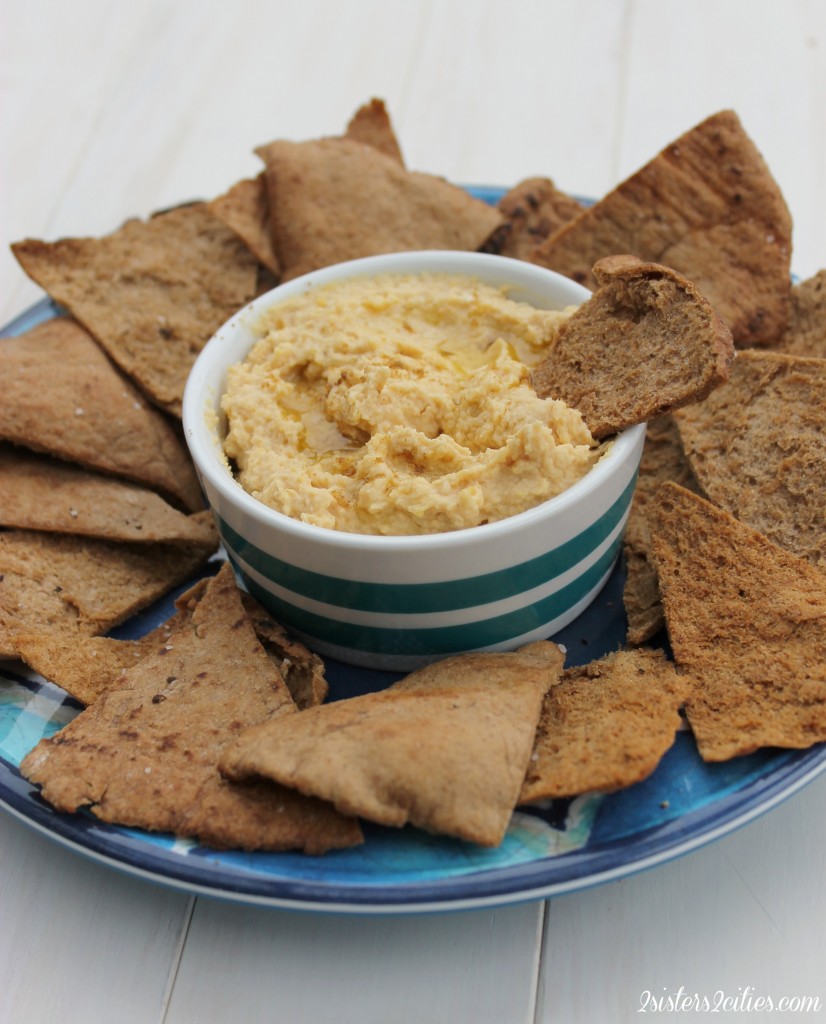
I have been making a batch of hummus and pita chips every weekend since we have come home.  The first batch I made was too garlicky, the second batch was a little too dry, but by the third batch I had perfected the recipe.  Here it is to share!

Hummus and Whole Wheat Pita Chips

Print
Hummus
Author: 2 Sisters 2 Cities
 
Ingredients
  • 2 cloves of garlic, inside green stem removed*
  • 4 tbsp. chickpea water (the liquid from the chickpea can)
  • 2 cans of chickpeas, rinsed thoroughly
  • ⅓ cup tahini
  • 6 tbsp. lemon juice, freshly squeezed (about 2 lemons)
  • 2 tsp. Kosher salt
  • 10 splashed of hot sauce (I used Franks, so if using a more concentrated hot sauce start with less)
*When you slice a piece of garlic in half lengthwise, you will see a green stemlike thing. Pull it out and throw it away. I always thought that this was some sort of kitchen myth so I stopped doing it awhile ago. I learned from David Lebovitz taste test post that if you aren't cooking the garlic, the green germ inside makes your dish bitter. Since we aren't cooking this garlic get those green centers out. Batches 1 and 2 of my hummus had the centers in them ,and the third batch did not. I could taste the difference!
Instructions
  1. Cut garlic in half to remove the green centers.
  2. Next cut the cloves into even sized pieces and throw them into the bowl of your food processor. Turn the food processor on and break the garlic up into smaller pieces.
  3. Add chickpeas, 2 tbsp of chick pea water, tahini, lemon juice, salt, and hot sauce. Process for about 30 seconds, add in additional 2 tbsp of water, food process again until desired thickness.
3.2.2199

 Hummus and Pita Chips

Print
Whole Wheat Pita Chips
Author: 2 Sisters 2 Cities
 
Ingredients
  • Whole wheat pocket pitas
  • 2-4 tbsp olive oil
  • Kosher salt
  • Freshly cracked pepper
Instructions
  1. Preheat oven to 375 degrees F. Line two baking sheets with non-stick silicone mats or parchment paper.
  2. With a bread or serrated knife take a pita and cut into 8 equal triangles (like a pizza.) Take each triangle and peel into two pieces (using pocket pitas). Repeat for all pitas.
  3. Starting with 2 tbsp. of olive oil in a small bowl use a pastry brush to brush each side of the pita with olive oil. Use additional olive oil as needed.
  4. Spread the pitas out on two baking sheets and sprinkle with kosher salt and fresh cracked pepper.
  5. Bake 1 sheet at a time for 8 minutes, turning pitas halfway through and baking an additional 4-5 minutes until golden brown
  6. Repeat for second batch, let pitas cool and store in a airtight container until serving.
3.2.2199

Source- Both Hummus and Pitas are adapted from Ina Garten

sisterk (2)


Filed Under: K's Sides, K's Recipes Tagged With: appetizers, hummus, pita chips, super bowl appetizers, whole wheat pita chips

Sweet Potato Casserole

Posted by Keelin Hollenbeck on November 27, 2013

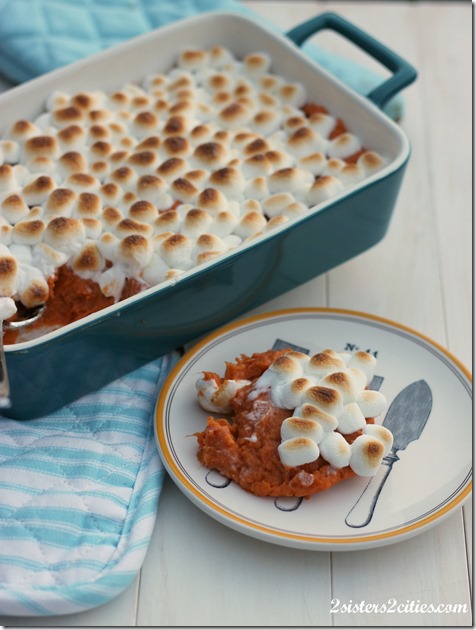
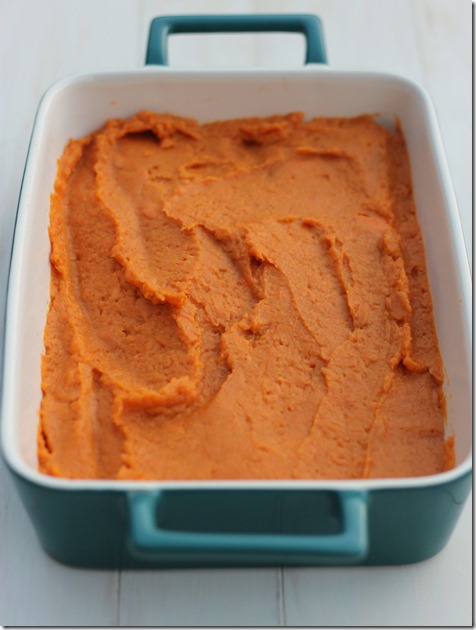
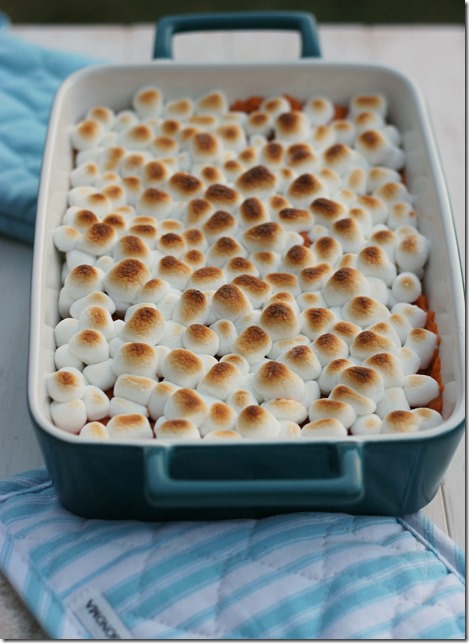
Sweet PotatoYam Casserole

Speaking of classic Thanksgiving recipes, this is the classic baked sweet potatoes or yam casserole recipe.  I know there are a lot of new moderns versions of this side, but I love this original marshmallow-covered one too much to give it up.  When we were younger my mom made the mistake of trying to update the sweet potato recipe to a more modern version which was topped with candied walnuts or pecans.  I am sure it would have been delicious, but my sisters and I threw such a fuss that she ended up having to put marshmallows on half.

What can I say?  To me it wouldn’t be Thanksgiving without marshmallow-covered candied yams/ sweet potatoes or canned jelled cranberry sauce (sliced at the can ring lines…. Not mashed up!) I call this sweet potatoes, but really I use yams because they are cheaper.  Preparing this dish is so easy, you will never use yams out of a can again!

Yams!
Print
Sweet Potato Casserole
Author: 2 Sisters 2 Cities
 
Ingredients
  • 2-3 pounds of yams or sweet potatoes
  • ¼ cup brown sugar
  • ¼ cup butter, melted
  • 2 tbsp. maple syrup
  • 2-3 cups marshmallows
Instructions
  1. Peel and cut sweet potatoes up into 1-1/2 inch pieces. Place in a large pot and cover with water. Bring to a boil and cook for about 10-12 minutes until sweets potatoes are tender.
  2. Drain sweet potatoes
  3. In a large bowl add cooked sweet potatoes, butter, maple syrup, and brown sugar. Mix together until combined and smooth.
  4. Spread out sweet potatoes in casserole dish. Bake for 20-25 minutes at 375 degrees until sides are bubbling. Add marshmallows on the top during the last 5 minutes. To get the toasted marshmallow effect, turn broiler on for the last 2 minutes. Be careful because they can burn easily!
  5. These yams can be made ahead, up until the baking step and then refrigerated or frozen. You will need to add extra time to the baking to make sure they heat thoroughly.
3.2.2124

Baked Yams with Marshmallows
sisterk (2)


Filed Under: K's Sides, K's Recipes Tagged With: candied yams, holiday, side dish, sides, sweet, sweet potato, Thanksgiving, thanksgiving menu, thanksgiving recipe, yams

Grandma’s Sweet Refrigerator Rolls

Posted by Keelin Hollenbeck on November 25, 2013

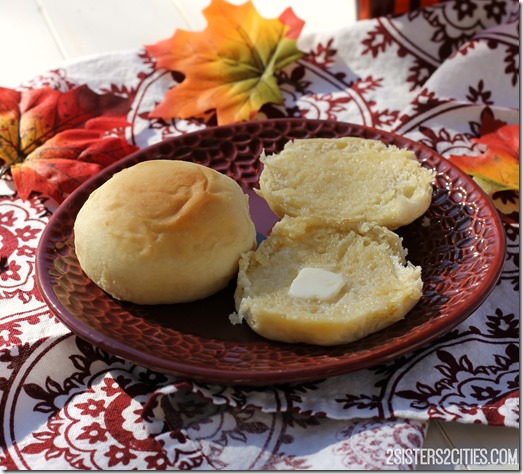
Sweet Refrigerator Rolls

What is Thanksgiving without homemade rolls?  This recipe is from our family cookbook that my aunt put together for everyone many, many years ago.  We are actually on our second edition and I use both cookbooks in my kitchen all of the time.  It’s great to have all my favorite family recipes in one place.  This recipe for sweet rolls is really special to me and M, it is our Grandma’s recipe for rolls that she made for Thanksgiving each year. We lost our grandma a few years ago, but we still have her recipes and family tradition that lives on.

These rolls not only have a place in our heart, but they are really tasty!  Their sweet taste goes perfectly with a small amount of butter and of course a thanksgiving dinner.   Make these rolls for your holiday meal this year!

These rolls can be frozen or the dough can be made the day before and then rolled and baked an hour before dinner (if you have extra oven space.)  I made these rolls over the weekend and froze them for my work Thanksgiving lunch Friday.  We are all about making things ahead here around here!  In the past when I was only cooking for four people, I cut the recipe in half and it turned out great.

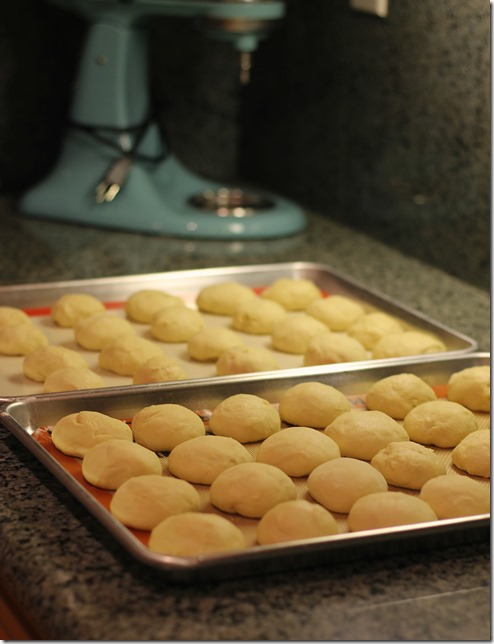
Homemade Rolls Rising

The rolls rising for 30 minutes before baking (plus my mixer in the background, isn’t she so pretty?)

Sweet Rolls

Mmmm rolls…..

Print
Grandma's Sweet Refrigerator Rolls
Author: 2 Sisters 2 Cities
Serves: 30-36 rolls
 
Ingredients
  • ¾ cup butter
  • 1 cup boiling water
  • ⅓ cup sugar
  • 4½ tsp. active dry yeast
  • 1 cup luke warm water
  • 2 eggs
  • ⅓ cup sugar
  • 6 cups flour
  • 2 tsp. salt
Instructions
  1. Combine butter and 1 cup of boiling water. Stir until butter is melted.
  2. In the bowl of your mixer with paddle attachment add ⅓ cup of sugar, yeast, and 1 cup luke warm water. Combine on low.
  3. Once the butter reaches room temperature, add into yeast mixture and mix until combined.
  4. Add in eggs and another ⅓ cup of sugar, mix well.
  5. Next add in flour and salt. Combine completely.
  6. Cover bowl with plastic wrap and place in the refrigerator for at least 4 hours or overnight. If leaving overnight, punch the dough down before you go to bed so it doesn’t overflow in your fridge.
  7. One hour before dinner, turn dough out on a floured surface. The dough will be sticky so make sure your hands and surface are well floured.
  8. Preheat the oven to 400 degrees F. Form dough 30-36 rolls evenly sized. Place rolls 1-inch apart on a silicone mat lined baking sheet, you may need 2 baking sheets.
  9. Allow to rise for 30 minutes, then bake for 10-12 minutes. For best results cook each baking sheets one at a time.
  10. Serve immediately or store in an airtight container once cooled. Rolls can be frozen for up to 2 months.
3.2.2124

Source-  Adapted from Grandma H’s original recipe
sisterk (2)


Filed Under: K's Sides, K's post Tagged With: Bread, family recipe, grandma's sweet rolls, rolls, Sweet Refrigerator rolls, Sweet rolls, Thanksgiving, thanksgiving sides

Homemade Apple Sauce

Posted by Keelin Hollenbeck on November 21, 2013

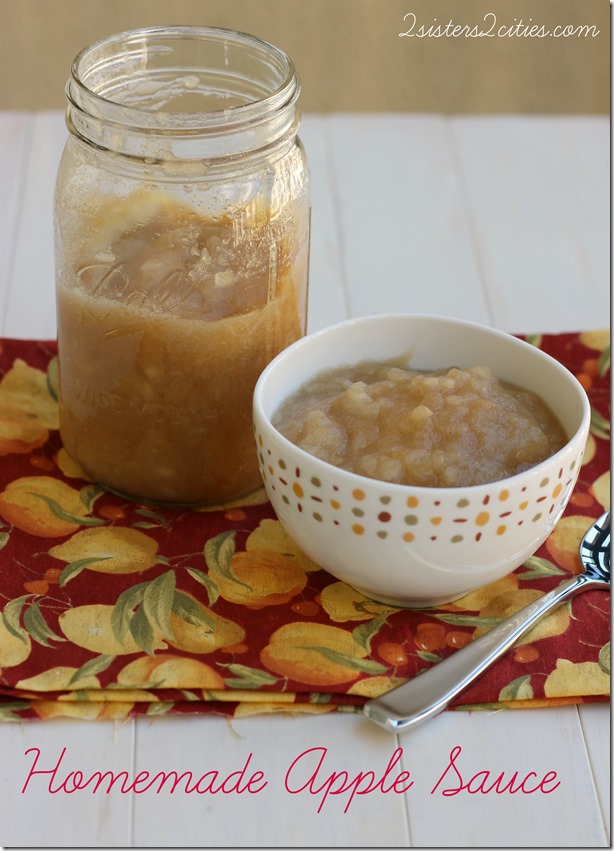
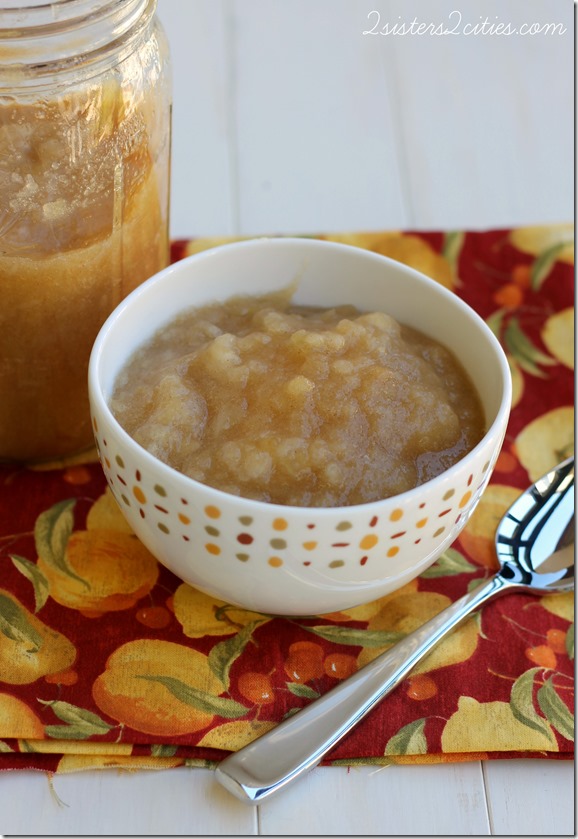
Homemade Apple Sauce
Oh dear, where have I been for the last few months?  This is a great question!  I have been busy moving… again!  I didn’t move across the country again, just across the bay.  I moved from the South Bay of San Francisco to the East Bay which equals a shorter commute for me and a larger kitchen! A win-win in my book.  I have over 1-2 hours back in my life each day,  which is beyond amazing.  People who don’t commute in major cities probably wouldn’t understand the excitement of moving from a 2-hour commute each way to a little bit less than an hour each way, but it is life altering!

I can’t believe next week is Thanksgiving, but I also can’t believe it’s almost December!  No fear the 2 sisters in 2 cities are here to help you with you last minute holiday meal planning.

One of my favorite sides for a holiday meal is homemade apple sauce.  It is so easy to make and 1000 times better than store-bought apple sauce.  Homemade apple sauce is like eating the inside of an apple pie- so delicious!  You don’t have to use the most expensive apples to make apple sauce.  You can use a variety of apples and they don’t need to be perfect.

What do you need?
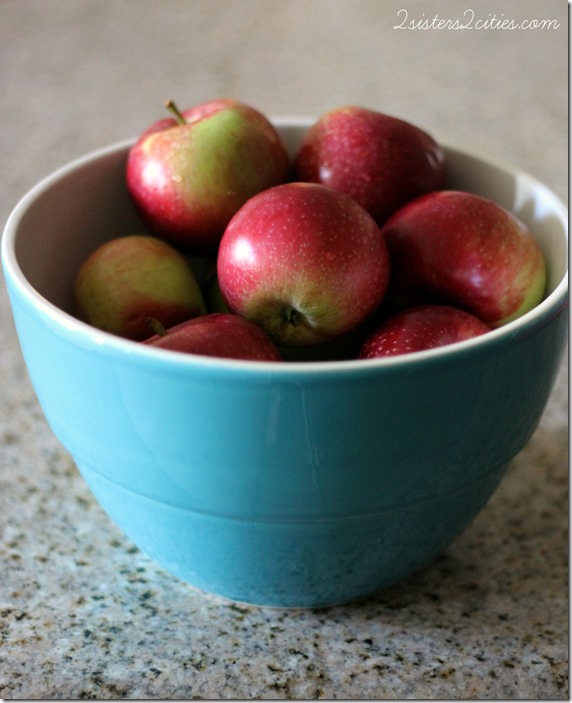
Apples for Apple Sauce
A bunch of apples is a must!  Get those apples that have been chilling in your fruit drawer for weeks.
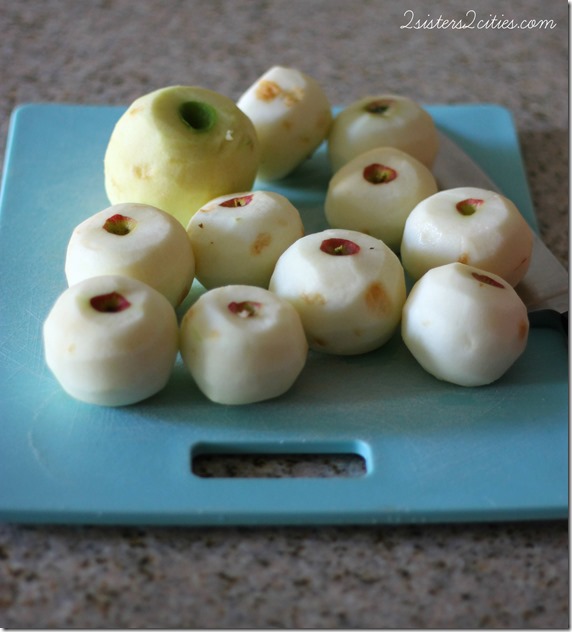
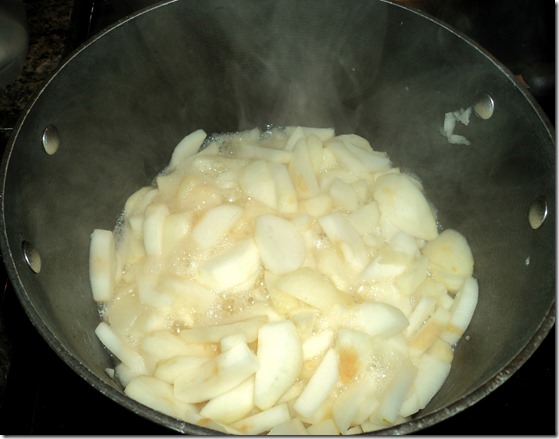
Peeled Apples for Apple Sauce
Peel those apples… bruises are okay!
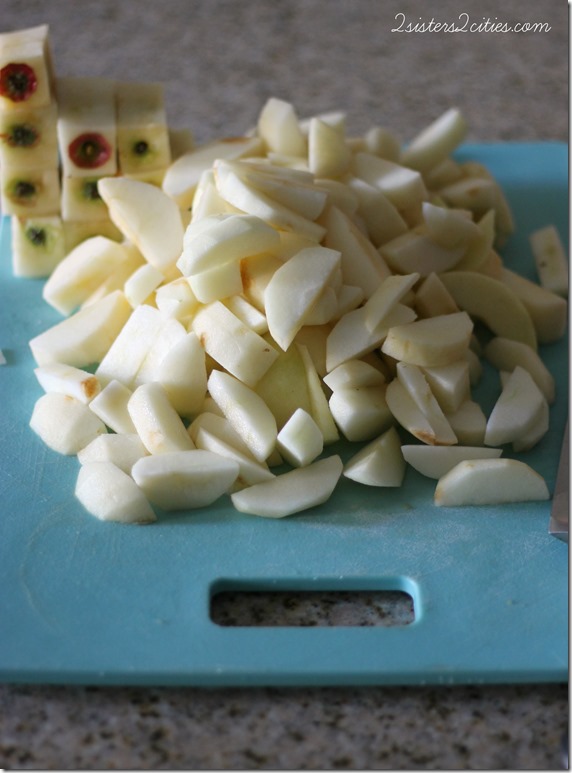
Slice Apples for Apple Sauce
Slice the apples evenly (and meticulously stack your apples cores.)
Cooking Apple Sauce
Cook those apple slices with water until softened.
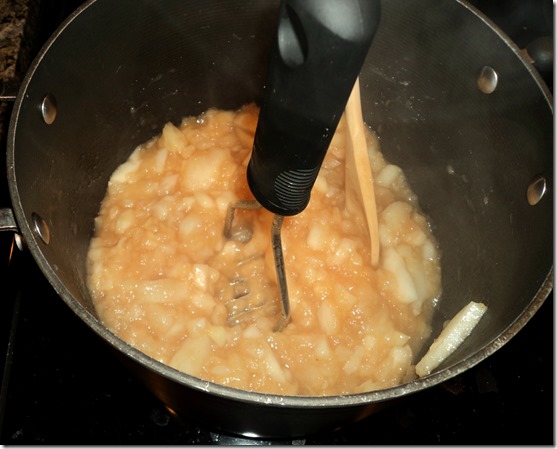
Mash Apples for Apple Sauce
Mash the apples once softened.
Apple Sauce
Tada!

Print
Apple Sauce
Author: 2 Sisters 2 Cities
 
Ingredients
  • 8-10 apples
  • ½ cup water
  • ¼ –1/2 cup granulated sugar (to taste)
  • ¼ tsp. cinnamon
Instructions
  1. Peel all the apples. Cut apples into evenly sized slices. Throw your peels and cores in your compost pile.
  2. Place sliced apples into a large pot. Add in water to pot and cook over medium heat. Put on cover and cook for 10-20 minutes until apples soften. Turn heat down if the apples start to boil.
  3. Apples should be easily mashed with a fork or potato masher when cooked. Mash apples to preferred thickness.
  4. Add in sugar, to taste, and cinnamon. Stir and cook for a few more minutes. Serve warm or cold and store in an air tight container in the refrigerator.
3.2.2124

sisterk (2)


Filed Under: K's Sides, K's Recipes Tagged With: apple sauce, apples, autumn, autumn recipes, easy sides, fall, fruit, holiday sides, homemade sides, sides, Thanksgiving, thanksgiving recipe

Cinco de Mayo Recipes: Dip your chip in this!

Posted by Keelin Hollenbeck on May 3, 2013

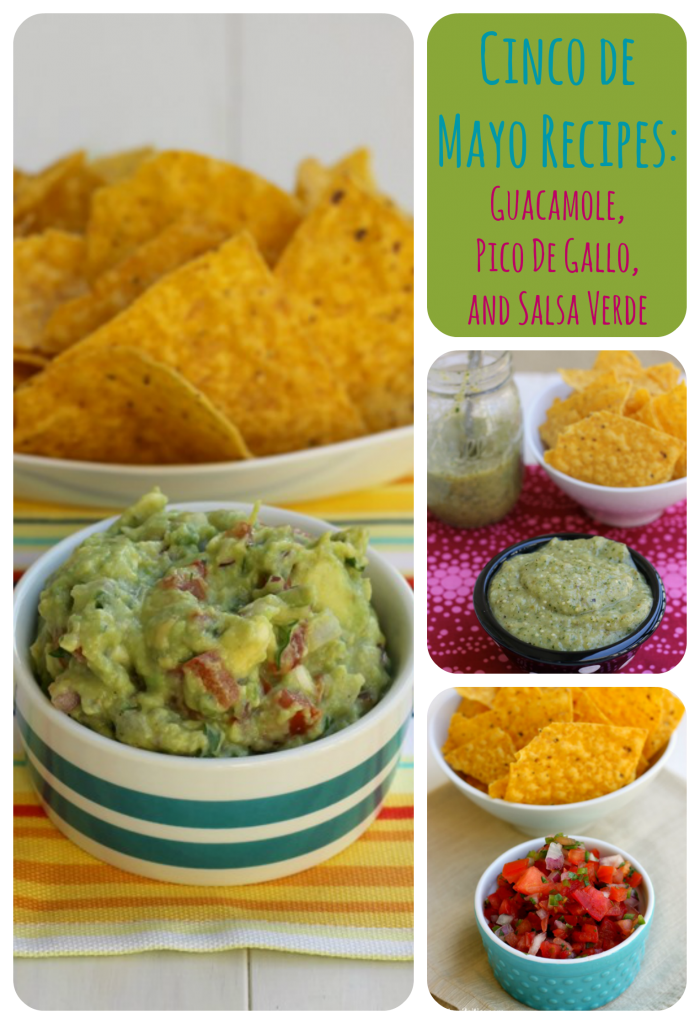
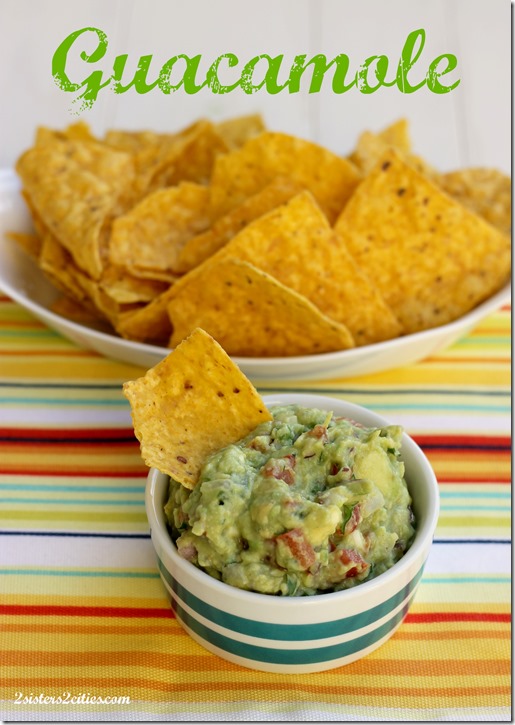
Cinco De Mayo Recipes: Guacamole, Pico De Gallo, and Salsa Verde {from 2 Sisters 2 Cities}

I started looking for Cinco de Mayo recipes to make last weekend.  I found really good-looking recipes for guacamole, pico de gallo, and salsa verde on the blog Shared Appetite.  I was so inspired by all of Chris’s photos and Mexican recipes, I planned a whole weekend of Mexican foods to cook.  There are even more recipes I want to try, but I decided to start with these three.

Guacamole

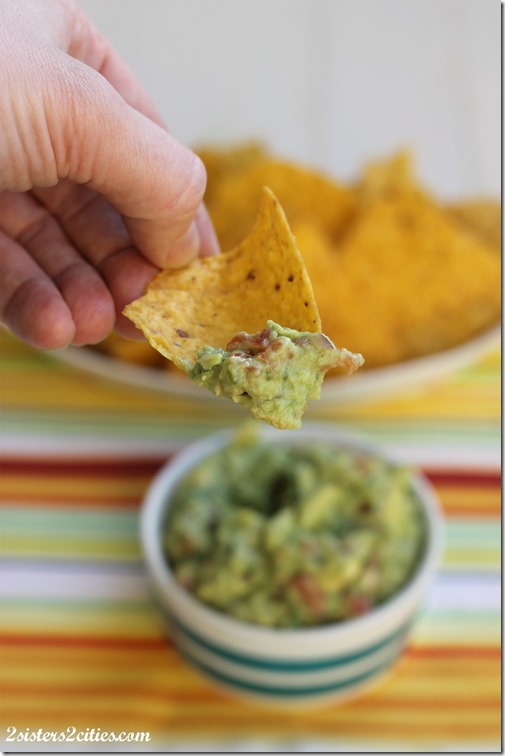
Guacamole

What goes more perfectly with margaritas than a bowl of fresh homemade guacamole and tortilla chips?  M and I have given you several recipes for guacamole over the years.  Think of this as an update to those.  I have to say this recipe is the closest to restaurant guacamole that I have ever made.  The best part of making guacamole is that it is so easy to make and you don’t need to cook anything-  just mix!  If you use my bag method, it is even easier.

The Best Guacamole

Print
Guacamole
 
Ingredients
  • ¼-1/3 cup finely chopped red onions
  • 2 tsp. chopped garlic, about 1-2 cloves depending on size
  • 1 jalapeno, seeded and deveined, chopped
  • ½ teaspoon cumin
  • 3 ripe avocados
  • 1-2 tbsp. lime juice, 1-2 limes depending on how juicy limes are
  • ½ large tomato, seeded and diced
  • ¼ c. cilantro, chopped
  • Kosher salt
  • Freshly ground pepper
Instructions
  1. Add red onion, garlic, jalapeno, and cumin into a large plastic bag.
  2. Cut the avocados in half and remove pits. Using a dull knife, like a butter knife, slice a grid pattern in the avocado making sure to not cut the skin (about 3-4 vertical, 4-5 horizontal). Flip the skin inside out over a bowl, and small squares of the avocado should fall out. Take a spoon and scrape off the rest. Repeat for the rest of the avocado halves.
  3. Once avocados are in the bowl, stir together and mash up to your liking ( I leave mine a bit chunky.)
  4. Add the avocado to the plastic bag with the other ingredients and add 1 tbsp. of lime and chopped cilantro. Seal bag and mix ingredients together with your hands on the outside of the bag. Add salt and pepper to taste and add additional lime if need.
  5. Let set for 30 minutes in the fridge in the bag for better flavor. Serve and enjoy.
  6. When storing leftovers make sure to place plastic wrap directly on guacamole to prevent browning.
3.2.1753

Source- slightly adapted from Shared Appetite

Pico de Gallo

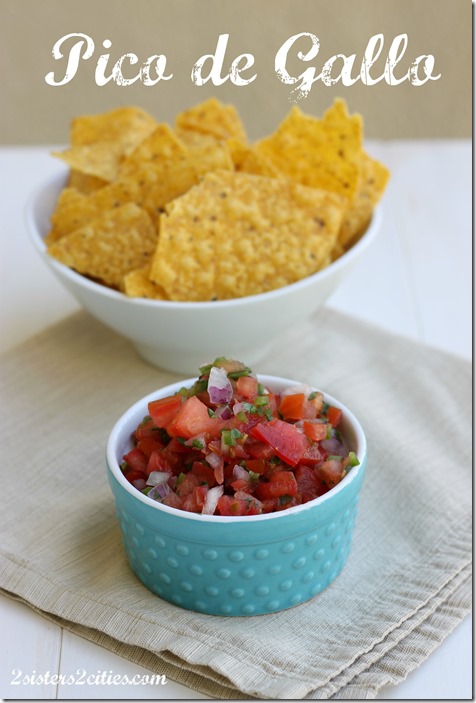
Pico de Gallo

Pico de Gallo is basically a fresh tomato salsa.  Salsa is one of my favorite condiments.  I like salsa with chips, tacos, fajitas, quesadillas, taco salads,  baked potatoes, and even perogies.  When I was single, I used to go through a huge jar of salsa every week.   When I go to Chipotle, I love their mild fresh tomato salsa on my burritos and in my salads.  I love it so much that I even get a side of it to go with their lime & kosher salt chips.  I have been searching for years for a recipe that is like their salsa and this recipe is totally it!

Whether you call it Pico de Gallo, fresh salsa, tomato salsa, or mild salsa, it is delicious and so easy to make!

Print
Pico De Gallo
 
Ingredients
  • 2 large tomatoes, diced
  • ¼ cup chopped red onion
  • 1 jalapeño, seeded, deveined and chopped
  • 1-2 tbsp. lime juice, about 1-2 limes depending on how juicy the limes are
  • ⅛- ¼ cup chopped cilantro
  • Kosher salt
Instructions
  1. In a bowl, combine all the ingredients and stir together. With cilantro and lime, start with the lower measurement and work up to higher measurement depending on your liking. Add kosher salt to taste.
  2. Let sit at least 30 minutes before serving.
  3. Store in an air tight container or jar in the refrigerator for up1-2 days.
  4. Serve with tacos, chips, fajitas, or quesadillas.
3.2.1753

Source- slightly adapted from Shared Appetite

Salsa Verde with Chips

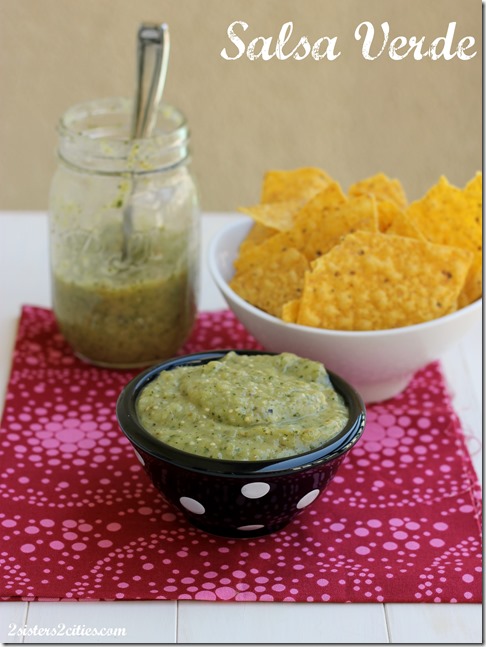
Salsa Verde

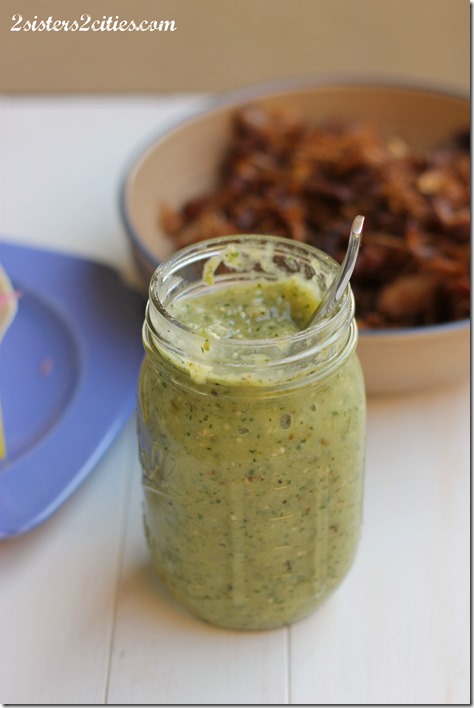
Let’s talk some more about salsa.  This salsa is green from the tomatillos that you put it it, instead of tomatoes.   There is a taco place in San Fran called Tacolicious and they often come to our market lunches and sample sales.   I love their carnitas or brisket tacos covered in some of their salsa verde!  Sooooo good.  My mouth is watering just thinking about it.   I made all these sauces and salsa this weekend like they were going out of style!  Can you tell that I love Mexican food?!

Jar of Salsa Verde

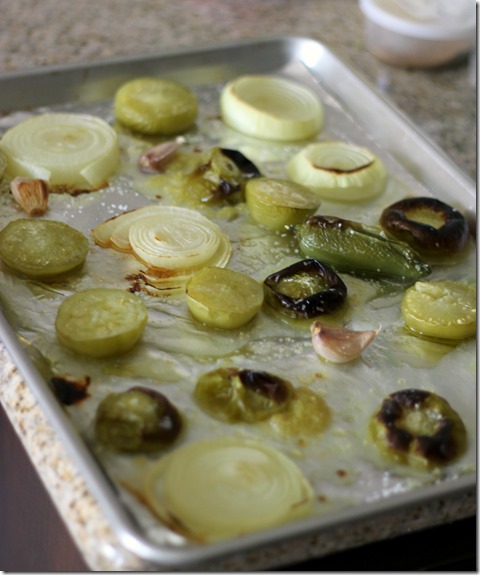
This salsa is easy to pull together by roasting all your veggies on a baking sheet.  You then simply process everything together and you have salsa.   Dip it with chips or top some tacos and you are good to go.

Roasted Tomatillas

Print
Salsa Verde
 
Ingredients
  • 6-8 small tomatillos, peeled,cleaned,and halved
  • 3-4 cloves garlic (still in its skin)
  • 1 onion, cut into 3-4 round slices
  • 1 jalapeño
  • 1-2 tablespoons olive oil
  • Kosher salt
  • 1-2 tablespoons lime juice, about 1-2 limes depending on how juicy the limes are
  • ⅓ cup loosely packed cilantro
  • Freshly ground black pepper
Instructions
  1. Preheat oven to 450 degrees
  2. Prepare a baking sheet by lining with aluminum foil and drizzling part of olive oil down on the pan to prevent sticking. Place tomatillos, garlic, onion, and jalapeño on the baking sheet. Take remaining olive oil and drizzle over vegetables and sprinkle with 1-2 tsp. kosher salt.
  3. Place baking sheet in oven for 18-20 minutes. After baking, turn broiler on for 3 -4 minutes to slightly char the top of vegetables. Take pan out of oven and let cool.
  4. Place tomatillos and onions in the food processor. Squeeze the garlic cloves out of their skins and add to food processor. With gloves or plastic bags on your hands, remove top and seeds from jalapeño. Add to food processor . Keep some seeds on the jalapeño for spiciness. Add in cilantro and 1 tbsp. lime juice, and salt and pepper to taste. Blend all together until smooth.
  5. Taste, add additional lime, salt and/or pepper if needed. Blend an additional couple seconds if adding ingredient.
  6. Store in an air tight container in the refrigerator and serve with tacos, chips, or whatever type of food you would put salsa on.
3.2.1753

Source- slightly adapted from Shared Appetite

Check back soon for more Cinco de Mayo recipes- taco and quesadilla recipes coming up!

sisterk (2)


Filed Under: K's Sides, K's Recipes Tagged With: chips, cinco de mayo, dipping sauces, fiesta, guacamole, mexican, mexican food, pico de gallo, salsa, salsa verde, tortilla chips

Happy Easter with Last Minute Easter Ideas!

Posted by 2 Sisters 2 Cities on March 31, 2013

Happy Easter Readers!   We have been busy this Easter season getting recipes and holiday ideas ready for you.   Feel free to browse around for more ideas, but here are some great ways to celebrate this holiday with your family and friends.
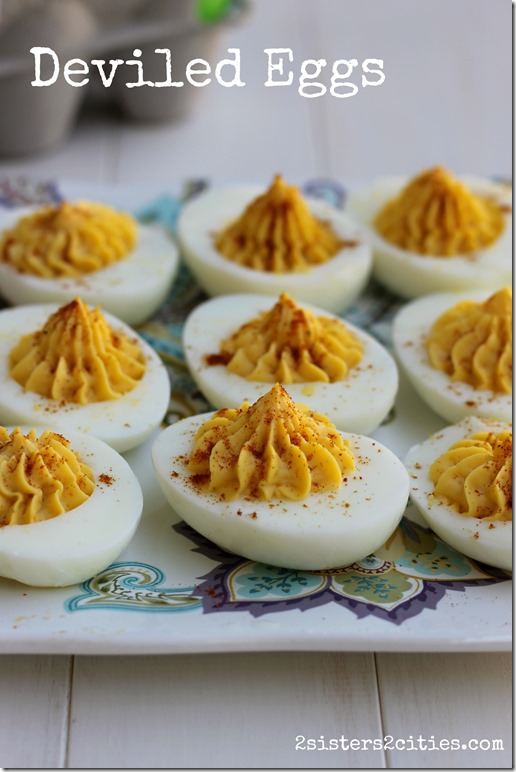
Deviled-Eggs.jpg
These classic deviled eggs have been a huge Pinterest hit this season.  They are so easy to make and delicious.  Make these for an appetizer tonight with your dinner!
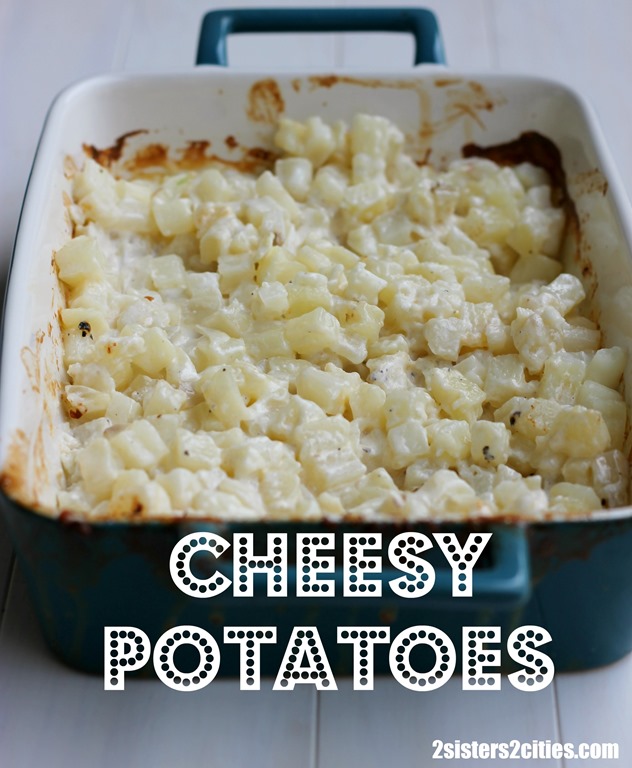
Cheesy-Potatoes.jpg
Our second favorite this season is the easy-peasy Cheesy Potatoes.   This recipe comes together in minutes with using the short-cut of frozen hash browns.
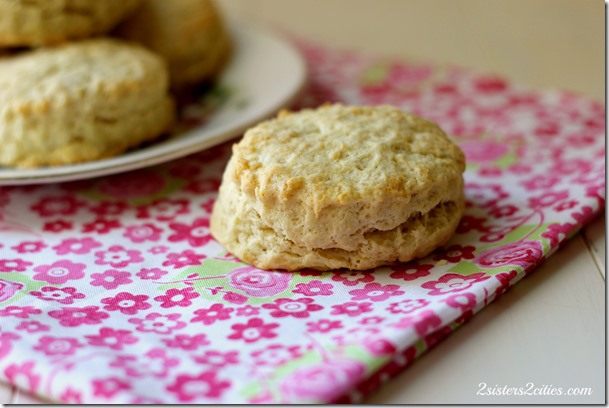
Delicious-Biscuits.jpg
Who doesn’t love a homemade biscuit fresh out of the oven?   This recipe here is so easy you can whip it up right now and have biscuits in under 30 minutes!
easter bunny place cards
How will you guest know where to sit?  Make these super cute and easy place cards.  Do I see a project for the kid’s to do while you are prepping dinner?
Chocolate Dipped Coconut Macaroons {from 2 Sisters 2 Cities}
Don’t forget our favorite course (especially pregnant M!)… Dessert!  Chocolate dipped coconut macaroons!
Easter-Funfetti-Cupcakes.jpg
Homemade Funfetti Cupcakes with buttercream frosting
topped with marshmallow peeps
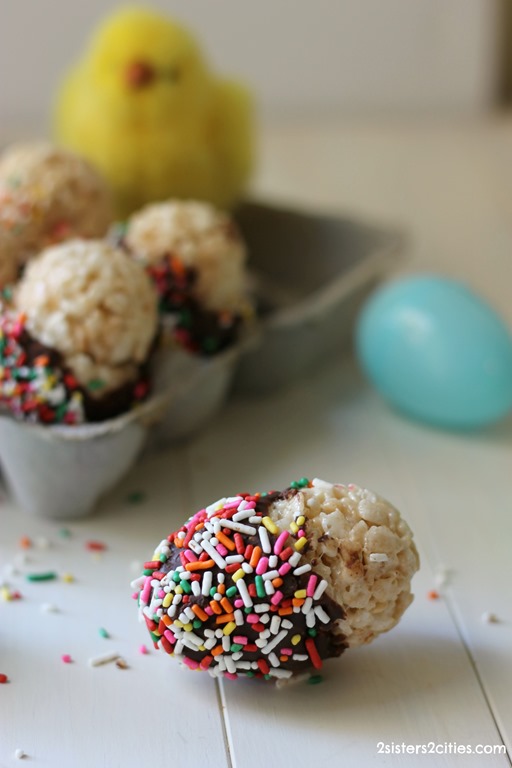
Rice-Krispie-Treat-Eggs.jpg
Rice Krispie Treat Eggs dipped in Peanut Butter Chocolate!

Peanut-Butter-Filled-Chocolate-Bunnies.jpg

Or Peanut Butter Filled Chocolate Bunnies!

Wishing you all a memory-filled and happy holiday!

Love always,
sisterk (2)  and  sister m signature


Filed Under: K's Desserts, K's Sides, K's Recipes, M's Desserts, M's recipes Tagged With: deviled eggs, easter, Easter Day Food Ideas, easter desserts, Easter Meal Ideas, easter sides, place cards

Buttermilk Biscuits

Posted by 2 Sisters 2 Cities on March 31, 2013

Buttermilk Biscuits

Happy Easter everyone!   You are probably looking for some last minute recipes here so I thought I would share with you an easy recipe for buttermilk biscuits.  Today for dinner I am serving baked ham with homemade biscuits, sweet potato casserole and steamed green beans.  When I was younger I use to call days like this “Ham Day!”

There is nothing like a homemade warm biscuit fresh out of the oven sliced with butter spread on it.  Like muffin and scones,  I am always surprised at how easy it is to make biscuits.  I guess with dinners every night and three-part cupcake recipes, a biscuit seems easy to make.  My favorite part in making biscuits is that you want there to be small chunks of butter in the dough so you really don’t have to mix it up much.  Other bonuses are that you really just need one bowl to make these and you don’t need a mixer!
Delicious Biscuits

Worried that you don’t have time to make homemade biscuits?  Make them ahead by placing the cut-out biscuits (before baking) on a wax paper-covered tray.  Place the tray in the freezer until biscuits are frozen.  Once frozen, place biscuits in freezer bags between layers of wax paper.  When you are ready to bake them, just pop them out, place them on a parchment paper-lined baking tray and bake for the specified time, plus an additional minute or two. Tada!  Fresh biscuist!

Print
Buttermilk Biscuits
Author: 2 Sisters 2 Cities
Prep time:  10 mins
Total time:  10 mins
Serves: 12 two-inch biscuits or 6 three-inch biscuits
 
Ingredients
  • 2¼ cups of all purpose flour
  • 2 tsp. of sugar
  • 1 tbsp. baking powder
  • ¾ tsp. salt
  • ¾ tsp. baking soda
  • 9 tbsp. cold unsalted butter ( 1 + ⅛ sticks of butter)
  • ¾ cups of buttermilk
Instructions
  1. Preheat oven to 400 degrees and prepare a baking sheet with parchment paper or a silicone mat.
  2. In a large bowl add flour, sugar, baking powder, salt, and baking soda and whisk together. Cut cold butter into small pieces and add to dry mixture. Using a pastry blender or your fingers, blend the butter into dry ingredients until the mixture has pea-sized crumbles.
  3. Add buttermilk and mix the ingredients until it just comes together. The mixture should be lumpy. Knead 2-3 times with hands to form dough together.
  4. On a lightly floured surface, place dough and pat flat until about ½-3/4 inch thick. With a floured round round cutter (I used a fluted 2-inch, but feel free to use a regular round cutter 2-3 inches big) cut out biscuits and line them up on baking sheet leaving about 2 inches of space in-between them. If you don’t have a round cutter, make drop biscuits by scooping out ¼ cup of dough and dropping on baking sheet, also leaving 2 inches between.
  5. Bake for 12-15 minutes until golden brown. Serve warm.
  6. *If make ahead method- Freeze biscuit dough on a wax paper lined baking sheet after cutting out rounds, or dropping dough. Once frozen add to a freezer bag. Bake frozen biscuits the same as above but adding a couple more minutes to the bake time.
  7. *If using buttermilk powder- Add 3 tablespoons of buttermilk powder to dry ingredients and then mix in ¾ cup water when above recipe says to add in the buttermilk.
3.2.1682

Homemade Biscuits

Source- Slightly adapted from Smitten Kitchen
sisterk (2)


Filed Under: K's Sides, K's Recipes Tagged With: biscuits, buttermilk biscuits, christmas dinner sides, easter sides, easy biscuits, easy sides, ham dinner, homemade sides

Classic Deviled Eggs

Posted by 2 Sisters 2 Cities on March 24, 2013

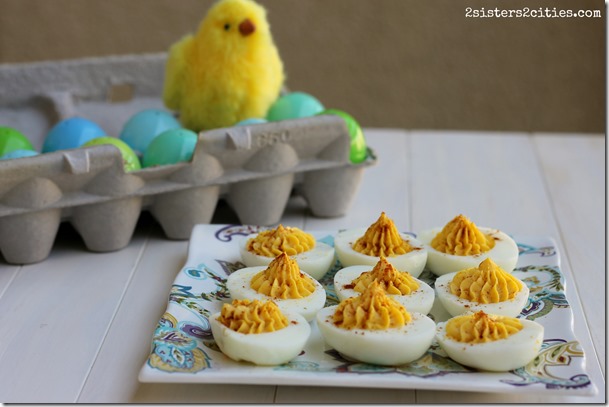
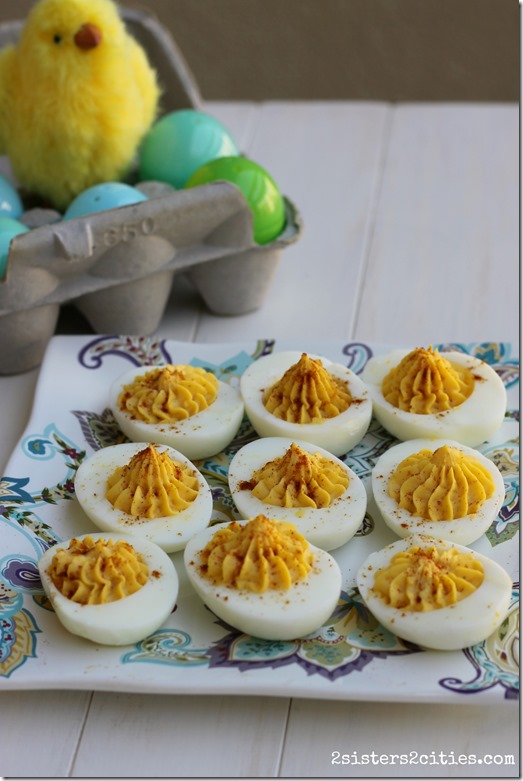
Deviled Eggs

Deviled Eggs are an Easter staple in my book.  Growing up, we used to decorate eggs with the Paas dye kits from the grocery store.  My mom would set up mugs with all the colors and my sisters and I would “wait patiently” for the color we wanted.  My sister C was always the artistic one and would make beautiful tie-dye patterns, striped, or multi-colored eggs.  I, on the other hand, didn’t have the patience for that so what I would do it  just leave my eggs in the dye for as long as possible to see how dark and bright I could get the color.  My favorite was the purple dye because it would never come out a perfectly solid color like the other dyes.  For some reason, the purple dye always made these beautiful splotches of pink, blue, and different shades of purple.

When we were all done with coloring our eggs, we would let them dry in our own individual styrofoam egg carton.   Later on, she would make deviled eggs from our colored eggs and I imagine egg salad later on in the weeks (How else do you use up 3-4 dozens hard boiled eggs because each of her children insisted on dying a whole carton full on their own.)

There are plenty of variations of Deviled Eggs, but today I am going to share with you a classic version.   If dyeing eggs isn’t part of your Easter tradition, have no fear as you can just make the eggs as specified below.

Classic Deviled Eggs

Print
Classic Deviled Eggs
 
Ingredients
  • 8 large eggs
  • 4 tbsp. mayonnaise (I used light)
  • 1½ teaspoons of vinegar (cider or white)
  • ¾ tsp. whole grain mustard
  • ¼ tsp. Worcestershire sauce
  • Salt and pepper, to taste
  • Paprika, for sprinkling
Instructions
To hard-boil eggs-
  1. Gently place the eggs in a medium saucepan and cover with cold water (water level should be 1-inch above the eggs.) Place saucepan on stove-top, set to high and bring to a boil. Once boiling, remove saucepan from heat, cover, and let stand for 10 minutes. Fill a medium-sized bowl with ice cold water while the eggs are sitting. After the 10 minutes, take eggs out of hot water with a slotted spoon and place in the ice water gently; let sit for 5 minutes.
To Make Deviled Eggs-
  1. Peel eggs and then slice length wise. Take out the yolks of the eggs and place them in a medium sized bowl. With a fork, mash the egg yolks until all the large chunks are gone. Add in remainder of ingredients and stir with a rubber spatula. Mash mixture on the side of the bowl to smooth out any lumps.
  2. Prepare a pastry bag with a large star tip (I used Wilton’s 6B). Take egg yolk mixture and add it to the pastry bag, then twist the top portion closed to push the eggs into the bag further. Pipe the yolks into the egg whites by applying pressure to pastry bag and lifting up slowly and releasing the pressure as the egg white fills with yolk. Sprinkle yolk filling with paprika and serve immediately.
3.2.1682

Source: Slightly adapted from Cook’s Illustrated Cookbook

Deviled Eggs for Easter

{Edited from original post} Since this post was so popular last year, Keelin added four new variations of deviled egg recipes this year.  After you try our classic deviled egg recipes, be sure to check back and try another variation!

  • Pickle Jalapeño
  • Pimiento Cheese
  • Herb and Crumb
  • Wasabi Ginger

Need more ideas for those leftover hard-boiled eggs?  Check out M’s post for 10 recipes for leftover Easter Eggs.

10-recipe-ideas-for-leftover-easter-eggs
sisterk (2)


Filed Under: K's Sides, K's Recipes, Party Ideas Tagged With: deviled eggs, easter appetizer, Easter eggs, easter side dish, hardboiled eggs, leftover Easter eggs, recipe ideas for leftover Easter eggs

Cheesy Potatoes

Posted by 2 Sisters 2 Cities on March 21, 2013

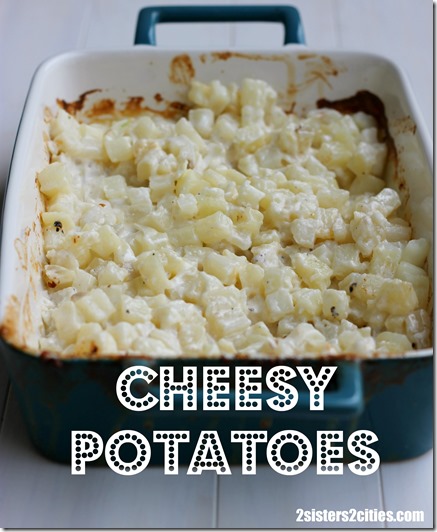
Cheesy Potatoes

Easter weekend is only a couple weeks away! What are you planning on serving this year? I have been thinking really hard lately about what recipes I can share with you to inspire you to make a homemade meal for the holiday weekend. M and I will also be sharing a number of recipes Easter entrees, sides, and desserts over the next ten days to help you get ready for your big Easter meal. First on the list: cheesy potatoes!

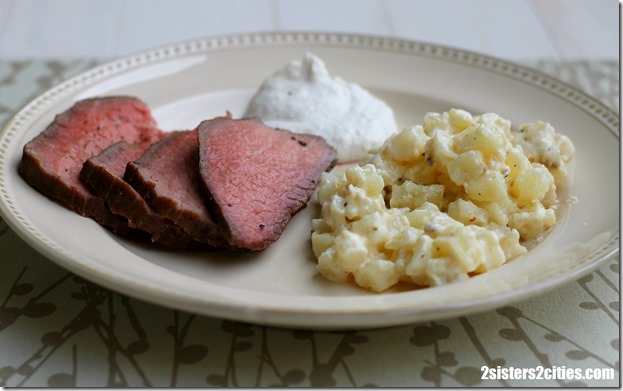
Growing up, I remember having ham served with sweet potatoes and biscuits for Easter dinner. Recently, I made the best roast beef with horseradish cream sauce over the weekend (I am planning to share this recipe with you later this week.) This recipe for cheesy potatoes would go perfectly with a ham dinner or a roast beef and it is so simple to make. You can half, double, or triple this recipe based on how many people you are serving it to.

Print
Cheesy Potatoes
 
Ingredients
  • 1-32 oz. (2 lbs.) package of frozen cubed hash browns, slightly thawed
  • ½ cup shredded Parmesan cheese
  • 2-3 cloves of garlic, sliced thinly
  • Salt and fresh cracked pepper, to taste
  • 2 cups of heavy cream
Instructions
  1. Preheat oven to 400 degrees
  2. Take half of the cubed hash browns and put them in an even layer in a 9x13 glass or ceramic pan.
  3. Sprinkle potatoes with shredded cheese and garlic slices. Add salt and pepper, to your liking.
  4. Top evenly with remaining potatoes. Pour the cream all over the potatoes.
  5. Cover pan with aluminum foil and bake for 35-40 minutes until potatoes are tender and cream sauce has thickened.
  6. Let set for 5 minutes before serving
3.2.1682

Roast Beef with a side of Cheesy Potatoes

sisterk (2)

Related Posts Plugin for WordPress, Blogger...


Filed Under: K's Sides, K's Recipes Tagged With: cheesy potatoes, east, easter, easter dinner, easter sides, potato recipe, side dish

  • 1
  • 2
  • 3
  • Next Page »

Recent Posts

  • Easy Holiday Office Party Tips
  • 5 Steps to an Easy Football Party
  • Gingerbread Biscotti
  • Holiday Coffee Bar and Thanksgiving Recipes
  • Soft Sugar Pumpkin Cookies
  • Cinnamon Sugar Apple Cake
  • Hello Pumpkin Season!
  • Make Your Own Milkshake Party!
  • Mama’s Pickles
  • S’more Cookies

Categories

  • About 2 Sisters 2 Cities (7)
  • Books (8)
  • Crafting & DIY (22)
  • Design & Decorating (15)
  • Gardening (5)
  • Giveaway (14)
  • Guest Bloggers (8)
  • K's post (46)
  • K's Recipes (191)
    • K's Desserts (75)
    • K's Entrees (23)
    • K's Sides (24)
  • M's post (72)
  • M's recipes (167)
    • M's Entrees (21)
    • M's Sides (14)
    • M's Desserts (30)
  • Organizing (7)
  • Party Ideas (49)
  • Uncategorized (1)
  • Vacation (12)
Stitch Fix

Archives

Blogroll

  • Annie's Eats
  • Bake at 350
  • Baked Bree
  • Boston Harbor Beacon
  • Confections of a Foodie Bride
  • Cook Like a Champion
  • Erin’s Food Files
  • Forever and a Recipe
  • Framed Cooks
  • Oh Happy Day
  • On Common Ground
  • Pennies on a Platter
  • Pink Parsley
  • Recipe Girl
  • Sally's Baking Addiction
  • Simply Scratch
  • The Curvy Carrot
  • The Pioneer Woman
  • Tidy Mom
  • Two Peas & Their Pod
  • What’s Gaby Cooking
  • Young House Love
Increase your website traffic with Attracta.com

grab a 2 sisters button!


Copyright © 2014 ~ 2 Sisters 2 Cities | Blog Design by Minx Design