2 Sisters 2 Cities

Image Map
  • About 2 Sisters 2 Cities
  • Recipe Index
  • Project Index
  • Contact Us
  • Like us on Facebook
  • Follow m on twitter
  • Follow k on twitter
  • Follow 2S2C on Pinterest
  • Follow 2S2C on G+
  • rss
  • e-mail 2S2C

California Salsa

Posted by Keelin Hollenbeck on February 22, 2013

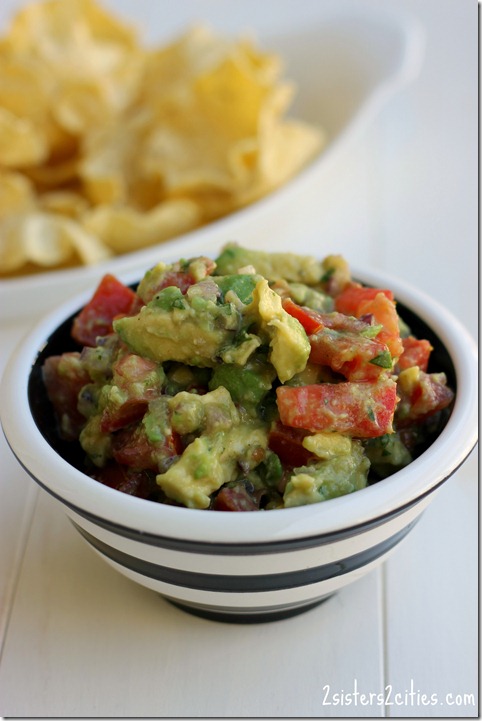
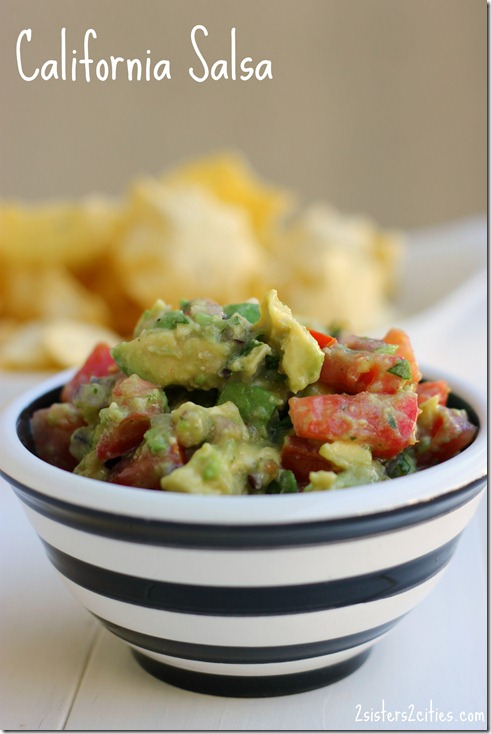
California Salsa

Have you ever noticed on restaurant menus that anything with California in the title has avocado in it?  The California BLT has avocado added, as well as the California chopped salad and the California eggs benedict.  I am not complaining about this because I love avocados.  In the grocery stores out here, avocados have been on sale lately for practically nothing (two or sometimes four for a dollar.)  I have been making BLTs with avocado like it’s my job.  The restaurant that caters my company’s cafeteria calls them BLATs, which I feel is the perfect name because it’s fun to say “may I please have a Blat.”

So…. avocados are abundant everywhere here in California.  When I saw this recipe for avocado salsa, I knew I had to try it.  I served it for lunch over the weekend so I could take advantage of some natural sunlight photos.  This recipe would be perfect to serve this weekend when you are watching the Oscars!  I served it with Baked Tostitos Scoops because they are my favorite.  Plus, I had to save calories because of my boyfriend’s latest baking adventures… more on that later.
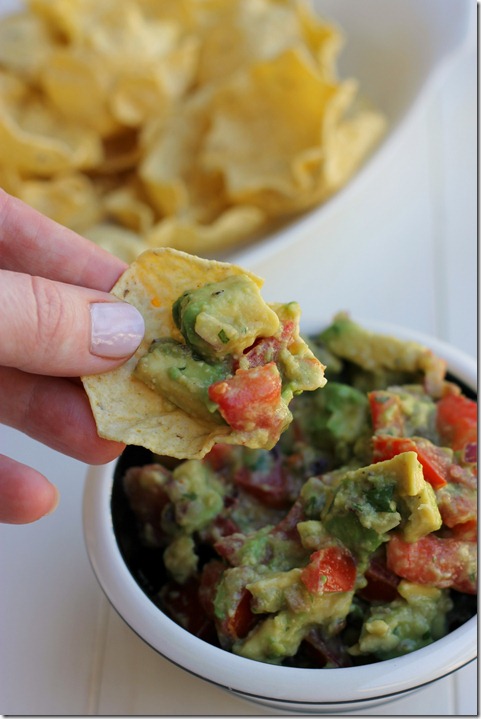
A Scoop of Avacado Salsa

Print
California Salsa
Author: 2 Sisters 2 Cities
 
Ingredients
  • 2 ripe avocados, cut into chunks
  • 3 ripe plum tomatoes, chopped
  • 2-3 tbsp. finely chopped red onion
  • 2 tbsp. finely chopped fresh cilantro
  • Juice from ½ lime, should equal about 1 tbsp.
  • Pinch of garlic powder
  • Salt and pepper to taste
Instructions
  1. Add tomatoes, onions, cilantro and avocado to a medium sized bowl.
  2. Lightly stir together, the avocado should remain chunky because it's a salsa not a guacamole.
  3. Add in lime juice, garlic powder, salt and pepper; and stir so all of the tomatoes and avocados are evenly covered.
  4. Serve immediately with tortilla chips or on tacos.
  5. *To keep leftover salsa from browning, place plastic wrap sprayed with a little cooking spray directly on top of salsa, pressing down slightly to cover the entire exposed top. Then top bowl tightly with another piece of plastic wrap and store in the refrigerator. It will still brown a little but this definitely slows it down.
#version#

Source– Adapted from Chef in Training

California Salsa and Tortilla Chips

sisterk (2)


Filed Under: K's Recipes, Party Ideas Tagged With: avocados, California, california living, california produce, california salsa, dip and chips, oscar snacks, oscars, salsa

Mickey Mouse Cupcakes

Posted by 2 Sisters 2 Cities on November 8, 2012

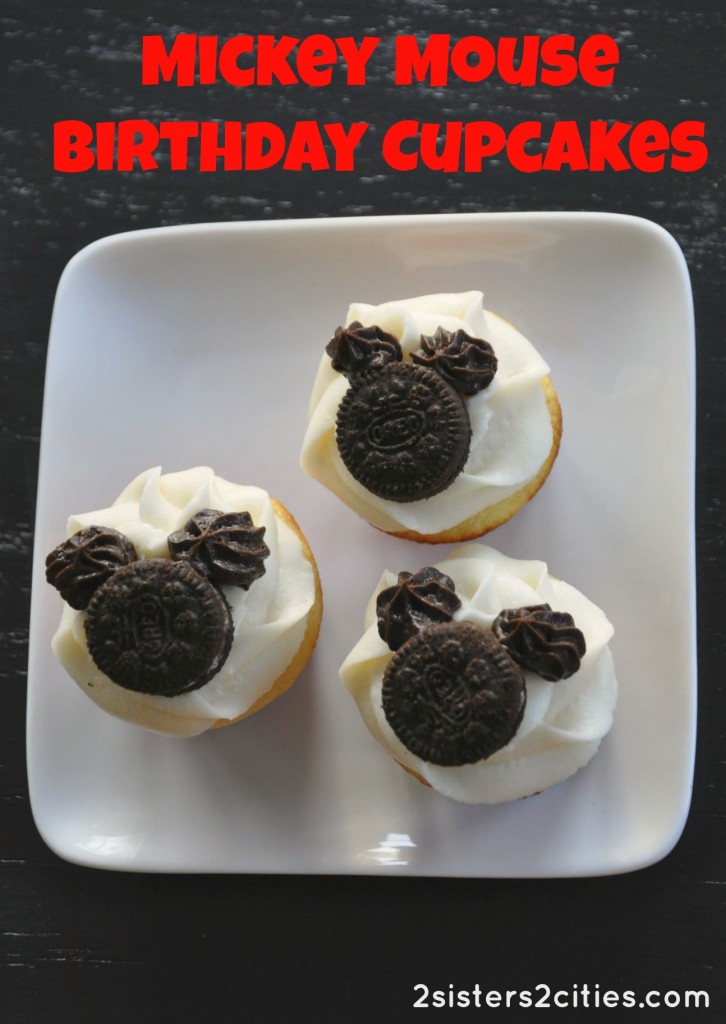
Mickey Mouse Cupcakes

As promised in my last post about T’s Mickey Mouse birthday party, I wanted to follow up with a post about making Mickey Mouse cupcakes.  T loves mini cupcakes so I opted to make the Mickey cupcakes on a smaller scale (but a large quantity!)  There are so many cute Mickey Mouse cupcakes on Pinterest and a lot of them involve Oreo cookies.  Since my cupcakes were going to be mini, I decided to incorporate mini Oreos.

For the cupcake and frosting recipe, I opted to use our hands-down favorite cupcake recipe- the Magnolia Vanilla Cupcake recipe with Vanilla Buttercream Icing.  While this recipe usually makes about two dozen full-sized cupcakes, I found it made about 75 mini cupcakes per batch.  The baking time is reduced to about 10 minutes.  I found mini red, white, and black polka-dotted cupcake liners at Michael’s.

To frost the cupcakes, I highly recommend reading this cupcake icing tutorial.  I used about 80% of the vanilla icing to frost the tops of the cupcakes.  For the remaining 20%, I mixed it with a couple tablespoons cocoa powder and set it aside to use later for the ears.  I used a large closed star tip to ice the cupcakes with plain vanilla frosting.  I then placed a mini Oreo in the middle of the frosted cupcake.  I then used the reserved chocolate icing to pipe two “ears” on top of the Oreos using a small open star tip.

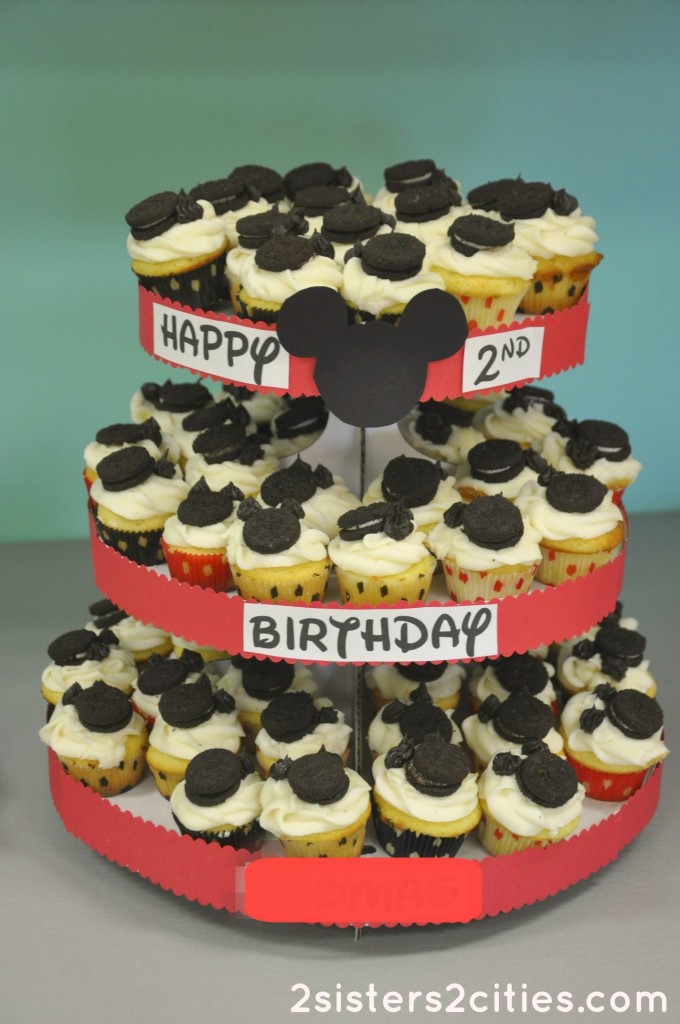
I then placed the mini Mickey Mouse cupcakes in my customized 3-tier cupcake stand (more details in the birthday post about how I made this.)

Mickey Mouse Cupcake Stand

Have you ever made cupcakes for a theme party?

sister m signature


Filed Under: M's Desserts, M's recipes, Party Ideas Tagged With: 2nd birthday party, baby t, Magnolia's Vanilla Cupcakes, mickey mouse, mickey mouse birthday party, mickey mouse cupcake holder, mickey mouse cupcakes, mini cupcakes

Mickey Mouse Birthday Party

Posted by 2 Sisters 2 Cities on November 7, 2012

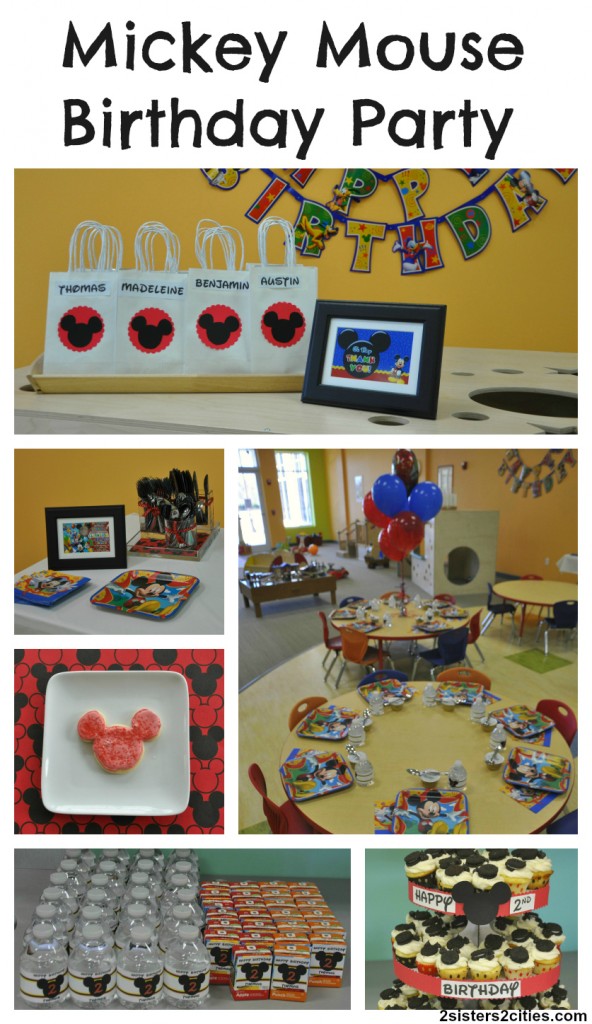
Mickey Mouse Birthday Party collage

This past weekend, we threw a children’s party for T’s second birthday.  I can’t believe my little baby is 2 already!  As I mentioned in my Halloween post, T loves the show Mickey Mouse Clubhouse so I decided to continue this theme and have a Mickey Mouse birthday party.

I started researching Mickey party ideas a few months ago via Pinterest.  There were so many cute Mickey Mouse Birthday Party ideas out there!  Since we were hosting the party at a local play center called Playdipity, I was able to focus my time on the details and not have to worry about the set-up at our house.  I decided to make customized Mickey Mouse invitations, favor bags, juice boxes, mini water bottles, cut-out cookies, mini cupcakes, and a cupcake holder.

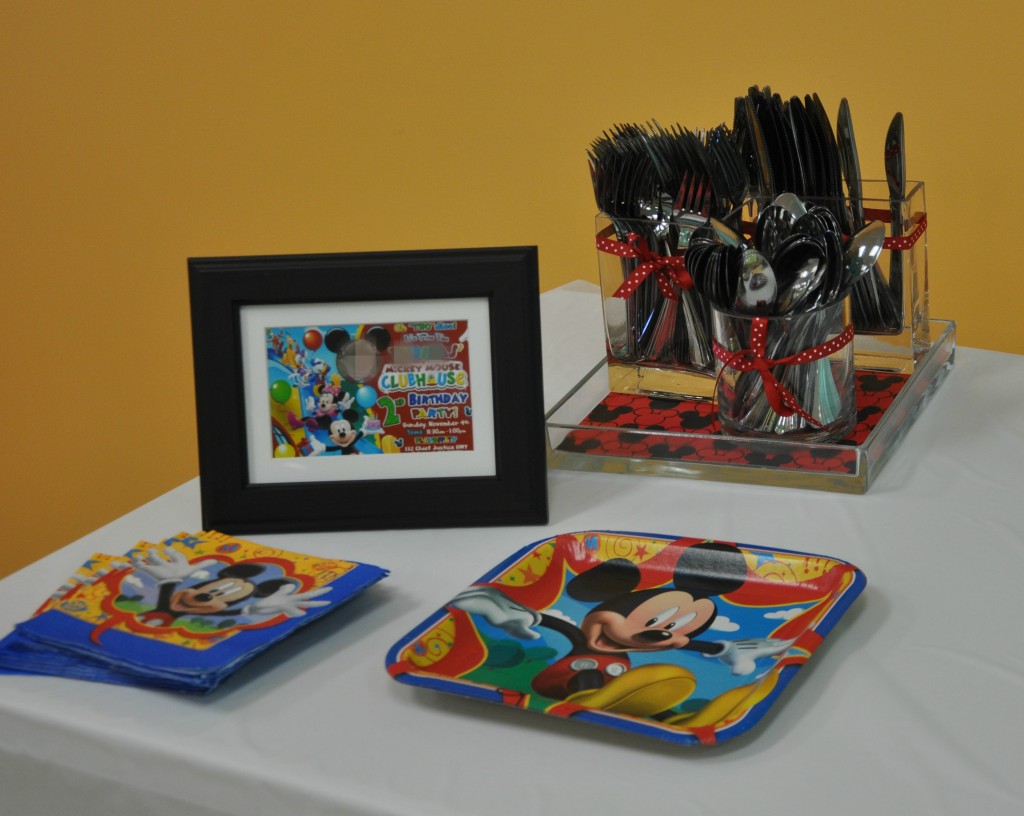
A month before the party, I found this great Mickey Mouse Clubhouse birthday inviations at etsy shop cgcdesignz. Denise was so great to work with and turned around the inviations fast.  I used the file she sent to order the printed invitations through cvs.com.  I used a promotion code for the photo lab and the invitations were practically free to print!  I think the total came to less than $2.  I then used some Mickey Mouse scrapbook paper I found at Michael’s (on sale for 25 cents a piece), some white envelopes I already owned, and the Paper Source envelope liner templates to create custom Mickey envelopes.  For the party, I used an inexpensive Ikea frame to use the invitation as a decoration on one of the tables.

Mickey Mouse Birthday Party table

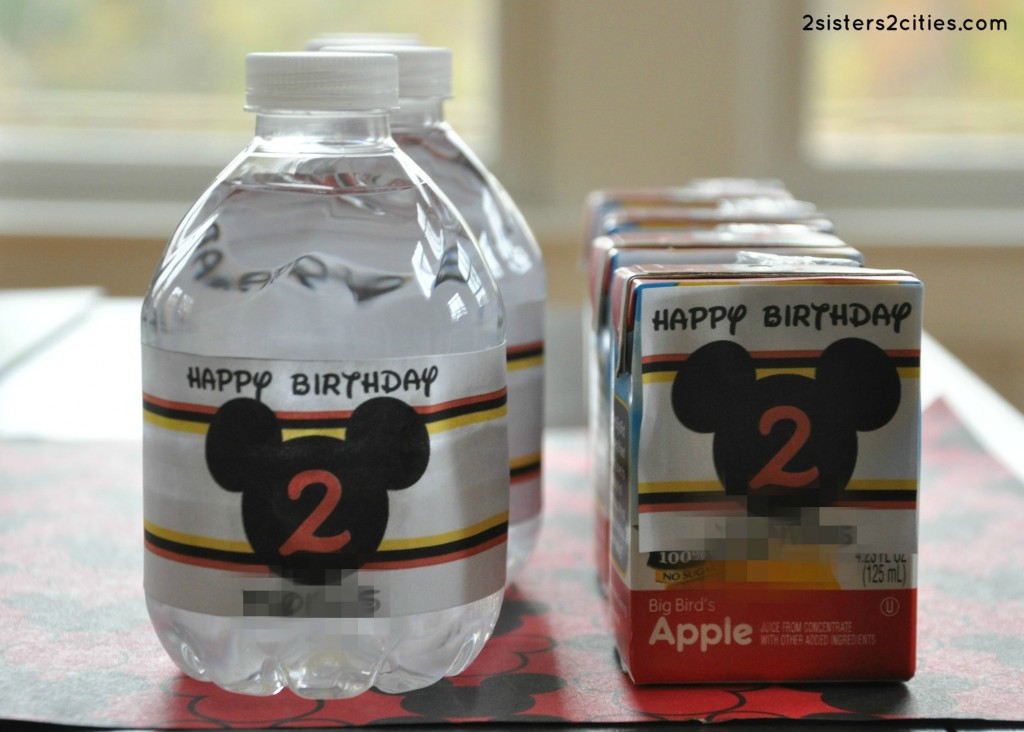
For the mini water bottles, juice boxes, and party favor bubbles, I used a free template That’s What {Che} Said.  Cheryl sells customized Mickey Mouse water bottle wrappers in her store or you can download the Waltograph font for free.  I cut out the strips for the mini water bottles and used double-sided tape to adhere it around the bottles.

Mickey Mouse water bottles and juice boxes

I ended up putting a large order in at Party City for Mickey-themed plates, napkins, balloons, birthday banner, cookie cutters, and coloring book party favors.  They had a Mickey Mouse themed cupcake stand, but I opted to go with the plain white cupcake stand and personalize it myself.  I cut out strips of red card stock with scallop scissors and used double-sided tape to adhere it to the three tiers.  I used the Waltograph font to add a personalized message to the cupcake stand.

Mickey Mouse Cupcake Stand

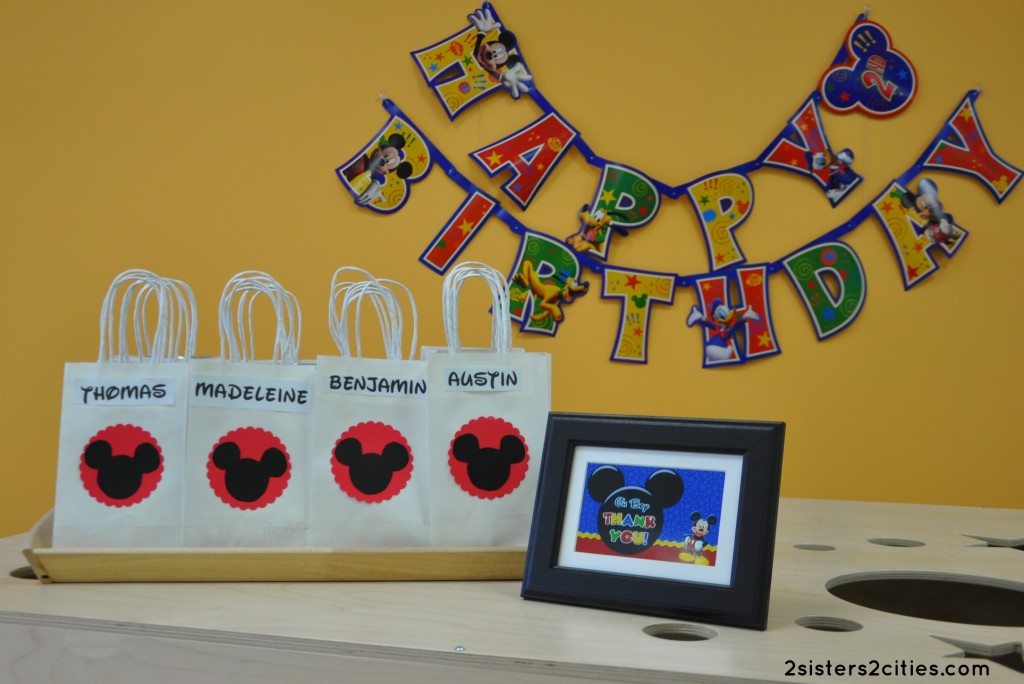
For the favor bags, I bought plain white paper bags at Michael’s.  I then used a large scallop punch to punch a red background out of red card stock.  Then, I used the Mickey Mouse cookie cutter to trace and cut out Mickey’s face using black paper.  I then used the Waltograph font again in a Word document to make a name label for each child.  I used double-sided tape to attach the name label, red scallop background, and Mickey Mouse shape to the bag.

Mickey Mouse Party Favor Bags

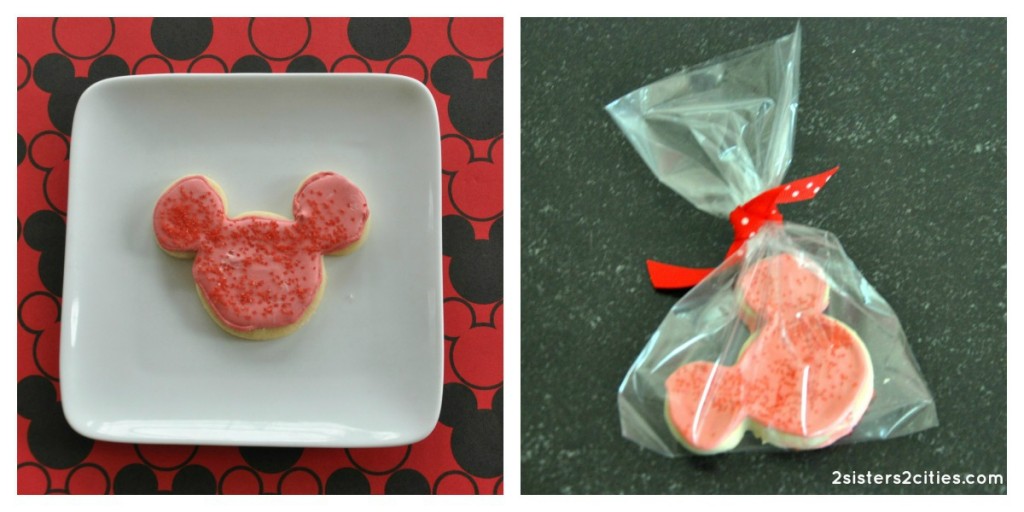
Each favor bag contained a Mickey Mouse coloring book set with crayons and stickers, Mickey Mouse bubbles, a bag of Gold Fish crackers, and a Mickey Mouse cut-out cookie.  I used K’s recipe for cut-out  sugar cookies and attempted to decorate with royal icing for the first time.  It was pretty tricky business!  I was trying to get the royal icing to be bright red, but it ended up being pink.  I added some red sanding sugar to redden the cookies up a bit.  The Mickey Mouse cookies were far from perfect, but I thought they were a cute addition to the favor bag.  It definitely made me appreciate what a science royal icing is!  I bagged the cookies up in little plastic sleeves and used a red and white polka dot ribbon to tie them up.

Mickey Mouse Cut-Out Cookies

T really enjoyed his Mickey Mouse Birthday Party!  I’ll share my recipe for the mini Mickey Mouse cupcakes tomorrow {edited: my Mickey Mouse Cupcakes post is up!}

sister m signature


Filed Under: Party Ideas Tagged With: 2nd birthday party, baby t, mickey mouse birthday party, mickey mouse clubhouse, toddler birthday party

Happy Halloween & Mickey Mouse Costume Reveal

Posted by 2 Sisters 2 Cities on October 31, 2012

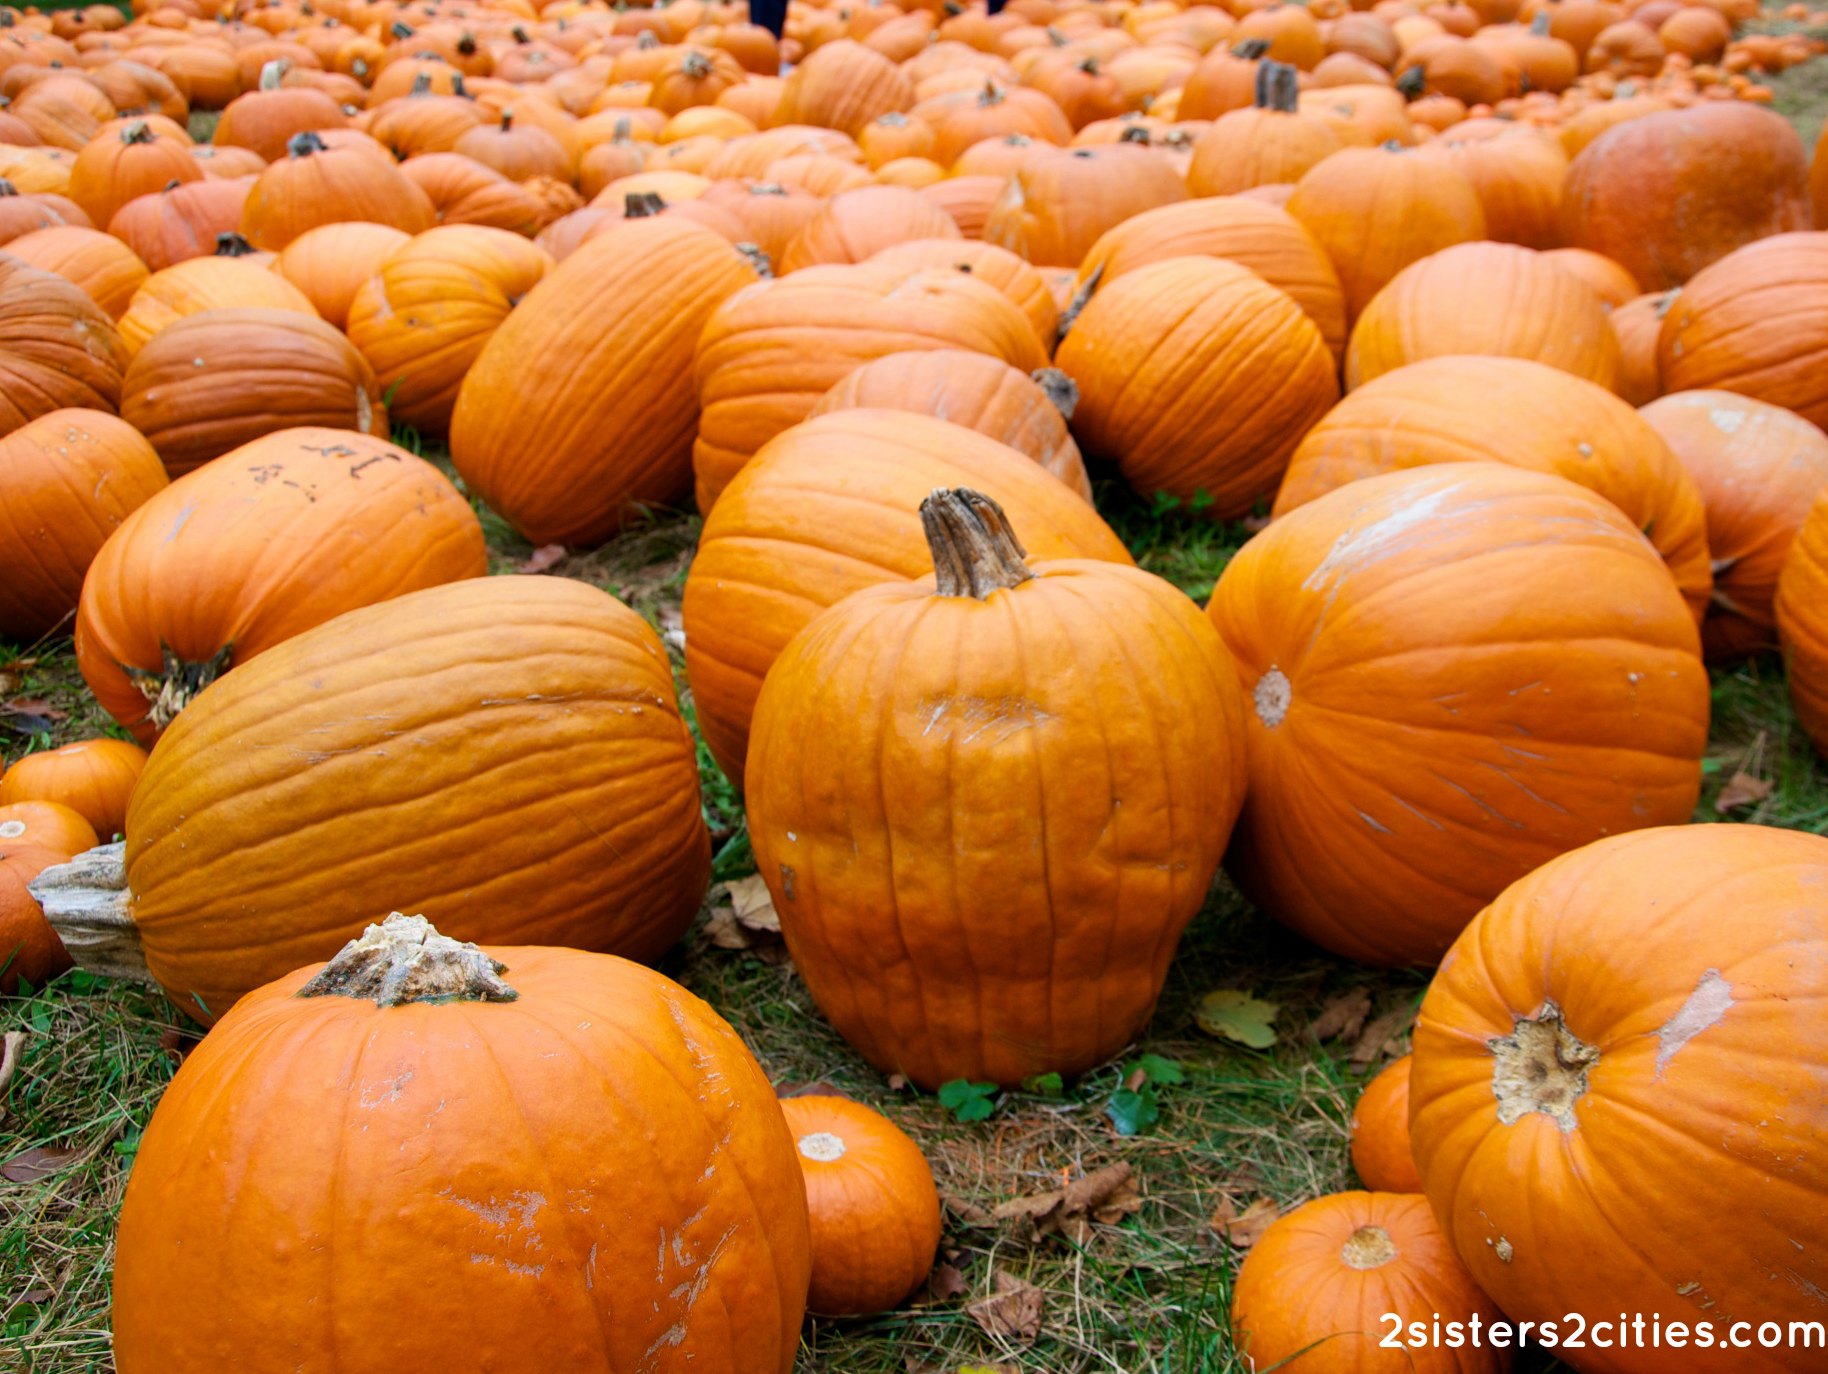
pumpkin patch

Happy Halloween everyone!  Is anyone else in shock that it is the last day of October?  We ended up pretty much unscathed from Hurricane Sandy.  One of our Japanese maples was uprooted and we lost power for a couple of hours, but pretty minor stuff compared to how others on the East Coast fared.  I hope everyone else out there that was affected by the storm is doing ok!

Since it’s now officially Halloween, I wanted to reveal baby T’s Mickey Mouse costume.  First, here’s a quick round-up of a few Halloween posts that we have done in the past.

Halloween round-up:

  • Scary Black Cat Cookies
  • Eery Half Moon Cookies
  • Boo-tiful Mini Pumpkin Muffins with Cream Cheese Frosting
  • Witch’s Cauldron Crockpot Cider with Mulling Spices
  • Spooky DIY Halloween Pennant Banner

Mickey Mouse Costume:

My son (who turns 2 in a couple of weeks) is pretty much obsessed with the tv show Mickey Mouse Clubhouse.  I decided a couple months ago to dress him up as Mickey Mouse for Halloween.  When I started looking for costumes on-line, I was unimpressed with the results so I decided to make the costume myself.  It was actually very simple to make and ended up costing less than $25.

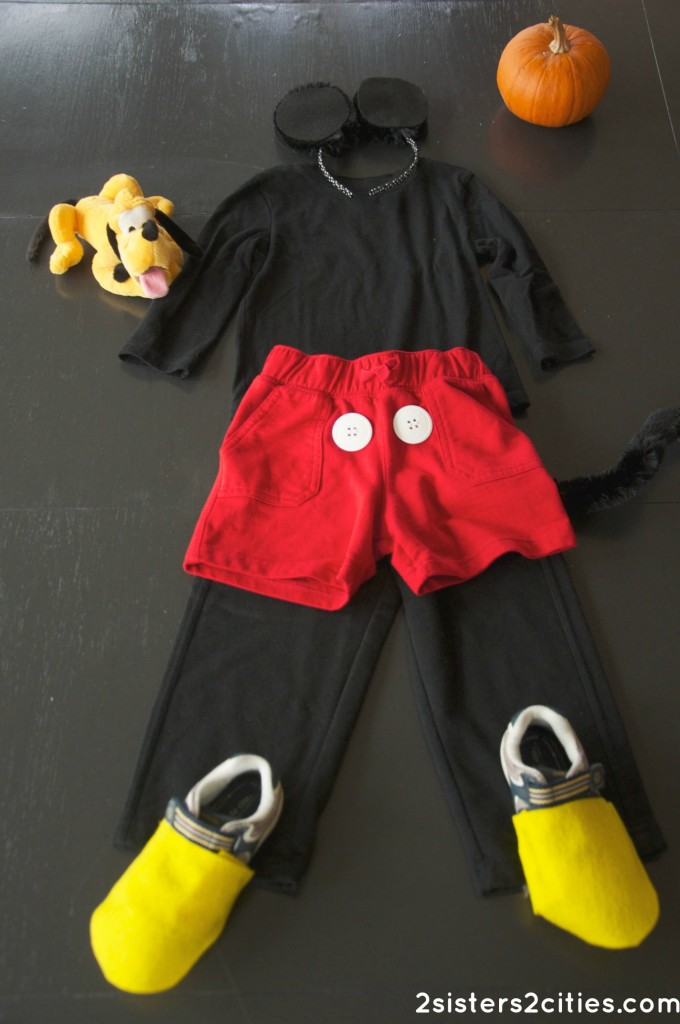
DIY Mickey Mouse Costume

Materials Needed:

  • black Pants– $5.00
  • long-sleeved black t-shirt– $4.00
  • red shorts– $4.25
  • 2 large white  buttons- less than $2.00 at Michael’s
  • headband- 99 cents  in clearance box at Target
  • thick black pipe cleaner (also called chenille stem)- $2.99 at Michael’s
  • black and yellow felt- 29 cents a piece at Michael’s
  • needle and thread- already had
  • scissor- already had
  • glue gun- already had
  • safety pin- already had
  • black face paint- $4.99 at Michael’s (I know I could have gotten this cheaper somewhere else, but I was running short on time and picked up a set here)
Directions:
Use needle and thread to attach 2 large white buttons to the front of the red shorts.  Cut the chenille stem in half and attach one half to the red shorts with a safety pin.  Use the other half of the chenille stem and cut two small pieces out of (long enough to shape two circle ears out of).  Twist both pieces into circles and attach to headband.  Cut out 4 black circles from the felt and use the glue gun to attach to the circular chenille stems on the headband.  Next, cut a two half-circles and 2 small rectangles from the yellow felt.  Put one half-circle on top of a sneaker and wrap the rectangle piece around the bottom of the sneaker.  Use a glue fun to attach the two pieces so it is a snug fit to the shoe (be careful not to glue the felt directly to the shoe however.)  Repeat for the other shoe.
When it’s costume time, put on black pants and black long-sleeved t-shirt.  Put red shorts on over the pants.  Put on “yellow” shoes and Mickey Mouse ears.  Dab a bit of black face paint on nose and start doing the Hot Dog dance!

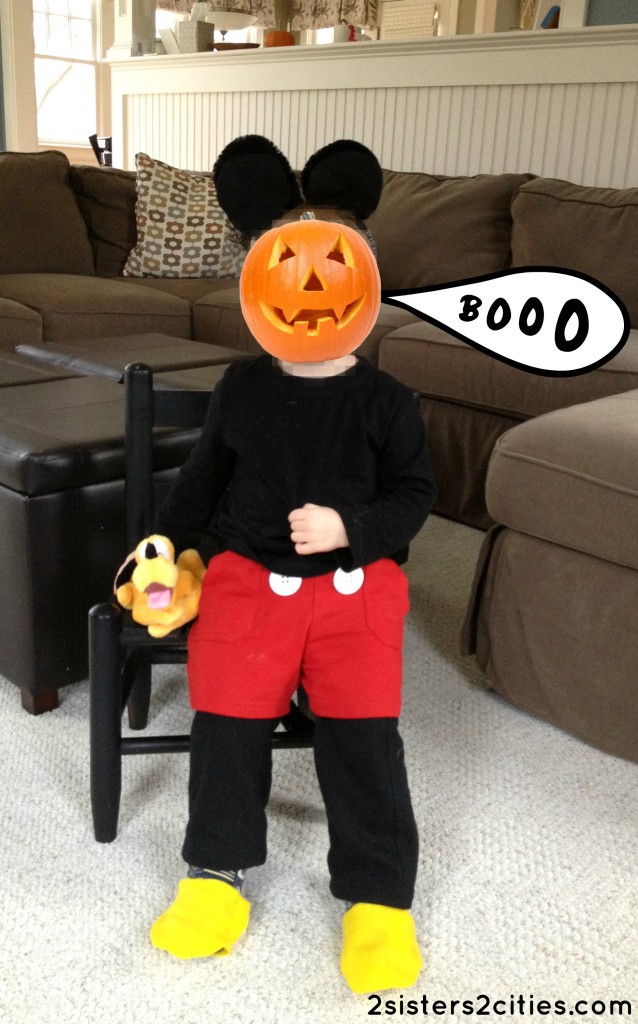
Here’s T getting ready to go trick-or-treating!

mickey mouse costume

Hope you have a great Halloween!

sister m signature


Filed Under: Crafting & DIY, Party Ideas Tagged With: diy costume, halloween, halloween diy projects, halloween recipes, mickey mouse clubhouse, mickey mouse costume

Scribble Shop Guest Post

Posted by 2 Sisters 2 Cities on September 27, 2012

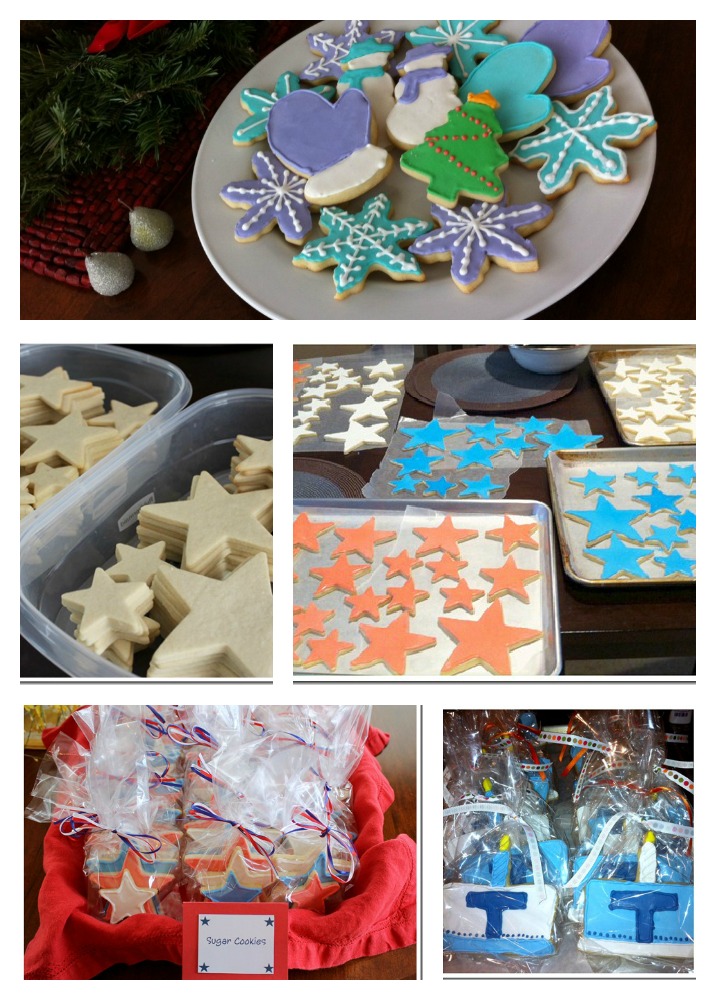
I’ve been a busy guest-blogger this week- today I’m guest-posting at the Scribble Shop blog.  I shared a number of K’s amazing (looking and tasting) cut-out sugar cookies that she has made to celebrate special occasions.  The post also has K’s favorite cut-out cookie recipe.  My Scribble Shop guest post can be found here.

Scribbleshop.com has tons of arts & crafts supplies, as well as an extensive amount of cookie and cake decorating supplies.  They have set up a special coupon code just for 2 Sisters 2 Cities’ readers to receive 15% off your order.  Just enter promotion code: 2CITIES2 to receive the 15% discount.  This promotion code is valid until November 1st!  It’s the perfect time to start stocking up for the holiday trifecta coming up.

Do you enjoy making cut-out cookies?  What’s your favorite cookie cutter that you own?  My personal favorites are some of the Christmas cookie cutters that my Grandma used to bake cookies with.


Filed Under: Guest Bloggers, M's recipes, Party Ideas Tagged With: 4th of july, baby's first birthday, christmas, cookie cutters, cut-out cookies, fourth of july, halloween, holidays, party favors, sugar cookies

Baked Beans

Posted by 2 Sisters 2 Cities on September 5, 2012

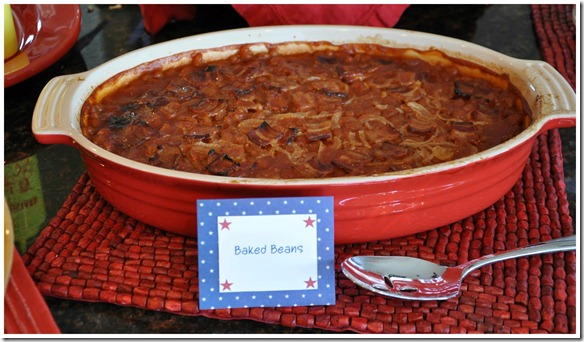
Finally my last recipe from my summer party!  I know it took me a while to post them all but I finally did it on basically the last day of summer- how appropriate.  This baked bean recipe is so good and so easy to make you are going to be wondering why you haven’t tried it earlier.  This recipe can be doubled for large crowds.

Baked Beans

Print
Baked Beans
 
Ingredients
  • 2 large cans (28 oz. each) of baked beans
  • ⅔ cup ketchup
  • ¼ cup brown sugar
  • 1 tbsp. Dijon mustard
  • ½ teaspoon hot pepper sauce
  • Dash of chili powder
  • Dash of black pepper
  • 1 medium onion, chopped
  • 4-5 pieces of Bacon
Instructions
  1. Preheat the oven to 350 degree and move rack to the center.
  2. Pour beans into a 13x9-inch baking dish. Stir in the ketchup, brown sugar, mustard, hot pepper sauce, chili powder, pepper and onions. Cut the bacon into 1-2 inch pieces and arrange on top of beans.
  3. Bake the beans for 55 minutes to an hour until the bean are bubbly and bacon is cooked. Let sit for 10 minutes before serving.
2.2.8

Source-  Adapted from What Can I Bring?


Filed Under: K's Recipes, Party Ideas

Banana Daiquiris

Posted by 2 Sisters 2 Cities on August 12, 2012

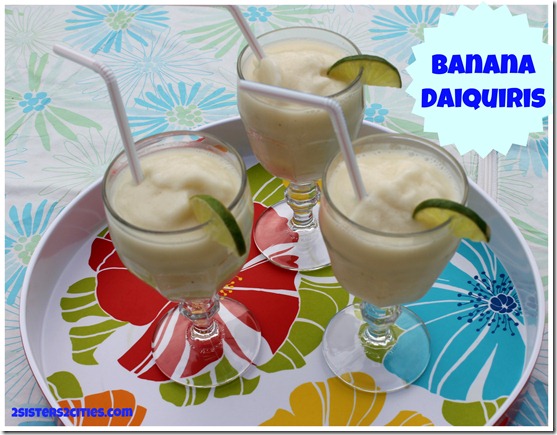
Banana Daiquiris

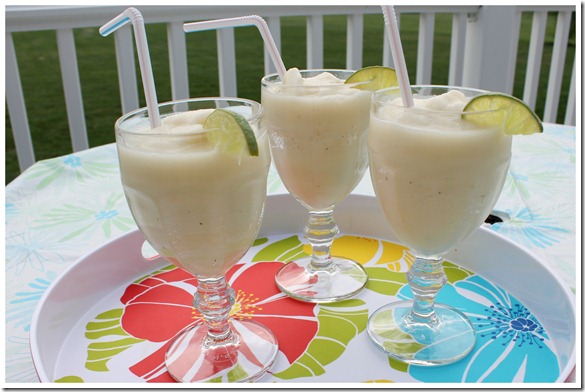
I made these Banana Daiquiris during Memorial Day weekend when I was testing out a few frozen drink recipes (the other recipe I tried was one for Strawberry Daiquiris.)   These were creamy, refreshing and a little boozy,  all good things in my book.  I found the recipe on a whim while I was at the grocery store getting the ingredients with my little sister M and my boyfriend.   The boyfriend was pushing for Banana Daiquiris because they are one of his favorites.  When claiming his receipts for all his work trips to Costa Rica over the summer, his accounting office asked him why he had all these “girly drinks” on his restaurant bills.  He proudly responded to them that they were his drinks and he enjoys a fruity frozen beverage.  Feel free to test this recipe out for yourself and let us know if you are on the banana daiquiri boat!

Print
Banana Daiquiris
Author: K
 
Ingredients
  • 2-3 ripe bananas
  • 1 cup coconut milk
  • 2 tablespoons of lime juice
  • ½ cup of sugar
  • 6 cups of ice
  • 4-8 ounces of rum (depending on how strong you want them)
Instructions
  1. Place half of each of the ingredients into the blender and blend until smooth. Pour into glasses and serve. Repeat with remaining ingredients for second batch.
  2. *Can easily be made without alcohol by omitting the rum. My mom enjoyed them this way.
2.2.8

Source– adapted from Food Network Recipes by Sandra Lee
Three Banana Daiquiris


Filed Under: K's Recipes, Party Ideas Tagged With: banana daiquiris, banana recipe, drink recipe, frozen drink recipe, fun cocktails, summer cocktail recipe, summer recipe

Tex-Mex Pimiento Cheese Dip

Posted by 2 Sisters 2 Cities on July 15, 2012

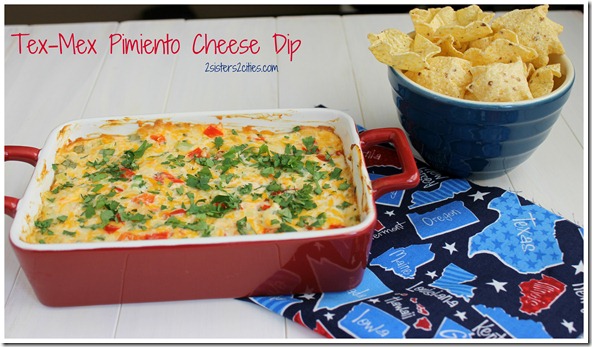
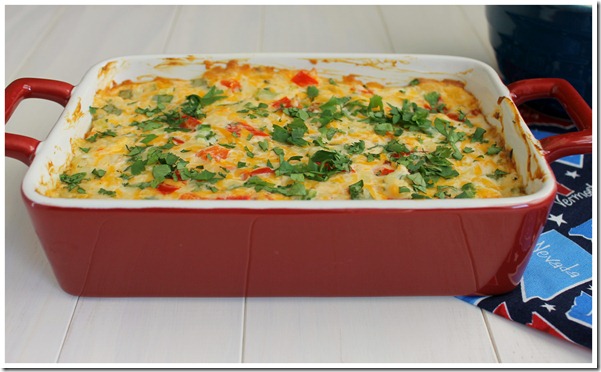
Tex-Mex Pimiento Cheese Dip
This Tex-Mex Pimiento Cheese Dip is seriously amazing, I mean make 3 times in the same week kind of amazing.  When we served this dip at our family lunch over Fourth of July, it was gone within minutes of coming out of the oven.  My mom made more of the pimiento cheese dip the next day because we had enjoyed it so much the day before.   Then, I made a half batch when I got home to take more photographs of the dip since I didn’t get one of the dip baked at the party.   The pimiento cheese dip is easy to pull together and can be made ahead of time.
Tex-Mex Pimiento Cheese Dip with Tortilla Chips

Print
Tex-Mex Pimiento Cheese Dip
 
Ingredients
  • ½ cup Greek Yogurt (0% Fat)
  • 6 oz. reduced fat cream cheese, softened
  • ¾ cup roasted red pepper, diced
  • 2 small or 1 large jalapeño peppers, ribbed, seeded and minced
  • 2-3 scallions, chopped
  • ¼ cup minced fresh cilantro, plus 1 tablespoon
  • 8 oz. of shredded pepper jack cheese
  • 8 oz. of shredded cheddar cheese
  • ¼ tsp. red pepper flakes
  • Salt and pepper, to your liking
Instructions
  1. Preheat oven to 350 degrees
  2. In a medium bowl combine Greek yogurt, cream cheese, roasted red peppers, scallions, ¼ cup cilantro, shredded cheddar, shredded pepper jack, red pepper flakes, salt and pepper.
  3. In a 2-quart oven-proof casserole dish spread the dip out evenly.
  4. Place in oven and bake for 20-25 minutes until cheese is bubbly and dip it hot.
  5. Top with remaining 1 tablespoon of chopped cilantro and serve with tortilla chips
  6. To make ahead of time-Do steps 2-3 and put plastic wrap over it and place in the fridge.
2.2.8

Source– Slightly adapted from Annie’s Eats

Tex-Mex Pimiento Cheese Dip Close-up


Filed Under: K's Recipes, Party Ideas Tagged With: appetizer, Appetizer Recipes, appetizer to bring to party, appetizers, party dish, party recipe, pimento cheese dip, pimiento cheese dip, summer appetizer recipe, summer recipe, tex mex pimiento cheese dip, tex-mex dish

Mediterranean Dip

Posted by 2 Sisters 2 Cities on July 11, 2012

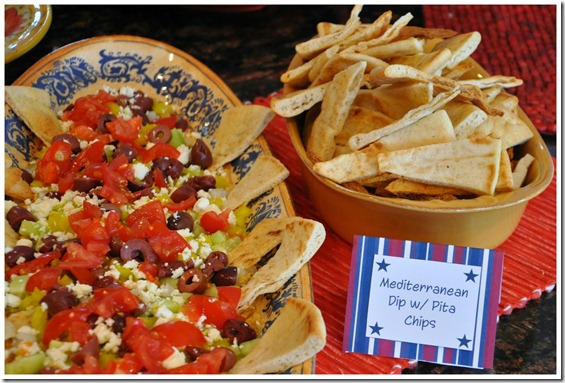
Mediterranean Dip Close-up
At my family’s Fourth of July lunch that my sisters and my mom hosted at my parent’s house, we served two dips for appetizers.  One of the dips we made was the a Mediterranean Layer Dip with toasted pita chips.

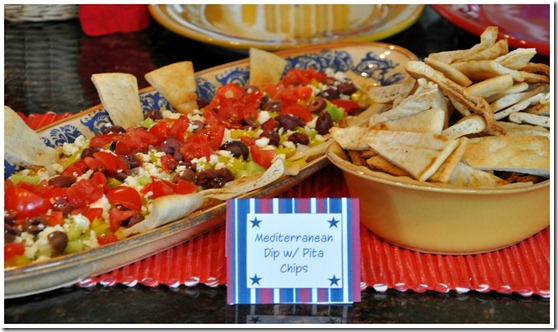
The Mediterranean Dip is similar to those seven layer Mexican dips with the layer of sour cream/cream cheese and taco seasoning, beans, salsa, lettuce, and tomato etc. but instead the layers have more of a Greek flair.  The first layer is the classic hummus, followed by basil pesto, cucumbers, red onion, banana peppers, kalamata olives, feta cheese and lastly fresh tomato.  Toast up some sliced triangles of pita bread with a touch of olive oil and you have yourself one worthy appetizer.

My mom also brought this to a graduation party to test it out before the party.  The dip did not last long and she was tracked down by several of the guest for the recipe. The original recipe calls for sun dried tomatoes but since it tomato season we opted to use some fresh ones from the farmers market. You can use your own recipe for the hummus or pesto but I am linking M’s hummus recipe here.
Mediterranean Dip

5.0 from 1 reviews
Print
Mediterranean Dip
 
Ingredients
  • Hummus
  • Basil Pesto
  • Cucumber, seeded and diced
  • Red Onion, diced
  • Banana Pepper, diced
  • Kalamata Olives, sliced
  • Crumbled Feta Cheese
  • Tomatoes, diced
Instructions
  1. Spread a layer of hummus on a platter followed by a layer of pesto. Next sprinkle evenly with cucumber, red onions, banana peppers, kalamata olives, feta cheese, and tomatoes.
  2. To toast pita chips- Cut pitas in triangle slices and place on a baking sheet. Preheat oven to 375 degrees. Brush pitas with olive oil and bake for 5-10 minutes. Turn over pita chips and continue to cook until toasted.
2.2.8

Source– Adapted from Annie’s Eats


Filed Under: K's Sides, K's Recipes, Party Ideas Tagged With: appetizer, Appetizer Recipes, dip recipes, dips, greek recipe, mediterranean dip, summer appetizer recipe, summer party, summer party ideas, summer recipes, toasted pita chips

Summer Party Ideas

Posted by 2 Sisters 2 Cities on July 8, 2012

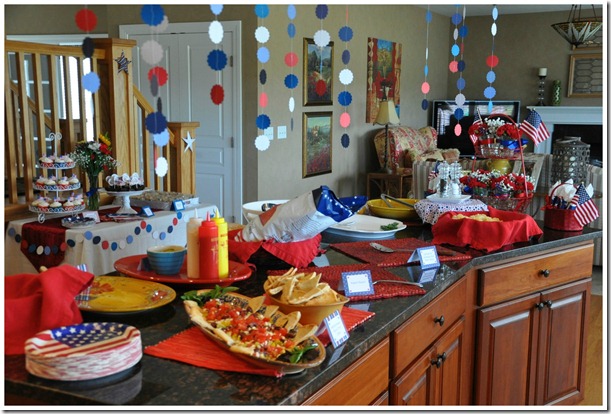
Fourth of July Party Buffet

We are fully in the midst of summer and I wanted to share some fun summer party ideas!  The theme for my party was actually a red, white, and blue Fourth of July party, but a lot of these ideas could be customized and used at any summer party.

At my family’s annual reunion, each year we have a wiffle ball tournament.  For those of you that don’t know what wiffle ball is, it is similar to baseball/softball except played with a plastic ball and bat.  You probably have seen them at the grocery store or Target/Wal-Mart during the summer.
32 Inch Wiffle Ball Bat With Baseball Combo
My family is extremely competitive and the winners of the annual wiffle ball tournament get bragging rights all year.   A few years ago, we started hosting the wiffle ball tournament at my parent’s house because of their large back yard and proximity to where everyone is staying. After the wiffle ball game, we then have a lunch for everyone.

This year, my mom and I started thinking about summer party ideas weeks before the lunch.  We wanted dishes we could make ahead of time and pull together easily after the game.  Some of the desserts are repeats of recipes I have posted about, but the rest of the recipes are new and I will post more details about them through out the week.

Our Summer Party Menu:

Lunch
Mediterranean Dip with Pita Chips
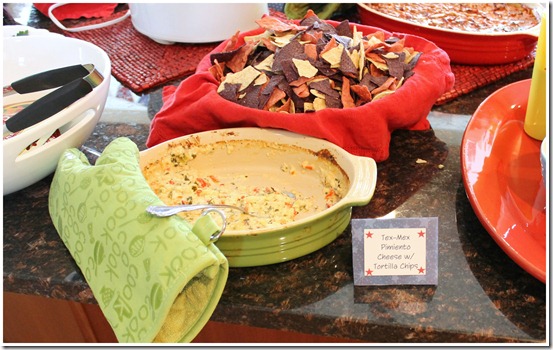
Tex-Mex Pimiento Cheese Dip with Red, White and Blue Tortilla Chips
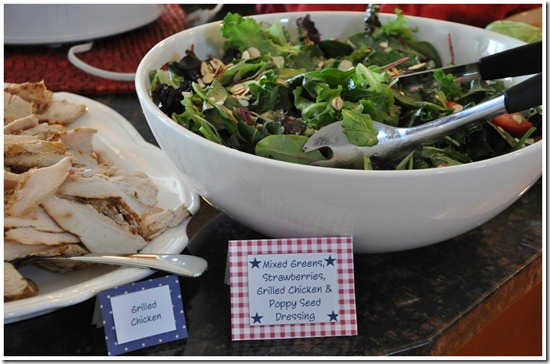
Mixed Greens Salad with Strawberries, Grilled Chicken and Poppy Seed Dressing
Sliders with Cheddar, Colby Cheese or Plain
Baked Beans
Kielbasa with Caraway-Root Beer Sauce
Kettle Chips
Lemonade, Ice Tea, and Water

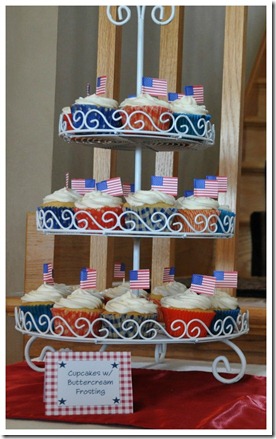
Vanilla Cupcakes with Buttercream Frosting
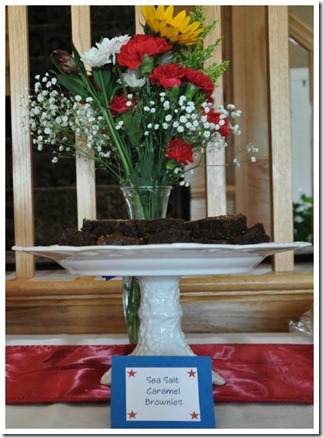
Sea Salt Caramel Brownies
White Trash Party Mix
Party Favors:
Sugar Cookies

Summer Party Decorations

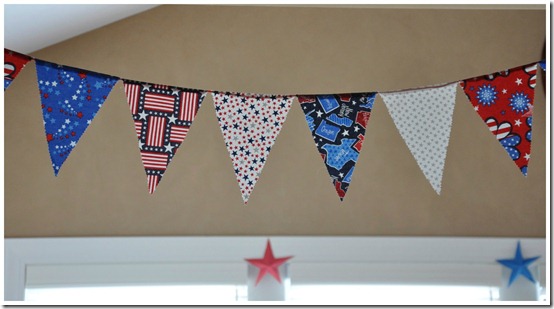
I was inspired by Pinterest to make decorations for the party with a Red, White, and Blue theme since it was Fourth of July weekend. Earlier this weekend, I posted about the Pennant Banner that I made for the party.  I hand-folded the stars in the background by following this post at The Gunny Sack.
Pennant Banner with Hand-Folded Stars in Background
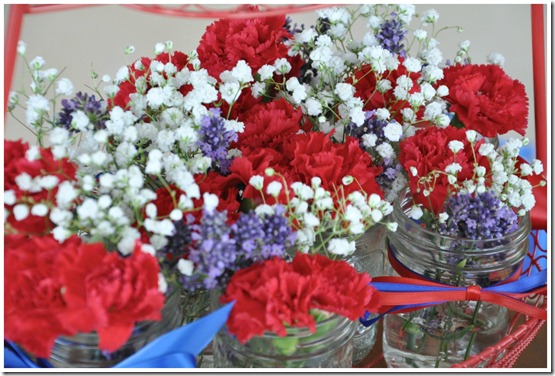
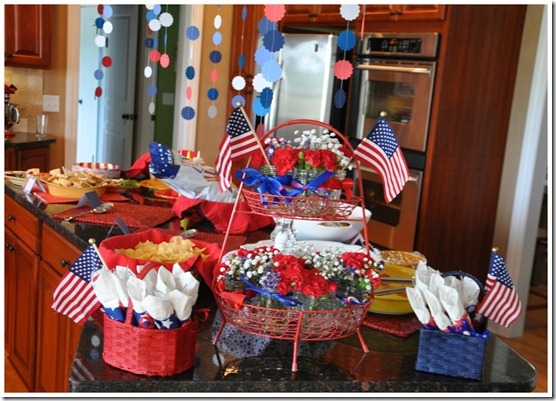
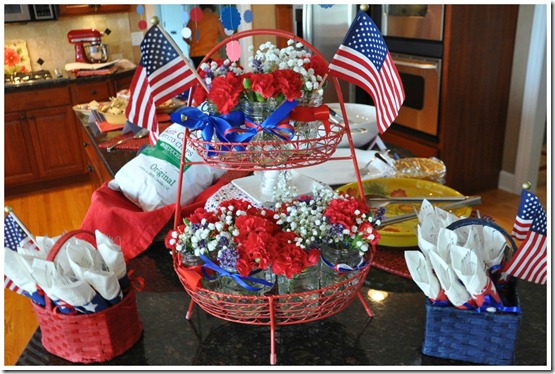
For the flowers we bought red carnations and white filler flowers, and then cut lavender from my mom’s garden.  We placed them in mason jars and tied red, white, and blue ribbon around the jars.  Then we placed the jars in a red 2-tied basket.

For the napkins and silverware, I wrapped the plastic silverware in a white napkin and then wrapped a red or blue star napkin folded in half around the bundle and tied with the opposite color ribbon.  I found two small red and blue baskets at Jo Ann’s Fabrics that I placed all the bundled silverware in and topped off with flags in the sides of both displays.
Flower Display
Here is a close-up of the flowers:
Close Up of Flowers

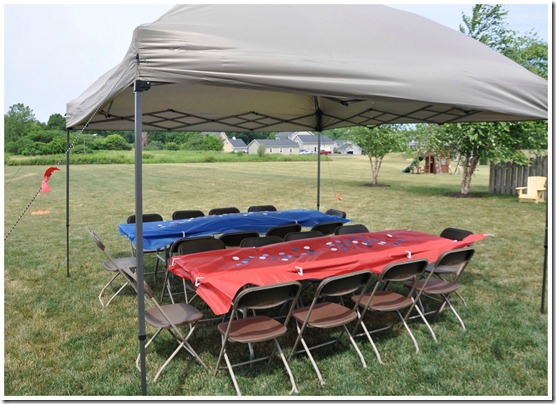
Outside we had two tables, chairs and a tent.  I made confetti for the tables using a paper punch and some leftover red, white, and blue paper.  It was a very windy day so we used  tablecloth clips to hold down the tablecloth and taped down the confetti.
Outside Tables
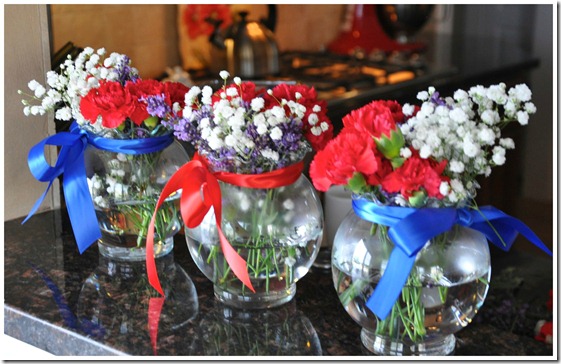
Simple, yet beautiful center pieces we made for the outside tables.  We had to wait to bring these out to the tables because of the wind.
Table Center Pieces
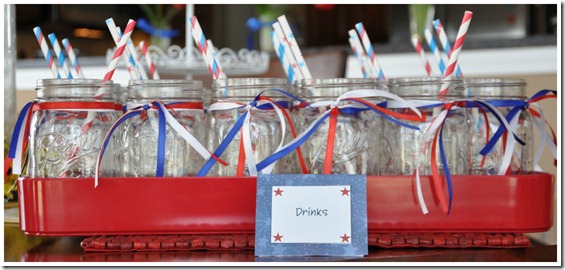
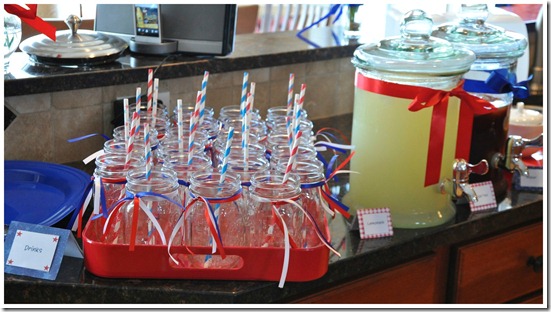
We had mason jars with ribbon tied around the rims and colorful patriotic themed paper straws all ready for my family to use as their drink glasses.  The paper straws are from this cute store called Shop Sweet Lulu.  I made homemade labels for all the food and drinks, which I will be posting about later in the week to explain how to make your own.
Mason Jar Glasses- Close-up
Another view of the island being set up for the lunch.  I hung handmade paper garland from the lights by sewing together scalloped edged circles punched out with a paper punch (adapted from Nest Of Posies.)
Table Display
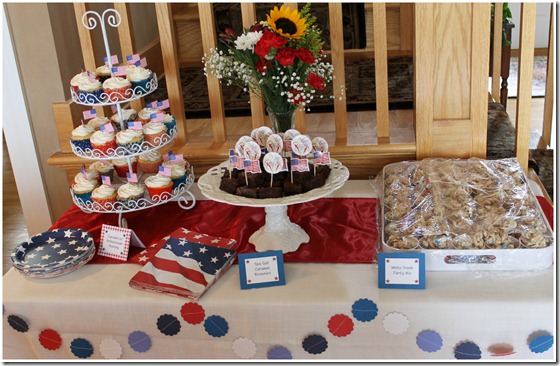
The dessert table decorated with white tablecloth, red runner, and the handmade garland.
Dessert Table 2
The drinks station set up on the counter.
Drink Table
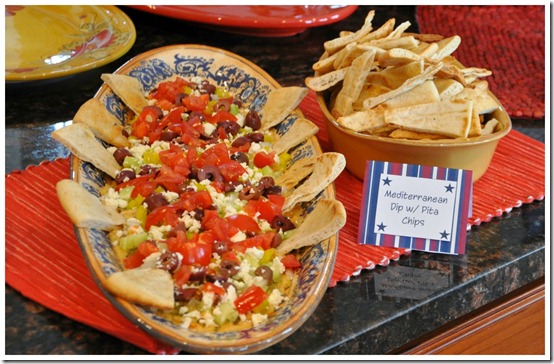
The Mediterranean Dip with Toasted Pita Chips.  Recipe to come soon, this one is a keeper!
Mediterranean Dip with Pita Chips
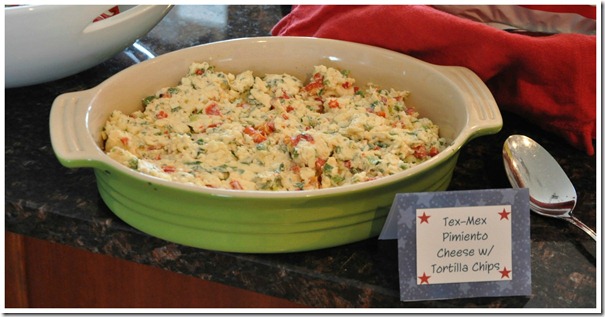
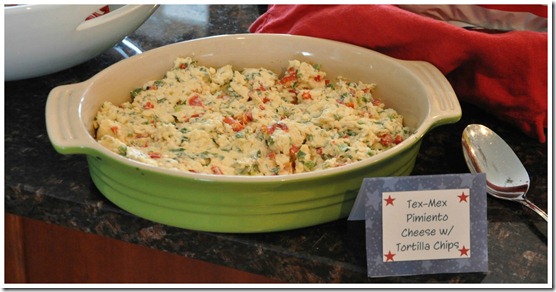
The Tex-Mex Pimiento Cheese Dip before it went into the oven.
Tex-Mex Pimiento Cheese Dip with Tortilla Chips

After is came out of the oven, it was gone after a few minutes.  Please don’t worry though- I have made it twice since because I wanted to get good photos of it cooked.  The sacrifices that I make for our loyal 2S2C readers!  Kidding-  this dip is seriously amazing, I really have made it twice since, but it was by no means a sacrifice.  Yum!!Pimiento Cheese Dip
Delicious Baked Beans, and yes, that is bacon on the top.
Baked Beans
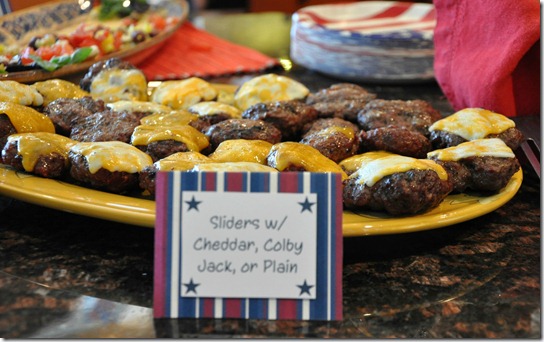
Sliders with your choice of cheeses or no cheese.  I have decided that a slider is the perfect size burger for me.  I was so full after one (and all that pimiento cheese dip Smile.)
Sliders Close-up
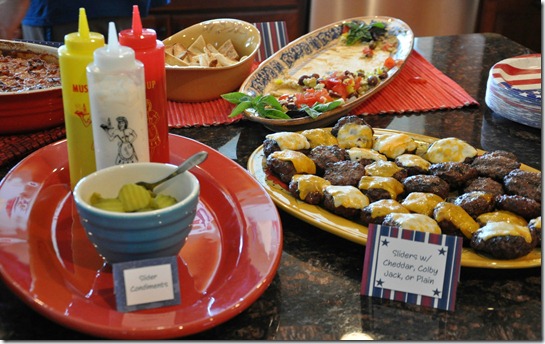
We had these really cute squeeze bottles filled with ketchup, mustard and mayonnaise and a bowl of dill pickle chips for the sliders.
Sliders
Mixed greens salad topped with Strawberries, candied almonds, grilled chicken and poppy-seed dressing.   This is one of my favorite summer salads.
Mixed Green, Strawberries, Grilled Chicken and Poppy Seed Dressing
A tower of my classic vanilla cupcakes and buttercream frosting.
Cupcake Tower
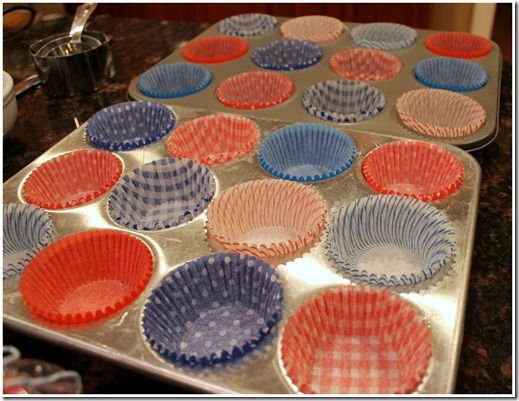
The cupcake liners are also from Shop Sweet Lulu.  Love them!  They really inspired me to keep the cupcakes simple with white frosting and flag toppers.
Cupcakes Liners from Shop Sweet Lulu
These Sea Salt Caramel Brownies were heaven!  I am dreaming about them now.
Sea Salt Caramel Brownies
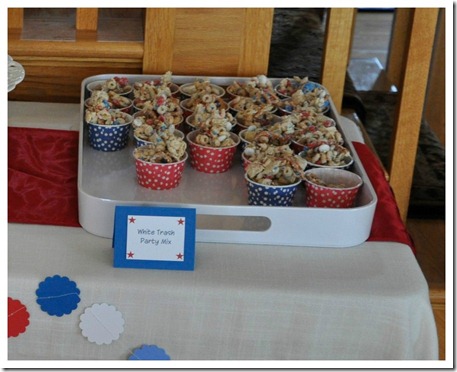
The White Trash Party Mix placed in small polka dot red and blue paper cups, which we also bought at Shop Sweet Lulu.   I added patriotic sprinkles to this batch of white trash and I was so happy with the results.
White Trash Party Mix
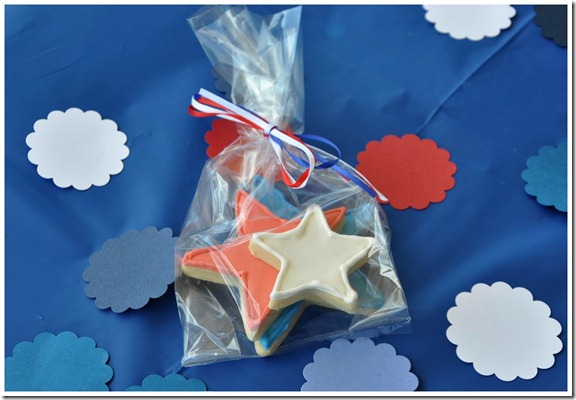
Last, but not least, the sugar cookie party favors were given to everyone as they left.
Sugar Cookie Favors
This party was a lot of fun to pull together with my mom and sisters.   I know that Fourth of July has already passed, but many of these ideas can be translated into Summer cookouts or summer birthday parties.  I can’t wait to share more details about the recipes and craft ideas from this party with you for the next week or two.   Stay tuned!

Related Posts Plugin for WordPress, Blogger...


Filed Under: Crafting & DIY, K's post, Party Ideas Tagged With: 4th of july, fourth of july, fourth of july party, labor day party, memorial day party, party ideas, patriotic holiday menu, patriotic menu ideas, patriotic party ideas, red white and blue party, red white and blue themed party, summer party, summer party ideas

  • « Previous Page
  • 1
  • 2
  • 3
  • 4
  • 5
  • Next Page »

Recent Posts

  • Easy Holiday Office Party Tips
  • 5 Steps to an Easy Football Party
  • Gingerbread Biscotti
  • Holiday Coffee Bar and Thanksgiving Recipes
  • Soft Sugar Pumpkin Cookies
  • Cinnamon Sugar Apple Cake
  • Hello Pumpkin Season!
  • Make Your Own Milkshake Party!
  • Mama’s Pickles
  • S’more Cookies

Categories

  • About 2 Sisters 2 Cities (7)
  • Books (8)
  • Crafting & DIY (22)
  • Design & Decorating (15)
  • Gardening (5)
  • Giveaway (14)
  • Guest Bloggers (8)
  • K's post (46)
  • K's Recipes (191)
    • K's Desserts (75)
    • K's Entrees (23)
    • K's Sides (24)
  • M's post (72)
  • M's recipes (167)
    • M's Entrees (21)
    • M's Sides (14)
    • M's Desserts (30)
  • Organizing (7)
  • Party Ideas (49)
  • Uncategorized (1)
  • Vacation (12)
Stitch Fix

Archives

Blogroll

  • Annie's Eats
  • Bake at 350
  • Baked Bree
  • Boston Harbor Beacon
  • Confections of a Foodie Bride
  • Cook Like a Champion
  • Erin’s Food Files
  • Forever and a Recipe
  • Framed Cooks
  • Oh Happy Day
  • On Common Ground
  • Pennies on a Platter
  • Pink Parsley
  • Recipe Girl
  • Sally's Baking Addiction
  • Simply Scratch
  • The Curvy Carrot
  • The Pioneer Woman
  • Tidy Mom
  • Two Peas & Their Pod
  • What’s Gaby Cooking
  • Young House Love
Increase your website traffic with Attracta.com

grab a 2 sisters button!


Copyright © 2014 ~ 2 Sisters 2 Cities | Blog Design by Minx Design